 |
Capital Punisment VII PBP Commentary |
Undercard bout
|
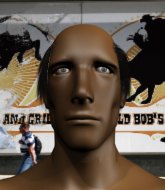
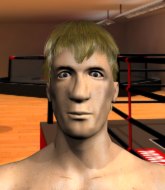
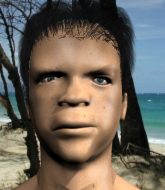
Coming up we have a super heavyweight MMA rules bout between Adam Eater (ranked 0 p4p, 0 weight class) and Ronnie Garvin (ranked 0 p4p, 0 weight class). Adam Eater could well score a knockout today. He has the power to get to Ronnie Garvin's chin.
 |
|
 |
| 200 cm
25
275 lbs
5 - 2 - 0 |
|
194 cm
26
272 lbs
3 - 1 - 0 |
Decent wrestler
Basic striking
Granite chin |
|
BJJ White Belt
Good kicks
Solid chin |
|
| |
|
Ladies and gentlemen. This fight is 3 rounds, in the super heavyweight division.
Introducing the fighter to my left, fighting out of the red corner.
With a record of
5 - 2 - 0, fighting out of Sydney, Adam Eater!
And introducing the fighter to my right, fighting out of the blue corner.
With a record of
3 - 1 - 0, fighting out of Sydney, Ronnie Garvin!
The judges for this bout are Steve Erwin, John Mangel and Eliza Hachem.

The bell rings for round one and we are underway!
Eater tries to check the leg kick but that clearly hurt him.

Eater looking to score a takedown here. Garvin is defending well but Eater drives through and ends up in Garvin's guard.
Eater is breathing heavily.
Garvin looking to control.
Eater being controlled here momentarily.
Garvin is trying to control the position but Eater postures up.
Eater wants to stand but Garvin has a closed guard, so he can't escape.
Eater throwing elbows and punches but not connecting, as Garvin works some decent striking defense from the bottom.
Eater won't allow Garvin to sweep him here.

The ref stands the fighters back up, due to lack of action by Ronnie Garvin.
Garvin wants to clinch.
Garvin connects with a crisp jab.

It looks like Adam Eater has been cut.
This is a great period of action - very entertaining stuff!
Eater on the wrong end of a vicious looking body shot.

That's one minute gone in the round.

Oooooh!!! Garvin has knocked Eater down with a huge combo! Garvin steps away and waves a wobbly Eater back to his feet! This one might not go much longer!
Wooooo! Give it up for these two warriors! They are putting on a show!
Garvin drops a shoulder and throws an uppercut that cracks Eater right on the button. Eater goes down! Garvin follows him to the mat and finishes the job with more strikes! Garvin gets the win via TKO!
Ladies and gentlemen, after 1:12 of round 1, we have a winner by way of TKO (Strikes). Ronnie Garvin!
|
|
|
|
|
|
|
|
|
|
|
|
|
|
|
|
|
|
|
|
|
|
|
| S |
C
A |
G |
S |
C
B |
G |
|
S |
C |
G |
|
energy
A | B |
|
hype
A | B |
|
pop
A | B |
|
mgr
A | B |
|
FIGHT
RATING
100% |
|
|
|
|
|
|
|
Undercard bout
|
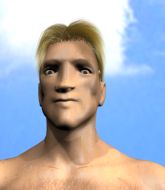
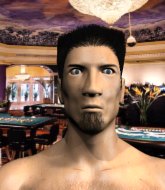
Coming up we have a super heavyweight MMA rules bout between James Roper (ranked 0 p4p, 0 weight class) and Ben Teo (ranked 0 p4p, 0 weight class). Ben Teo has the better chin. Will he look to stand and bang today?
 |
|
 |
| 194 cm
26
265 lbs
5 - 0 - 0 |
|
189 cm
25
275 lbs
3 - 2 - 0 |
Powerful takedowns
Brawler
Very strong |
|
BJJ Blue Belt
Decent boxing
Heavy handed |
|
| |
|
Ladies and gentlemen. This fight is 3 rounds, in the super heavyweight division.
Introducing the fighter to my left, fighting out of the red corner.
With a record of
5 - 0 - 0, fighting out of Sydney, James Roper!
And introducing the fighter to my right, fighting out of the blue corner.
With a record of
3 - 2 - 0, fighting out of Sydney, Ben Teo!
The judges for this bout are Eliza Hachem, John Mangel and Steve Erwin.
The bell rings for round one and we are underway!
A head kick misses from Teo.
Teo fakes high and shoots in for a takedown but Roper avoids it really well and circles away.
Roper shoots in for a takedown but doesn't get it.

Teo takes the fight into the clinch.
Roper has Teo pressed against the cage, preventing Teo from circling away and getting back to striking at range.
Roper pulls guard effortlessly.
Teo wants to control from the top but Roper keeps moving.
Teo stands up and looks to throw the legs aside to pass to side control. Roper swivels though and keeps the full guard.

Roper looking to try and escape his hips here, looking for a submission. It looks like he's going for a triangle but Teo is defending well. Roper quickly switches to an armbar and extends the arm! Teo has no choice but to tap, to a very quick submission! Wow, that was lightning fast! Roper celebrates on the cage, with the crowd.
Ladies and gentlemen, after 1:57 of round 1, we have a winner by way of Submission (Armbar). James Roper!
|
|
|
|
|
|
|
|
|
|
|
|
|
|
|
|
|
|
|
|
|
|
|
| S |
C
A |
G |
S |
C
B |
G |
|
S |
C |
G |
|
energy
A | B |
|
hype
A | B |
|
pop
A | B |
|
mgr
A | B |
|
FIGHT
RATING
33% |
|
|
|
|
|
|
|
Undercard bout
|
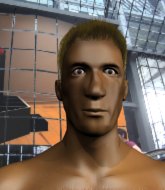
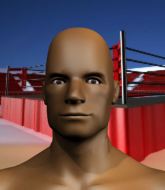
Coming up we have a light heavyweight MMA rules bout between Dave Dobinski (ranked 0 p4p, 0 weight class) and Bubby Brown (ranked 0 p4p, 0 weight class). Brown has chosen Klaas & Bodybangers - Freak as his entrance music. I'm sure you'll be fascinated to know that I was talking to some pointless Z list celebrity before the fight and he thought that Bubby Brown was going to win. Let's see if he was right.
 |
|
 |
| 187 cm
18
210 lbs
1 - 1 - 0 |
|
175 cm
21
200 lbs
4 - 4 - 1 |
BJJ White Belt
Excellent boxer
KO power |
|
BJJ Blue Belt
Brawler
Granite chin |
|
| |
|
Ladies and gentlemen. This fight is 3 rounds, in the light heavyweight division.
Introducing the fighter to my left, fighting out of the red corner.
With a record of
1 - 1 - 0, fighting out of Sydney, Dave Dobinski!
And introducing the fighter to my right, fighting out of the blue corner.
With a record of
4 - 4 - 1, fighting out of Sydney, Bubby Brown!
The judges for this bout are Hugh Johnson, Steve Erwin and Eliza Hachem.
The bell rings for round one and we are underway!
Jab, cross, leg kick. Nice combination by Dobinski!

Brown fakes a strike and closes the distance, dragging Dobinski to the ground. Brown is now in Dobinski's guard.
We've had a lack of effective grappling in the last minute or so, which could well see a referee standup.
Brown content to stall in guard here.
The ref warns both fighters not to hold the cage as they work up against the meshing.
Brown should think about turning a few of those tyres round his middle into muscle if he wants people to take him seriously as an athlete.
The crowd are loving this. Great action here.
Bubby Brown has forced the referee to step in and restart the fight on the feet.
Left hook, right uppercut from Dobinski.
Brown clinches.
That's one minute gone in the round.
Brown stalling here - the referee won't stand for too much of that.
Brown misses with a hook to the ribs.
Dobinski prevents the takedown attempt.
Stalling in the clinch from Brown.
Dobinski misses with a hook to the ribs.
Some stalling of biblical proportions here from Brown.
Dobinski working hard to break the clinch.
Brown is looking for a takedown.
Dobinski tries to stall but Brown uses the opportunity to gain a better position.
Dobinski wants to break free but Brown has control.

Dobinski pushes off and circles away, back to the middle of the mat.
Dobinski lands a jab to the nose.
Dobinski misses with a few strikes there.
Dobinski cracks a nice hook into Brown's ribs.

That's two minutes gone in the round.
Dobinski works the jab nicely.
This is a great period of action - very entertaining stuff!
Dobinski misses with a series of wild punches.
Dobinski sizes up Brown with a pawing jab and scores with a straight right down the middle.
Brown looks frustrated there after his takedown attempt is stuffed easily.
Dave Dobinski has stuffed three takedown attempts in the round now. That's going to take a lot out of Bubby Brown.
The fight moves into the clinch position.
Brown works for the underhooks and manages to get a trip takedown into guard.
Brown pushes down on Dobinski's leg and manages to get into half guard.
Dobinski is trying to stand.
Brown looks over to his corner - he wants some instructions but his corner are not responding.

That's three minutes gone in the round.
Brown works his way into side control.

Brown stands up.
Some wild striking there from Dobinski.
Dobinski stalks Brown and leaps in with a furious combination of punches. Uppercuts and crosses smash into Brown's face. Brown staggers backwards, shaken.
Dobinski keeping a good distance there, avoiding the body shot.
Dobinski scores with a jab. Brown acknowledges it with a nod of the head.

That's four minutes gone in the round.
The crowd cheering loudly, showing their appreciation for the quality fight we're seeing here.
Dobinski scores with a nice head shot.
Brown tries a switch kick but it misses it's target.
Dobinski throws a nice looking combination but Brown bobs and weaves to avoid any damage.
Brown shoots in for a takedown and gets it. Oh and he's advanced to full mount straight away.
Brown takes a little breather and maintains the position. The referee will be looking for him to stay active from such a dominant position though.
Brown with the ground and pound from mount.
Brown with shots to the head and body - Dobinski looks very uncomfortable down there.
Brown lands a nice shot to the head.
The crowd are going absolutely nuts as the round comes to an end - what a fantastic round of action!
BOOM! Brown connects with a massive shot to the dome!
Dobinski knows he needs to get back to his feet asap. He's simply no match for Brown on the ground.
Brown unloading with bombs!
The fighters are pressed up against the cage, both looking to find a bit of space to work.
Brown takes a little breather and maintains the position. The referee will be looking for him to stay active from such a dominant position though.
And thats the end of the round the fighters go back to their corners.
That was a close round but I would say that Dave Dobinski will probably get the nod.
That's time! Dobinski's corner gives him a slap on the ass as he gets ready to fight.

Dobinski throws a nice looking combination but Brown bobs and weaves to avoid any damage.
Brown rushes forward with a series of wild hooks but Dobinski moves out of range and avoids them all easily.
Brown scores with a head kick.
Dobinski misses with a few strikes there.
Brown drops down and drives through with a powerful takedown into guard.
Brown trying to control the position from guard on top but Dobinski is wriggling around, looking for whatever he can.

Brown thinks about going for a leg but decides against it, in order to maintain the position.
Brown has the superior BJJ but he's also working some ground strikes into his gameplan.
Brown forces his way into half guard.
Brown lands strikes from half guard.
That's one minute gone in the round.
Brown controlling the pace.
Brown works his way into side control.
Brown works to advance to full mount. Dobinski defends for a few seconds but eventually he succumbs.
Bubby Brown has got the better of the ground game so far.
Brown controlling from the full mount.
That's two minutes gone in the round.
Brown with some aggressive grappling here. He's looking for submissions here, rather than waiting for the opportunity to counter.
Brown is in full mount, looking to secure a guillotine but Dobinski is surviving well by controlling Brown's body position as best he can.
Brown looking for a guillotine from mount but Dobinski is having none of it.
Brown takes a little breather and maintains the position. The referee will be looking for him to stay active from such a dominant position though.
That's three minutes gone in the round.
Brown has hold of Dobinski's left arm, perhaps looking for a submission. The two fighters tussle over control of the isolated limb and Dobinski manages to get his arm back to his side and away from danger.
Brown lands an elbow that was bordering on illegal but the referee lets it go with a warning.
Brown content just to control the position here.
That's four minutes gone in the round.
Brown is working to isolate an arm here. It's a telegraphed submission attempt but he's gone for it anyway - and he's got it! Brown extends the arm and Dobinski is forced to tap!
Ladies and gentlemen, after 4:19 of round 2, we have a winner by way of Submission (Armbar). Bubby Brown!
Bubby Brown thanked the fans post fight for their support.
|
|
|
|
|
|
|
|
|
|
|
|
|
|
|
|
|
|
|
|
|
|
|
| S |
C
A |
G |
S |
C
B |
G |
|
S |
C |
G |
|
energy
A | B |
|
hype
A | B |
|
pop
A | B |
|
mgr
A | B |
|
FIGHT
RATING
57% |
|
|
|
|
|
|
|
Undercard bout
|
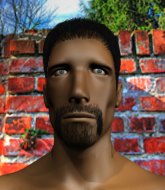
Coming up we have a middleweight MMA rules bout between Alex Glenn (ranked 0 p4p, 0 weight class) and AJ March (ranked 0 p4p, 0 weight class). March is bouncing up and down as he enters the arena, backed by The Firm - Star Trekkin'. AJ March looks lathargic as he enters the arena. Wake up son, you're about to have a fight!
 |
|
 |
| 181 cm
24
185 lbs
4 - 1 - 0 |
|
185 cm
23
184 lbs
2 - 5 - 1 |
Decent wrestler
Brawler
Granite chin |
|
BJJ Blue Belt
Solid Muay Thai
Determined |
|
| |
|
Ladies and gentlemen. This fight is 3 rounds, in the middleweight division.
Introducing the fighter to my left, fighting out of the red corner.
With a record of
4 - 1 - 0, fighting out of Sydney, Alex Glenn!
And introducing the fighter to my right, fighting out of the blue corner.
With a record of
2 - 5 - 1, fighting out of Sydney, AJ March!
The judges for this bout are Donatello Bradman, Summer Carpenter and Bruno Hogan.
The bell rings for round one and we are underway!
Glenn throws a body kick but he was well out of range there.
Glenn tries to clinch but is not successful on this occasion.
Glenn tries to clinch but March moves out of range.
March forces Glenn back against the cage and clinches.
March gets underhooks to prevent Glenn's takedown attempt.
March is trying to push Glenn away but Glenn has him pressed against the cage, so he's going nowhere.
March wants to break free. God knows he wants to breaaaak freeee.
March blocks a couple of punches on the inside.
Glenn wants to break free but March has control.
March tries to pull guard but Glenn holds him up against the cage and eventually March drops back down to his feet.
Glenn fails to pull guard.
Glenn is looking to score with knees to the body. Maybe he'll change it up and go body then head. March is defending well for now.
Glenn breaks the clinch.
That's one minute gone in the round.
March throws a front kick that sends Glenn stumbling back into the cage.
Glenn fails in his attempt to clinch.
Glenn scores a takedown into full mount!
The referee looks like he's ready to step in and stand the fighters back up.
March takes a big shot to the head but keeps on trying to improve his position.
Glenn can't quite control the action as he would like just now, as March is looking to escape.
Glenn scoring with strikes but March is staying in there.
March swinging wildly from the bottom but he's not landing.
March is working to get back to half guard.
Glenn has been looking to land a fair amount of strikes on the ground. He might be looking to soften his opponent up in order to work for a submission.
That's two minutes gone in the round.
Glenn controlling from mount.
We've seen a great period of action over the last minute or so - credit to both fighters for going all out!
Glenn lands a heavy elbow.

It looks like AJ March has been cut.
Glenn controlling from mount.
That's three minutes gone in the round.
Glenn with the ground and pound from mount.
That has opened up AJ March's cut even more.
Glenn controlling the pace for now.
Glenn raining down hammerfists from mount.
The cut above AJ March's eye is starting to cause him problems now.
That's four minutes gone in the round.
Glenn lands a shot to the body, followed up by a shot to the exposed head of his trapped opponent.
AJ March's cut is absolute horrible now. This looks like something out of a horror film with blood covering both fighters.
The referee calls the doctor in to look at AJ March's cut. Oh no, the doctor has called an end to the bout!
Ladies and gentlemen, after 4:28 of round 1, we have a winner by way of TKO (Cut). Alex Glenn!
|
|
|
|
|
|
|
|
|
|
|
|
|
|
|
|
|
|
|
|
|
|
|
| S |
C
A |
G |
S |
C
B |
G |
|
S |
C |
G |
|
energy
A | B |
|
hype
A | B |
|
pop
A | B |
|
mgr
A | B |
|
FIGHT
RATING
37% |
|
|
|
|
|
|
|
Undercard bout
|
Coming up we have a lightweight MMA rules bout between Jhon Jones (ranked 0 p4p, 0 weight class) and Justin Hodges (ranked 0 p4p, 0 weight class). Chooooooooon! I think Jones might be my favorite fighter, now he's come out to Bloodwork. Justin Hodges will no doubt be trying to keep this one on the feet, where he has a distinct advantage.
 |
|
 |
| 170 cm
21
155 lbs
6 - 2 - 0 |
|
190 cm
25
155 lbs
2 - 4 - 0 |
BJJ Blue Belt
Counter striker
Experienced |
|
Good takedowns
Brawler
Solid chin |
|
| |
|
Ladies and gentlemen. This fight is 3 rounds, in the lightweight division.
Introducing the fighter to my left, fighting out of the red corner.
With a record of
6 - 2 - 0, fighting out of Sydney, Jhon Jones!
And introducing the fighter to my right, fighting out of the blue corner.
With a record of
2 - 4 - 0, fighting out of Sydney, Justin Hodges!
The judges for this bout are Summer Carpenter, Eliza Hachem and John Mangel.
The bell rings for round one and we are underway!
Hodges has Jones up against the cage in a clinch.
Hodges tries to take the fight to the ground by pulling guard but can't manage it.
Hodges tries to break free but Jones pushes him back against the cage.
Hodges pulls guard successfully.
Jones won't allow Hodges to get back to his feet.
Jones knows he needs to get back to his feet asap. He's simply no match for Hodges on the ground.
Hodges looks gassed!
Jones seems content to control from guard here. He's going to have to remain active though if he doesn't want to get stood back up.

Jhon Jones has forced the referee to step in and bring the fight back to the feet.
Jones shoots in for a takedown! He's got it and he's managed to land in full mount! That's better than Jones was expecting from the takedown attempt, I'm sure!
That's one minute gone in the round.
Jones controlling from the full mount.
Hodges is wriggling around trying to escape.
Jones looking to control and managing it successfully.
That's two minutes gone in the round.
We may be looking at a referee standup if the pace doesn't pick up soon.
The fighters are pressed up against the cage, both looking to find a bit of space to work.
The ref stands the fighters back up. Jhon Jones wasn't doing enough on the ground.
Hodges with a lazy takedown attempt
and Jones counters with a nice double leg into side control. Hodges won't be happy with that.
Hodges seems a little lost for a moment, as Jones dominates the positioning.
We've seen a great period of action over the last minute or so - credit to both fighters for going all out!
Jones wants to work for a kimura but he's foiled early by Hodges, who protects the arm well.
Jones taking a breather here.
Jones seems to have a rather negative gameplan on the ground. He seems keen to just score the takedown and hold down Hodges for as long as he can get away with.
That's three minutes gone in the round.
Hodges is looking to reverse the position.
Jones controls the position from side control.
The ref warns both fighters not to hold the cage as they work up against the meshing.
The referee claps his hands together and tells the fighters to work.
Jhon Jones has forced the referee to step in and bring the fight back to the feet.
Jones fakes an overhand right and shoots for a takedown. Hodges sprawls well initially but Jones persists and gets the takedown into half guard.
Jones slows the pace down in half guard.
That's four minutes gone in the round.
Jones wants to pass the guard but Hodges is defending well.
Hodges is trying to stand up here but Jones is controlling him well.
Hodges looking for submissions off his back.
Hodges is trying to control but Jones passes into side control!
Jones is staying tight to Hodges's torso, preventing him from escaping.
The crowd are loving this. Great action here.
As the round comes to an end the crowd are showing their appreciation for a great round of action.
You can see the frustration on Hodges's face, being in this tough position on the bottom.
And thats the end of the round the fighters go back to their corners.
Jhon Jones dominated that round.
That's time! Jones's corner gives him a slap on the ass as he gets ready to fight.
Excellent takedown into side control there by Jones.
Hodges taking a bit of punishment here - Jones scoring with strikes.
Jones lands an elbow.
Jones tries for a kimura. Not really close to a finish though.
Jones in side control, just content to control the action for now.
Hodges is breathing heavily.
That's one minute gone in the round.
Hodges can't do much from the bottom here.
A bit of a lull in the action. I'm sure it will pick up again soon... even if the ref has to physically pick them up and put them back on their feet.
Jhon Jones overall seems to be getting the better of the ground position in the fight so far.
We may be looking at a referee standup if the pace doesn't pick up soon.
That's two minutes gone in the round.
The ref stands the fighters back up because Jhon Jones just wasn't active enough.
Jones gets tackled into the cage by Hodges. Hodges maintains the clinch.
Jones is working for takedown but Hodges is calmly controlling the position for now.
Hodges successfully pulls guard.
Hodges can't do much from the bottom at the moment, as Jones controls the pace.
Hodges is trying to keep Jones in close.
Jones trying to pass the guard but can't manage it just yet.
Jones trying to control the position from guard on top but Hodges is wriggling around, looking for whatever he can.
It looks like the ref is thinking about a standup.
Hodges manages to sweep nicely, so he's now on top. Jones manages to get himself to full guard.
That's three minutes gone in the round.
Jones trying to control the position here.
Jhon Jones has forced the referee to step in and bring the fight back to the feet.
Jones fakes an overhand right and shoots for a takedown. Hodges sprawls well initially but Jones persists and gets the takedown into half guard.
Still in half guard, Jones seems content to control.
That's four minutes gone in the round.
Hodges wants to get back to his feet.
We're going to have a standup here because Jhon Jones wasn't active enough for the referee's liking.
Jones tries to shoot in for a takedown. He's got hold of a leg but Hodges swivels and escapes.
Jones dives in and grabs Hodges's left leg, looking for a takedown. Hodges pushes down on Jones's head and hops out.
That's three failed takedown attempts in the round for Jhon Jones. That's going to take a lot out of him.
Jones feints and then dives in with a takedown. That was a long way out but the feint bought him enough time to close the distance and complete the takedown. Now we'll play guard for a bit and see who can get the better of that position.
Hodges being controlled here, momentarily.
The crowd are loving this. Great action here.
Jones's ground tactics aren't going to win him many fans. Let's hope he's got fireworks for us if he gets back to his feet because he's not doing much on the ground.
As the round comes to an end the crowd are showing their appreciation for a great round of action.
Jones trying to control but Hodges is working from the bottom.
And thats the end of the round the fighters go back to their corners.
Jhon Jones dominated that second round.
Well, the break between rounds is over. Let's get back to the scrappin! The crowd applaud as we get ready to start the final round!

Hodges shoots in but doesn't get the takedown
and Jones counters with a takedown into full mount! That could mean trouble for Hodges!
Jones looking for an armbar but decides to keep the dominant position instead.
Jones controlling from mount.
Jones avoids the attempt from Hodges to control.
Hodges is desperately trying to get back to half guard.
Jones is working on an americana here. Ooh, that looks pretty nasty! Nope, Hodges has managed to escape the submission attempt.
Hodges takes a big intake of breath there - he's definitely tired.
That's one minute gone in the round.
Jones tucks in and makes sure he doesn't lose the dominant position.
A nice elbow there by Jones.
Jones tucks in and makes sure he doesn't lose the dominant position.
Jones wants to take his opponent's back but Hodges doesn't allow it.
Jones looking to control and managing it successfully.
That's two minutes gone in the round.
Hodges is wriggling around trying to escape.
Jones takes a little breather and maintains the position. The referee will be looking for him to stay active from such a dominant position though.
Hodges really trying hard to get back to half guard here.
Jones wants to finish this one by submission but Hodges is holding onto his waist, trying to prevent any attacks from Jones.
Hodges is working to get back to half guard.
That's three minutes gone in the round.
Jones sitting in mount, just looking to control for the moment.
Hodges is a painfully thin specimen of a man. You do wonder whether a good body kick would snap him clean in two.
Jones is looking to work his way around to Hodges's back. He needs to be careful though, as he's in danger of losing this dominant position.
Jones content just to control the position here.
Hodges is desperately trying to improve his position but Jones has a good base and remains in mount.
That's four minutes gone in the round.
Jones working to secure an arm triangle but it's not happening for him just yet.
Hodges is wriggling around trying to escape.
Jones tucks in and makes sure he doesn't lose the dominant position.
The crowd applaud the fighters efforts here as the round comes to an end.
The referee must be thinking about standing these guys back up.
Jones landing punches.
And that's the end of the fight!
Jhon Jones showed his dominance in that final round.
Well I reckon that's a shut out for Jones, winning every round. Will the judges agree? They are the ones who matter, even if they are often depressingly incompetent. Over to the ring announcer for the scorecards.
Ladies and gentlemen, after 3 rounds of action, we go to the scorecards for a decision.
Judge Summer Carpenter scores the fight 30:27
Judge Eliza Hachem scores the fight 30:27
Judge John Mangel scores the fight 30:27
In favor of your winner, by unanimous decision... Jhon Jones!
Jhon Jones very nearly forgot to thank ANABOLIC **160** and LAUNDRY amongst all the excitement of his win but just as the interview came to a close, he screamed their name. Hopefully he'll get a few nice freebies in the mail as a thank you.
|
|
|
|
|
|
|
|
|
|
|
|
|
|
|
|
|
|
|
|
|
|
|
| S |
C
A |
G |
S |
C
B |
G |
|
S |
C |
G |
|
energy
A | B |
|
hype
A | B |
|
pop
A | B |
|
mgr
A | B |
|
FIGHT
RATING
44% |
|
|
|
|
|
|
|
Co-main event
|
Coming up we have a featherweight MMA rules bout between Juan Ramirez (ranked 0 p4p, 0 weight class) and Dun Fighten (ranked 0 p4p, 0 weight class). Dun Fighten is staring across the cage at his opponent, tweaking his nipples.
 |
|
 |
| 175 cm
25
145 lbs
4 - 2 - 0 |
|
182 cm
25
148 lbs
1 - 4 - 0 |
Good wrestling
Counter striker
Very strong |
|
BJJ Blue Belt
Decent boxing
Solid chin |
|
| |
|
Ladies and gentlemen. This fight is 3 rounds, in the featherweight division.
Introducing the fighter to my left, fighting out of the red corner.
With a record of
4 - 2 - 0, fighting out of Sydney, Juan Ramirez!
And introducing the fighter to my right, fighting out of the blue corner.
With a record of
1 - 4 - 0, fighting out of Sydney, Dun Fighten!
The judges for this bout are Damien Edna, Steve Erwin and Winston Howard.
The bell rings for round one and we are underway!
Fighten circles away from the clinch attempt.
Fighten throws a right hand that Ramirez ducks under and follows up with a left that Ramirez also avoids with ease.
Fighten feints and then dives in with a takedown. That was a long way out but the feint bought him enough time to close the distance and complete the takedown. Now we'll play guard for a bit and see who can get the better of that position.
We could do with one of the fighters taking the initiative a bit more on the ground - they're both waiting to capitalize on a mistake.
Fighten throws a strike but Ramirez rolls with it and manages to sweep. Now he's in guard on top.
Ramirez trying to pass the guard but can't manage it just yet.
The ref warns both fighters not to hold the cage as they work up against the meshing.
Fighten working the defensive guard well to avoid strikes from Ramirez.
Ramirez throwing strikes from guard but Fighten blocks nicely.
The fighters are pressed up against the cage, both looking to find a bit of space to work.
Ramirez drops back for a leg but he's not going to get it - he lets go and Fighten dives on top into guard.
That's one minute gone in the round.
Fighten stands and steps away. Ramirez gets to his feet too and we're back to the striking game.
Fighten tries to bum rush Ramirez with a series of wild strikes but Ramirez uses good footwork to avoid the assault.
Ramirez avoids a punch combination nicely.
Ramirez gets caught on his heels momentarily as he allows Fighten to score an easy takedown into full guard.
Ramirez looking for submissions from the bottom but instead Fighten passes into side control.
That's two minutes gone in the round.
Fighten tries to score with some ground and pound. Ramirez controls his posture well this time though and the shots don't do any damage.
Fighten trying to control the action but Ramirez is working from the bottom.
That's three minutes gone in the round.
Both fighters take a look at the clock.
Ramirez can't do much from the bottom here.
That's four minutes gone in the round.
Well. There's a bit of a lull in the action here and the crowd are starting to get restless.
The referee is asking the fighters to pick up the pace.
Juan Ramirez has forced the referee to step in and bring the fight back to the feet.
Decent striking displayed by Fighten there.
Fighten drives through with a really nice takedown into side control.
Ramirez tries to control the position but he's not in luck - Fighten easily slips into full mount!
And thats the end of the round the fighters go back to their corners.
Dun Fighten dominated that round.
The fighters' corners scream their final instructions, as the referee calls time. Here we go, back to the action!
Fighten displaying good standup as he scores with a three punch combination.
Fighten fakes an overhand right and shoots for a takedown. Ramirez sprawls well initially but Fighten persists and gets the takedown into half guard.
Ramirez trying to control here but he's found himself mounted! Oh no!
Fighten is stalling here but it's allowed Ramirez to get half guard.
Ramirez controlling the position well.
That's one minute gone in the round.
Fighten wants to advance to full mount but Ramirez doesn't think that's going to happen and regains full guard instead.
Fighten preventing the sweep.
Fighten working some ground and pound from guard but it's not doing any damage.
That's two minutes gone in the round.
Well. There's a bit of a lull in the action here and the crowd are starting to get restless.
Ramirez wants to control the position but Fighten says "no thanks buddy" and passes to half guard.
Fighten missing with the ground and pound from half guard.
Ramirez trying to control but Fighten postures up.
Ramirez is concentrating on defense, preventing Fighten from advancing position.
The ref stands the fighters back up because Juan Ramirez just wasn't active enough.
Fighten looks to land a combination. Ramirez sees it coming but can only parry a couple of the shots.
That's three minutes gone in the round.
Fighten throws a combination but it was largely blocked by Ramirez.
Ramirez tries to close the distance and clinch but Fighten swats him to one side with an open hand palm strike and circles away.
A cross from Fighten lands.
Dun Fighten is looking to throw some combinations by the looks of things.
Fighten is looking for a takedown here. He's shot in and has managed to get it, finishing up in Ramirez's half guard.
Fighten tries to stand but his arm is trapped.
Ramirez wants to control but Fighten is keeping busy.
That's four minutes gone in the round.
Fighten missing with the ground and pound from half guard.

Neither fighter is doing enough for the referee's liking and he's decided to stand them back up.
Ramirez takes a punch to the jaw and another one to the bread basket.
Fighten is a painfully thin specimen of a man. You do wonder whether a good body kick would snap him clean in two.
Ramirez moves in looking to clinch but Fighten pushes him off.
Fighten takes a step back and watches a body kick go sailing past his mid section.
Fighten swats away the attempt to clinch by Ramirez.
Ramirez throws a push kick but Fighten slaps the foot to one side.
And thats the end of the round the fighters go back to their corners.
Dun Fighten showed his class in that round. I'd imagine he'll take it on all the scorecards.
The minute break is over - no more time for sponges and pep talks - back to the action! This is the final round!

Ramirez pushes Fighten up against the cage in a clinch.
Fighten gets double underhooks to prevent a takedown attempt from Ramirez.
Fighten is leaning against Ramirez and scores with a nice uppercut to the body.
Ramirez can't get the takedown.
Ramirez is trying to break free.
Ramirez is trying to pull guard but being pressed up against the cage enables Fighten to keep the fight standing.
That's three failed takedown attempts in the round for Juan Ramirez. That's going to take a lot out of him.
Ramirez tries to pull guard but Fighten forces him back to his feet, against the cage.
Fighten stops a takedown attempt from Ramirez.
Ramirez wants to break free. God knows he wants to breaaaak freeee.
That's one minute gone in the round.
Ramirez tries to score a body lock takedown but Fighten shows good agility there to stay on his feet.
Ramirez has Fighten pressed up against the cage and is working for takedown. Fighten manages to improve position though and keeps the fight standing.
Fighten jumps into guard, dragging Ramirez to the mat.
Ramirez works over Fighten with some ground and pound from guard.
Ramirez distracts Fighten with his right hand and drops a big elbow with his other arm.
Ramirez prevents Fighten from getting back to his feet.
Ramirez is looking to work some ground and pound but Fighten has wrist control.
Ramirez throwing elbows and punches but not connecting, as Fighten works some decent striking defense from the bottom.
Ramirez throwing strikes from guard but Fighten blocks nicely.
That's two minutes gone in the round.
Ramirez trying to control but Fighten is working from the bottom.
Ramirez scores with a decent looking elbow strike.
Ramirez trying to control but Fighten is working from the bottom.
We must be close to a standup if these guys don't pick up the pace.
We're going to have a standup here because Juan Ramirez wasn't active enough for the referee's liking.
Fighten fails to land with a series of punches.
That's three minutes gone in the round.
Fighten looks to score with a combo but nothing lands.
The fight stays on the outside here - Ramirez looks like he's thinking about clinching though.
Ramirez throws a leg kick that misses.
Fighten defends well against a solid takedown attempt from Ramirez.
Ramirez tries to clinch up.
Fighten lands a two punch combo.
Fighten moves into range and throws a lovely three punch combination.
That's four minutes gone in the round.
Fighten looking to shoot here. He's gone for it and he's landed a takedown into mount! Oh, that's bad for Ramirez!
Ramirez is working to get back to half guard.
Juan Ramirez has stepped it up - he knows he needs a finish here!
Fighten throwing sloppy strikes here. Perhaps if he tightened up his striking from such a dominant position, he'd be able to finish easier.
The crowd applaud the fighters efforts here as the round comes to an end.
Fighten throwing sloppy strikes, which aren't doing any damage.
And that's the end of the fight!
That was a close round. You could make an argument for either fighter but I would give it to Juan Ramirez.
I think Fighten has won this one but let's see whether the judges agree with me. Over to the ring announcer for the scorecards.
Ladies and gentlemen, after 3 rounds of action, we go to the scorecards for a decision.
Judge Damien Edna scores the fight 28:29
Judge Steve Erwin scores the fight 28:29
Judge Winston Howard scores the fight 28:29
In favor of your winner, by unanimous decision... Dun Fighten!
|
|
|
|
|
|
|
|
|
|
|
|
|
|
|
|
|
|
|
|
|
|
|
| S |
C
A |
G |
S |
C
B |
G |
|
S |
C |
G |
|
energy
A | B |
|
hype
A | B |
|
pop
A | B |
|
mgr
A | B |
|
FIGHT
RATING
36% |
|
|
|
|
|
|
|
Main event
|
Coming up we have a bantamweight MMA rules bout between Ray Richardson (ranked 0 p4p, 0 weight class) and Trent Fuller (ranked 0 p4p, 0 weight class). Both fighters look pumped up here. Let's hope this is a good fight!
 |
|
 |
| 175 cm
21
135 lbs
6 - 2 - 0 |
|
175 cm
19
135 lbs
3 - 3 - 0 |
Good wrestling
Brawler
Experienced |
|
BJJ White Belt
Excellent boxer
Heavy handed |
|
| |
|
Ladies and gentlemen. This fight is 3 rounds, in the bantamweight division.
Introducing the fighter to my left, fighting out of the red corner.
With a record of
6 - 2 - 0, fighting out of Sydney, Ray Richardson!
And introducing the fighter to my right, fighting out of the blue corner.
With a record of
3 - 3 - 0, fighting out of Sydney, Trent Fuller!
The judges for this bout are Bruno Hogan, Donatello Bradman and Winston Howard.
The bell rings for round one and we are underway!
Richardson darts in and clinches Fuller up against the cage.
Fuller looks like he'd prefer to be striking at range right now.
Fuller is working hard here but doesn't seem to be able to control effectively, up against the cage.
Richardson tries to score a body lock takedown but Fuller shows good agility there to stay on his feet.
Richardson decides to pull guard.
The referee claps his hands together and tells the fighters to work.
Richardson manages to land a sweep and now he's in mount on top!
Richardson cracks Fuller with a nasty head shot there - the crowd let out an audible gasp there, as the noise reverberated around the arena.
Richardson lands a shot to the body, followed up by a shot to the exposed head of his trapped opponent.
Fuller takes a big shot to the head but keeps on trying to improve his position.

Fuller is rocked!
We've seen a great period of action over the last minute or so - credit to both fighters for going all out!
Fuller is looking to improve his position but Richardson isn't that keen on the idea.
The ref warns both fighters not to hold the cage as they work up against the meshing.
Richardson putting on the heat here with some good ground and pound!
Fuller is still in real trouble! Can Richardson finish him?
Fuller is bucking up trying to escape but Richardson cracks him with another couple of good strikes.
Richardson landing shots from mount.
That's one minute gone in the round.
Richardson connects with a couple of good shots from mount.
Richardson drops a big elbow. That's hurt Fuller! More shots from Richardson and the ref steps in! The fight is over!
Ladies and gentlemen, after 1:25 of round 1, we have a winner by way of TKO (Strikes). Ray Richardson!
An out of breath Ray Richardson thanked his loyal fans in his post fight interview, giving them credit for his success over the course of his career.
|
|
|
|
|
|
|
|
|
|
|
|
|
|
|
|
|
|
|
|
|
|
|
| S |
C
A |
G |
S |
C
B |
G |
|
S |
C |
G |
|
energy
A | B |
|
hype
A | B |
|
pop
A | B |
|
mgr
A | B |
|
FIGHT
RATING
69% |
|
|
|
|
|
|
|
|
|
|

