 |
GFL 17 PBP Commentary |
Undercard bout
|
|
|
|
Undercard bout
|
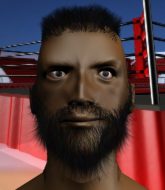
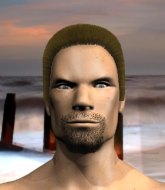
Coming up we have a heavyweight MMA rules bout between Alex Payne (ranked 0 p4p, 0 weight class) and Max Biruchinskiy (ranked 0 p4p, 0 weight class). Max Biruchinskiy has the better chin. Will he look to stand and bang today?
 |
|
 |
| 195 cm
25
274 lbs
0 - 0 - 0 |
|
200 cm
25
265 lbs
1 - 2 - 0 |
BJJ White Belt
Solid boxing
Very strong |
|
BJJ Blue Belt
Good kicks
Determined |
|
| |
|
Ladies and gentlemen. This fight is 3 rounds, in the heavyweight division.
Introducing the fighter to my left, fighting out of the red corner.
With a record of
0 - 0 - 0, fighting out of Tokyo, Alex Payne!
And introducing the fighter to my right, fighting out of the blue corner.
With a record of
1 - 2 - 0, fighting out of Tokyo, Max Biruchinskiy!
The judges for this bout are Shigeki Fujiwara, Shigeki Sano and Hirohito Nitta.

The bell rings for round one and we are underway!
Payne shapes like he's going to throw a leg kick but settles back down.
Payne rushes forward with a series of wild hooks but Biruchinskiy moves out of range and avoids them all easily.
Nice cross by Biruchinskiy.
A head kick misses from Biruchinskiy.
Payne is keeping his hands low and just asking to be knocked out. Biruchinskiy Raises his leg and lands a stunning axe kick! Payne is out cold, face down on the mat!
Ladies and gentlemen, after 0:14 of round 1, we have a winner by way of KO (Head Kick). Max Biruchinskiy!
|
|
|
|
|
|
|
|
|
|
|
|
|
|
|
|
|
|
|
|
|
|
|
| S |
C
A |
G |
S |
C
B |
G |
|
S |
C |
G |
|
energy
A | B |
|
hype
A | B |
|
pop
A | B |
|
mgr
A | B |
|
FIGHT
RATING
100% |
|
|
|
|
|
|
|
Undercard bout
|
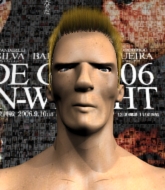
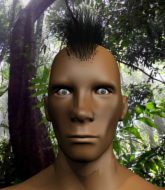
Coming up we have a bantamweight MMA rules bout between Kazuya Takeda (ranked 0 p4p, 0 weight class) and Badong Vargas (ranked 0 p4p, 0 weight class). Kazuya Takeda has the better chin. Will he look to stand and bang today?
 |
|
 |
| 174 cm
19
135 lbs
4 - 2 - 0 |
|
170 cm
21
140 lbs
4 - 4 - 0 |
BJJ Blue Belt
Solid Muay Thai
Good chin |
|
Dangerous GnP
Excellent boxer
Good gas tank |
|
| |
|
Ladies and gentlemen. This fight is 3 rounds, in the bantamweight division.
Introducing the fighter to my left, fighting out of the red corner.
With a record of
4 - 2 - 0, fighting out of Tokyo, Kazuya Takeda!
And introducing the fighter to my right, fighting out of the blue corner.
With a record of
4 - 4 - 0, fighting out of Tokyo, Badong Vargas!
The judges for this bout are Shigeki Fujiwara, Yukihiro Shimada and Taro Takaoka.
The bell rings for round one and we are underway!

Takeda moves into the clinch.
Nice body punch from Takeda - that landed with a thud.
Vargas tries to work over Takeda's body with a swooping hook but it only glances the target.
Vargas is defending well against a takedown attempt.

Vargas pushes off and circles away, back to the middle of the mat.
Vargas tries a head kick but it misses.
Takeda bobs and weaves and then throws a good body kick.
Badong Vargas seems to be the more aggressive standup fighter in this bout.
Vargas swings away with a leg kick that misses.

The fight moves into the clinch position.
Takeda has Vargas pressed against the cage, preventing Vargas from circling away and getting back to striking at range.
Takeda tries for a takedown. No joy.
Vargas working hard to break the clinch.
Takeda with a knee to the head.
Takeda stalling in the clinch.
Vargas tries to land knees in the clinch but Takeda avoids the damage to the body.
Vargas breaks the clinch and we're back to striking at distance.
No luck for Vargas with that takedown attempt.
Vargas clinches up with Takeda and pushes him back against the cage.

That's one minute gone in the round.
Vargas breaks the clinch and we return to the middle of the mat.
Takeda slaps away a takedown attempt from Vargas, before circling back to the center of the mat.
Vargas throws a body kick, spinning off balance
and Takeda makes him pay by landing a thudding low kick.
Vargas moves forwards but Takeda connects with a nice, crisp jab.
Takeda scores with a head kick.
Vargas shoots for a takedown but Takeda saw that one coming a mile off and avoided it easily.
Kazuya Takeda has stuffed three takedown attempts in the round now. That's going to take a lot out of Badong Vargas.
Takeda rushes Vargas and presses him up against the cage.

Takeda has hold of one of Vargas's legs. Vargas is fighting the takedown attempt but Takeda gets the trip and lands the takedown into guard.
Takeda wants to pass the guard but Vargas is keeping the position.
Vargas is avoiding any damage by keeping wrist control.
Takeda stays in close to Vargas's body and controls the position.

That's two minutes gone in the round.
The fans in attendance giving it up for the two fighters, who have really let it all hang out in the last minute or so!
Takeda trying to control but Vargas is working from the bottom.

The ref stands the fighters back up. Kazuya Takeda wasn't doing enough on the ground.
Vargas throws a series of punches but Takeda moves out of range.
Takeda throws a nice head kick!
Vargas throws a combination that misses
and Takeda counters with a nice leg kick.
Vargas fails with a rather predictable takedown attempt.
Ouch! a nice leg kick from Takeda, right into the meat.
A slapping body kick lands there for Takeda.
Vargas shoots in with a takedown attempt and he has Takeda pinned against the cage. Takeda gets the underhooks and manages to circle away.
Vargas moves into the clinch.

That's three minutes gone in the round.
Knees to the body from Takeda.
Vargas's corner calls for him to break the clinch, which he does.
Vargas throws a body punch but Takeda moves out of range.
Vargas has closed the distance and engaged Takeda in a clinch.
Takeda has hold of one of Vargas's legs. Vargas is fighting the takedown attempt but Takeda gets the trip and lands the takedown into guard.
Vargas can't do much from the bottom at the moment, as Takeda controls the pace.
Takeda works a leg free and moves into half guard.
Vargas won't allow Takeda to pass to mount.
Takeda stalling.

That's four minutes gone in the round.
Takeda trying to advance position but Vargas counters by regaining guard.
Wooooo! Give it up for these two warriors! They are putting on a show!
Vargas looking to control.
As the round comes to an end the crowd are showing their appreciation for a great round of action.
Takeda throwing strikes but missing.
And that�s the end of the round � the fighters go back to their corners.
Kazuya Takeda dominated that round.
The referee calls time. The cornermen exit stage left and we're back to business.

Vargas moves into range and throws a combination. A nice jab followed by a hook to the body.

It looks like Kazuya Takeda has been cut.
Takeda stuffs the takedown.
Takeda delivers a nice body kick.
Takeda throws a right high kick that is partially blocked by Vargas.
A punch combination from Vargas misses.
A nice leg kick lands there from Takeda.
Vargas fakes high and shoots in for a takedown but Takeda avoids it really well and circles away.
Vargas shoots in looking for a takedown. Takeda tries to sprawl out of it but Vargas keeps driving through. The fighters are pinned against the cage. Takeda manages to get underhooks and after a bit of a struggle, circles away and we're back to standing.
Kazuya Takeda has stuffed three takedown attempts in the round now. That's going to take a lot out of Badong Vargas.
Vargas takes a kick to the side of the head.
Vargas clinches up with Takeda and pushes him back against the cage.
Takeda misses with a knee strike.
Takeda misses the knee to the body. Nice hip positioning from Vargas.
Takeda taking a breather.
That's one minute gone in the round.
Vargas tries to break the clinch but Takeda is controlling the position.
Takeda landing knees to the body. They look like they could hurt.
Vargas gets through Takeda's defenses to land a nice punch to the side of the head.
Takeda misses with a knee to the head.
Vargas blocks a knee to the body. He'll have a nicely bruised forearm in the morning.
A knee to the head by Takeda.
A hook to the body from Vargas.
Vargas breaks the clinch and we're back to striking at distance.
Takeda throws a body kick that digs right into the meat.
Takeda checks the leg kick.
Vargas closes the distance and clinches up with Takeda, looking for a takedown. Vargas pushes Takeda against the cage but Takeda circles to the side and manages to break the clinch.
Vargas takes a punch right to his stomach. That took the wind out of him momentarily.
Takeda thows a body kick. Vargas tries to catch it but that hurt him.
Vargas has taken the fight to the clinch.
Takeda looking for a takedown.
Vargas tried to land a shot to the body but connects with Takeda's elbow.
Vargas has dropped down and is looking to force the takedown but it's defended by Takeda after a bit of a struggle.
That's two minutes gone in the round.
Vargas has dropped down and is looking to force the takedown but it's defended by Takeda after a bit of a struggle.
Vargas is breathing heavily.
This is a great period of action - very entertaining stuff!
Vargas missing with knees to the body.
Takeda with an attempt at a knee that misses.
A right hook to the body lands for Vargas.
Takeda using the Thai clinch to land knees to the body.
Vargas gets double underhooks to prevent a takedown attempt from Takeda.
Vargas takes a knee right on the jaw!
Takeda looking to throw knees to the head but Vargas is blocking nicely.
Knees in the clinch landing for Takeda.
Takeda scores with a knee to the head.
Vargas is working Takeda over against the cage.
Vargas managing to block the knees to the body from Takeda.
Vargas lands an uppercut.
That's three minutes gone in the round.
Takeda putting his Muay Thai to good use. He has Vargas in a tight clinch and is doing some damage with knees to the body.
Vargas is trying to work out of this bad position, with his back against the cage.
Takeda landing some nice looking knees to the body.
Takeda is defending well against a takedown attempt.
Vargas tries to work over Takeda's body with a swooping hook but it only glances the target.
Vargas misses with a body punch.
Vargas managing to block the knees to the body from Takeda.
Takeda is trying to wear down his opponent with knees to the body.
A hook to the body from Vargas.
Takeda tries for a takedown but Vargas manages to get underhooks.
Takeda keeps control of Vargas as he tries to wriggle out of the double underhooks.
Vargas tries to score a body lock takedown but Takeda shows good agility there to stay on his feet.
Takeda lands with a right to the head.
Vargas fails to pull guard.
Vargas is trying to pull guard but Takeda has him pressed against the cage.
That's four minutes gone in the round.
Vargas prevents a takedown attempt there.
Takeda is looking for a takedown up against the cage. Vargas gets underhooks though and prevents the takedown attempt.
Knees to the body from Takeda.
This is a great period of action - very entertaining stuff!
Takeda landing some nice looking knees to the body.
Vargas has had enough of the clinch and is looking to separate.
Vargas tries to work over Takeda's body with a swooping hook but it only glances the target.
Takeda dictating the pace here, as the fighters clinch against the cage.
Takeda missing with knees to the body.
Vargas prevents a takedown attempt there.
As the round comes to an end the crowd are showing their appreciation for a great round of action.
Both guys are working to get underhooks.
Vargas is trying to work out of this bad position, with his back against the cage.
Vargas scores with a shoulder strike.
And that�s the end of the round � the fighters go back to their corners.
That was a close second round but I would say that Kazuya Takeda will probably get the nod.
The cut man is working on Kazuya Takeda's cut.
That's the end of the round. The referee orders the cornermen out of the cage so we can get back down to business. This is the final round!

Vargas misses with a wild combination.
Vargas has Takeda up against the cage in a clinch.
Takeda is looking to score with knees to the body. Maybe he'll change it up and go body then head. Vargas is defending well for now.
Vargas gets double underhooks to prevent a takedown attempt from Takeda.
Takeda prevents a body shot from Vargas.
Takeda gets a nice trip takedown into half guard.
Takeda looks over to his corner - he wants some instructions but his corner are not responding.
Takeda is stalling here. Vargas is in no mood to hang around though. He's locked up a kimura from the bottom! Takeda seems to be keeping calm but he's forced to roll out of the hold and Vargas has ended up in side control on the top. Nice work.
Takeda is trying to improve his position.
That's one minute gone in the round.

Vargas stands up.
Vargas gets his takedown attempt stuffed easily
and Takeda counters with a quick right hand to the jaw.
Kazuya Takeda is winning the standup battle so far.
Vargas pulls out of a head kick attempt.
Vargas takes a big intake of breath there - he's definitely tired.
Vargas shoots in and drives through. Takeda sprawls well.
Takeda fakes with a right hand and throws a good leg kick, right into the thigh. That had to hurt Vargas.
Vargas gets his takedown attempt stuffed easily
and Takeda counters with a nice body kick.
Kazuya Takeda has stuffed three takedown attempts in the round now. That's going to take a lot out of Badong Vargas.
That's two minutes gone in the round.
Takeda takes the fight into the clinch.
Vargas throws a blind hook that connects with the side of Takedas head.
Knees to the body from Takeda.
Vargas wants to strike at distance but he can't break free of the clinch.
Kazuya Takeda has scored more points in the clinch so far.
Takeda tries to land knees in the clinch but Vargas avoids the damage to the body.
Takeda trying to stall but Vargas improves his position.
Takeda tries to land knees in the clinch but Vargas avoids the damage to the body.
Takeda putting his Muay Thai to good use. He has Vargas in a tight clinch and is doing some damage with knees to the body.
Vargas breaks the clinch and we're back to striking at distance.
Vargas has developed a nice purple lump on his ribcage, as a result of some heavy body kicks from Takeda.
Fantastic stuff here - a very entertaining period of action, which has drawn cheers from the crowd.
A slapping leg kick lands for Takeda.
Takeda moves into range and lands a nice body kick.
Vargas has taken the fight to the clinch.
Takeda trying to land knees to the body.
Vargas drops down looking for an ankle pick but Takeda pulls his leg out and moves away.
Vargas has taken the fight to the clinch.
That's three minutes gone in the round.
Takeda unloads a knee to the mid-section.
Kneeeeees! The crowd are calling for knees to the body. Takeda obliges.
A right handed body shot lands from Vargas.
Takeda tries to score a body lock takedown but Vargas shows good agility there to stay on his feet.
Takeda is clearly stalling here... Pick up the pace son.
Takeda using the Thai plumb to throw knees but Vargas has his back arched nicely, preventing the strike.
Vargas lands a short shot on the inside that snaps the head of Takeda backwards.
Takeda wants to take the fight to the mat but Vargas manages to get underhooks and keep the fight in the clinch.
Takeda is looking to score with knees to the body. Maybe he'll change it up and go body then head. Vargas is defending well for now.
Vargas lands with a good tight uppercut to the head.
Vargas tries to land a knee to the body but he is off balance and Takeda avoids it.
That's four minutes gone in the round.
Takeda with an attempt at a knee that misses.
Vargas blocks a knee to the body. He'll have a nicely bruised forearm in the morning.
Vargas works on Takeda's body with a couple of short punches.
Vargas can't find room to land a body shot as Takeda controls the action.
Takeda throws a vicious knee straight up the middle but Vargas blocks it with crossed arms.
Vargas escapes the clinch and we're back to striking.
Vargas instigates a clinch.
The crowd are loving this. Great action here.
Vargas tried to land a shot to the body but connects with Takeda's elbow.
Vargas tries a body shot but Takeda blocks it.
Takeda is trying to wear down his opponent with knees to the body.
Vargas escapes the clinch and we're back to striking.
As the round comes to an end the crowd are showing their appreciation for a great round of action.
Vargas darts in and clinches Takeda up against the cage.
Takeda scores a nice knee to the body.
The two fighters are working to gain dominance in the clinch.
Badong Vargas has stepped it up - he knows he needs a finish here!
Kazuya Takeda is fighting for a decision here - he's started to take the cautious approach.
Vargas can't break the clinch.
And that's the end of the fight!
That was a close round. You could make an argument for either fighter but I would give it to Kazuya Takeda.
Well Takeda has outscored his opponent in every aspect of the fight today. Only a scarily incompetent judge or two will keep him from a well deserved win... Over to the ring announcer for the scorecards.
Ladies and gentlemen, after 3 rounds of action, we go to the scorecards for a decision.
Judge Shigeki Fujiwara scores the fight 30:27
Judge Yukihiro Shimada scores the fight 30:27
Judge Taro Takaoka scores the fight 30:27
In favor of your winner, by unanimous decision... Kazuya Takeda!
Kazuya Takeda really struggled to get his t-shirt on before his hand was raised. Making sure that Fossington & Blythe: Gentlemen's Fight Attire logo gets some air time is pretty tricky when you're all sweaty.
|
|
|
|
|
|
|
|
|
|
|
|
|
|
|
|
|
|
|
|
|
|
|
| S |
C
A |
G |
S |
C
B |
G |
|
S |
C |
G |
|
energy
A | B |
|
hype
A | B |
|
pop
A | B |
|
mgr
A | B |
|
FIGHT
RATING
81% |
|
|
|
|
|
|
|
Co-main event
|
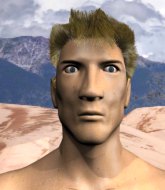
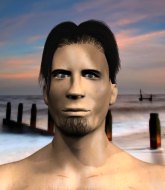
Coming up we have a light heavyweight MMA rules bout between Shamus McDermid (ranked 0 p4p, 0 weight class) and Kurt Orbiso (ranked 0 p4p, 0 weight class). McDermid comes into the arena with The Drunken Scotsman - The Irish Rovers blaring out of the sound system. These two fighters really are very evenly matched on the feet - it will be fascinating to see who can assert themselves in that aspect of the fight.
 |
|
 |
| 195 cm
23
215 lbs
2 - 2 - 0 |
|
193 cm
21
207 lbs
3 - 1 - 0 |
BJJ Blue Belt
Solid Muay Thai
Cardio machine |
|
BJJ Purple Belt
Decent boxing
Solid chin |
|
| |
|
Ladies and gentlemen. This fight is 3 rounds, in the light heavyweight division.
Introducing the fighter to my left, fighting out of the red corner.
With a record of
2 - 2 - 0, fighting out of Tokyo, Shamus McDermid!
And introducing the fighter to my right, fighting out of the blue corner.
With a record of
3 - 1 - 0, fighting out of Tokyo, Kurt Orbiso!
The judges for this bout are Shigeki Fujiwara, Yukihiro Shimada and Yuuki Gou.
The bell rings for round one and we are underway!
McDermid lands a nice looking body kick.
McDermid with a nice cross.

It looks like Kurt Orbiso has been cut.
Orbiso blocks a head kick by McDermid.
McDermid pushes Orbiso up against the cage in a clinch.
McDermid is working on a leg, looking for a takedown but Orbiso is defending well.
McDermid scores with a knee to the head.
Orbiso looks gassed!
This has been an exciting period of action!
The referee calls for McDermid to work.
McDermid lands an elbow that stopped Orbiso in his tracks for a moment.
Orbiso avoids the elbow strike from McDermid, against the cage.
McDermid lands an elbow that stopped Orbiso in his tracks for a moment.
That has opened up Kurt Orbiso's cut even more.
McDermid lands a nice elbow from the clinch.
The cut above Kurt Orbiso's eye is starting to cause him problems now.
McDermid manages to get underhooks and slows down the pace for a moment.
Orbiso looks like he'd prefer to be striking at range right now.
McDermid lands an elbow inside.
Kurt Orbiso's cut is absolute horrible now. This looks like something out of a horror film with blood covering both fighters.
The referee calls the doctor in to look at Kurt Orbiso's cut. Oh no, the doctor has called an end to the bout!
Ladies and gentlemen, after 0:58 of round 1, we have a winner by way of TKO (Cut). Shamus McDermid!
Shamus McDermid very nearly forgot to thank Charlie Wang's Tattered Rags & 95% Laundry amongst all the excitement of his win but just as the interview came to a close, he screamed their name. Hopefully he'll get a few nice freebies in the mail as a thank you.
|
|
|
|
|
|
|
|
|
|
|
|
|
|
|
|
|
|
|
|
|
|
|
| S |
C
A |
G |
S |
C
B |
G |
|
S |
C |
G |
|
energy
A | B |
|
hype
A | B |
|
pop
A | B |
|
mgr
A | B |
|
FIGHT
RATING
89% |
|
|
|
|
|
|
|
Main event
|
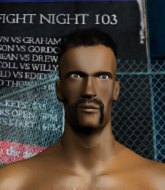
Coming up we have a welterweight MMA rules bout between Nammer Da Hammer (ranked 0 p4p, 0 weight class) and Charlie Sheen (ranked 0 p4p, 0 weight class). Sheen is bouncing up and down as he enters the arena, backed by DJ Khaled - All I do is Win. These two fighters really are very evenly matched on the feet - it will be fascinating to see who can assert themselves in that aspect of the fight.
 |
|
 |
| 178 cm
23
180 lbs
11 - 3 - 0 |
|
183 cm
21
180 lbs
2 - 1 - 0 |
Good wrestling
Excellent boxer
Cardio machine |
|
Good takedowns
Excellent MT
Granite chin |
|
| |
|
Ladies and gentlemen. This fight is 3 rounds, in the welterweight division.
Introducing the fighter to my left, fighting out of the red corner.
With a record of
11 - 3 - 0, fighting out of Tokyo, Nammer Da Hammer!
And introducing the fighter to my right, fighting out of the blue corner.
With a record of
2 - 1 - 0, fighting out of Rio de Janeiro, Charlie Sheen!
The judges for this bout are Sosuke Kotani, Yukihiro Shimada and Shigeki Fujiwara.
The bell rings for round one and we are underway!
Sheen scores with a straight right hand, right through his opponent's guard.
Da Hammer ducks under an overhand right and circles away with a smile on his face.
Sheen is the aggressor but that punch slipped nicely by Da Hammer.
Da Hammer throws a hard body shot but it just misses.
Da Hammer lands a two punch combo.
Da Hammer darts in and out, connecting with a jab.
The fighters circling - Sheen throws out the jab but it was never going to land.
Sheen takes an uppercut right on the button but keeps his composure.
Da Hammer ducks under a wild hook from Sheen.
Sheen rushes in with a sloppy looking punch
and Da Hammer counters with a lovely straight right hand!
Wooooo! Give it up for these two warriors! They are putting on a show!
Da Hammer displays some good footwork, moving neatly out of range as Sheen throws out the jab.
Sheen lunges at Da Hammer with a hook that half lands and is half blocked by Da Hammer's hand.
Da Hammer walks straight into an uppercut. Luckily it didn't land flush.
Da Hammer throws a right and a left that Sheen avoids nicely.
Charlie Sheen seems to be the more aggressive standup fighter in this bout.
Da Hammer moves out of range as Sheen strikes.
Sheen misses with a looping left.
That's one minute gone in the round.
Sheen misses with a body shot
and Da Hammer counters with a good right hand that lands right on the jaw.
Sheen throws an off balance right hand
and Da Hammer counters with a shot to the ribs. That looked like it hurt.
Sheen tries to clinch there but Da Hammer circles away.
Da Hammer moves away from the strike by Sheen.
A telegraphed right hand from Sheen misses the target.
Da Hammer takes a body punch but keeps moving.
A looping hook to the body misses from Sheen. Da Hammer does a little dance to reset his feet.
Sheen staying out of range there.
Da Hammer uses some good footwork to avoid the body shot by Sheen.
Da Hammer looks to land a right hand but Sheen moved out of range.
Sheen lands the left hand.
Sheen moves out of range of the strikes.
Sheen lands a nice looking body shot.
That's two minutes gone in the round.
Sheen misses with a straight right.
Sheen closes the distance and clinches.
Sheen tries a body shot but Da Hammer blocks it.
Da Hammer drops down for a takedown but doesn't get it.
The crowd are loving this. Great action here.
Da Hammer blocks an uppercut.
Sheen has Da Hammer pressed against the cage, preventing Da Hammer from circling away and getting back to striking at range.
Da Hammer lands a body punch.
Da Hammer is trying to break the clinch but Sheen has him pressed against the cage.
Sheen tries to land a shot to the body but it's blocked.
Sheen blocks a couple of punches on the inside.
Da Hammer scores with a shoulder strike.

Da Hammer escapes the clinch and we're back to striking.
Sheen misses with a straight right.
That's three minutes gone in the round.
Da Hammer misses with a two punch combination.
Sheen throws a hard body shot but it just misses.
Da Hammer misses with a looping right.
Da Hammer throws a shot from downtown. Sheen moves away and avoids it.
Sheen thows a body shot but no joy.
Sheen misses with a hook to the body
enabling Da Hammer to counter with a crisp jab.
Sheen misses with a telegraphed body shot
and Da Hammer cracks him with a counter punch right on the button.
Da Hammer takes a step towards his opponent and connects with a left hand, before circling away.
Sheen connects with a looping left hand that seems like it dazed Da Hammer momentarily.
Sheen throws a right hand that misses
and Da Hammer counters with a crisp hook to the side of the head.
Sheen uses some good footwork to avoid the body shot by Da Hammer.
Sheen tries to clinch but is not successful on this occasion.
Sheen clinches with his opponent.
That's four minutes gone in the round.
A head punch blocked on the inside by Da Hammer.
Sheen blocks a punch to the side of the head.
The fans in attendance giving it up for the two fighters, who have really let it all hang out in the last minute or so!
Da Hammer can't break the clinch.
Sheen doesn't land with the attempted body shot.
Da Hammer misses with a punch to the body.
Da Hammer breaks from the clinch.
Sheen swings widly with a right hand
and Da Hammer counters with a shot to the ribs. That looked like it hurt.
Da Hammer lunges in with swinging rights and lefts but Sheen circles away quickly and effectively.
Da Hammer moves out of range as Sheen strikes.
Sheen takes a step towards his opponent and connects with a left hand, before circling away.
Sheen tries to clinch but Da Hammer moves out of range.
The crowd are going absolutely nuts as the round comes to an end - what a fantastic round of action!
Da Hammer takes a body punch that cleary hurt but he's trying not to show any weakness.
Sheen scores with a crisp jab that stopped Da Hammer in his tracks.
Sheen ducks under a wild hook from Da Hammer.
And that�s the end of the round � the fighters go back to their corners.
A close round but Charlie Sheen will probably get the nod.
That's time! Back to the action!
Sheen throws an ugly left hook that misses
and Da Hammer counters with a nice uppercut.
Da Hammer swings for the body but Sheen moves out of range.
Sheen ducks down and throws a hook to the body but Da Hammer moves away.
Da Hammer feints a jab promting Sheen to slip. Da Hammer then demonstrates his capabilities by jabbing again. Sheen slips again and ducks right into an uppercut.
Da Hammer lands with a shot to the body.
Da Hammer throws a right and a left that both miss.
A cross from Sheen lands.
Sheen fakes high and swings low for a body shot but Da Hammer manages to avoid it.
Sheen misses with a body shot.
A jab lands there for Sheen.
Sheen misses with a straight right.
Sheen darts in and clinches Da Hammer up against the cage.
Da Hammer has Sheen pushed against the cage.
That's one minute gone in the round.
Da Hammer has Sheen pressed up against the cage. He's trying to work for a single leg takedown. Da Hammer pulls back from the cage and twists to the side, sending Sheen tumbling to the mat - Da Hammer dives into Sheen's guard.
We've had a lack of effective grappling in the last minute or so, which could well see a referee standup.
Da Hammer wants to control from the top but Sheen keeps moving.
Sheen working the defensive guard well to avoid strikes from Da Hammer.
Da Hammer stands and throws Sheen's legs to the side, diving into side control.
Sheen wants to control but Da Hammer postures up.

Da Hammer tries for an arm triangle. That looks pretty tight to me. Is this one over!?! Possibly, maybe, no Da Hammer has let go of the choke. Obviously it wasn't as tight as we thought!
You can see the frustration on Sheen's face, being in this tough position on the bottom.
The fighters are pressed up against the cage, both looking to find a bit of space to work.
That's two minutes gone in the round.
Da Hammer wants to control but Sheen is keeping him busy.
Da Hammer is looking for a kimura. He might have it! No, Sheen has escaped the position, nice work there.
Sheen is trying to get back to half guard.
The ref warns both fighters not to hold the cage as they work up against the meshing.
Da Hammer scores with a couple of nice shots to the head there. The referee takes a look at Sheen to see if he's OK.
This has been an exciting period of action!
Da Hammer tries for an arm triangle. That looks pretty tight to me. Is this one over!?! Possibly, maybe, no Da Hammer has let go of the choke. Obviously it wasn't as tight as we thought!
Sheen is trying to get back to half guard. He's pushing on Da Hammer's leg. He's managed it. Nice work.
That's three minutes gone in the round.
Da Hammer wants to free his trapped foot but Sheen is holding on for dear life with his legs.
Da Hammer thumps the canvas. Not on purpose obviously - he just missed Sheen's head.
The fighters are battling for position here. Sheen manages to regain full guard. Nice work.
Da Hammer has gone for a leg lock! Sheen slips out almost immediately though and dives into Da Hammer's guard.
Da Hammer controlling the position.
That's four minutes gone in the round.
Sheen wants to control from the top but Da Hammer keeps moving.
Da Hammer has control of Sheen's left arm, preventing Sheen from doing any damage.
As the round comes to an end the crowd are showing their appreciation for a great round of action.

The ref stands the fighters back up, due to lack of action by Charlie Sheen.
Da Hammer steps to the side to avoid the strikes from Sheen.
And that�s the end of the round � the fighters go back to their corners.
Nammer Da Hammer dominated that second round.
The fighters' corners scream their final instructions, as the referee calls time. Here we go, back to the action! The crowd applaud as we get ready to start the final round!
Da Hammer throws a jab when Sheen was well out of range.
Sheen jabs Da Hammer to the body, keeping him at a distance.
Nice cross by Da Hammer.
Sheen ducks right into an uppercut from Da Hammer.
Sheen takes one on the button.
Sheen waving his hands out in front of him, looking to distract Da Hammer.
Sheen tries to clinch up.
Da Hammer slips a jab from Sheen.
A jab from Da Hammer misses.
A shot to the liver by Sheen. Beautiful body shot.
Sheen throws a poor cross that misses
and Da Hammer counters with a shot to the ribs. That looked like it hurt.
Sheen throws a hook but Da Hammer avoids it easily.
Nice jab there from Da Hammer.
That's one minute gone in the round.
Sheen fakes with an overhand right and moves in to clinch with Da Hammer, pushing him back against the cage.
Da Hammer pushes off and circles away, back to the middle of the mat.
Sheen tries to clinch but Da Hammer moves away
and Da Hammer counters with a good right hand that lands right on the jaw.
Da Hammer throws a hard body shot but it just misses.
Sheen waving his hands out in front of him, looking to distract Da Hammer.
Da Hammer lands a jab to the head.
Sheen wants to clinch.
Sheen misses with a body shot. Nice footwork from Da Hammer.
Da Hammer blocks a jab.
Sheen misses with a wild body shot.
Da Hammer staying out of range there.
That's two minutes gone in the round.
Sheen is on the wrong end of a nice combination from Da Hammer.
Sheen throws an overhand right that lands on Da Hammer's shoulder, as Da Hammer tries to avoid the shot.
Sheen tries to clinch but Da Hammer moves out of range.
Da Hammer pushing out the jab but it's not landing.
Sheen throws a hook but Da Hammer blocks it.
Sheen looks to clinch
and Da Hammer counters with a straight punch to the midsection.
This is a great period of action - very entertaining stuff!
A punch lands to the side of Da Hammer 's head but he takes it in his stride.
Sheen ducks down and throws a hook to the body but Da Hammer moves away.
Da Hammer scores with a crisp jab that stopped Sheen in his tracks.
Da Hammer lands the left hand.
Da Hammer uses good head movement to avoid the hook from Sheen.
Da Hammer throws a monster uppercut resembling something out of street fighter but it doesn't land.
That's three minutes gone in the round.
Sheen misses with a straight left.
Sheen shakes his hands off, looking to compose himself, but takes a jab to the jaw whilst he does it.
Sheen swings for the body but Da Hammer moves out of range.
A punch lands to the side of Sheen 's head but he takes it in his stride.
Da Hammer digs a good hook to Sheen's body.
Sheen has a pretty nasty looking mouse under his right eye.
Sheen throws a jab but it's blocked by Da Hammer.
Da Hammer swings widly with a right hand
and Da Hammer takes a counter punch right on the button for his troubles.
Da Hammer walks into a left hand.
Sheen misses with a hook
and Da Hammer counters with a quick right hand to the jaw.
No joy there for Da Hammer, who threw a few shots but didn't land.
Sheen looks to score with a jab to the body but Da Hammer is just out of range.
Sheen just misses with a punch to the body.
Sheen connects with a nice looking jab.
That's four minutes gone in the round.
Sheen throws an overhand right that lands on Da Hammer's shoulder, as Da Hammer tries to avoid the shot.
Sheen tries to close the distance and clinch but Da Hammer swats him to one side with an open hand palm strike and circles away.
Da Hammer throws a monster uppercut resembling something out of street fighter but it doesn't land.
Sheen throws a hard body shot but it just misses.
Da Hammer scores with a big left there. The judges will like that one.
We've seen a great period of action over the last minute or so - credit to both fighters for going all out!
Sheen misses with a hook
enabling Da Hammer to counter with a crisp jab.
Da Hammer throws a shot from downtown. Sheen moves away and avoids it.
Da Hammer moves out of range of the strikes.
Sheen keeps his opponent at a distance with a nice jab.
As the round comes to an end the crowd are showing their appreciation for a great round of action.
Sheen swings and misses with a shot to the body
and Da Hammer counters with a crisp hook to the side of the head.
Da Hammer connects with a good right hand that stumbles Sheen. Sheen circles away out of range and recomposes himself.
Da Hammer lands a powerful looking uppercut that connected with his opponent's jaw.
And that's the end of the fight!
Nammer Da Hammer showed his dominance in that final round.
Well Da Hammer has outscored his opponent in every aspect of the fight today. Only a scarily incompetent judge or two will keep him from a well deserved win... Over to the ring announcer for the scorecards.
Ladies and gentlemen, after 3 rounds of action, we go to the scorecards for a decision.
Judge Sosuke Kotani scores the fight 29:28
Judge Yukihiro Shimada scores the fight 29:28
Judge Shigeki Fujiwara scores the fight 29:28
In favor of your winner, by unanimous decision... Nammer Da Hammer!
During a confident post fight interview, Nammer Da Hammer thanked all his fans. He seemed very genuine when describing how motivated his fans keep him.
|
|
|
|
|
|
|
|
|
|
|
|
|
|
|
|
|
|
|
|
|
|
|
| S |
C
A |
G |
S |
C
B |
G |
|
S |
C |
G |
|
energy
A | B |
|
hype
A | B |
|
pop
A | B |
|
mgr
A | B |
|
FIGHT
RATING
70% |
|
|
|
|
|
|
|
|
|
|
