 |
CHOKE Change Tour Vol. 2 PBP Commentary |
Undercard bout
|
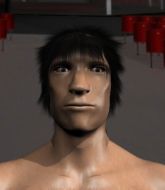
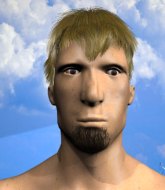
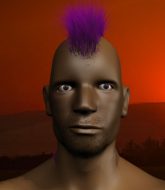
Coming up we have a welterweight MMA rules bout between Geoff Harding (ranked 0 p4p, 0 weight class) and Guybrush Threepwood (ranked 0 p4p, 0 weight class). Both fighters look fresh as a daisy as they make their way towards the ring.
 |
|
 |
| 182 cm
19
175 lbs
1 - 1 - 0 |
|
180 cm
22
174 lbs
1 - 1 - 0 |
BJJ Blue Belt
Counter striker
Self confident |
|
BJJ Blue Belt
Solid Muay Thai
Granite chin |
|
| |
|
Ladies and gentlemen. This fight is 3 rounds, in the welterweight division.
Introducing the fighter to my left, fighting out of the red corner.
With a record of
1 - 1 - 0, fighting out of Tokyo, Geoff Harding!
And introducing the fighter to my right, fighting out of the blue corner.
With a record of
1 - 1 - 0, fighting out of Tokyo, Guybrush Threepwood!
The judges for this bout are Kenichi Hosakawa, Hirohito Nitta and Shigeki Fujiwara.

The bell rings for round one and we are underway!
Harding circles away from the clinch attempt.
Threepwood stuffs the takedown attempt from Harding. Harding gets slowly back to his feet.

Harding decides to change it up a bit and drives through with a nice takedown into half guard.
Threepwood is pressing down on Harding's left leg trying to get back to full guard. He's managed it.
Harding working some ground and pound from guard but it's not doing any damage.
Harding is standing up over Threepwood. Threepwood looks to escape but Harding dives into side control.
Threepwood tries to bench press Harding off him but Harding keeps the position.
Threepwood on the wrong end of some ground and pound.
Threepwood pushes Harding away and creates a bit of space to escape. He's almost out here... but no, Harding gets a good hold of his legs and remains firmly in side control.
Threepwood is positioning himself to get back to half guard.
Harding trying to control the action but Threepwood is working from the bottom.

That's one minute gone in the round.
Threepwood is positioning himself to get back to half guard.
Harding trying to control the position but Threepwood is working away.
Threepwood wings away with a couple of strikes but they don't land.
Threepwood tries to work a leg under to get back to half guard but Harding wriggles his own leg back out and remains in side control.

The referee has ruled that neither fighter is active enough on the ground and has stood them back up.
Harding shoots in for a takedown. "I don't think so" says Threepwood as he avoids it easily.
Threepwood moves in looking to clinch but Harding pushes him off.

That's two minutes gone in the round.
The crowd are showing their displeasure at the lack of action as loud boos ring out around the arena.
Harding just misses with a punch to the body.
Harding shoots in for a takedown but Threepwood shows good takedown defense.
That's three failed takedown attempts in the round for Geoff Harding. That's going to take a lot out of him.
Threepwood fails in his attempt to clinch.
Threepwood tries to clinch but is not successful on this occasion.
Threepwood tries to clinch but Harding moves out of range.

Threepwood moves into the clinch.
Harding managing to block the knees to the body from Threepwood.
Threepwood is pressed up against the ropes. Harding has hold of a leg and is looking to drag Threepwood down to the mat. Threepwood avoids the attempt though and has circled away. We're back to striking at a distance.
Threepwood doesn't succeed with the takedown
so Harding counters with a double leg into guard. Good agility.
Harding is breathing heavily.
Threepwood looking to sweep here. No luck so far.
Harding wants to pass the guard but Threepwood is keeping the position.
Harding in full guard, throwing the ground and pound. No damage this time.
Harding trying to land body shots but he keeps hitting the mat.
Harding prevents Threepwood from getting back to his feet.

That's three minutes gone in the round.
The fighters are going at a pretty good pace and they're both starting to sweat now.
Harding trying to control the position from guard on top but Threepwood is wriggling around, looking for whatever he can.

Harding drops back for a leg but he's not going to get it - he lets go and Threepwood dives on top into guard.

Threepwood gets to his feet and steps away from his opponent.
Harding scores with a takedown into Threepwood's guard.
Harding trying to pass the guard but can't manage it just yet.
Harding postures up as if he's going to throw some strikes but drops back for an ankle! Threepwood is in big trouble! He looks ready to tap! But no, he's escaped and dives on top of Harding, into his guard.
Threepwood wants to stand and escape but instead Harding has hit a sweep and he's now on top in guard.

That's four minutes gone in the round.
Threepwood is trying to stand up but he's not managed so far.
Harding trying to pass the guard but can't manage it just yet.
Threepwood will have to put a bit more behind his punches if he's going to do any damage from this position.
Harding missing there with some ground and pound from the guard.
Threepwood has his feet on Harding's hips. He pushes off and gets to his feet. Nice work.
Threepwood drives through with a really nice takedown into side control.
The fighters are trapped in the ropes so we're going to have a reposition here. The ref calls for a break and repositions the fighters in the center of the ring.
The crowd applaud the fighters efforts here as the round comes to an end.
Threepwood tries to stand but Harding is controlling his head.
And thats the end of the round the fighters go back to their corners.
Geoff Harding dominated that round.
The referee calls time. The cornermen exit stage left and we're back to business.

Threepwood closes the distance but Harding moves to the side
and Harding counters with a takedown into side control.
Harding working the head with strikes.
Harding avoids the strikes from the bottom by Threepwood.
The fighters are tangled up in the ropes here. We might need a restart if the fighters can't break free themselves.
Harding gets to mount! Threepwood was on the offensive and wasn't defending properly.
Threepwood wants to hold on but Harding pushes him away.
Harding landing punches.
Threepwood taking shots to the head.
Threepwood is in all sorts of trouble here.
Harding has been looking to land a fair amount of strikes on the ground. He might be looking to soften his opponent up in order to work for a submission.
The referee warns Threepwood that he has to improve his position here as he takes two more clean shots to the head.
Threepwood is breathing heavily.
Threepwood gets back to half guard.
Harding frees up his trapped foot and advances to mount.
That's one minute gone in the round.
Harding goes for an armbar but he's not got it
Threepwood turns into him and now he's in Harding's guard.
Harding looking to control.
Harding has his hands on Threepwood's head, controlling the position.
Threepwood trying to pass the guard but can't manage it just yet.
Harding lands a beautiful switch and he's in full mount! That could spell trouble for Threepwood!
Threepwood is trying to escape but when you're mounted that's not too easy.
That's two minutes gone in the round.
Harding putting on the heat here with some good ground and pound!
Threepwood working to try and regain half guard.
Threepwood is writhing around trying to get back to his feet.
Threepwood really trying hard to get back to half guard here.
That's three minutes gone in the round.
Threepwood slips a leg in and gets back to half guard.
Threepwood works his way to full guard. Good work.
Threepwood is looking to get back to his feet but can't, whilst Harding is controlling him.
Harding slows down the pace of the fight for a moment. He'll need to remain active if he doesn't want to see the fight stood back up.
Harding content to strike from guard, landing some decent shots.
Harding stands up and looks to throw the legs aside to pass to side control. Threepwood swivels though and keeps the full guard.
Threepwood looking to control but Harding passes into half guard.
Threepwood is looking to escape.
That's four minutes gone in the round.
Harding stands up and beckons Threepwood to join him on the feet.
Threepwood avoids the head kick by Harding.
Harding gets in close and instigates a clinch.
Threepwood lands an elbow just above Harding 's eye.
Threepwood keeps control of Harding as he tries to wriggle out of the double underhooks.
Harding drops down looking for an ankle pick but Threepwood pulls his leg out and moves away.
Harding circles away from the clinch attempt
and Harding counters with a nice double leg into half guard.
The crowd applaud the fighters efforts here as the round comes to an end.
Harding is keen to just control but Threepwood is a slippery customer.
Harding looks towards his corner to check for any instructions. The corner give him nothing to work with, so he cracks Threepwood with a short hammerfist. I guess that's as good as any advice he could get in this position.
And thats the end of the round the fighters go back to their corners.
Geoff Harding dominated that second round.
OK. That's time! The bell goes and we're back to the action. The crowd applaud as we get ready to start the final round!

Harding feints and as Threepwood raises his hands in defense, Harding changes levels and drives through with a takedown into guard.
Harding trying to pass the guard. He's being very persistent here but Threepwood manages to land a sweep and now he's on top!
Harding looking to sweep here. No luck so far.
Harding has a closed guard, preventing Threepwood from standing up.
Threepwood being controlled here momentarily.
Threepwood is looking to stand up but Harding won't let him.
Both fighters are breathing heavily.
That's one minute gone in the round.
Threepwood throws a big right hand that misses.
Well, the referee has seen enough. Neither fighter is active enough on the ground so he's stood them back up.
Threepwood tries to clinch but fails miserably
and Harding counters by moving into the clinch.
Threepwood throws a knee to the head but misses.
Threepwood lands a knee to the head.
Threepwood is trying to slow down the pace of the fight but Harding is keeping busy.
Nice elbow from Threepwood.
Threepwood tries for a takedown but Harding manages to get underhooks.
Harding takes a knee right on the jaw!

Harding is rocked!
Threepwood unloads a knee to the mid-section. Harding lets out a prehistoric sounding urrrrgh.
Oh Harding is still all over the place! His legs are completely gone! Will he be able to recover?!!
A short left from Threepwood.
Threepwood stops a takedown attempt from Harding.
Harding managing to block the knees to the body from Threepwood.
Harding seems to have got his legs back now.
Threepwood looking for a takedown.
Threepwood stops a takedown attempt from Harding.
Harding is working for takedown but Threepwood is calmly controlling the position for now.
That's three failed takedown attempts in the round for Geoff Harding. That's going to take a lot out of him.
Threepwood connects with a nasty looking knee right to Harding's face.
Harding decides to pull guard.
Threepwood wants to stand and escape but instead Harding has hit a sweep and he's now on top in guard.
That's two minutes gone in the round.
Harding stands up from Threepwood's guard - Harding perhaps looking for a knockout.
Harding circles away from the clinch attempt.
Harding drives through with a really nice takedown into side control.
Threepwood manages to work his way to half guard, despite Harding's best efforts.
Threepwood is trying to stand up here but Harding is controlling him well.
Threepwood wants to stand back up but Harding manages to pass into side control.
Threepwood is trying to escape and get back to his feet.
That's three minutes gone in the round.
Harding wants to control but Threepwood is keeping him busy.
Geoff Harding overall seems to be getting the better of the ground position in the fight so far.
Threepwood tries to get back to half guard but can't.
Threepwood takes a couple of big shots there - the referee warns him that he has to defend himself better.
Harding lands a knee to the body and follows it up with some ground and pound to the head. That will wear Threepwood down.
Threepwood takes an elbow right on the bridge of the nose and winces in pain.
Harding has hold of Threepwood's arm here. He's working for an Americana. It looks like he might have it! Threepwood tries to escape but he's just digging himself in deeper - Harding cranks the arm and Threepwood screams in pain! The ref makes a decision and ends the fight before the tap - no complains from Threepwood, who is just happy to have his arm attached to his body.
Ladies and gentlemen, after 4:04 of round 3, we have a winner by way of Submission (Americana). Geoff Harding!
|
|
|
|
|
|
|
|
|
|
|
|
|
|
|
|
|
|
|
|
|
|
|
| S |
C
A |
G |
S |
C
B |
G |
|
S |
C |
G |
|
energy
A | B |
|
hype
A | B |
|
pop
A | B |
|
mgr
A | B |
|
FIGHT
RATING
80% |
|
|
|
|
|
|
|
Undercard bout
|
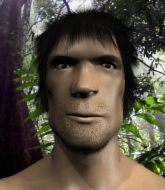
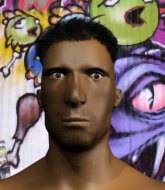
Coming up we have a welterweight MMA rules bout between Koron Maafi (ranked 0 p4p, 0 weight class) and Lyoja Masiina (ranked 0 p4p, 0 weight class). Koron Maafi has the better chin. Will he look to stand and bang today?
 |
|
 |
| 190 cm
22
179 lbs
2 - 2 - 0 |
|
175 cm
22
170 lbs
1 - 0 - 1 |
BJJ Blue Belt
Solid Muay Thai
Granite chin |
|
BJJ Purple Belt
Brawler
Very confident |
|
| |
|
Ladies and gentlemen. This fight is 3 rounds, in the welterweight division.
Introducing the fighter to my left, fighting out of the red corner.
With a record of
2 - 2 - 0, fighting out of Tokyo, Koron Maafi!
And introducing the fighter to my right, fighting out of the blue corner.
With a record of
1 - 0 - 1, fighting out of Tokyo, Lyoja Masiina!
The judges for this bout are Shirou Masuda, Shigeki Fujiwara and Sosuke Kotani.
The bell rings for round one and we are underway!
No luck for Masiina with that takedown attempt.
Maafi misses with a half-hearted attempt at a head kick.
Masiina circles away from the clinch attempt.
Maafi cracks the inside of Masiina's front leg.
Maafi has Masiina up against the ropes in a clinch.

Maafi breaks the clinch and we return to the middle of the mat.
Masiina looks frusrated there after his takedown attempt is stuffed easily.
Masiina fails with a rather predictable takedown attempt.
Koron Maafi has stuffed three takedown attempts in the round now. That's going to take a lot out of Lyoja Masiina.
Masiina chopped to the floor by a nice leg kick but he springs right back up before Maafi can pounce on him.
Maafi fakes with a right hand and throws a good leg kick, right into the thigh. That had to hurt Masiina.
Maafi throws a quick head kick that skims the top of Masiina's head.
Maafi lands with a nice body kick.
Masiina looks gassed!
The crowd are loving this. Great action here.
Maafi jabs at Masiina's body.
Masiina looks for a takedown but Maafi sprawls well.
Masiina blocks a head kick by Maafi.
That's one minute gone in the round.
Maafi circles to his right before unloading a perfect head kick! Masiina drops to the canvas, hurt badly! Maafi follows Masiina to the ground and unloads with a series of strikes that force the referee to step in and end the fight! This one is all over!
Ladies and gentlemen, after 1:09 of round 1, we have a winner by way of TKO (Strikes). Koron Maafi!
|
|
|
|
|
|
|
|
|
|
|
|
|
|
|
|
|
|
|
|
|
|
|
| S |
C
A |
G |
S |
C
B |
G |
|
S |
C |
G |
|
energy
A | B |
|
hype
A | B |
|
pop
A | B |
|
mgr
A | B |
|
FIGHT
RATING
82% |
|
|
|
|
|
|
|
Undercard bout
|
|
|
|
Undercard bout
|
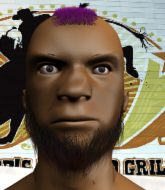
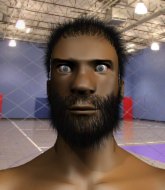
Coming up we have a lightweight MMA rules bout between Kindo Suzuki (ranked 0 p4p, 0 weight class) and Hugo Diaz (ranked 0 p4p, 0 weight class). Hugo Diaz acknowledges the crowd's support as he enters the ring.
 |
|
 |
| 170 cm
22
158 lbs
3 - 1 - 0 |
|
180 cm
22
162 lbs
2 - 0 - 0 |
BJJ Blue Belt
Good knees
Granite chin |
|
BJJ Brown Belt
Counter striker
Determined |
|
| |
|
Ladies and gentlemen. This fight is 3 rounds, in the lightweight division.
Introducing the fighter to my left, fighting out of the red corner.
With a record of
3 - 1 - 0, fighting out of Tokyo, Kindo Suzuki!
And introducing the fighter to my right, fighting out of the blue corner.
With a record of
2 - 0 - 0, fighting out of Tokyo, Hugo Diaz!
The judges for this bout are Kenichi Hosakawa, Taro Takaoka and Shirou Masuda.
The bell rings for round one and we are underway!
Diaz fails with the takedown.
Suzuki is looking to take this fight into the clinch.
Suzuki tries to close the distance and clinch up but Diaz swats him away and circles back towards the center.
Suzuki instigates a clinch.
Both guys are working to get underhooks.
Suzuki misses with a knee strike.
Suzuki with a knee to the head.
Diaz manages to pull guard. Let's see whether he can land a sub off his back.
Diaz working a defensive guard here.
We've had a slow start to the round here - hopefully the action picks up.
Suzuki trying to control but Diaz is working from the bottom.
Suzuki preventing the sweep.
That's one minute gone in the round.
Diaz is looking for a triangle here but Suzuki uses the submission attempt to pass into side control.
Diaz is looking to regain half guard here but Suzuki keeps moving and retains side control.
Suzuki wants to stand but Diaz has his arm trapped.
The fighters are tangled up in the ropes here. We might need a restart if the fighters can't break free themselves.
Diaz is sneaking out the side here. He's bucked Suzuki off and has taken his back!
Diaz is cranking Suzuki's head sideways - that looks painful. He's managed to get his other arm under the chin and this looks bad for Suzuki! He's tightened the choke and Suzuki is tapping out!
Ladies and gentlemen, after 2:02 of round 1, we have a winner by way of Submission (RNC). Hugo Diaz!
|
|
|
|
|
|
|
|
|
|
|
|
|
|
|
|
|
|
|
|
|
|
|
| S |
C
A |
G |
S |
C
B |
G |
|
S |
C |
G |
|
energy
A | B |
|
hype
A | B |
|
pop
A | B |
|
mgr
A | B |
|
FIGHT
RATING
29% |
|
|
|
|
|
|
|
Undercard bout
|
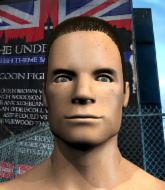
Coming up we have a lightweight MMA rules bout between Shigetoshi Kaga (ranked 0 p4p, 0 weight class) and Judo Saiko (ranked 0 p4p, 0 weight class). Kaga comes into the arena with Fighting 17th - Hans Zimmer blaring out of the sound system. Man, I cannot wait for this one!
 |
|
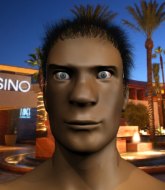 |
| 181 cm
19
160 lbs
2 - 1 - 0 |
|
175 cm
20
161 lbs
2 - 0 - 0 |
BJJ Purple Belt
Brawler
Cuts easily |
|
BJJ Blue Belt
Brawler
Solid chin |
|
| |
|
Ladies and gentlemen. This fight is 3 rounds, in the lightweight division.
Introducing the fighter to my left, fighting out of the red corner.
With a record of
2 - 1 - 0, fighting out of Tokyo, Shigetoshi Kaga!
And introducing the fighter to my right, fighting out of the blue corner.
With a record of
2 - 0 - 0, fighting out of Tokyo, Judo Saiko!
The judges for this bout are Shigeki Fujiwara, Yukihiro Shimada and Hirohito Nitta.
The bell rings for round one and we are underway!
Saiko tries to work over Kaga's front leg with a kick but Kaga checks it.
Saiko misses with a wild combination.
Kaga looks for a takedown here. Will he get it? Saiko is fending him off so far but Kaga persists. Nope, Saiko circles away and we're back to standing.
Saiko does a little shimmy and throws a leg kick. The leg kick missed by a considerable margin though, making him look a little bit silly for doing the shimmy.
Saiko is looking to score with low kicks.
Kaga shoots in for a takedown and gets it.
Saiko is holding on to half guard well.
Saiko is looking to regain full guard. Not this time though.
Kaga landing with strikes to the body and head, softening up his opponent.
Saiko is trying to stand back up but Kaga is controlling him
Kaga is looking to take a break and control but Saiko is keeping him honest, looking to work from the bottom.
Kaga has freed up his trapped foot and advances to mount.
Saiko looks gassed!
That's one minute gone in the round.
Kaga can't quite control the action as he would like just now, as Saiko is looking to escape.
Kaga connects with a couple of good shots from mount.
Kaga is standing up out of mount! Strange tactic there - he must really want this one on the feet!
Judo Saiko seems to be the more aggressive standup fighter in this bout.
Kaga has a takedown stuffed.
Judo Saiko is looking to keep the fight on the feet at all costs.
Kaga tries to close the distance and clinch but Saiko swats him to one side with an open hand palm strike and circles away.
A punch combination from Saiko misses.
Kaga forces Saiko back against the ropes and clinches.
Saiko gets double underhooks to prevent a takedown attempt from Kaga.
That's three failed takedown attempts in the round for Shigetoshi Kaga. That's going to take a lot out of him.
Kaga is trying to slow down the pace of the fight but Saiko is keeping busy.
Kaga throws a punch but it's blocked by Saiko.
That's two minutes gone in the round.
Saiko drops to a knee looking for a takedown but Kaga gets the underhooks and prevents it.
Kaga drags the fight down to the ground.
Kaga has a closed guard, preventing Saiko from standing up.
The fighters are tangled up in the ropes here. We might need a restart if the fighters can't break free themselves.
Saiko stopping the sweep attempt from Kaga.
Kaga lands a beautiful switch and he's in full mount! That could spell trouble for Saiko!
Saiko wants to control but Kaga is having none of it.
Kaga controlling the position easily from mount.
That's three minutes gone in the round.
Saiko is looking to get back to his feet - it's going to be hard from this position.
Saiko tries to hold on but Kaga pushes him away.
Saiko is trying desperately to improve position.
Kaga trying to control but Saiko is having none of it.
Kaga with some aggressive grappling here. He's looking for submissions here, rather than waiting for the opportunity to counter.
Kaga avoids the attempt from Saiko to control.
That's four minutes gone in the round.
There's not a lot going on here and the crowd are letting the fighters know they're not willing to tolerate a lack of action.
Kaga trying to control but Saiko is having none of it.
Kaga stands up from the dominant position, so we're back on the feet.
Kaga scores with a nice takedown into half guard. Let's see what he's got on the ground.
Kaga trying to control from half guard but Saiko is working away.
Kaga is controlling the pace.
Saiko avoiding damage under a succession of punches from Kaga.
Saiko is not content to let Kaga control the position.
And thats the end of the round the fighters go back to their corners.
Shigetoshi Kaga dominated that round.
That's time! Kaga's corner gives him a slap on the ass as he gets ready to fight.
Kaga clinches up against the ropes.
Kaga tries to take the fight to the ground by pulling guard but can't manage it.
Kaga fails to pull guard.
Kaga is trying to work for a single leg takedown but Saiko pulls him back up using the underhooks.
That's three failed takedown attempts in the round for Shigetoshi Kaga. That's going to take a lot out of him.
Kaga breaks the clinch.
Kaga just misses with a punch to the body.
Saiko shapes like he's going to throw a leg kick but settles back down.
Kaga fails in his attempt to clinch.
Saiko misses with a straight right.
Kaga has his head slapped from side to side by a 3 punch combination. That must have hurt him.
Saiko is looking to clinch but Kaga is avoiding it.
Saiko throws a low kick but Kaga avoids it.
Saiko throws a body punch but Kaga moves out of range.
Saiko will need to tighten up his combinations if he doesn't want to gas himself out, swinging at thin air.
Kaga moves in looking to clinch but Saiko pushes him off.
Saiko is breathing heavily.
Kaga fakes an overhand right and shoots for a takedown. Saiko sprawls well initially but Kaga persists and gets the takedown into half guard.
Kaga wants to control but Saiko is keeping him busy.
That's one minute gone in the round.
Saiko trying to hold on to Kaga's head to control him but Kaga postures up.
Saiko scrambles, trying to get to his feet, but Kaga manages to mount him!
Saiko holds of for dear life.
Saiko is looking to improve his position but Kaga isn't that keen on the idea.
Kaga avoids the attempt from Saiko to control.
Saiko keeping his composure momentarily, calmly looking to get back to half guard.
That's two minutes gone in the round.
The crowd are starting to boo a lack of action.
Kaga has control of Saiko's right arm, working for a kimura. It's a bit of a token attempt though and Saiko regains control of the situation pretty easily.
Kaga tries to control but Saiko wriggling away.
Saiko is working to get back to half guard.
Kaga is working on an americana here. Ooh, that looks pretty nasty! Nope, Saiko has managed to escape the submission attempt.
Saiko regains half guard.
Kaga is keen to just control but Saiko is a slippery customer.
Kaga wants to get back to his feet.
That's three minutes gone in the round.
Kaga is trying to work for a kimura. He's got his hands clasped together - this could be trouble! No, Saiko has managed to free his arm - good work.
Kaga is trying to work for a kimura. He's got his hands clasped together - this could be trouble! No, Saiko has managed to free his arm - good work.
Kaga looking for a kimura but he'll have to free his other leg if he wants to finish that. Perhaps he's just using it as a distraction technique.
Kaga is trying to control the action in half guard but Saiko is working away on the bottom, looking perhaps to get back to full guard.
That's four minutes gone in the round.
The crowd are showing their displeasure at the lack of action as loud boos ring out around the arena.
Kaga scores with a couple of good hammerfists.
Kaga seems to have lost interest with the ground game and is thinking about standing back up.
Kaga is trying to work for a kimura but Saiko is defending well.
Kaga throwing shots but Saiko is blocking nicely.
Kaga trying to control from half guard but Saiko is working away.
Kaga not landing any meaningful shots this time.
Neither fighter is doing enough for the referee's liking and he's decided to stand them back up.
Kaga throws a head kick that Saiko semi-blocks.
Kaga throws a quick inside leg kick.
Saiko attempts a leg kick but it's missed by a good margin.
Saiko throws a combination but comes up with nothing but fresh air.
Kaga thuds his shin into the meat of Saiko's side.
Kaga scores with a nice takedown into half guard. Let's see what he's got on the ground.
Saiko is trying to maintain the position but Kaga is very close to passing his half guard.
And thats the end of the round the fighters go back to their corners.
Shigetoshi Kaga dominated that second round.
The fighters get back to their feet, the hooter sounds and we're back to the action! The crowd applaud as we get ready to start the final round!
Kaga shoots in looking for a takedown. Saiko tries to sprawl out of it but Kaga keeps driving through. The fighters are pinned against the ropes. Saiko manages to get underhooks and after a bit of a struggle, circles away and we're back to standing.
Kaga tries to shoot in for a takedown. He's got hold of a leg but Saiko swivels and escapes.
This fight brought to you by 5M nutrition - it's mmmmm tasty. Nice jab by Saiko.
Shigetoshi Kaga is looking to throw some combinations by the looks of things.
Saiko tries to clinch but Kaga moves away
and Kaga counters with a head kick.
Saiko comes forward and lands a shot to the body, then darts back out of range.
No luck for Kaga with that takedown attempt.
That's three failed takedown attempts in the round for Shigetoshi Kaga. That's going to take a lot out of him.
Saiko misses with a jab and misses with a cross straight after too.
Kaga drops down and drives through with a powerful takedown into guard.
Kaga trying to control but Saiko is working from the bottom.
Kaga pushing down on Saiko's thigh, trying to pass to half guard. He's managed it... Nice work.
Kaga wants to pass to mount but Saiko is defending the position.
Kaga stalling.
Kaga is looking to take a break and control but Saiko is keeping him honest, looking to work from the bottom.
That's one minute gone in the round.
Saiko manages to escape and get back to his feet!
Saiko throws a hard body shot but it just misses.
Saiko takes a big intake of breath there - he's definitely tired.
Kaga circles away from the clinch attempt
and Kaga counters with a takedown into full mount! That could mean trouble for Saiko!
Kaga lands a shot to the body, followed up by a shot to the exposed head of his trapped opponent.
Kaga trying to control but he's not successful this time.
Kaga looking to finish Saiko with some ground and pound. This is bad for Saiko!
Shigetoshi Kaga overall seems to be getting the better of the ground position in the fight so far.
Kaga tries to control but Saiko wriggling away.
Saiko is trying to escape the mount.
That's two minutes gone in the round.
Kaga lands with some vicious ground and pound - can Saiko hang on?
Kaga lands a big elbow.
Kaga in mount throwing good strikes here, bouncing his opponent's head off the canvas.
Kaga has been looking to land a fair amount of strikes on the ground. He might be looking to soften his opponent up in order to work for a submission.
Saiko is trying to get back to his feet but can't.
Saiko tries to get back to half guard but can't.
Saiko wants to hold on but Kaga pushes him away.
Saiko wants to try and get back to his feet.
Kaga thowing strikes but they're hitting the gloves, not doing any damage.
Kaga takes Saiko's back.
Kaga is looking to finish the fight by rear naked choke. Saiko knows exactly what he's got planned though, so he's defending well. Maybe a few strikes would soften Saiko for a finish.
Saiko is trying to stand back up.
That's three minutes gone in the round.
Kaga biding his time, looking for the opening.
Kaga is looking to control Saiko but Saiko is wriggling around and keeping busy.
Kaga is working the ground and pound. Can Saiko escape?
Saiko can't escape the position.
Kaga trying to control.
Saiko is taking damage to the body and head.
Kaga is working the ground and pound. Can Saiko escape?
That's four minutes gone in the round.
A lull in the action here being met with boos from the crowd.
Saiko is in bad spot here.
Kaga is staying calm and holding on to the back position, whilst working on a rear naked choke. Saiko is defending well though. Kaga let's go of the attempt for now.
Saiko prevents Kaga from getting a body triangle.
Judo Saiko has stepped it up - he knows he needs a finish here!
Saiko defends a prolonged rear naked choke attempt and turns nicely into his opponent's guard.
Saiko has decided he wants to stand but the closed guard of Kaga is proving hard to escape from.
Saiko postures up.
Kaga is working an open guard here, looking to improve his position. No doubt that will leave him open to counters but at least he's being more offensive.
Kaga lands a beautiful switch and he's in full mount! That could spell trouble for Saiko!
And that's the end of the fight!
Shigetoshi Kaga showed his dominance in that final round.
Well I reckon that's a shut out for Kaga, winning every round. Will the judges agree? They are the ones who matter, even if they are often depressingly incompetent. Over to the ring announcer for the scorecards.
Ladies and gentlemen, after 3 rounds of action, we go to the scorecards for a decision.
Judge Shigeki Fujiwara scores the fight 30:27
Judge Yukihiro Shimada scores the fight 30:27
Judge Hirohito Nitta scores the fight 30:27
In favor of your winner, by unanimous decision... Shigetoshi Kaga!
|
|
|
|
|
|
|
|
|
|
|
|
|
|
|
|
|
|
|
|
|
|
|
| S |
C
A |
G |
S |
C
B |
G |
|
S |
C |
G |
|
energy
A | B |
|
hype
A | B |
|
pop
A | B |
|
mgr
A | B |
|
FIGHT
RATING
42% |
|
|
|
|
|
|
|
Undercard bout
|
Coming up we have a welterweight MMA rules bout between Mike heh (ranked 0 p4p, 0 weight class) and Yushin Fujita (ranked 0 p4p, 0 weight class). heh kept the crowd waiting but all that was forgotten when his ring entrance music started. The incomparable musical genuis that is Marilyn Manson - Fight Song. The crowd seem to be enjoying Fujita's choice of entrance music: Koto - Jabdah. There are an array of beautiful celebrities at ringside tonight! I wonder if any of them paid for their tickets.
 |
|
 |
| 178 cm
20
176 lbs
1 - 0 - 0 |
|
177 cm
20
180 lbs
2 - 0 - 0 |
BJJ Blue Belt
Basic striking
Cuts easily |
|
BJJ Blue Belt
Brawler
Tends to cut |
|
| |
|
Ladies and gentlemen. This fight is 3 rounds, in the welterweight division.
Introducing the fighter to my left, fighting out of the red corner.
With a record of
1 - 0 - 0, fighting out of Tokyo, Mike heh!
And introducing the fighter to my right, fighting out of the blue corner.
With a record of
2 - 0 - 0, fighting out of Tokyo, Yushin Fujita!
The judges for this bout are Shirou Masuda, Shigeki Sano and Yasuomi Hirokawa.
The bell rings for round one and we are underway!
heh uses decent footwork to sidestep a right hand from Fujita.
Fujita gets caught flat footed, as heh shoots in with a quick takedown into guard.
heh trying to pass the guard but can't manage it just yet.
Fujita tries to land a sweep but no joy.
heh scoring with some ground and pound.
heh wants to control from the top but Fujita keeps moving.
Fujita is looking for a triangle here but heh uses the submission attempt to pass into side control.
heh is looking to take a break and control but Fujita is keeping him honest, looking to work from the bottom.
heh has knee on belly and moves into mount.
Fujita is looking to improve his position but heh isn't that keen on the idea.
heh wants to control the pace but Fujita is squirming around nicely.
That's one minute gone in the round.
Fujita wants to control but heh is having none of it.
Fujita is wriggling around trying to escape.
heh tries to control but Fujita wriggling away.
Fujita is in a horrible position here. heh smacks him with another shot as he tries to escape the position.
heh landing shots from mount.
heh controlling the position easily from mount.
Fujita working to try and regain half guard.
heh wants to control the pace but Fujita is squirming around nicely.
heh scoring with strikes but Fujita is staying in there.
The fighters are tangled up in the ropes here. We might need a restart if the fighters can't break free themselves.
heh landing strikes from the mount and Fujita is in trouble!
That's two minutes gone in the round.
heh trying to control but he's not successful this time.
heh landing shots from mount.
Fujita is in all sorts of trouble here.
The fighters are going at a pretty good pace and they're both starting to sweat now.
heh controlling his opponent.
Fujita really trying hard to get back to half guard here.
Fujita is persisting with the attempt to improve his position.
heh trying to control but Fujita is having none of it.
Fujita tries to reverse the position but heh maintains control.
heh controlling from the full mount.
That's three minutes gone in the round.
Fujita regains half guard.
heh prevents Fujita from improving his position.
heh frees up his trapped foot and advances to mount.
heh fakes a shot to the body and cracks his opponent in the head. Nice ground and pound there!
The fighters are trapped in the ropes so we're going to have a reposition here. The ref calls for a break and repositions the fighters in the center of the ring.
heh trying to control but Fujita is having none of it.
Fujita is wriggling around trying to escape.
Fujita looks gassed!
heh can't quite control the action as he would like just now, as Fujita is looking to escape.
Fujita tries to hold on but heh pushes him away.
heh can't quite control the action as he would like just now, as Fujita is looking to escape.
heh content just to control the position here.
That's four minutes gone in the round.
The referee stands the fighters back up. Mike heh just wasn't active enough from the dominant position.
heh shoots in for a takedown but Fujita shows good takedown defense.
Fujita attempts a low kick but it misses it's target.
Fujita fakes a head punch and goes low to the body. Nicely done.
Excellent takedown into side control there by Fujita.
Fujita is looking to finish here, going for an Americana. heh knows the correct defense though, so he's OK.
Fujita avoids the strikes from the bottom by heh.
heh is sneaking out the side here. He's bucked Fujita off and has taken his back!
Fujita prevents heh from getting a body triangle.
Fujita fending off the submission attempt from heh.
And thats the end of the round the fighters go back to their corners.
Mike heh dominated that round.
The corners get their ten second warning. Both fighters stand from their stools and stare eachother down, ready to get back to the action.
heh will have to do better than that with his takedown attempts.
Fujita misses with a wild combination.
heh darts in and lands a nice takedown into half guard.
heh landing with strikes to the body and head, softening up his opponent.
heh seems to be taking a bit of a break to think of his next move. He lands a short punch in the meantime.
heh is just sitting in half guard, waiting for something to happen.
heh trying to control the action but Fujita is working from the bottom.
Fujita wants to improve his position but heh is controlling well.
Fujita is not content to let heh control the position.
That's one minute gone in the round.
Fujita tries to get to full guard but heh has control of the leg.
Fujita is breathing heavily.
heh wants to lay and pray for a moment but Fujita keeps working.
The referee decides to stand the fighters back up.
heh changes levels and looks for a double leg takedown. Fujita tries to avoid it but heh manages to keep hold of a leg and drag Fujita to the ground. Fujita escapes though and pops straight back up to his feet.
Fujita throws a monster uppercut resembling something out of street fighter but it doesn't land.
heh takes a punch to the jaw and another one to the bread basket.
heh uses decent footwork to sidestep a right hand from Fujita.
heh with a lazy takedown attempt
and Fujita counters with a nice uppercut.
That's three failed takedown attempts in the round for Mike heh. That's going to take a lot out of him.
The fight stays on the outside here - heh looks like he's thinking about clinching though.
Fujita misses with a jab and misses with a cross straight after too.
heh fails with the takedown
so Fujita counters with a double leg into guard. Good agility.
Fujita stands up over heh, holding his feet. He dives back in and lands a decent shot to the head.
Fujita stands up and looks to throw the legs aside to pass to side control. heh swivels though and keeps the full guard.
heh is working from a closed guard but he's struggling to control his opponent.
Mike heh overall seems to be getting the better of the ground position in the fight so far.
heh lands a good elbow from the bottom.
That's two minutes gone in the round.
heh is trying to hold Fujita in close to prevent damage but Fujita has managed to pass into half guard.
heh has no desire to be mounted, so is trying to control. Fujita is working away from the top position though.
Fujita working the head and body with strikes.
heh pushes Fujita off looking to stand but Fujita dives back in and keeps control.
Neither fighter is doing enough for the referee's liking and he's decided to stand them back up.
heh feints and as Fujita raises his hands in defense, heh changes levels and drives through with a takedown into guard.
heh trying to control but Fujita is working from the bottom.
heh stands up and looks to throw the legs aside to pass to side control. Fujita swivels though and keeps the full guard.
heh passes into half guard.
The crowd are loving this. Great action here.
heh with a momentary lay and pray from half guard.
That's three minutes gone in the round.
heh's ground tactics aren't going to win him many fans. Let's hope he's got fireworks for us if he gets back to his feet because he's not doing much on the ground.
heh is looking for a kimura but he's never going to get it from there.
heh looks to score some points with some ground and pound.
heh not doing much here.
The two fighters exchange a few words. I couldn't hear what they were saying but maybe it's more fun if you make it up yourself. heh connects with a nice short shot to Fujita's temple.
Fujita is looking to improve his position.
That's four minutes gone in the round.
A lull in the action here being met with boos from the crowd.
Nice strikes from heh there.
Fujita is working for an escape here. He's hooked one of heh's legs and he's managed to sneak out and take heh's back!
heh breaks Fujita's hooks off and manages to turn into his guard.
heh slows down the pace of the fight for a moment. He'll need to remain active if he doesn't want to see the fight stood back up.
heh preventing the sweep.
heh is just sitting in guard, looking to avoid any submissions.
Fujita keeping moving, preventing heh from controlling successfully.
The referee stands the fighters back up. Mike heh just wasn't active enough from the dominant position.
heh gets a takedown into half guard.
Fujita is working for an escape here. He's hooked one of heh's legs and he's managed to sneak out and take heh's back!
The crowd applaud the fighters efforts here as the round comes to an end.
heh turns into Fujita and is now in his guard.
heh pressing down on his opponent's thigh, looking to pass guard. Fujita is keeping the position for now.
And thats the end of the round the fighters go back to their corners.
That was a close second round but I would say that Mike heh will probably get the nod.
OK. That's time! The bell goes and we're back to the action. So, we enter the final round. Let's see if either fighter can bring us a finish, or whether we're going to the judges scorecards.
Fujita looks to throw the jab but heh is out of range.
heh tries for a takedown but Fujita circles away easily
and Fujita counters with a shot to the ribs. That looked like it hurt.
Fujita fails to land with the punch combination there - jab, cross, hook, miss, miss, miss.
heh shoots in from a long way out. He's driving through with the takedown attempt and he eventually gets it, landing in Fujita's guard.
heh trying to control the position from guard on top but Fujita is wriggling around, looking for whatever he can.
heh is really struggling to control Fujita but he's trying to hold on to the position.
Fujita is working actively off his back, looking to secure an arm or perhaps work for a triangle.
heh trying to control but Fujita is working from the bottom.
Fujita working from the bottom, still in full guard. He's managed to get a loose triangle. heh doesn't seem to be doing much to defend here, obviously he feels comfortable in the position. heh manages to throw the legs off his shoulder and he's back into guard - no problem.
heh wants to control from the top but Fujita keeps moving.
Fujita had isolated an arm as going for an omaplata. heh is defending the submission well but is in a very vulnerable position. Fujita Is leaning forward trying to finish the omaplata but decides to abandon it, and take heh's back instead.
That's one minute gone in the round.
heh defends a rear naked choke attempt by controlling one of Fujita's arms.
Both fighters are breathing heavily.
heh breaks Fujita's hooks off and manages to turn into his guard.
heh slows down the pace of the fight for a moment. He'll need to remain active if he doesn't want to see the fight stood back up.
Fujita wants to sweep here but heh controlling him for the moment.
heh slows down the pace of the fight, as he sits in guard.
Fujita looking to control.
heh would like to get this fight back to the feet but can't get free from the closed guard.
Fujita not looking particularly offensive just at the moment.
Fujita keeping moving, preventing heh from controlling successfully.
That's two minutes gone in the round.
There's not a lot going on here and the crowd are letting the fighters know they're not willing to tolerate a lack of action.
Fujita throwing his legs up looking for a triangle.
Fujita is working the butterfly guard. He manages to land a nice scissor sweep and is now in half guard on the top. Nice move.
Fujita landing with strikes to the body and head, softening up his opponent.
Fujita in half guard on the top. He's looking for a kimura... He's got it locked and he's managed to free his trapped foot. heh tries to escape but it's on too tight and he has to tap! Great BJJ skills there from Fujita!
Ladies and gentlemen, after 2:44 of round 3, we have a winner by way of Submission (Kimura). Yushin Fujita!
|
|
|
|
|
|
|
|
|
|
|
|
|
|
|
|
|
|
|
|
|
|
|
| S |
C
A |
G |
S |
C
B |
G |
|
S |
C |
G |
|
energy
A | B |
|
hype
A | B |
|
pop
A | B |
|
mgr
A | B |
|
FIGHT
RATING
90% |
|
|
|
|
|
|
|
Undercard bout
|
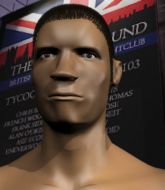
Coming up we have a welterweight MMA rules bout between Jimmy Cheeseburger (ranked 0 p4p, 0 weight class) and Torbjorn Nilsson (ranked 0 p4p, 0 weight class). Cheeseburger comes into the arena with Lynyrd Skynrd-Simple Man blaring out of the sound system. Torbjorn Nilsson will no doubt be trying to keep this one on the feet, where he has a distinct advantage.
 |
|
 |
| 178 cm
19
170 lbs
3 - 1 - 0 |
|
185 cm
20
165 lbs
2 - 1 - 0 |
BJJ Blue Belt
Brawler
Big heart |
|
BJJ Blue Belt
Counter striker
Tends to cut |
|
| |
|
Ladies and gentlemen. This fight is 3 rounds, in the welterweight division.
Introducing the fighter to my left, fighting out of the red corner.
With a record of
3 - 1 - 0, fighting out of Tokyo, Jimmy Cheeseburger!
And introducing the fighter to my right, fighting out of the blue corner.
With a record of
2 - 1 - 0, fighting out of Tokyo, Torbjorn Nilsson!
The judges for this bout are Kenichi Hosakawa, Shirou Masuda and Yasuomi Hirokawa.
The bell rings for round one and we are underway!
Nilsson avoids the body shot from Cheeseburger.
Nilsson shoots in for a takedown - he's clinched up with Cheeseburger but Cheeseburger pushes him off and we're back to square one.
Nilsson scores with a nice takedown into half guard. Let's see what he's got on the ground.
The referee walks around the fighters to get a better view of the action. Nilsson lands a nice short elbow.
Cheeseburger is looking to control Nilsson's leg but it's slowly edging free. Can Cheeseburger avoid being mounted?
Nilsson is looking to take a break and control but Cheeseburger is keeping him honest, looking to work from the bottom.
Nilsson looking for a kimura but he'll have to free his other leg if he wants to finish that. Perhaps he's just using it as a distraction technique.
Cheeseburger looking for submissions off his back.
Cheeseburger is working for an escape here. He's hooked one of Nilsson's legs and he's managed to sneak out and take Nilsson's back!
That's one minute gone in the round.
Nilsson defends a rear naked choke attempt by controlling one of Cheeseburger's arms.
Cheeseburger lands with a couple of good shots - one to the side of the head and one questionable shot that could be viewed as to the back of the head but the referee lets it go.
Nilsson tries to escape the position - he's now mounted. Is that better or worse? Hard to tell!
Cheeseburger can't quite control the action as he would like just now, as Nilsson is looking to escape.
Nilsson tries to hold on but Cheeseburger pushes him away.
Cheeseburger has control of Nilsson's right arm, working for a kimura. It's a bit of a token attempt though and Nilsson regains control of the situation pretty easily.
Cheeseburger prevents Nilsson from getting the reversal.
The referee warns Nilsson that he has to improve his position here as he takes two more clean shots to the head.
Cheeseburger wants to take his opponent's back but Nilsson doesn't allow it.
Cheeseburger avoids the attempt from Nilsson to control.
That's two minutes gone in the round.
The fighters are starting to get a bit slippery now, which will make submissions a bit more difficult.
Cheeseburger unloading with bombs!
Cheeseburger has control of Nilsson's right arm, working for a kimura. It's a bit of a token attempt though and Nilsson regains control of the situation pretty easily.
Cheeseburger is breathing heavily.
Nilsson regains half guard.
Cheeseburger lands strikes from half guard.
Nilsson moves into full guard.
There's a bit of a scramble here and now Nilsson is on top in guard.
Cheeseburger working from the bottom, still in full guard. He's managed to get a loose triangle. Nilsson doesn't seem to be doing much to defend here, obviously he feels comfortable in the position. Nilsson manages to throw the legs off his shoulder and he's back into guard - no problem.
Cheeseburger keeping moving, preventing Nilsson from controlling successfully.
Nilsson might have to switch it up a bit here because his efforts to control Cheeseburger kaven't been going to plan, at least at the current moment in time.
That's three minutes gone in the round.
Cheeseburger manages to sweep nicely, so he's now on top. Nilsson manages to get himself to full guard.
Nilsson is working actively off his back, looking to secure an arm or perhaps work for a triangle.
Nilsson keeping moving, preventing Cheeseburger from controlling successfully.
Nilsson keeping full guard, as Cheeseburger tries to pass.
The fighters are tangled up in the ropes here. We might need a restart if the fighters can't break free themselves.
Cheeseburger trying to control the position from guard on top but Nilsson is wriggling around, looking for whatever he can.
There's a bit of a scramble here and now Nilsson is on top in guard.
Cheeseburger trying to strike from the bottom but really, it's not the best position to be doing that from!
Nilsson forces his way into half guard.
Nilsson seems to be looking for submissions.
That's four minutes gone in the round.
Cheeseburger preventing any damage for now, controlling his opponent's head.
Nilsson thows a huge punch but Cheeseburger dodges it nicely.
Cheeseburger is trying to maintain the position but Nilsson is very close to passing his half guard.
Cheeseburger is working for an escape here. He's hooked one of Nilsson's legs and he's managed to sneak out and take Nilsson's back!
Cheeseburger is working for the choke. It looks like he might have got it... has he...? Yes! Nilsson is tapping out! This one is all over!
Ladies and gentlemen, after 4:45 of round 1, we have a winner by way of Submission (RNC). Jimmy Cheeseburger!
|
|
|
|
|
|
|
|
|
|
|
|
|
|
|
|
|
|
|
|
|
|
|
| S |
C
A |
G |
S |
C
B |
G |
|
S |
C |
G |
|
energy
A | B |
|
hype
A | B |
|
pop
A | B |
|
mgr
A | B |
|
FIGHT
RATING
53% |
|
|
|
|
|
|
|
Undercard bout
|
Coming up we have a welterweight MMA rules bout between Akaki Murasa (ranked 0 p4p, 0 weight class) and Greg Lupul (ranked 0 p4p, 0 weight class). Both fighters look fresh as a daisy as they make their way towards the ring.
 |
|
 |
| 180 cm
22
180 lbs
2 - 0 - 0 |
|
177 cm
19
177 lbs
3 - 2 - 0 |
BJJ Blue Belt
Solid Muay Thai
Big heart |
|
BJJ Blue Belt
Brawler
Plays chess |
|
| |
|
Ladies and gentlemen. This fight is 3 rounds, in the welterweight division.
Introducing the fighter to my left, fighting out of the red corner.
With a record of
2 - 0 - 0, fighting out of Tokyo, Akaki Murasa!
And introducing the fighter to my right, fighting out of the blue corner.
With a record of
3 - 2 - 0, fighting out of Tokyo, Greg Lupul!
The judges for this bout are Shigeki Fujiwara, Kenichi Hosakawa and Shigeki Sano.
The bell rings for round one and we are underway!
Lupul connects with a solid leg kick.
Lupul throws a head kick that misses.
Lupul keeps the fight on the outside.
Lupul tries a switch kick but it misses it's target.
Lupul misses with a series of wild punches.
Lupul lands a jab to the nose.
Lupul throws a right and a left that both miss.
Murasa takes a body kick right on the floating rib. Ouchie.
Murasa fails in his attempt to clinch.
Lupul misses with a jab, cross combination.
Murasa takes a jab on the nose. He smiles like he loves it and keeps coming.
Lupul shoots for a takedown but Murasa saw that one coming a mile off and avoided it easily.
Greg Lupul seems to be the more aggressive standup fighter in this bout.
Murasa blocks a head kick by Lupul.
Lupul throws a hard body shot but it just misses.
Murasa tries to close the distance and clinch up against the ropes but Lupul paws at him with a jab and circles away.
Murasa wants to clinch up but Lupul keeps it at a distance.
Murasa fails in his attempt to clinch.
Lupul throws a head kick but Murasa moves out of range.
Murasa misses with a head kick.
That's one minute gone in the round.
Lupul will need to tighten up his combinations if he doesn't want to gas himself out, swinging at thin air.
Murasa tries to clinch but is not successful on this occasion.
No luck for Lupul with that takedown attempt.
Lupul with a body punch. A glancing blow.
Murasa tries to clinch up but Lupul circles away and keeps his distance.
Lupul circles away from the clinch attempt.
Murasa wants to clinch.
Lupul tries a switch kick but it misses it's target.
Ohhhhhhhhhh, brutal head kick from Murasa! This one is all over!
Ladies and gentlemen, after 1:46 of round 1, we have a winner by way of KO (Head Kick). Akaki Murasa!
|
|
|
|
|
|
|
|
|
|
|
|
|
|
|
|
|
|
|
|
|
|
|
| S |
C
A |
G |
S |
C
B |
G |
|
S |
C |
G |
|
energy
A | B |
|
hype
A | B |
|
pop
A | B |
|
mgr
A | B |
|
FIGHT
RATING
45% |
|
|
|
|
|
|
|
Co-main event
|
Coming up we have a welterweight MMA rules bout between Takayuki Okubo (ranked 0 p4p, 0 weight class) and Joonas Peuralinna (ranked 0 p4p, 0 weight class). Peuralinna comes into a darkened arena with his song building. Blue moon kicks in, the lights come on and the crowd goes wild! What a showman! Takayuki Okubo has the better chin. Will he look to stand and bang today?
 |
|
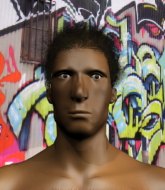 |
| 175 cm
21
178 lbs
4 - 1 - 0 |
|
178 cm
19
170 lbs
2 - 1 - 0 |
BJJ Purple Belt
Basic striking
Good chin |
|
BJJ Blue Belt
Counter striker
Determined |
|
| |
|
Ladies and gentlemen. This fight is 3 rounds, in the welterweight division.
Introducing the fighter to my left, fighting out of the red corner.
With a record of
4 - 1 - 0, fighting out of Tokyo, Takayuki Okubo!
And introducing the fighter to my right, fighting out of the blue corner.
With a record of
2 - 1 - 0, fighting out of Tokyo, Joonas Peuralinna!
The judges for this bout are Shigeki Sano, Shigeki Fujiwara and Yukihiro Yamamoto.
The bell rings for round one and we are underway!
Peuralinna fails with a takedown attempt from distance.
Peuralinna fails with a takedown attempt.
Okubo misses with a few strikes there.
Okubo fakes a jab and throws a low kick but Peuralinna checks it well.
Okubo throws a combination but it was largely blocked by Peuralinna.
Okubo pivots, looking for a leg kick but Peuralinna is out of range and Okubo settles back down.
Takayuki Okubo seems to be the more aggressive standup fighter in this bout.
Horrible takedown by Peuralinna or perhaps it was just good defense by Okubo which made him look bad.
Takayuki Okubo has stuffed three takedown attempts in the round now. That's going to take a lot out of Joonas Peuralinna.
Peuralinna takes a hook to the side of the head. I wonder if that's got his ears ringing.
We've had a slow start to the round here - hopefully the action picks up.
Okubo gets a takedown into half guard.
Okubo moves nicely into side control.
Peuralinna is working to avoid the ground and pound but Okubo connects with a decent elbow.
Peuralinna stops Okubo from passing to mount.
That's one minute gone in the round.
Okubo trying to control the action but Peuralinna is working from the bottom.
Okubo in side control, just content to control the action for now.
Peuralinna is positioning himself to get back to half guard.
The fighters are tangled up in the ropes here. We might need a restart if the fighters can't break free themselves.
Okubo passes to full mount! That's big trouble for Peuralinna!
Okubo lands a big shot there that rocks Peuralinna but he's holding on and managing to survive for now.
Okubo lands a big shot there that rocks Peuralinna but he's holding on and managing to survive for now.
Okubo punishing his opponent with strikes.
Peuralinna is rocked!
Okubo prevents Peuralinna from getting the reversal.
Okubo landing strikes from the mount.
Peuralinna bucks up and manages to get a nice reversal! He's in guard on the top - nicely done!
Okubo is controlling Peuralinna's posture.
That's two minutes gone in the round.
Peuralinna pressing down on his opponent's thigh, looking to pass guard. Okubo is keeping the position for now.
Okubo manages to land a sweep and now he's in mount on top!
Peuralinna is desperately trying to get back to half guard.
Okubo lands a big elbow.
Okubo postures up and cracks his opponent a couple of times before moving back into close ground control. Peuralinna looks a forlorn figure.
The fighters are starting to get a bit slippery now, which will make submissions a bit more difficult.
Okubo is landing with some decent strikes but Peuralinna is trying to advance his position so the referee is letting the fight continue.
Peuralinna is bucking up trying to escape but Okubo cracks him with another couple of good strikes.
The crowd cheering loudly, showing their appreciation for the quality fight we're seeing here.
Okubo landing strikes, looking to finish!
Peuralinna is still in real trouble! Can Okubo finish him?
Peuralinna looks gassed!
Peuralinna is squirming around, avoiding Okubo's attempts to control the action.
Peuralinna gets back to half guard.
That's three minutes gone in the round.
Okubo stops Peuralinna from getting back to his feet.
Peuralinna seems to have recovered his senses.
Okubo is figuring out what he wants to do next.
The fighters are trapped in the ropes so we're going to have a reposition here. The ref calls for a break and repositions the fighters in the center of the ring.
Okubo working some ground and pound from close in. He's looking to maintain this position and strike for a while by the looks of things... although he'll probably advance to full mount in a minute now I've said that.
Okubo prevents Peuralinna from improving his position.
Okubo has been looking to land a fair amount of strikes on the ground. He might be looking to soften his opponent up in order to work for a submission.
The fighters are battling for position here. Peuralinna manages to regain full guard. Nice work.
Peuralinna keeping moving, preventing Okubo from controlling successfully.
Peuralinna had isolated an arm as going for an omaplata. Okubo is defending the submission well but is in a very vulnerable position. Peuralinna Is leaning forward trying to finish the omaplata but decides to abandon it, and take Okubo's back instead.
Okubo manages to reverse the position and now he's in Peuralinna's guard. Nice work there by Okubo.
Peuralinna looking for a sweep. Not yet Peuralinna, not yet.
Peuralinna looking for submissions from the bottom but instead Okubo passes into side control.
Peuralinna struggling a bit here.
That's four minutes gone in the round.
Peuralinna tries to bench press Okubo off him but Okubo keeps the position.
Peuralinna is moving his hips around well on the bottom and has managed to get back to half guard.
Peuralinna gets back to full guard.
Okubo has a momentary lapse of concentration, allowing Peuralinna to throw up a leg and lock on what appears to be a pretty tight triangle! Okubo is fighting it off but it's all too little too late - Peuralinna pulls down on the head and he's put Okubo to sleep! This one is all over!
Ladies and gentlemen, after 4:32 of round 1, we have a winner by way of Submission (Triangle). Joonas Peuralinna!
|
|
|
|
|
|
|
|
|
|
|
|
|
|
|
|
|
|
|
|
|
|
|
| S |
C
A |
G |
S |
C
B |
G |
|
S |
C |
G |
|
energy
A | B |
|
hype
A | B |
|
pop
A | B |
|
mgr
A | B |
|
FIGHT
RATING
67% |
|
|
|
|
|
|
|
Main event
|
Coming up we have a lightweight MMA rules bout between Mike Bennett (ranked 0 p4p, 0 weight class) and Hadeo Ichisun (ranked 0 p4p, 0 weight class). Bennett's ring entrance music is that housewives' favourite, Stronger, Kanye West. Mike Bennett has the edge in experience - let's see if he can make that count tonight.
 |
|
 |
| 182 cm
20
155 lbs
5 - 1 - 0 |
|
171 cm
22
155 lbs
3 - 0 - 0 |
BJJ Purple Belt
Brawler
Prefers standup |
|
BJJ Brown Belt
Counter striker
Solid chin |
|
| |
|
Ladies and gentlemen. This fight is 3 rounds, in the lightweight division.
Introducing the fighter to my left, fighting out of the red corner.
With a record of
5 - 1 - 0, fighting out of Tokyo, Mike Bennett!
And introducing the fighter to my right, fighting out of the blue corner.
With a record of
3 - 0 - 0, fighting out of Tokyo, Hadeo Ichisun!
The judges for this bout are Shirou Masuda, Ren Mimura and Tatsuya Matsuyama.
The bell rings for round one and we are underway!
Ichisun blocks a leg kick.
Bennett tries to clinch up but Ichisun circles away and keeps his distance.
Bennett fails in his attempt to clinch.
Bennett is looking to take this fight into the clinch.
Bennett looking to land some kicks to the body here.
Bennett throws a combination but comes up with nothing but fresh air.
Bennett scores with a reasonable looking shot to the body. Ichisun doesn't seem bothered though.
Bennett throws a series of punches but Ichisun avoids them all with ease.
Ichisun checks a leg kick.
Bennett tries to clinch up but Ichisun circles away and keeps his distance.
Bennett throws a combination but it was largely blocked by Ichisun.
Ichisun shoots in for a double leg but Bennett sprawls well. That's going to sap some energy.
Bennett throws a jab but it's blocked by Ichisun.
Bennett tries to clinch but is not successful on this occasion.
Bennett throws a sloppy head kick and Ichisun moves out of range easily.
That's one minute gone in the round.
Ichisun blocks a leg kick.
Ichisun fails miserably with a takedown attempt.
Bennett throws a right hand that Ichisun ducks under and follows up with a left that Ichisun also avoids with ease.
Excellent takedown into side control there by Ichisun.
Ichisun prevents Bennett from escaping the position.
Ichisun is looking to finish here, going for an Americana. Bennett knows the correct defense though, so he's OK.
Ichisun tries for an arm triangle. That looks pretty tight to me. Is this one over!?! Possibly, maybe, no Ichisun has let go of the choke. Obviously it wasn't as tight as we thought!
Ichisun moves into full mount!
Bennett is wriggling around trying to escape.
That's two minutes gone in the round.
Ichisun is thinking about an arm triangle here, looking to tighten it up before moving to side control. Bennett can see it coming though and defends well with a couple of strikes to the head and some good arm positioning.
Ichisun looks gassed!
Bennett tries to hold on but Ichisun pushes him away.
Ichisun looking to secure an arm triangle but Bennett defends it well.
Ichisun goes for an armbar but he's not got it
Bennett turns into him and now he's in Ichisun's guard.
Bennett trying to pass the guard but can't manage it just yet.
Ichisun working from the bottom, still in full guard. He's managed to get a loose triangle. Bennett doesn't seem to be doing much to defend here, obviously he feels comfortable in the position. Bennett manages to throw the legs off his shoulder and he's back into guard - no problem.
Bennett avoids a guillotine attempt easily.
Ichisun is actively looking for submissions from his back. He's worked himself a little space on the bottom and seems to be going for a triangle. No, he's switched into an armbar! That was slick! Bennett rolls with it to try and escape but Ichisun cranks on the arm and Bennett is forced to tap out! This one is aaaaaaaaall over!
Ladies and gentlemen, after 3:02 of round 1, we have a winner by way of Submission (Armbar). Hadeo Ichisun!
|
|
|
|
|
|
|
|
|
|
|
|
|
|
|
|
|
|
|
|
|
|
|
| S |
C
A |
G |
S |
C
B |
G |
|
S |
C |
G |
|
energy
A | B |
|
hype
A | B |
|
pop
A | B |
|
mgr
A | B |
|
FIGHT
RATING
49% |
|
|
|
|
|
|
|
|
|
|
