 |
CWFC 26 Christmas Carnage PBP Commentary |
Undercard bout
|
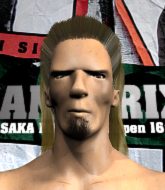
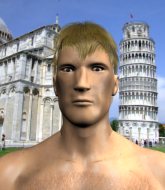
Coming up we have a welterweight MMA rules bout between Jon The Blanket (ranked 0 p4p, 0 weight class) and James Benson (ranked 0 p4p, 0 weight class). This should be fireworks!
 |
|
 |
| 170 cm
25
173 lbs
7 - 12 - 0 |
|
179 cm
26
180 lbs
1 - 2 - 0 |
Good wrestling
Brawler
Very strong |
|
Good wrestler
Counter striker
Granite chin |
|
| |
|
Ladies and gentlemen. This fight is 3 rounds, in the welterweight division.
Introducing the fighter to my left, fighting out of the red corner.
With a record of
7 - 12 - 0, fighting out of Las Vegas, Jon The Blanket!
And introducing the fighter to my right, fighting out of the blue corner.
With a record of
1 - 2 - 0, fighting out of Los Angeles, James Benson!
The judges for this bout are Timothy Bukovac, Don Winkell and Frank Antenori.

The bell rings for round one and we are underway!

The Blanket darts in and lands a nice takedown into half guard.
The referee must be thinking about standing these guys back up.
The Blanket wants to control but Benson is keeping him busy.
The fighters are pressed up against the cage, both looking to find a bit of space to work.
Benson wants to improve his position but The Blanket is controlling well.
Benson makes his way to full guard. A much better position for Benson.
Benson wants to stand up but The Blanket is controlling him.

Benson is throwing his legs up, looking for submissions. The Blanket is aware though and is defending well.
The Blanket trying to move into half guard but instead Benson has managed to sweep!

The Blanket kicks Benson off and gets to his feet.
The Blanket shoots in but no luck this time.
Benson closes this distance looking for a takedown but The Blanket circles away.
We've seen a great period of action over the last minute or so - credit to both fighters for going all out!
The Blanket shoots in but doesn't get the takedown

and Benson counters with a nice double leg into side control. The Blanket won't be happy with that.

That's one minute gone in the round.
Benson wants to take a breather but The Blanket manages to regain guard - a lesson learnt for Benson.
Benson stands up and looks to throw the legs aside to pass to side control. The Blanket swivels though and keeps the full guard.
Benson prevents The Blanket from getting back to his feet.

Benson stands up and waves to The Blanket to follow him.
The Blanket scores with a takedown into Benson's guard.
The Blanket trying to land body shots but he keeps hitting the mat.
Benson looking to sweep here. No luck so far.

That's two minutes gone in the round.
The Blanket postures up and lands a big shot to Benson's brow.
Benson is throwing his legs up, looking for submissions. The Blanket is aware though and is defending well.
The Blanket missing there with some ground and pound from the guard.
The fans in attendance giving it up for the two fighters, who have really let it all hang out in the last minute or so!
The Blanket throwing strikes but missing.
The Blanket looking to pass the guard.
The Blanket postures up to throw the ground and pound strikes but they don't connect.
Benson tries to strike from the bottom.
Benson wants to sweep here but The Blanket controlling him for the moment.
The Blanket postures up and scores with a shot to the body and a follow up elbow to the head.
Benson escapes his hips to the side and looks to be working for an armbar. The Blanket gives him a little smile and shakes his head. No chance.

That's three minutes gone in the round.
The Blanket throwing strikes from guard but Benson blocks nicely.
The Blanket is looking to work some ground and pound but Benson has wrist control.
Benson is working the butterfly guard. He manages to land a nice scissor sweep and is now in half guard on the top. Nice move.
Benson is trying to control. The Blanket wants to improve his position but can't escape this time.
The Blanket makes some distance and scrambles quickly back to his feet. Nice work!
Benson defends well against a solid takedown attempt from The Blanket.
That's three failed takedown attempts in the round for Jon The Blanket. That's going to take a lot out of him.
The Blanket gets his takedown attempt stuffed easily
and Benson counters with a nice single leg takedown and he's in The Blanket's guard now.
Benson throwing shots from guard but he's hitting more mat than opponent.
Benson looking to pass the guard.

That's four minutes gone in the round.
The crowd cheering loudly, showing their appreciation for the quality fight we're seeing here.
The Blanket is looking to get back to his feet but can't, whilst Benson is controlling him.
The Blanket keeping full guard, as Benson tries to pass.
Benson advances to half guard.
Benson has hold of the far side arm. He's working for the Kimura, can The Blanket defend it? Benson steps over the head and cranks it - The Blanket is tapping out! That was textbook stuff right there - nice submission victory for Benson!
Ladies and gentlemen, after 4:32 of round 1, we have a winner by way of Submission (Kimura). James Benson!
An out of breath and clearly excited James Benson thanked Charlie Wang's Nutrition and 95 % Laundry for their help and support (and free stuff they sent him).
|
|
|
|
|
|
|
|
|
|
|
|
|
|
|
|
|
|
|
|
|
|
|
| S |
C
A |
G |
S |
C
B |
G |
|
S |
C |
G |
|
energy
A | B |
|
hype
A | B |
|
pop
A | B |
|
mgr
A | B |
|
FIGHT
RATING
50% |
|
|
|
|
|
|
|
Undercard bout
|
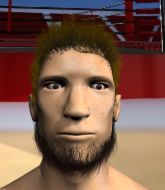
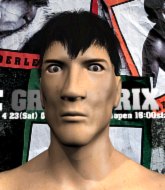
Coming up we have a heavyweight MMA rules bout between Gunn Show (ranked 0 p4p, 0 weight class) and Conchito El Guapo (ranked 0 p4p, 0 weight class). Show's entrance music is Real American. A fine choice. El Guapo has chosen Bebot as his entrance music. Conchito El Guapo acknowledges the crowd's support as he enters the cage.
 |
|
 |
| 196 cm
27
270 lbs
3 - 4 - 0 |
|
179 cm
26
255 lbs
4 - 3 - 0 |
BJJ White Belt
Excellent boxer
Very strong |
|
Decent wrestler
Counter striker
Granite chin |
|
| |
|
Ladies and gentlemen. This fight is 3 rounds, in the heavyweight division.
Introducing the fighter to my left, fighting out of the red corner.
With a record of
3 - 4 - 0, fighting out of Los Angeles, Gunn Show!
And introducing the fighter to my right, fighting out of the blue corner.
With a record of
4 - 3 - 0, fighting out of Los Angeles, Conchito El Guapo!
The judges for this bout are Frank Antenori, and Don Winkell.
The bell rings for round one and we are underway!
Show connects with the punch.

It looks like Conchito El Guapo has been cut.
El Guapo avoids a punch combination nicely.
El Guapo dodges the punch combination from Show.
El Guapo moves out of range as Show throws a body kick.
El Guapo fails miserably with a takedown attempt.
El Guapo avoids a low kick by using good footwork.
Show throws a wild combination but nothing lands.
Show throws a left and a right that both miss
so El Guapo counters with a double leg into guard. Good agility.
That's one minute gone in the round.
El Guapo stands and throws Show's legs to the side, diving into side control.
Show takes a big shot right to the temple there but he's taken it well.
El Guapo has the superior BJJ but he's also working some ground strikes into his gameplan.
Show can't do much from the bottom here.
The ref warns both fighters not to hold the cage as they work up against the meshing.
El Guapo looking to punish the body of his opponent here but Show is avoiding damage well.
Show is not in a great position here, taking some shots.
El Guapo in side control, trying to ground and pound but not landing this time.
El Guapo lands a few punches from side control.
Show is looking for a sweep.
Wooooo! Give it up for these two warriors! They are putting on a show!
El Guapo lands a decent elbow from side control.
Show wants to get back to his feet.
Show is looking to reverse the position.
El Guapo is putting a hurting on Show here, landing some big shots from side control.
Show takes a nasty elbow to the side of the head.

Show is rocked!
El Guapo scores with a big shot from side control... and another... and another! Oh Show is done here - save him referee! More strikes land and eventually the ref does step in and El Guapo can finally stop beating on his defenseless opponent!
Ladies and gentlemen, after 2:03 of round 1, we have a winner by way of TKO (Strikes). Conchito El Guapo!
Our winner, Conchito El Guapo, made sure he spent some time buttering up the crowd during his post fight interview, which will no doubt bring him a few more fans.
|
|
|
|
|
|
|
|
|
|
|
|
|
|
|
|
|
|
|
|
|
|
|
| S |
C
A |
G |
S |
C
B |
G |
|
S |
C |
G |
|
energy
A | B |
|
hype
A | B |
|
pop
A | B |
|
mgr
A | B |
|
FIGHT
RATING
66% |
|
|
|
|
|
|
|
Undercard bout
|
|
|
|
Undercard bout
|
Coming up we have a light heavyweight MMA rules bout between Dima Huxley (ranked 0 p4p, 0 weight class) and Leon Hansen (ranked 0 p4p, 0 weight class). Leon Hansen is the more experienced fighter, so let's see if that makes a difference tonight.
 |
|
 |
| 187 cm
22
210 lbs
3 - 0 - 0 |
|
187 cm
31
218 lbs
17 - 9 - 0 |
BJJ Purple Belt
Great elbows
Insanely flexible |
|
Good wrestler
Excellent boxer
Good gas tank |
|
| |
|
Ladies and gentlemen. This fight is 3 rounds, in the light heavyweight division.
Introducing the fighter to my left, fighting out of the red corner.
With a record of
3 - 0 - 0, fighting out of Los Angeles, Dima Huxley!
And introducing the fighter to my right, fighting out of the blue corner.
With a record of
17 - 9 - 0, fighting out of Los Angeles, Leon Hansen!
The judges for this bout are Don Winkell, Timothy Bukovac and Jack Bonds.
The bell rings for round one and we are underway!
Hansen scores with a jab.
Hansen lands a right hook to the body.
Huxley showing good head movement there, avoiding the strikes from Hansen.
Hansen tries to score a power double leg takedown but Huxley sees that one coming and sprawls well. That will dishearten Hansen somewhat.
Hansen gets his head snapped back by a nice shot there.
Hansen cracks a nice hook into Huxley's ribs.
Hansen digs a good hook to Huxley's body.
Huxley tries a switch kick but it misses it's target.
Hansen throws a body punch but Huxley moves out of range.
We've seen a great period of action over the last minute or so - credit to both fighters for going all out!
Hansen fakes with the hands and throws a leg kick but Huxley is out of range.
Huxley swings wildly with a couple of big hooks
and Hansen counters with a quick right hand to the jaw.

It looks like Dima Huxley has been cut.
That's one minute gone in the round.
Huxley thows a body kick. Hansen tries to catch it but that hurt him.
Hansen stuns Huxley with a nice body shot, before stepping back out of range.
Hansen tries to check the leg kick but that clearly hurt him.
Hansen throws a low kick but it's checked well by Huxley.
Huxley throws out a token jab with nothing on it.
Huxley connects with a good right hand that stumbles Hansen. Hansen circles away out of range and recomposes himself.
Hansen lands a jab-cross combination.
This has been an exciting period of action!
Huxley drops his hands momentarily and Hansen takes advantage with a crisp shot to the head.
Hansen swinging wildly here.
Huxley thumps Hansen with a low kick.
Huxley lands a head kick. Hansen smiles back at him and beckons him forward.
Danga de danga de dang - Huxley scores with a four punch combination!
That's two minutes gone in the round.
Huxley throws the kick towards the body but Hansen avoids it.
Huxley throws a front kick that sends Hansen stumbling back into the cage.
Hansen fails with a takedown attempt from distance.
Dima Huxley is looking to keep the fight on the feet at all costs.
Hansen on the receiving end of a decent leg kick there by Huxley. Huxley obviously looking to wear him down.
Hansen misses with a straight right.
A leg kick checked by Hansen.
Huxley throws a head kick that connects with a bit of head and a bit of hand.
Hansen lands with a cross to side of his opponent's head.
Huxley lands a jab to the nose.
Huxley tries a head kick but it misses.
Huxley throws a nice head kick!
Hansen thows a left - swing and a miss!
Nice cross by Huxley.
That's three minutes gone in the round.
Huxley looks to land a body kick but Hansen moved away.
Huxley turns his hip over beautifully as he lands a nice leg kick.
Hansen lands a slapping body shot.
Hansen decides to change it up a bit and drives through with a nice takedown into half guard.
Hansen throwing punches and elbows but they're not doing any damage.
Huxley blocking the ground and pound attempt from Hansen.
Huxley on his back here. We all know that wrestlers don't like being on their back so let's see if Huxley tries to get out of the position.
Huxley is doing well to control the position and prevent Hansen from advancing to side control.
Hansen wants to pass to mount but Huxley is defending the position.
That's four minutes gone in the round.
Hansen is persisting with the attempt to improve his position.
Hansen misses with a head shot. Huxley uses the momentum to regain guard.
Huxley utilising some decent striking defenses from the guard, preventing the ground and pound.
This is a great period of action - very entertaining stuff!
Hansen sitting in guard here, content to control.
The crowd are going absolutely nuts as the round comes to an end - what a fantastic round of action!
Hansen throws a big right hand that misses.
Hansen working some strikes from top position.
And thats the end of the round the fighters go back to their corners.
A close round but Leon Hansen will probably get the nod.
The cut man is working on Dima Huxley's cut.
Well, the break between rounds is over. Let's get back to the scrappin!

Hansen misses with a shot to the body
letting Huxley counter with a right hand.
Hansen throws out a loose jab but Huxley uses good head movement to avoid it.
Hansen loads up on a big right hand but Huxley slips the punch.
Hansen blocks a head kick by Huxley.
Hansen moves forwards but Huxley connects with a nice, crisp jab.
Huxley stuffs the takedown attempt from Hansen. Hansen gets slowly back to his feet.
Hansen lands with a shot to the body.
Leon Hansen seems to be getting the better of the standup.
Hansen scores with a jab to the head.
No luck for Hansen with that takedown attempt.
A looping hook to the body misses from Hansen. Huxley does a little dance to reset his feet.
Huxley misses with an uppercut.
That's one minute gone in the round.
Ouch! a nice leg kick from Huxley, right into the meat.
Huxley misses with a leg kick.
Hansen swings wildly with a right hand that was never going to find it's target.
Huxley chopping away at his opponent's legs.
Huxley pushes Hansen away with a front kick.
Hansen throws a wild combination but nothing lands.
Huxley throws a head kick that looked like it stung.
Dima Huxley is looking to throw some combinations by the looks of things.
Huxley lands a nice leg kick that just misses Hansen's sensitive parts.
Huxley throws a body kick that digs right into the meat.
Hansen is breathing heavily.
We've seen a great period of action over the last minute or so - credit to both fighters for going all out!
The fighters are starting to perspire pretty heavily.
Huxley has his head snapped back a nice jab. A little nod from Huxley there as he acknowledges the shot.
Hansen shakes his hands off, looking to compose himself, but takes a jab to the jaw whilst he does it.
Huxley with a nice looking leg kick. You could hear that one land in a back row.
Hansen moves his head to the side to avoid a jab but walks straight into a cross.
That's two minutes gone in the round.
A decent looking body kick lands there for Huxley.
Hansen misses with a wild body shot.
Hansen has his front leg slapped to the side - a nice low kick landing there from Huxley.
Huxley throws a head kick that looked like it stung.
Huxley lands with a head kick! That's gotta hurt.
Huxley throws a nice outside leg kick.
Huxley moves out of range of the strikes.
Hansen's leg has a nasty welt from taking a succession of leg kicks. That must be slowing him down.
Hansen shoots for a takedown but Huxley saw that one coming a mile off and avoided it easily.
Dima Huxley has stuffed three takedown attempts in the round now. That's going to take a lot out of Leon Hansen.

Huxley gets in close and instigates a clinch.
Huxley lands an elbow inside.
Huxley connects with a knee to the head.

Hansen is rocked!
Huxley scores with a knee to the head.
Hansen is still on wobbly legs! Can Huxley finish him?
Huxley working Hansen over with knees to the body.
Huxley has Hansen pressed up against the cage in a tight Thai clinch. Hansen is arching his back, trying to avoid the knees but a big one sneaks through from Huxley - that's hurt Hansen badly! Oh, another knee lands and Hansen is covering up! The referee steps in to save him - possibly a bit early but Hansen doesn't seem to be complaining.
Ladies and gentlemen, after 3:01 of round 2, we have a winner by way of TKO (Knees). Dima Huxley!
Dima Huxley spent the whole post fight interview bigging himself up. It didn't go down that well with the fans after a while as they thought it was a big arrogant.
|
|
|
|
|
|
|
|
|
|
|
|
|
|
|
|
|
|
|
|
|
|
|
| S |
C
A |
G |
S |
C
B |
G |
|
S |
C |
G |
|
energy
A | B |
|
hype
A | B |
|
pop
A | B |
|
mgr
A | B |
|
FIGHT
RATING
81% |
|
|
|
|
|
|
|
Undercard bout
|
Coming up we have a welterweight MMA rules bout between Master Blaster (ranked 0 p4p, 0 weight class) and Kris Kringle (ranked 0 p4p, 0 weight class). Blaster comes to the cage accompanied by The Number of The Beast - Iron Maiden. Over to our ring announcer for the fighter introductions!
 |
|
 |
| 178 cm
31
178 lbs
16 - 5 - 0 |
|
189 cm
26
175 lbs
9 - 6 - 0 |
Good takedowns
Solid boxing
Big right hand |
|
BJJ Purple Belt
Decent boxing
Determined |
|
| |
|
Ladies and gentlemen. This fight is 3 rounds, in the welterweight division.
Introducing the fighter to my left, fighting out of the red corner.
With a record of
16 - 5 - 0, fighting out of Los Angeles, Master Blaster!
And introducing the fighter to my right, fighting out of the blue corner.
With a record of
9 - 6 - 0, fighting out of Los Angeles, Kris Kringle!
The judges for this bout are Timothy Bukovac, Jack Bonds and Don Winkell.
The bell rings for round one and we are underway!
Kringle looking to shoot here. He's gone for it and he's landed a takedown into mount! Oh, that's bad for Blaster!
Kringle throws an elbow from mount that misses. Lucky escape for Blaster because Kringle loaded up on that one.
Kringle lands a big elbow.
Kringle throws an elbow from mount that misses. Lucky escape for Blaster because Kringle loaded up on that one.
Blaster throwing hammer fists to the chest of Kringle. What's that going to do exactly?
The ref warns both fighters not to hold the cage as they work up against the meshing.
Blaster is looking to improve his position but Kringle isn't that keen on the idea.
Blaster taking shots to the head.
Blaster really trying hard to get back to half guard here.
Blaster has been looking to land a fair amount of strikes on the ground. He might be looking to soften his opponent up in order to work for a submission.
Kringle sends his fist crashing into the mat - the crowd let out a collective ooooooh. Let's hope he's not broken it!
Blaster really trying hard to get back to half guard here.
Wooooo! Give it up for these two warriors! They are putting on a show!
Blaster flailing away with punches but nothing is landing.
Blaster throwing hammer fists to the chest of Kringle. What's that going to do exactly?
Kringle blocks Blaster's feeble attempts to strike from the bottom.
Kringle landing strikes, looking to finish!
Blaster is looking to get to half guard.
That's one minute gone in the round.
Kringle lands a couple of nice shots there from mount.
Both fighters really going for it on the ground here!
Kringle blocks Blaster's feeble attempts to strike from the bottom.
Kringle blocks Blaster's feeble attempts to strike from the bottom.
Blaster is in a horrible position here. Kringle smacks him with another shot as he tries to escape the position.
Kringle punishing his opponent with strikes.
Kringle postures up and cracks his opponent a couple of times before moving back into close ground control. Blaster looks a forlorn figure.
The crowd cheering loudly, showing their appreciation for the quality fight we're seeing here.
Blaster working to try and regain half guard.
Blaster slips a leg in and gets back to half guard.
Blaster misses with some strikes from the bottom.
Kringle thumps the canvas. Not on purpose obviously - he just missed Blaster's head.

Blaster looking for submissions off his back.
Blaster manages to get to full guard.
That's two minutes gone in the round.
Kringle sneaks a leg through and gets to half guard. That was like a knife through butter how easily he passed Blaster's guard.
Blaster tries to get to full guard but Kringle has control of the leg.
Blaster is looking to sinch up a guillotine here but Kringle pulls his head out easily.
Kringle is scoring with some nice ground and pound from the dominant position.
Blaster is looking to improve his position.
Blaster might be looking to lock onto one of his opponent's long limbs for a submission, whilst we're on the ground.
Blaster looking for submissions from an awkward position here.
Kringle wants to lay and pray for a moment but Blaster keeps working.
Kringle passes the guard and advances to mount!
That's three minutes gone in the round.
Blaster tries to reverse the position but Kringle maintains control.
Kringle landing shots from mount.
Blaster is trying desperately to improve position.
Kringle pausing momentarily but resumes with a couple of decent strikes that do a bit of damage.
Kringle lands a shot to the body, followed up by a shot to the exposed head of his trapped opponent.
Kringle lands an elbow that was bordering on illegal but the referee lets it go with a warning.
Kringle looking to finish Blaster with some ground and pound. This is bad for Blaster!
Fantastic stuff here - a very entertaining period of action, which has drawn cheers from the crowd.
Kringle looking to control but Blaster is working nicely, looking to advance position himself.
That's four minutes gone in the round.
Blaster working to try and regain half guard.
Blaster is working hard here to advance position.
Kringle working away from the top, dropping strikes.
Blaster is looking to improve his position but Kringle isn't that keen on the idea.
Kringle lands with some strikes.
Kringle lands with some vicious ground and pound - can Blaster hang on?
Blaster is rocked!
Kringle in mount throwing good strikes here, bouncing his opponent's head off the canvas.
Oh Blaster is still in real trouble! Will he be able to recover?!!
Kringle unloads with some vicious shots from mount and Blaster wants out - he looks towards the referee who steps in to save him! Kringle celebrates on the cage and the crowd goes wild!
Ladies and gentlemen, after 4:58 of round 1, we have a winner by way of TKO (Strikes). Kris Kringle!
|
|
|
|
|
|
|
|
|
|
|
|
|
|
|
|
|
|
|
|
|
|
|
| S |
C
A |
G |
S |
C
B |
G |
|
S |
C |
G |
|
energy
A | B |
|
hype
A | B |
|
pop
A | B |
|
mgr
A | B |
|
FIGHT
RATING
85% |
|
|
|
|
|
|
|
Undercard bout
|
Coming up we have a light heavyweight MMA rules bout between Ryan Kikkazz (ranked 0 p4p, 0 weight class) and Angel BloodWing (ranked 0 p4p, 0 weight class). Kikkazz comes to the cage accompanied by Love The Way You Lie - Eminem. Over to our ring announcer for the fighter introductions!
 |
|
 |
| 182 cm
25
212 lbs
1 - 0 - 0 |
|
190 cm
20
215 lbs
6 - 3 - 0 |
BJJ Blue Belt
Basic striking
Very strong |
|
BJJ Blue Belt
Decent boxing
Knockout power |
|
| |
|
Ladies and gentlemen. This fight is 3 rounds, in the light heavyweight division.
Introducing the fighter to my left, fighting out of the red corner.
With a record of
1 - 0 - 0, fighting out of Los Angeles, Ryan Kikkazz!
And introducing the fighter to my right, fighting out of the blue corner.
With a record of
6 - 3 - 0, fighting out of Los Angeles, Angel BloodWing!
The judges for this bout are Timothy Bukovac, Frank Antenori and Don Winkell.
The bell rings for round one and we are underway!
Kikkazz gets taken down but at least he's managed to land in guard.
If this pace continues, the referee will definitely step in and force a standup.
Kikkazz is looking for a triangle but BloodWing pushes his legs off easily.
Kikkazz has an active guard here but BloodWing has managed to pass into half guard.
Kikkazz avoiding damage under a succession of punches from BloodWing.
Kikkazz won't allow BloodWing to pass to mount.
Kikkazz is looking to sinch up a guillotine here but BloodWing pulls his head out easily.
BloodWing is keen to just control but Kikkazz is a slippery customer.
It looks like BloodWing is going to stand back up.
BloodWing is keeping good posture, landing some ground and pound.
Kikkazz is staying active underneath BloodWing, who seems content to just control the action from this position.
Kikkazz is looking to sinch up a guillotine here but BloodWing pulls his head out easily.
That's one minute gone in the round.
Kikkazz looking for submissions off his back.
BloodWing tries to pass to full mount but Kikkazz defends it.
BloodWing is looking to pass the guard... He's managed it - he's now in full mount!
BloodWing lands a heavy elbow.
BloodWing lands a nice shot to the head.
BloodWing blocks Kikkazz's feeble attempts to strike from the bottom.
Kikkazz is desperately trying to get back to half guard.
BloodWing looking for an armbar but decides to keep the dominant position instead.
Kikkazz really trying hard to get back to half guard here.
That's two minutes gone in the round.
BloodWing putting on the heat here with some good ground and pound!
The crowd are loving this. Great action here.
Kikkazz keeping his composure momentarily, calmly looking to get back to half guard.
BloodWing tries to control but Kikkazz wriggling away.
Kikkazz working to try and regain half guard.
BloodWing raining down shots from the mount!
Kikkazz can't escape the position.
That's three minutes gone in the round.
Kikkazz is mounted and he's throwing punches. Is that wise?
BloodWing has hold of an arm here, looking to extend it. He's committed to the armbar attempt here! Will he get it?! Yes! Kikkazz is forced to tap!
Ladies and gentlemen, after 3:37 of round 1, we have a winner by way of Submission (Armbar). Angel BloodWing!
An out of breath and clearly excited Angel BloodWing thanked Charlie Wang's Nutrition and 95 % Laundry for their help and support (and free stuff they sent him).
|
|
|
|
|
|
|
|
|
|
|
|
|
|
|
|
|
|
|
|
|
|
|
| S |
C
A |
G |
S |
C
B |
G |
|
S |
C |
G |
|
energy
A | B |
|
hype
A | B |
|
pop
A | B |
|
mgr
A | B |
|
FIGHT
RATING
51% |
|
|
|
|
|
|
|
Undercard bout
|
Coming up we have a middleweight MMA rules bout between Bill Brasky (ranked 0 p4p, 0 weight class) and Taco Grande (ranked 0 p4p, 0 weight class). These two fighters really are very evenly matched on the feet - it will be fascinating to see who can assert themselves in that aspect of the fight.
 |
|
 |
| 185 cm
24
201 lbs
6 - 3 - 0 |
|
193 cm
21
204 lbs
3 - 2 - 0 |
BJJ Purple Belt
Excellent boxer
Insanely flexible |
|
Good wrestler
Excellent MT
Good gas tank |
|
| |
|
Ladies and gentlemen. This fight is 3 rounds, in the middleweight division.
Introducing the fighter to my left, fighting out of the red corner.
With a record of
6 - 3 - 0, fighting out of Los Angeles, Bill Brasky!
And introducing the fighter to my right, fighting out of the blue corner.
With a record of
3 - 2 - 0, fighting out of Los Angeles, Taco Grande!
The judges for this bout are Timothy Bukovac, Frank Antenori and Jack Bonds.
The bell rings for round one and we are underway!
Grande thows a body shot but no joy.
Brasky scores with a jab.
Grande tries to clinch but Brasky moves out of range.
Brasky missing with a left hand there. Grande was out of range so wasted energy throwing that one.
Brasky uses some good footwork to avoid the body shot by Grande.
Nice defenses there by Brasky.

Grande instigates a clinch.
Grande wants a takedown but no success here.
Brasky misses with a hook from the clinch.
Grande misses with a short punch on the inside.
Brasky has had enough of the clinch and is looking to separate.

Grande pushes off and circles away, back to the middle of the mat.
Brasky buckles his opponent's knee momentarily with a nice leg kick.
Brasky punishes Grande's body with a nice straight punch.
Grande takes a body punch but keeps moving.
The crowd cheering loudly, showing their appreciation for the quality fight we're seeing here.
Grande steps to the side to avoid the strikes from Brasky.
Grande fails to land with a series of punches.
Brasky will need to tighten up his combinations if he doesn't want to gas himself out, swinging at thin air.
That's one minute gone in the round.
Brasky swings wildly with a right hand that was never going to find it's target.
Brasky lands a jab-cross combination.
Brasky misses with a low kick as Grande jumps back.
Grande misses with a body shot.
Grande works the jab nicely.
Brasky lands with a cross to side of his opponent's head.
Brasky lands with an uppercut that bounces Grande off the cage and back into range.
Brasky connects with a lovely right hand, straight down the pipe.
Grande uses good footwork to get in and out, landing a nice hook.
Grande bobbing and weaving, closes the distance and lands a hook to the side of Brasky's head.
Brasky lands with a kick to the temple. Grande shrugs as if to say "is that all you've got?"
The crowd cheering loudly, showing their appreciation for the quality fight we're seeing here.
Grande is looking to clinch but Brasky is avoiding it.
Brasky throws a hook to the body but it doesn't connect.
Brasky throws an overhand right that lands on Grande's shoulder, as Grande tries to avoid the shot.
That's two minutes gone in the round.
Brasky does a little shimmy and throws a leg kick. The leg kick missed by a considerable margin though, making him look a little bit silly for doing the shimmy.
Brasky throws the kick towards the body but Grande avoids it.
Grande has closed the distance and engaged Brasky in a clinch.
Grande keeps control of Brasky as he tries to wriggle out of the double underhooks.
Grande wants a takedown but no success here.
Brasky misses with a shot to the kidneys.
Grande breaks the clinch.
Brasky blocks a head kick by Grande.
A big left from Brasky misses.
Grande thows a body shot but no joy.
Brasky lands a nice hook to Grande's body. Grande takes it in his stride and looks to land his own strikes.
Grande gets cracked there but stands up to it.
Brasky finds nothing but air with that leg kick attempt.
A punch combination from Brasky misses.
Grande looks to score with a jab to the body but Brasky is just out of range.
Brasky lands with a good body shot.
Grande looks gassed!
That's three minutes gone in the round.
Brasky throws out a token jab with nothing on it.
Grande looks to score with a jab to the body but Brasky is just out of range.
Bill Brasky is looking to keep the fight on the feet at all costs.
Brasky takes the fight into the clinch.
Brasky misses with a shot to the kidneys.
Brasky tries to land a knee to the head but misses.
Grande with the Thai clinch. He's looking to land a big knee but he's not managed it this time.
Grande escapes the clinch and we're back to striking.
Grande throws a low kick but it's checked well by Brasky.
A shot to the liver by Brasky. Beautiful body shot.
Brasky throws a shot to the body.
Brasky scores with a nice one two combo and darts back out of range to avoid anything coming in the opposite direction.
Grande slips under a jab.
Grande scores with a spinning back kick!
This is a great period of action - very entertaining stuff!
Brasky tries to close the distance and clinch up but Grande swats him away and circles back towards the center.
That's four minutes gone in the round.
Grande tries to close the distance and clinch up against the cage but Brasky paws at him with a jab and circles away.
Grande avoids a kick to the body.
Brasky slips a jab from Grande.
Brasky takes a swing at Grande's ribcage but misses.
Nice cross by Brasky.
Brasky closes the distance and lands a one-two.
Grande is rocked!
Grande looks to land a right hand but Brasky moved out of range.
Grande is still on wobbly legs! Can Brasky finish him?
A jab from Brasky finds it's way through Grande's defenses.
Well, he's not going to score with shots like that. A lazy body kick attempt from Grande.
Brasky Rushes Grande and starts throwing punches like they are going out of style! Grande is up against the cage and has nowhere to go. Brasky Piles on the pressure and Grande crumples to the floor! This one is all over!
Ladies and gentlemen, after 4:40 of round 1, we have a winner by way of TKO (Strikes). Bill Brasky!
Bill Brasky seemed lost for words in his post fight interview but he remembered to thank his fans and directed everyone to his website.
|
|
|
|
|
|
|
|
|
|
|
|
|
|
|
|
|
|
|
|
|
|
|
| S |
C
A |
G |
S |
C
B |
G |
|
S |
C |
G |
|
energy
A | B |
|
hype
A | B |
|
pop
A | B |
|
mgr
A | B |
|
FIGHT
RATING
64% |
|
|
|
|
|
|
|
Undercard bout
|
Coming up we have a bantamweight MMA rules bout between Freddy Mak (ranked 0 p4p, 0 weight class) and eat Me (ranked 0 p4p, 0 weight class). Both fighter's entrance songs getting the crowd jumping here.
 |
|
 |
| 174 cm
20
140 lbs
5 - 1 - 0 |
|
150 cm
28
139 lbs
14 - 10 - 0 |
Powerful takedowns
Solid boxing
Very quick |
|
BJJ Purple Belt
Counter striker
Granite chin |
|
| |
|
Ladies and gentlemen. This fight is 5 rounds, for the bantamweight championship of the world!
Introducing the champion to my left, fighting out of the red corner.
With a record of
5 - 1 - 0, fighting out of Los Angeles, Freddy Mak!
And introducing the challenger to my right, fighting out of the blue corner.
With a record of
14 - 10 - 0, fighting out of Los Angeles, eat Me!
The judges for this bout are , Don Winkell and Frank Antenori.
The bell rings for round one and we are underway!
Mak looking for a takedown here - he's got it.
Mak missing there with some ground and pound from the guard.
Mak throwing strikes but missing.
Mak pressing down on his opponent's thigh, looking to pass guard. Me is keeping the position for now.
Mak cracks Me with a solid left hand.
Me is looking to get back to his feet but can't, whilst Mak is controlling him.
Mak is in close to Me's body, working some short punches and elbows.
Mak pressing down on his opponent's thigh, looking to pass guard. Me is keeping the position for now.
Me is looking to stand back up... there's a bit of a scramble and Mak dives into side control.
Me tries to get back to half guard but can't.
Mak throwing strikes but missing, from side control.
Mak is trying to ground and pound but Me uses the momentary lack of control by Mak to regain half guard.
Mak is keeping good posture, landing some ground and pound.
That's one minute gone in the round.
Me on the receiving end of some nice ground and pound.
Mak stops Me from getting back to his feet.
The fighters are pressed up against the cage, both looking to find a bit of space to work.
Mak is looking for a kimura. It's going to be difficult to finish that from half guard though and Me defends it well.
Me avoiding damage under a succession of punches from Mak.
Mak works his way into side control.
Me trying to control but Mak flips him over like a cheap hooker and has his back!
Both fighters really going for it on the ground here!
Mak looking to break Me's wrist control so he can sink in the choke. Me remaining controlled and patient though - he really has to keep calm otherwise Mak will wrap this one up with the rear naked choke!
Me defends a rear naked choke attempt by controlling one of Mak's arms.
This has been an exciting period of action!
Me is trying to stand back up.
Mak looking for the RNC.
That's two minutes gone in the round.
Mak working for a RNC but it's not happening just yet.
Me is trying to get back to his feet but Mak has full control of the position and if anything, Me has just worked his way into a worse spot.
Mak cracks Me with a big shot to body and one to the head - really punishing Me from the back mount here, looking to soften him up.
Mak is remaining active here, looking for the choke. The more discerning members of the crowd will appreciate his efforts.
Mak lands a shot to the head.
Me covers up after that shot from Mak.
Me is trying to remain composed but Mak is hammering down strikes to the side of his head.
That's three minutes gone in the round.
Me rolls and manages to get back to half guard. Nicely done.
Mak will need to keep those long limbs tucked in whilst he's on the ground, to prevent any submissions.
Mak tries to pass the half guard into mount. Me knows what he's doing though and prevents the attempt.
Me looks like he's trying to stand up.
Mak tries to pass to full mount but Me defends it.
Mak missing with the ground and pound from half guard.
Me wants to get back to his feet.
Mak seems to be looking for submissions.
Mak works his foot free and advances to mount.
Me is working to get back to half guard.
Me looks gassed!
Mak lands a shot to the body, followed up by a shot to the exposed head of his trapped opponent.
That's four minutes gone in the round.
Mak is still in mount, landing shots to his trapped opponent. Me can't stay in a position like this for much longer.
Mak lands with some vicious ground and pound - can Me hang on?
The fans in attendance giving it up for the two fighters, who have really let it all hang out in the last minute or so!
Mak looking to ground and pound his opponent to a finish here.
Mak scoring with strikes but Me is staying in there.
Mak postures up and connects with a big shot that has rocked Me badly. He's trying desperately to grab hold of Mak around the waist but Mak pushes him off and unloads with more strikes, forcing the referee to jump in and save him! Mak is the winner by TKO! Mak jumps onto the cage and shouts into the camera. "We did it momma!"
Ladies and gentlemen, after 4:37 of round 1, we have a winner by way of TKO (Strikes). Freddy Mak!
Freddy Mak is the new bantamweight champion!
|
|
|
|
|
|
|
|
|
|
|
|
|
|
|
|
|
|
|
|
|
|
|
| S |
C
A |
G |
S |
C
B |
G |
|
S |
C |
G |
|
energy
A | B |
|
hype
A | B |
|
pop
A | B |
|
mgr
A | B |
|
FIGHT
RATING
61% |
|
|
|
|
|
|
|
Co-main event
|
Coming up we have a light heavyweight MMA rules bout between Quinton Lind (ranked 0 p4p, 0 weight class) and Justin Lynch (ranked 0 p4p, 0 weight class). Lind's entrance music is Ice Cube & Dr Dre - Natural Born Killaz. A fine choice. Lynch has chosen Culture Club - Do You Really Want To Hurt Me as his entrance music. Well, I have no idea who's going to take this one!
 |
|
 |
| 182 cm
24
216 lbs
13 - 6 - 0 |
|
177 cm
27
215 lbs
20 - 10 - 0 |
Good wrestling
World class boxer
Cardio machine |
|
Good wrestler
World class boxer
Powerful |
|
| |
|
Ladies and gentlemen. This fight is 5 rounds, for the light heavyweight championship of the world!
Introducing the champion to my left, fighting out of the red corner.
With a record of
13 - 6 - 0, fighting out of Montreal, Quinton Lind!
And introducing the challenger to my right, fighting out of the blue corner.
With a record of
20 - 10 - 0, fighting out of Las Vegas, Justin Lynch!
The judges for this bout are Frank Antenori, Timothy Bukovac and .
The bell rings for round one and we are underway!
Lind throws a low kick but Lynch avoids it.
Lind blocks a head kick by Lynch.
Lind slips under a jab.
Lynch connects with a looping left hand that seems like it dazed Lind momentarily.
Lind lands a powerful looking uppercut that connected with his opponent's jaw.
Lind throws a hard body shot but it just misses.
Lind works over Lynch's head and body with a nice combination.
Lynch pivots as if he's going to throw a leg kick but stops half way.
Lynch lands a head shot.
Lynch looks to score with a jab to the body but Lind is just out of range.
Lind throws a body punch but Lynch moves out of range.
A swing and a miss from Lind.
The fans in attendance giving it up for the two fighters, who have really let it all hang out in the last minute or so!
An inside leg kick lands from Lind.
Lind tries to clinch but Lynch moves away
and Lynch counters with a stiff right hand.
That's one minute gone in the round.
Lynch pivots as if he's going to throw a leg kick but stops half way.
Lind throws a chopping leg kick but Lynch manages to avoid taking any serious damage.
Lynch with a body punch. A glancing blow.
Lind misses with a wild body shot.
Lind connects with a leg kick. He turned his hip over nicely there.
Lynch loads up on a big right hand but Lind slips the punch.
A shot to the liver by Lind. Beautiful body shot.
Well, he's not going to score with shots like that. A lazy body kick attempt from Lind.
A shot to the liver by Lynch. Beautiful body shot.
Lynch sizes up Lind with a pawing jab and scores with a straight right down the middle.
Lind connects with a leg kick. Lynch looked like he was expecting something else and didn't defend it.
The crowd cheering loudly, showing their appreciation for the quality fight we're seeing here.
Lynch moves into range and lands a nice leg kick.
Lind misses with a body shot. Nice footwork from Lynch.
That's two minutes gone in the round.
Lind scores with a nice right hand.
Lynch throws a leg kick but Lind checks it.
Lind misses with a body shot.
Lynch keeps Lind at a distance using the push kick.
Lind explodes with a nice body kick and back out of range. Nice work.
Lind feints and then cracks Lynch's leading leg with a nice low kick. He's obviously looking to slow Lynch down.
Lynch looks gassed!
Lynch moves out of range as Lind throws a body kick.
Lynch throws a leg kick
and Lind counters with a slapping leg kick.
Lind lands with a hook. Lynch tried to avoid it but it clipped the top of his head.
Lind scores with a jab to the body.
Lind misses with a body punch
and Lynch counters with a shot to the ribs. That looked like it hurt.
Lind darts in and clinches Lynch up against the cage.
That's three minutes gone in the round.
A short right from Lind.
Lind blocks an uppercut.
Lind tries to land a shot to the body but it's blocked.
Lind throws a hook to the body. More of an arm punch but it's all scoring with the judges.
A head punch blocked on the inside by Lind.
Lind struggles to land a body shot inside as Lynch controls his hands.
Lynch working hard to break the clinch.
Lind tried to land a shot to the body but connects with Lynch's elbow.
Lynch is looking to break free of the clinch but Lind has double underhooks.
Lynch misses with some punches.

Lind manages to break the clinch.
Lind lands with a kick to the ribs.
Lind tries to clinch but is not successful on this occasion.
Lynch will need to tighten up his combinations if he doesn't want to gas himself out, swinging at thin air.
Lind misses with a low kick as Lynch jumps back.
That's four minutes gone in the round.
Lind punishes Lynch's body with a nice straight punch.
We've seen a great period of action over the last minute or so - credit to both fighters for going all out!
Lynch avoids the clinch attempt nicely.
Lynch blocks a head kick by Lind.
Lind throws a nice hook to the body that draws an oooh from the crowd.
Lind tries to clinch but Lynch moves out of range.
Lind wants to clinch up but Lynch keeps it at a distance.
Lynch has his front leg slapped to the side - a nice low kick landing there from Lind.
Quinton Lind seems to be the more aggressive standup fighter in this bout.
Lind throws a sloppy head kick and Lynch moves out of range easily.
Lind moves out of range as Lynch throws a body kick.
The crowd are going absolutely nuts as the round comes to an end - what a fantastic round of action!
Lynch cracks Lind with a right hand to the side of the head.
Lind throws a leg kick that misses.
A nice inside leg kick there by Lynch. That's going to slow Lind down.
And thats the end of the round the fighters go back to their corners.
Quinton Lind dominated that round.
That's time! Lind's corner gives him a slap on the ass as he gets ready to fight.
Lind wings a very wild body shot but it does the job and lands to the midsection.
Lynch thows a body shot but no joy.
Lynch takes one on the button.
Lind throws a decent looking leg kick but it doesn't land clean.
Lind buckles his opponent's knee momentarily with a nice leg kick.
The fight moves into the clinch position.
A quick uppercut on the inside from Lind.
Lind is leaning against Lynch and scores with a nice uppercut to the body.
Lynch blocks a punch to the side of the head.
Lind prevents a body shot from Lynch.
Lind swings wildly with an uppercut but Lynch uses good head movement to avoid it.
A nice left hand lands by Lind.
This is a great period of action - very entertaining stuff!
Lind lands a nice looking hook to the body, against the cage.
Lynch is breathing heavily.
Lind escapes the clinch and we're back to striking.
Lind lands a right hook to the body.
That's one minute gone in the round.
Lynch on the wrong end of an overhand right that came out of nowhere.
Lind connects with the punch.
Lynch throws an off balance right hand
and Lind counters with a shot to the ribs. That looked like it hurt.
Lynch circles away from the clinch attempt.
Lind feints and then cracks Lynch's leading leg with a nice low kick. He's obviously looking to slow Lynch down.
Nice straight punches there by Lind. You know Roy Jones Jr respects the hands of Lind.
Lind tries to close the distance and clinch but Lynch swats him to one side with an open hand palm strike and circles away.
Lynch takes a step towards his opponent and connects with a left hand, before circling away.
Lynch misses with a leg kick.
Lind lands a nice shot to the body.
The crowd cheering loudly, showing their appreciation for the quality fight we're seeing here.
Lynch circles away from the clinch attempt.
A head kick misses from Lynch.
Quinton Lind is winning the standup battle so far.
That's two minutes gone in the round.
Lind scores with a sloppy right hand. Lynch should have avoided that one.
Lind tries to clinch but Lynch is having none of it.
Lynch rushes Lind and pushes him back against the cage in a clinch.
Lynch is working hard here but doesn't seem to be able to control effectively, up against the cage.
A short right from Lind.
Lynch swings wildly with an uppercut but Lind uses good head movement to avoid it.
Lind blocks a couple of punches on the inside.
A short right from Lind on the inside.
Lind lands a body punch - he's looking to wear down Lynch.
Lind makes some space for himself and lands an uppercut.
Lind misses with a body punch.
Lind can't find room to land a body shot as Lynch controls the action.
Lind lands a body punch.
Lind escapes the clinch and we're back to striking.
Lind swings wildly with a right hand that was never going to find it's target.
Lind lands an overhand left. A wild punch that just about connected.
That's three minutes gone in the round.
Lynch takes a really solid shot there but just smiles back and shrugs his shoulders.
Lynch is rocked!
Lind gets to the clinch - let's see what his plan is here.
Still in the clinch, Lind scores with a nice short uppercut.
Lynch is still on wobbly legs! Can Lind finish him?
Lind lands a nice shot to the body.
Lind is really dominating this fight. Is there anything that Lynch can do to turn this around?
Lind gets through Lynch's defenses to land a nice punch to the side of the head.
A short left from Lind.
Lind lands a big right hand that drops Lynch! The killer instinct kicks in and Lind finishes his opponent with a series of strikes from mount. A dominating finish by Lind!
Ladies and gentlemen, after 3:31 of round 2, we have a winner by way of TKO (Strikes). Quinton Lind!
Quinton Lind retains his light heavyweight title!
Quinton Lind took to the microphone after his victory and thanked his sponsors, Charlie Wang's Nutrition and 95 % Laundry for their support in the buildup to the fight.
|
|
|
|
|
|
|
|
|
|
|
|
|
|
|
|
|
|
|
|
|
|
|
| S |
C
A |
G |
S |
C
B |
G |
|
S |
C |
G |
|
energy
A | B |
|
hype
A | B |
|
pop
A | B |
|
mgr
A | B |
|
FIGHT
RATING
63% |
|
|
|
|
|
|
|
Main event
|
Coming up we have a featherweight MMA rules bout between Yuoki Akamara (ranked 0 p4p, 0 weight class) and Travis Hunter (ranked 0 p4p, 0 weight class). Akamara's entrance music is Illuminati. A fine choice. Travis Hunter has the eye of the tiger tonight.
 |
|
 |
| 182 cm
24
155 lbs
15 - 8 - 1 |
|
170 cm
26
141 lbs
16 - 7 - 0 |
Abu Dhabi Champ
Solid boxing
Very strong |
|
Good wrestler
Excellent boxer
Powerful |
|
| |
|
Ladies and gentlemen. This fight is 5 rounds, in the featherweight division.
Introducing the fighter to my left, fighting out of the red corner.
With a record of
15 - 8 - 1, fighting out of Los Angeles, Yuoki Akamara!
And introducing the fighter to my right, fighting out of the blue corner.
With a record of
16 - 7 - 0, fighting out of Los Angeles, Travis Hunter!
The judges for this bout are Timothy Bukovac, Frank Antenori and Jack Bonds.
The bell rings for round one and we are underway!
Akamara shoots in for a takedown - he's clinched up with Hunter but Hunter pushes him off and we're back to square one.
Hunter throws a combination but it was largely blocked by Akamara.
Akamara misses the shot to the body.
Hunter lands a slapping body shot.
Akamara looks for a takedown. He's got it. We're now in half guard.
Akamara scoring with strikes to the body and head.
Akamara thumps the canvas. Not on purpose obviously - he just missed Hunter's head.
Hunter is not content to let Akamara control the position.
Hunter is pressing down on Akamara's left leg trying to get back to full guard. He's managed it.
Akamara throwing strikes from guard but Hunter blocks nicely.
Hunter looking to sweep here. No luck so far.
Hunter is trying to keep Akamara in close.
That's one minute gone in the round.
Akamara in full guard, throwing the ground and pound. No damage this time.
Akamara with a flurry of punches that miss.
Hunter is trying to control the position from the bottom.
Akamara wants to control from the top but Hunter keeps moving.
Akamara throws an elbow that misses. Hunter uses the momentum to reverse the position. He's now in Akamara's guard. Nice move by Hunter!
Akamara has Hunter pulled in close to control his posture.
Akamara is working actively off his back, looking to secure an arm or perhaps work for a triangle.
The fighters are pressed up against the cage, both looking to find a bit of space to work.
Hunter trying to pass the guard but can't manage it just yet.
That's two minutes gone in the round.
Akamara escapes his hips to the side and looks to be working for an armbar. Hunter gives him a little smile and shakes his head. No chance.
Hunter works over Akamara with some ground and pound from guard.
Hunter lying in Akamara's guard like a wet fish here, stalling away. Akamara decides he's had enough of all that nonsense - he escapes his hips and locks up an armbar! Wow, that was slick! Hunter taps! This one is aaaaaaaaaaall over!
Ladies and gentlemen, after 2:34 of round 1, we have a winner by way of Submission (Armbar). Yuoki Akamara!
|
|
|
|
|
|
|
|
|
|
|
|
|
|
|
|
|
|
|
|
|
|
|
| S |
C
A |
G |
S |
C
B |
G |
|
S |
C |
G |
|
energy
A | B |
|
hype
A | B |
|
pop
A | B |
|
mgr
A | B |
|
FIGHT
RATING
48% |
|
|
|
|
|
|
|
|
|
|
