 |
RISE #7 - Blood on Leidseplein PBP Commentary |
Undercard bout
|
|
|
|
Undercard bout
|
|
|
|
Undercard bout
|
|
|
|
Undercard bout
|
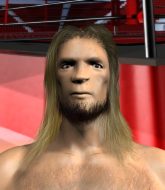
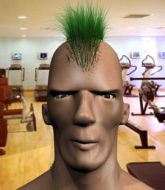
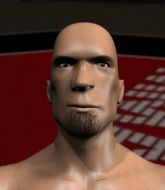
Coming up we have a super heavyweight MMA rules bout between Conan Silpoja (ranked 0 p4p, 0 weight class) and Hansi Horseshead (ranked 0 p4p, 0 weight class). Horseshead comes into a darkened arena with his song building. Oasis - Wonderwall kicks in, the lights come on and the crowd goes wild! What a showman! Hansi Horseshead told me before the fight that he's been watching a lot of DVDs so let's see if that helps him in this one! I can't wait to find out!
 |
|
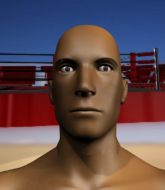 |
| 208 cm
20
272 lbs
0 - 0 - 0 |
|
202 cm
20
285 lbs
2 - 0 - 0 |
Good wrestling
Great elbows
Cardio machine |
|
BJJ Blue Belt
World class boxer
Granite chin |
|
| |
|
Ladies and gentlemen. This fight is 3 rounds, in the super heavyweight division.
Introducing the fighter to my left, fighting out of the red corner.
With a record of
0 - 0 - 0, fighting out of Helsinki, Conan Silpoja!
And introducing the fighter to my right, fighting out of the blue corner.
With a record of
2 - 0 - 0, fighting out of Amsterdam, Hansi Horseshead!
The judges for this bout are Paulsen Ambrosius, Radbod Blank and Albert Achterberg.

The bell rings for round one and we are underway!
Horseshead misses with a jab and misses with a cross straight after too.
Horseshead is the aggressor but that punch slipped nicely by Silpoja.
Horseshead swings away but doesn't land with a series of punches.
Horseshead scores with a decent looking hook.
Silpoja ducks under a wild hook from Horseshead.
Horseshead rushes forward with a series of wild hooks but Silpoja moves out of range and avoids them all easily.
Horseshead throws a front kick aimed at Silpoja's knee but Silpoja avoids it well.
Silpoja tries to move into range but Horseshead moves to the side and lands with a nice right hand.
The crowd cheering loudly, showing their appreciation for the quality fight we're seeing here.
Silpoja dodges the punch combination from Horseshead.
Horseshead misses with a jab and misses with a cross straight after too.
Horseshead misses with a combination

so Silpoja counters with a double leg into guard. Good agility.
The referee claps his hands together and tells the fighters to work.
Silpoja won't allow Horseshead to get back to his feet.
Silpoja connects with a couple of short punches.
Silpoja wants to control from the top but Horseshead keeps moving.

That's one minute gone in the round.
Silpoja postures up and scores with a shot to the body and a follow up elbow to the head.
Silpoja has been looking to land a fair amount of strikes on the ground. He might be looking to soften his opponent up in order to work for a submission.
Silpoja lands a couple of decent looking shots.
Horseshead has momentary wrist control but Silpoja slips an elbow through the middle.
Silpoja won't allow Horseshead to get back to his feet.
Silpoja makes a bit of distance and scores with some ground and pound, still in guard.
Silpoja is looking to work some ground and pound but Horseshead has wrist control.
Horseshead has momentary wrist control but Silpoja slips an elbow through the middle.
Silpoja is working Horseshead over from the guard. He should look to pass the guard and do a little more damage with these strikes.
The fans in attendance giving it up for the two fighters, who have really let it all hang out in the last minute or so!
Silpoja working some ground and pound from guard but it's not doing any damage.
Silpoja landing some decent shots from guard.
Silpoja with a nice head shot there.

That's two minutes gone in the round.
Silpoja prevents Horseshead from getting back to his feet.
Silpoja works over Horseshead with some ground and pound from guard.
Horseshead really doesn't want to stay on the ground with Silpoja. If he can't get it back to his feet, it's only a matter of time before he'll be tapping out.
Silpoja scoring with punches to the head and body.
We get told so often about how wrestlers don't like to be on their backs. Let's see if Horseshead can do anything to dispel that myth.
Silpoja scores with a decent looking elbow strike.
Silpoja with a couple of shots to the head there. Not particularly brutal.
Silpoja not doing a lot at the moment. He'll have to show some more aggression or the fight will get stood up.
Silpoja lands a couple of elbows.
Silpoja keeps in close for a moment and lands a decent shot to the side of Horseshead's head.
Silpoja is working the ground and pound from guard. He might want to try advancing position though to get more of an impact.
Silpoja slows down the pace of the fight, as he sits in guard.
Silpoja trying to control the position from guard on top but Horseshead is wriggling around, looking for whatever he can.

That's three minutes gone in the round.
Silpoja lands a couple of decent looking shots.
Silpoja is working the ground and pound from guard. He might want to try advancing position though to get more of an impact.
Silpoja lands a couple of digs.
Silpoja throwing strikes from guard but Horseshead blocks nicely.
Silpoja looking to control the position here, rather than advance.

That's four minutes gone in the round.
Silpoja passes easily into side control. Nice work.
Silpoja scores with punches from side control.
We've seen a great period of action over the last minute or so - credit to both fighters for going all out!
Silpoja lands a knee to the body and follows it up with some ground and pound to the head. That will wear Horseshead down.
Silpoja landing with strikes to the head and body from side control.
A lull in the action here.
Horseshead is not in a great position here, taking some shots.
The crowd are going absolutely nuts as the round comes to an end - what a fantastic round of action!
Horseshead takes a nasty elbow to the side of the head.
Horseshead wants to get back to his feet but Silpoja is dominant here and he's now got Horseshead's back!
And thats the end of the round the fighters go back to their corners.
Conan Silpoja dominated that round.
The minute break is over - no more time for sponges and pep talks - back to the action!

Horseshead with a body punch. A glancing blow.
Horseshead keeps the fight standing with a nice sprawl.
Horseshead throws out a loose jab but Silpoja uses good head movement to avoid it.
A cross from Horseshead lands.
Horseshead just misses with a punch to the body.
A combination from Horseshead does no damage.
Horseshead connects with a body shot.
A momentary lapse in concentration from Horseshead enables Silpoja to shoot in and score with a neat double leg. Horseshead manages to secure a closed guard as the fighters hit the mat.
Fantastic stuff here - a very entertaining period of action, which has drawn cheers from the crowd.
Silpoja passes Horseshead's right leg, so he's now in half guard.
Nice strikes from Silpoja there.
Silpoja working Horseshead over with strikes.
Silpoja scoring with strikes to the body and head.
That's one minute gone in the round.
Silpoja working Horseshead over with strikes.
Horseshead is trying to stand.
The referee walks around the fighters to get a better view of the action. Silpoja lands a nice short elbow.
Silpoja is keeping good posture, landing some ground and pound.
Silpoja trying to control from half guard but Horseshead is working away.
Horseshead is trying to stand.
Horseshead is breathing heavily.
Ground and pound from Silpoja.
Silpoja moves into full mount! Horseshead won't be happy about that!
Silpoja lands with some strikes.
We've seen a great period of action over the last minute or so - credit to both fighters for going all out!
Silpoja lands a big shot there that rocks Horseshead but he's holding on and managing to survive for now.
That's two minutes gone in the round.
Silpoja working Horseshead over with strikes here.
Silpoja working away from the top, dropping strikes.
Horseshead takes a big shot to the head but keeps on trying to improve his position.
Silpoja is really dominating this fight. Is there anything that Horseshead can do to turn this around?
Horseshead wants to use the cage to get back to his feet here.
Silpoja landing shots from mount.
Silpoja working the ground and pound effectively.
Silpoja has his opponent pinned against the cage, landing some nasty ground and pound that is really making a bit of a mess out of Horseshead's face.
Silpoja pausing momentarily but resumes with a couple of decent strikes that do a bit of damage.
Silpoja landing shots from mount.
That's three minutes gone in the round.
Silpoja lands a heavy elbow.

Horseshead is rocked!
Silpoja cracks Horseshead with a big head shot that has him covering up instantly! He's rolled onto his side and the referee has seen enough - this one is aaaaaaaaaaall over!
Ladies and gentlemen, after 3:24 of round 2, we have a winner by way of TKO (Strikes). Conan Silpoja!
|
|
|
|
|
|
|
|
|
|
|
|
|
|
|
|
|
|
|
|
|
|
|
| S |
C
A |
G |
S |
C
B |
G |
|
S |
C |
G |
|
energy
A | B |
|
hype
A | B |
|
pop
A | B |
|
mgr
A | B |
|
FIGHT
RATING
79% |
|
|
|
|
|
|
|
Undercard bout
|
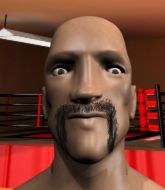
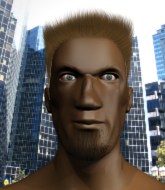
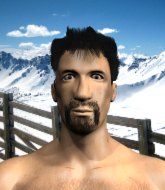
Coming up we have a super heavyweight MMA rules bout between Pvt. Duane Doberman (ranked 0 p4p, 0 weight class) and Lou Haggen (ranked 0 p4p, 0 weight class). Duane Doberman and Lou Haggen. Man, I cannot wait for this one!
 |
|
 |
| 180 cm
25
300 lbs
1 - 0 - 0 |
|
186 cm
24
224 lbs
1 - 2 - 0 |
BJJ White Belt
Solid boxing
KO power |
|
BJJ Blue Belt
Decent boxing
Heavy handed |
|
| |
|
Ladies and gentlemen. This fight is 3 rounds, in the super heavyweight division.
Introducing the fighter to my left, fighting out of the red corner.
With a record of
1 - 0 - 0, fighting out of London, Pvt. Duane Doberman!
And introducing the fighter to my right, fighting out of the blue corner.
With a record of
1 - 2 - 0, fighting out of Amsterdam, Lou Haggen!
The judges for this bout are Aafke Stam, Paul Aken and Wagner Zegers.
The bell rings for round one and we are underway!
Doberman misses with a low kick.
Doberman fakes a couple of low kicks, before throwing one on the third attempt. It connects and Haggen has to reset his feet before getting ready to engage.
Doberman slaps away a takedown attempt from Haggen, before circling back to the center of the mat.
Haggen rushes forward with a series of wild hooks but Doberman moves out of range and avoids them all easily.
Doberman lands a powerful looking uppercut that connected with his opponent's jaw.
This is a great period of action - very entertaining stuff!
Nice body punch from Doberman.
Haggen looks gassed!
Doberman fakes a jab and scores with a low kick.
Doberman throws a quick inside leg kick.
Doberman swings and misses with a hook to the body.
Haggen on the wrong end of a nice low kick. He's acting like it's no big deal but he doesn't want to take many more of those.
Doberman throws a jab to the body, straight down the pipe. Boom. That sent Haggen stumbling backwards but he manages to regain his composure quickly.
Haggen takes a body punch but keeps moving.
Doberman turns his hip over beautifully as he lands a nice leg kick.
Haggen gets clipped by a big right hand and goes down spinning to the canvas! Doberman gets the back mount and begins to drop bombs on his rocked foe! Haggen is too out of it to defend against the strikes and the referee jumps in to save him from the beatdown!
Ladies and gentlemen, after 0:49 of round 1, we have a winner by way of TKO (Strikes). Pvt. Duane Doberman!
Pvt. Duane Doberman really struggled to get his t-shirt was on before his hand was raised. Making sure that PRIME DESIGNS logo gets some air time is pretty tricky when you're all sweaty.
|
|
|
|
|
|
|
|
|
|
|
|
|
|
|
|
|
|
|
|
|
|
|
| S |
C
A |
G |
S |
C
B |
G |
|
S |
C |
G |
|
energy
A | B |
|
hype
A | B |
|
pop
A | B |
|
mgr
A | B |
|
FIGHT
RATING
100% |
|
|
|
|
|
|
|
Undercard bout
|
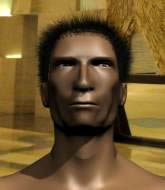
Coming up we have a super heavyweight MMA rules bout between Ooga Booga (ranked 0 p4p, 0 weight class) and Stipe Junakovic (ranked 0 p4p, 0 weight class). Over to our ring announcer for the fighter introductions!
 |
|
 |
| 199 cm
18
294 lbs
1 - 0 - 0 |
|
185 cm
21
240 lbs
4 - 8 - 0 |
Good takedowns
Basic striking
Good chin |
|
BJJ Blue Belt
Brawler
Solid chin |
|
| |
|
Ladies and gentlemen. This fight is 3 rounds, in the super heavyweight division.
Introducing the fighter to my left, fighting out of the red corner.
With a record of
1 - 0 - 0, fighting out of Amsterdam, Ooga Booga!
And introducing the fighter to my right, fighting out of the blue corner.
With a record of
4 - 8 - 0, fighting out of Amsterdam, Stipe Junakovic!
The judges for this bout are Aafke Stam, Patrick Alders and Daniel Blasius.
The bell rings for round one and we are underway!
Junakovic tries to clinch up but Booga circles away and keeps his distance.

Junakovic closes the distance and looks for a trip takedown... aaaand he's got it - Junakovic lands in his opponent's guard.
We must be close to a standup if these guys don't pick up the pace.

Booga looking for submissions from the bottom here. Moving his hips around, possibly looking for an armbar.
There's a bit of a scramble here and now Booga is on top in guard.

Booga avoids a guillotine attempt easily.
The fighters are pressed up against the cage, both looking to find a bit of space to work.
The crowd cheering loudly, showing their appreciation for the quality fight we're seeing here.
Booga got a little sloppy there for a moment and Junakovic has worked his way into a loose triangle - can he finish it?! No, Booga has managed to get both his arms back between Junakovic's legs - danger averted.
Junakovic is working actively off his back, looking to secure an arm or perhaps work for a triangle.
The ref warns both fighters not to hold the cage as they work up against the meshing.
Junakovic escapes his hips to the side and looks to be working for an armbar. Booga gives him a little smile and shakes his head. No chance.
Junakovic looking for submissions off his back, moving his hips, looking for an opening.
Junakovic has an omoplata and is looking to use it perhaps as a submission or perhaps to transition. Booga is in a bit of discomfort here, but he's managed to free himself and has dived into side control! That didn't work out too well for Junakovic.
Junakovic looks gassed!
That's one minute gone in the round.
Booga has an Americana. Junakovic didn't react quickly enough there and he's in big trouble now! He tries to squirm out but is forced to tap! Booga is delighted and gyrates in front of the ring girls. They seem to like the attention - it'll be interesting to see if Booga hooks up with any of them at the after show party.
Ladies and gentlemen, after 1:23 of round 1, we have a winner by way of Submission (Americana). Ooga Booga!
|
|
|
|
|
|
|
|
|
|
|
|
|
|
|
|
|
|
|
|
|
|
|
| S |
C
A |
G |
S |
C
B |
G |
|
S |
C |
G |
|
energy
A | B |
|
hype
A | B |
|
pop
A | B |
|
mgr
A | B |
|
FIGHT
RATING
68% |
|
|
|
|
|
|
|
Undercard bout
|
Coming up we have a light heavyweight MMA rules bout between Sam Gunn (ranked 0 p4p, 0 weight class) and Alexander Burenko (ranked 0 p4p, 0 weight class). Gunn comes to the cage accompanied by Fade to Black. These two fighters really are very evenly matched on the feet - it will be fascinating to see who can assert themselves in that aspect of the fight.
 |
|
 |
| 189 cm
25
214 lbs
1 - 1 - 0 |
|
188 cm
25
205 lbs
2 - 1 - 0 |
BJJ Brown Belt
Solid boxing
Good in bed |
|
BJJ Blue Belt
Excellent MT
Granite chin |
|
| |
|
Ladies and gentlemen. This fight is 3 rounds, in the light heavyweight division.
Introducing the fighter to my left, fighting out of the red corner.
With a record of
1 - 1 - 0, fighting out of St Petersburg, Sam Gunn!
And introducing the fighter to my right, fighting out of the blue corner.
With a record of
2 - 1 - 0, fighting out of Amsterdam, Alexander Burenko!
The judges for this bout are Wagner Zegers, Paulsen Ambrosius and Patrick Alders.
The bell rings for round one and we are underway!
Burenko fails in his attempt to clinch.
Burenko tries to close the distance and clinch up against the cage but Gunn paws at him with a jab and circles away.
Burenko tries to clinch but is not successful on this occasion.
Gunn tries to clinch but Burenko is having none of it.
Burenko is looking to clinch but Gunn is avoiding it.
Burenko doesn't manage to clinch there - Gunn circles away.
Burenko defends well against a solid takedown attempt from Gunn.
Burenko tries to clinch but is not successful on this occasion.
Burenko fails with an attempt to clinch.
Burenko moves in looking to clinch but Gunn pushes him off.
Burenko tries to sprawl but Gunn drives through with a takedown into half guard.
The referee must be thinking about standing these guys back up.
Gunn is looking for the mount but instead finds himself back in full guard.
Gunn looking to sit in guard and control but Burenko gets the butterfly guard and sweeps. He's now in the guard on the top.
Gunn is looking for a triangle but Burenko pushes his legs off easily.
Burenko wants to get up but he can't break Gunn's closed guard. He needs to be careful trying to break the legs open, as he's open to submissions here.
That's one minute gone in the round.
Burenko wants to stand and escape but instead Gunn has hit a sweep and he's now on top in guard.
Burenko keeping moving, preventing Gunn from controlling successfully.
Gunn drops back for a leg but he's not going to get it - he lets go and Burenko dives on top into guard.
Burenko wants to stand but Gunn has a closed guard, so he can't escape.
Gunn is looking to sinch up a triangle. Burenko throws the leg off to one side though and gets in tight to Gunn's body to avoid the submission. Gunn has instead reached around Burenko's neck and now has a guillotine! Oh, this is biiiig trouble! Gunn arches his back and squeezes and forces the tap from his hapless opponent.
Ladies and gentlemen, after 2:01 of round 1, we have a winner by way of Submission (Guillotine). Sam Gunn!
|
|
|
|
|
|
|
|
|
|
|
|
|
|
|
|
|
|
|
|
|
|
|
| S |
C
A |
G |
S |
C
B |
G |
|
S |
C |
G |
|
energy
A | B |
|
hype
A | B |
|
pop
A | B |
|
mgr
A | B |
|
FIGHT
RATING
51% |
|
|
|
|
|
|
|
Undercard bout
|
Coming up we have a welterweight MMA rules bout between Pvt. Claude Dillingham (ranked 0 p4p, 0 weight class) and Jake Hardy (ranked 0 p4p, 0 weight class). Claude Dillingham and Jake Hardy. The key to victory for Pvt. Claude Dillingham has got to be keeping the fight on the feet.
 |
|
 |
| 176 cm
18
181 lbs
2 - 0 - 0 |
|
182 cm
18
184 lbs
2 - 0 - 0 |
Good takedowns
Basic striking
Cardio machine |
|
Good wrestler
Basic striking
Granite chin |
|
| |
|
Ladies and gentlemen. This fight is 5 rounds, for the welterweight championship of the world!
Introducing the champion to my left, fighting out of the red corner.
With a record of
2 - 0 - 0, fighting out of London, Pvt. Claude Dillingham!
And introducing the challenger to my right, fighting out of the blue corner.
With a record of
2 - 0 - 0, fighting out of Amsterdam, Jake Hardy!
The judges for this bout are Patrick Alders, Aafke Stam and Paulsen Ambrosius.
The bell rings for round one and we are underway!

Hardy moves into the clinch.
Dillingham managing to block the knees to the body from Hardy.
Hardy blocks a body shot from Dillingham.
Hardy wants the takedown. Dillingham is fighting it off but Hardy persists and manages to bring the fight to the ground, ending up in Dillingham's guard against the cage.
Dillingham wants to sweep but no luck.

The ref stands the fighters back up, due to lack of action by Jake Hardy.
Hardy closes the distance but Dillingham moves to the side
and Dillingham counters with a leg kick that reverborates around the arena.
Hardy tries to clinch there but Dillingham circles away.
Hardy doesn't manage to clinch there - Dillingham circles away.
Dillingham avoids the clinch attempt nicely.
Hardy stuffs the takedown attempt from Dillingham. Dillingham gets slowly back to his feet.
That's one minute gone in the round.
Hardy is looking to take this fight into the clinch.
Dillingham circles away from the clinch attempt.
Hardy moves out of range of the leg kick from Dillingham.
Dillingham throws a leg kick
and Hardy counters with a nice double leg into half guard.
Dillingham is looking to improve his position.
Hardy perhaps working for something from half guard, or maybe not. It looks like he's just sitting there.
That's two minutes gone in the round.
The ref calls for a clean break and stands the fighters back up. Jake Hardy wasn't active enough on the ground.
A clash of legs there as Hardy blocks the low kick.
The fight stays on the outside here - Hardy looks like he's thinking about clinching though.
Hardy wants to clinch up but Dillingham keeps it at a distance.
A head kick misses from Dillingham.
Dillingham feints with a shoulder and throws a nice leg kick to Hardy's calf.
Dillingham scores with a nice strike.
This is a great period of action - very entertaining stuff!
Dillingham misses with a low kick.
Dillingham motions for Hardy to come forward. Dillingham throws a leg kick but it misses it's target.
Dillingham throws a leg kick that misses.
Hardy moves in looking to clinch but Dillingham pushes him off.
Dillingham throws a quick inside leg kick.
Jake Hardy seems to be the more aggressive standup fighter in this bout.
A punch combination from Dillingham misses.
Dillingham scores with a shot to the body.
That's three minutes gone in the round.
Dillingham just misses with a punch to the body.
Dillingham dips down and scores with a jab to the body.
Dillingham throws a low kick but his opponent is out of range.
Hardy is looking to clinch.
Dillingham throws a low kick but Hardy moves out of range easily.
Dillingham throws a nice outside leg kick.
Hardy tries to clinch but is not successful on this occasion.
Hardy moves in looking to clinch but Dillingham pushes him off.
Hardy tries to clinch there but Dillingham circles away.
Dillingham shoots in and drives through. Hardy sprawls well.
Dillingham takes a push kick to the midsection and stumbles backwards.
Dillingham walks forward and throws out a flicking leg kick. Hardy checks it nicely though, as he moves to the side.
Dillingham looking to land some kicks to the body here.
Dillingham throws a nice outside leg kick.
Dillingham throws an uppercut from half a mile away. Hardy sees it coming and avoids it easily.
That's four minutes gone in the round.
Hardy shoots in for a takedown! He's got it and he's managed to land in full mount! That's better than Hardy was expecting from the takedown attempt, I'm sure!
Hardy controlling the pace for now.
Wooooo! Give it up for these two warriors! They are putting on a show!
Hardy's corner are shouting for him to control the position and he seems happy to oblige.
As the round comes to an end the crowd are showing their appreciation for a great round of action.
Dillingham is in all sorts of trouble here.
And thats the end of the round the fighters go back to their corners.
A close round but Jake Hardy will probably get the nod.
That's the end of the round. The referee orders the cornermen out of the cage so we can get back down to business.
Hardy tries to clinch up.
Dillingham avoids the clinch attempt nicely.
Hardy is looking to clinch.
Hardy wants to clinch up but Dillingham keeps it at a distance.
Hardy is looking to take this fight into the clinch.
Hardy tries to clinch up against the cage, rushing in the close the distance. Dillingham manages to break the clinch and circles back to the middle of the mat.
Hardy on the wrong end of a kick to the body.
Hardy tries to clinch but Dillingham moves away
and Dillingham counters with a nice leg kick.
A nice inside leg kick there by Dillingham. That's going to slow Hardy down.
Hardy tries to clinch but Dillingham moves out of range.
Dillingham will have to do better than that with his takedown attempts.
Dillingham scores with a sloppy right hand. Hardy should have avoided that one.
Hardy clinches up against the cage.
A short right from Dillingham on the inside.
Dillingham working aggressively here.
Dillingham blocking some punches.
That's one minute gone in the round.
Hardy missing with knees to the body.
Dillingham goes for a body shot but it's blocked.
A body shot lands from Dillingham.
Hardy goes for a body shot but it's blocked.
Hardy goes for a body shot but it's blocked.

Hardy's corner calls for him to break the clinch, which he does.
That kick from Dillingham tenderised Hardy's leg. Hardy is trying to keep his angry face on.
Hardy is breathing heavily.
Dillingham throws a nice outside leg kick.
Hardy on the wrong end of a nice low kick. He's acting like it's no big deal but he doesn't want to take many more of those.
Hardy moves in looking to clinch but Dillingham pushes him off.
Dillingham shoots in for a takedown. "I don't think so" says Hardy as he avoids it easily.
Dillingham dips down and scores with a jab to the body.
Dillingham throws a right and a left that both miss.
Hardy moves in looking to clinch but Dillingham pushes him off.
Wooooo! Give it up for these two warriors! They are putting on a show!
Dillingham scores with a slapping inside leg kick.
Hardy shoots in for a takedown - he's clinched up with Dillingham but Dillingham pushes him off and we're back to square one.
Dillingham fails to land the takedown.
That's three failed takedown attempts in the round for Pvt. Claude Dillingham. That's going to take a lot out of him.
That's two minutes gone in the round.
Dillingham is looking to score with low kicks.
Dillingham with a nice cross.
Some wild striking there from Dillingham.
Dillingham throws a head kick that Hardy semi-blocks.
Hardy wants to clinch but Dillingham slips to the side
and Dillingham decides to take the opportunity to score a takedown. He's landed in Hardy's guard.
Dillingham is trying to work a guillotine from the top, or something like that? Don't know how he thinks he's going to get a finish from there.
Dillingham working some ground and pound from guard but it's not doing any damage.
That's three minutes gone in the round.
Hardy looking to control the pace of the fight rather than finish it.
Hardy working the defensive guard well to avoid strikes from Dillingham.
Dillingham working some ground and pound from guard but it's not doing any damage.
That's four minutes gone in the round.
Well. There's a bit of a lull in the action here and the crowd are starting to get restless.
Jake Hardy has forced the referee to step in and restart the fight on the feet.
Dillingham misses with a few strikes there.
Hardy tries to close the distance and clinch up but Dillingham swats him away and circles back towards the center.
Hardy tries to clinch there but Dillingham circles away.
Dillingham lands a beauty of a right hand that gets the crowd cheering.
Hardy drops his hands momentarily and Dillingham takes advantage with a crisp shot to the head.
Dillingham throws a nice inside leg kick.
Pvt. Claude Dillingham is winning the standup battle so far.
Hardy moves into the clinch.
Hardy tries to throw a body punch but Dillingham avoids it by throwing Hardy back against the cage.
Dillingham lands a short shot on the inside that snaps the head of Hardy backwards.
A battle for position here, against the cage.
Hardy misses with a body punch.
As the round comes to an end the crowd are showing their appreciation for a great round of action.
Hardy managing to block the knees to the body from Dillingham.
Hardy tries a body shot but Dillingham blocks it.
Hardy's leg has a nasty welt from taking a succession of leg kicks. That must be slowing him down.
Dillingham lands a body shot in the clinch.
And thats the end of the round the fighters go back to their corners.
Pvt. Claude Dillingham dominated that second round.
The corners get their ten second warning. Both fighters stand from their stools and stare eachother down, ready to get back to the action.

Dillingham wants to slow Hardy down by chopping away at his legs.
Dillingham will have to do better than that with his takedown attempts.
Hardy uses some good footwork to avoid the body shot by Dillingham.
Hardy tries to clinch up against the cage, rushing in the close the distance. Dillingham manages to break the clinch and circles back to the middle of the mat.
Dillingham throws a body punch but Hardy moves out of range.
A looping hook to the body misses from Dillingham. Hardy does a little dance to reset his feet.
No luck with that takedown attempt from Dillingham.
Dillingham misses with a takedown attempt. He shot from a bit too far out.
That's three failed takedown attempts in the round for Pvt. Claude Dillingham. That's going to take a lot out of him.
Hardy tries to clinch but Dillingham is having none of it.
Hardy slaps away a takedown attempt from Dillingham, before circling back to the center of the mat.
Hardy tries to close the distance and clinch up but Dillingham swats him away and circles back towards the center.
Hardy tries to close the distance and clinch but Dillingham swats him to one side with an open hand palm strike and circles away.
That's one minute gone in the round.
Dillingham looks for the body kick but Hardy saw that one coming.
Hardy tries to clinch but Dillingham is having none of it.
Dillingham circles away from the clinch attempt.
Hardy tries to clinch there but Dillingham circles away.
Dillingham throws a nice inside leg kick.
Hardy is looking to clinch but Dillingham is avoiding it.
Dillingham swats away the attempt to clinch by Hardy.
Hardy tries to close the distance and clinch up but Dillingham swats him away and circles back towards the center.
Dillingham throws a decent looking leg kick but it doesn't land clean.
Hardy doesn't manage to clinch there - Dillingham circles away.
A thudding body kick lands there by Dillingham!
Dillingham lunges in with an uppercut that skims his opponent's chin.
Hardy fails with an attempt to clinch.
Dillingham throws a leg kick but Hardy checks it.
That's two minutes gone in the round.
Dillingham circles away from the clinch attempt.
No luck with that takedown attempt from Dillingham.
Hardy tries to close the distance and clinch but Dillingham swats him to one side with an open hand palm strike and circles away.
Hardy is looking to clinch but Dillingham is avoiding it.
Dillingham does a little shimmy and throws a leg kick. The leg kick missed by a considerable margin though, making him look a little bit silly for doing the shimmy.
Dillingham with a nice looking leg kick. You could hear that one land in a back row.
The fans in attendance giving it up for the two fighters, who have really let it all hang out in the last minute or so!
Hardy fails with an attempt to clinch.
Hardy tries to clinch but is not successful on this occasion.
Dillingham throws a right and a left that Hardy avoids nicely.
Dillingham swats away the attempt to clinch by Hardy.
Hardy has managed to clinch.
Hardy tries to throw a body punch but Dillingham avoids it by throwing Hardy back against the cage.
That's three minutes gone in the round.
Hardy prevents Dillingham from breaking the clinch.
Dillingham scores with a nice hook to the head.
Dillingham can't find room to land a body shot as Hardy controls the action.
Dillingham wants to break free. God knows he wants to breaaaak freeee.
Dillingham tries to land knees in the clinch but Hardy avoids the damage to the body.
Dillingham unloads a knee to the mid-section. Hardy lets out a prehistoric sounding urrrrgh.
Hardy takes a big intake of breath there - he's definitely tired.
A right hand to the body from Dillingham.
Hardy misses with a hook to the ribs.
Dillingham trying to stall but Hardy improves his position.
Dillingham is leaning against Hardy and scores with a nice uppercut to the body.
Dillingham tries to land a shot to the body but it's blocked.
Hardy tried to land a shot to the body but connects with Dillingham's elbow.
Dillingham struggles to land a body shot inside as Hardy controls his hands.
Hardy stalls.
A short right from Dillingham.
Dillingham scores with a shoulder strike.
That's four minutes gone in the round.
Hardy drops to a knee looking for a takedown but Dillingham gets the underhooks and prevents it.
Dillingham lands a right uppercut that snaps the head of Hardy backwards.
The crowd are loving this. Great action here.
Dillingham on the defensive, avoiding the knees to the body.
Hardy wants to break free. God knows he wants to breaaaak freeee.
Dillingham misses with a body punch.
Dillingham trying to control the position but instead, Hardy has worked for underhooks and has pushed Dillingham into the cage.
Dillingham throws a blind hook that connects with the side of Hardys head.
Dillingham tried to land a shot to the body but connects with Hardy's elbow.
Hardy tries to land knees in the clinch but Dillingham avoids the damage to the body.
As the round comes to an end the crowd are showing their appreciation for a great round of action.
Dillingham lands a left hand.
Pvt. Claude Dillingham has scored more points in the clinch so far.
Dillingham lands a shot to the body.
Hardy prevents a body shot from Dillingham.
Dillingham lands a body shot.
Dillingham goes for a body shot but it's blocked.
And thats the end of the round the fighters go back to their corners.
Pvt. Claude Dillingham clearly takes that round.
That's the end of the interval. I'm sure that seemed a lot quicker than a minute for our two fighters! Back to the action.

Dillingham dips down and scores with a jab to the body.
Dillingham closes the distance and clinches up with Hardy, looking for a takedown. Dillingham pushes Hardy against the cage but Hardy circles to the side and manages to break the clinch.
Dillingham stalks Hardy and leaps in with a furious combination of punches. Uppercuts and crosses smash into Hardy's face. Hardy staggers backwards, shaken.
Hardy wants to clinch up but Dillingham keeps it at a distance.
Hardy closes the distance looking to clinch
and Dillingham makes him pay by landing a thudding low kick.
Hardy is looking to clinch.
Dillingham throws a body kick that misses.
Hardy slaps away a takedown attempt from Dillingham, before circling back to the center of the mat.
Hardy tries to close the distance and clinch up against the cage but Dillingham paws at him with a jab and circles away.
Hardy tries to clinch but Dillingham moves out of range.
Dillingham looking to throw a kick but he's pulled out of it.
Hardy is absolutely dripping with sweat - he looks exhausted.
That's one minute gone in the round.
Hardy tries to check the leg kick but that clearly hurt him.
Dillingham digs a good hook to Hardy's body.
Hardy fails with an attempt to clinch.
Hardy looks for a takedown but Dillingham sprawls well.
Dillingham throws a leg kick but Hardy moved away.
Dillingham lands with a kick to the ribs.
Dillingham throws a decent looking leg kick but it doesn't land clean.
Hardy will need to close the distance a bit before he attacks - that leg kick was thrown from too far away.
Dillingham cracks the inside of Hardy's front leg.
Dillingham ducks down and throws a hook to the body but Hardy moves away.
Dillingham misses with a low kick.
Dillingham feints with a shoulder and throws a nice leg kick to Hardy's calf.
Hardy tries to clinch but Dillingham moves out of range.
That's two minutes gone in the round.
Dillingham keeps the fight on the outside.
Dillingham dances in quickly and lands a nice inside leg kick on Hardy. That did some damage!
Hardy tries to clinch but Dillingham moves out of range.
Dillingham looks to land a combination. Hardy sees it coming but can only parry a couple of the shots.
The fans in attendance giving it up for the two fighters, who have really let it all hang out in the last minute or so!
Dillingham moves into range and lands a nice leg kick.
Hardy closes the distance and clinches.
Hardy goes for a body shot but it's blocked.
Hardy misses with a punch to the body.
Dillingham scores with a nice hook to the head.
Hardy lands a shot to the body.
Dillingham goes for a body shot but it's blocked.

Dillingham escapes the clinch and we're back to striking.
Dillingham avoids the clinch attempt nicely.
Dillingham thows a body shot but no joy.
Hardy closes the distance and pushes Dillingham back into the cage.
That's three minutes gone in the round.
A body shot lands from Dillingham.
Dillingham's corner calls for him to break the clinch, which he does.
Dillingham lands a glancing blow to the side of Hardy's head.
Hardy keeping a good distance there, avoiding the body shot.
Hardy avoids the body shot from Dillingham.
Dillingham pulls out of a head kick attempt.
Hardy tries to clinch up against the cage, rushing in the close the distance. Dillingham manages to break the clinch and circles back to the middle of the mat.
Dillingham scores with a reasonable looking shot to the body. Hardy doesn't seem bothered though.
Hardy fails with an attempt to clinch.
Dillingham keeps the fight on the outside.
Hardy gets in close and instigates a clinch.
Dillingham misses with a punch to the body.
Dillingham breaks the clinch and we return to the middle of the mat.
Dillingham thumps Hardy with a low kick.
Hardy wants to clinch.
That's four minutes gone in the round.
Hardy is looking to clinch but Dillingham is avoiding it.
Dillingham throws a head kick but Hardy moves out of range.
Dillingham is looking to wear down Hardy with body shots, infact he's throwing more body shots than head shots at the moment.
Dillingham throws a feint and then finishes with a kick to the body.
Hardy is looking to clinch.
We've seen a great period of action over the last minute or so - credit to both fighters for going all out!
Hardy showing good head movement there, avoiding the strikes from Dillingham.
Hardy wants to clinch
and Dillingham counters with a leg kick that reverborates around the arena.
Hardy gets to the clinch - let's see what his plan is here.
As the round comes to an end the crowd are showing their appreciation for a great round of action.
Dillingham tries to break free but Hardy pushes him back against the cage.
Dillingham tries a body shot but Hardy blocks it.
Hardy breaks the clinch and we return to the middle of the mat.
Hardy is looking to clinch.
And thats the end of the round the fighters go back to their corners.
Pvt. Claude Dillingham had his way with Jake Hardy in that round.
OK. That's time! The bell goes and we're back to the action. Ladies and gentlemen, this is the final round!

Hardy wants to clinch but Dillingham slips to the side
and Dillingham counters with a left to the body.
Hardy tries to clinch but fails miserably
and Dillingham counters with a head kick.
Dillingham circles away from the clinch attempt
and Dillingham counters with a nice uppercut.
A combination from Dillingham does no damage.
Hardy tries to clinch but Dillingham moves out of range.
Dillingham works Hardy's body with a nice hook.
Hardy tries to clinch but Dillingham is having none of it.
Hardy gets caught napping as Dillingham dives in and scores a takedown. Hardy manages to retain guard.
Hardy is adopting a defensive guard.
The referee must be thinking about standing these guys back up.
Dillingham trying to control the position from guard on top but Hardy is wriggling around, looking for whatever he can.
Hardy is wobbling all over the place through exhaustion. Will he make it to the final bell?
That's one minute gone in the round.

The ref stands the fighters back up. Pvt. Claude Dillingham wasn't doing enough on the ground.
Nice defenses there by Hardy.
Hardy avoids a kick to the body.
Dillingham misses with a takedown attempt - Hardy sprawls well and throws a nice strike on the way out which just misses.
Dillingham fails with a takedown attempt from distance.
Hardy throws a push kick but Dillingham slaps the foot to one side.
Dillingham tries to sprawl but Hardy drives through with a takedown into half guard.
The fighters are pressed up against the cage, both looking to find a bit of space to work.
Hardy is taking a breather. Dillingham says something to him but it's hard to make out. Perhaps he's telling him to get on with it and actually do something.
We could do with one of the fighters taking the initiative a bit more on the ground - they're both waiting to capitalize on a mistake.
That's two minutes gone in the round.
Dillingham is trying to maintain the position but Hardy is very close to passing his half guard.
Jake Hardy has forced the referee to step in and restart the fight on the feet.
Hardy tries to clinch but Dillingham is having none of it.
Dillingham throws a leg kick which misses Hardy's front leg but catches the back leg as Hardy tries to avoid it.
Dillingham moves into range and lands a nice body kick.
Dillingham wants to slow Hardy down by chopping away at his legs.
Hardy is looking to clinch but Dillingham is avoiding it.
Hardy checks a leg kick nicely.
Dillingham swats away the attempt to clinch by Hardy.
That's three minutes gone in the round.
Hardy moves to clinch but Dillingham breaks away
and Dillingham counters with a slapping leg kick.
Hardy tries to clinch up but Dillingham circles away and keeps his distance.
Dillingham fakes with a right hand and throws a good leg kick, right into the thigh. That had to hurt Hardy.
Dillingham throws out a leg kick but Hardy moves out of range and Dillingham only half commits.
Dillingham displays good takedown defense there as he swats away a double leg from Hardy.
Hardy on the wrong end of a nice low kick. He's acting like it's no big deal but he doesn't want to take many more of those.
Dillingham tries for a takedown but Hardy sees it coming a mile off and avoids it easily.
Pvt. Claude Dillingham is fighting for a decision here - he's started to take the cautious approach.
That's three failed takedown attempts in the round for Pvt. Claude Dillingham. That's going to take a lot out of him.
Dillingham looks to score with a jab to the body but Hardy is just out of range.
Dillingham shoots in for a takedown but Hardy shows good takedown defense there and keeps this one on the feet.
Hardy wants to clinch
and Dillingham counters nicely by changing levels and landing a hook to the body.
Dillingham swats away the attempt to clinch by Hardy.
That's four minutes gone in the round.
Dillingham throws a front kick aimed at Hardy's knee but Hardy avoids it well.
Hardy is looking to clinch.
Dillingham circles away from the clinch attempt.
Hardy looking to shoot here. He's gone for it and he's landed a takedown into mount! Oh, that's bad for Dillingham!
Dillingham is looking to get to half guard.
As the round comes to an end the crowd are showing their appreciation for a great round of action.
And that's the end of the fight!
That was a close round. You could make an argument for either fighter but I would give it to Pvt. Claude Dillingham.
I think Dillingham has won this one but let's see what the judges have to say. Over to the ring announcer for the scorecards.
Ladies and gentlemen, after 5 rounds of action, we go to the scorecards for a decision.
Judge Patrick Alders scores the fight 49:46
Judge Aafke Stam scores the fight 49:46
Judge Paulsen Ambrosius scores the fight 49:46
In favor of your winner, by unanimous decision... Pvt. Claude Dillingham!
Pvt. Claude Dillingham is the new welterweight champion!
Pvt. Claude Dillingham took to the microphone after his victory and thanked his sponsors, PRIME DESIGNS for their support in the buildup to the fight.
|
|
|
|
|
|
|
|
|
|
|
|
|
|
|
|
|
|
|
|
|
|
|
| S |
C
A |
G |
S |
C
B |
G |
|
S |
C |
G |
|
energy
A | B |
|
hype
A | B |
|
pop
A | B |
|
mgr
A | B |
|
FIGHT
RATING
100% |
|
|
|
|
|
|
|
Co-main event
|
Coming up we have a super heavyweight MMA rules bout between Alistair Overeem (ranked 0 p4p, 0 weight class) and Bob Schribber (ranked 0 p4p, 0 weight class). Schribber has chosen Surfacing - Slipknot as his entrance music. Alistair Overeem has the better chin. Will he look to stand and bang today?
 |
|
 |
| 195 cm
25
265 lbs
4 - 2 - 0 |
|
183 cm
25
237 lbs
2 - 0 - 0 |
Decent wrestler
Solid boxing
Granite chin |
|
BJJ Blue Belt
Decent boxing
Prefers standup |
|
| |
|
Ladies and gentlemen. This fight is 3 rounds, in the super heavyweight division.
Introducing the fighter to my left, fighting out of the red corner.
With a record of
4 - 2 - 0, fighting out of Amsterdam, Alistair Overeem!
And introducing the fighter to my right, fighting out of the blue corner.
With a record of
2 - 0 - 0, fighting out of Amsterdam, Bob Schribber!
The judges for this bout are Albert Achterberg, Radbod Blank and Paul Aken.
The bell rings for round one and we are underway!
Overeem tries to shoot in for a takedown. He's got hold of a leg but Schribber swivels and escapes.
Overeem shoots for a double leg takedown but Schribber sprawls well. He's pushed Overeem's face into the mat and manages to get back to his feet relatively easily.
Overeem fails miserably with a takedown attempt.
That's three failed takedown attempts in the round for Alistair Overeem. That's going to take a lot out of him.
Overeem throws a wild combination but nothing lands.
Schribber throws a jab, cross combination which is slipped
and Overeem cracks him with a counter punch right on the button.
Overeem stalks Schribber and leaps in with a furious combination of punches. Uppercuts and crosses smash into Schribber's face. Schribber staggers backwards, shaken.
Overeem misses with a takedown attempt - Schribber sprawls well and throws a nice strike on the way out which just misses.
Schribber throws a right and a left that Overeem avoids nicely.
Schribber looks gassed!
Overeem shoots in for a takedown. He's persisting with it as Schribber sprawls well. Schribber wins this battle and keeps the fight standing. Overeem gets slowly back to his feet.
Overeem closes the distance and looks for a trip takedown... aaaand he's got it - Overeem lands in his opponent's guard.
That's one minute gone in the round.
Overeem trying to control the position from guard on top but Schribber is wriggling around, looking for whatever he can.
Overeem throwing shots from guard but he's hitting more mat than opponent.
Overeem drops back for a leg but he's not going to get it - he lets go and Schribber dives on top into guard.
Schribber won't allow Overeem to get back to his feet.
Schribber trying to control but Overeem is working from the bottom.

Schribber decides to stand up and beckons his opponent to follow.
Overeem cracks Schribber with an open hand slap.
That's two minutes gone in the round.
Schribber keeps the fight standing with a nice sprawl.
Excellent takedown into side control there by Overeem.
Overeem will need to keep those long limbs tucked in whilst he's on the ground, to prevent any submissions.
Schribber is working to avoid the ground and pound but Overeem connects with a decent elbow.
The crowd are loving this. Great action here.
Overeem wants to lay and pray for a moment but Schribber keeps working.
The fighters are pressed up against the cage, both looking to find a bit of space to work.
Schribber dodges the ground and pound from Overeem.
Schribber can't do much from the bottom here.
Overeem is looking to finish here, going for an Americana. Schribber knows the correct defense though, so he's OK.
Overeem working the head and body with strikes.
That's three minutes gone in the round.
Overeem fails to land a wild elbow strike.
Overeem creates a bit of distance and throws down some hard shots.
Overeem in side control, trying to ground and pound but not landing this time.
Overeem scores with punches from side control.
Schribber defending against the ground and pound.
Schribber tries to slip a leg under to move to half guard but Overeem presses down on the leg and jumps into full mount!
BOOM! Overeem connects with a massive shot to the dome!
That's four minutes gone in the round.
Overeem scoring with some good ground and pound from mount here. Will he manage to finish Schribber?
This has been an exciting period of action!
Overeem postures up and cracks his opponent a couple of times before moving back into close ground control. Schribber looks a forlorn figure.
Schribber is rocked!
Overeem looking to finish Schribber with some ground and pound. This is bad for Schribber!
Schribber is still in real trouble! Can Overeem finish him?
Oooooh, big shot lands for Overeem! Schribber is hurt baaadly! Overeem is firing away with more strikes - Schribber is covering up... the ref is warning him to do something. He's just covering up though still and the ref has to step in to end the fight! This one is all over!
Ladies and gentlemen, after 4:35 of round 1, we have a winner by way of TKO (Strikes). Alistair Overeem!
|
|
|
|
|
|
|
|
|
|
|
|
|
|
|
|
|
|
|
|
|
|
|
| S |
C
A |
G |
S |
C
B |
G |
|
S |
C |
G |
|
energy
A | B |
|
hype
A | B |
|
pop
A | B |
|
mgr
A | B |
|
FIGHT
RATING
48% |
|
|
|
|
|
|
|
Main event
|
Coming up we have a middleweight MMA rules bout between Radek Kowalski (ranked 0 p4p, 0 weight class) and Tony Tiger (ranked 0 p4p, 0 weight class). These two fighters really are very evenly matched on the feet - it will be fascinating to see who can assert themselves in that aspect of the fight.
 |
|
 |
| 185 cm
21
187 lbs
4 - 2 - 0 |
|
190 cm
19
184 lbs
3 - 3 - 0 |
BJJ Blue Belt
Basic striking
Good chin |
|
BJJ Blue Belt
Good kicks
Knockout power |
|
| |
|
Ladies and gentlemen. This fight is 3 rounds, in the middleweight division.
Introducing the fighter to my left, fighting out of the red corner.
With a record of
4 - 2 - 0, fighting out of St Petersburg, Radek Kowalski!
And introducing the fighter to my right, fighting out of the blue corner.
With a record of
3 - 3 - 0, fighting out of Amsterdam, Tony Tiger!
The judges for this bout are Daniel Blasius, Nard Betker and Albert Achterberg.
The bell rings for round one and we are underway!
Tiger connects with a leg kick. Kowalski looked like he was expecting something else and didn't defend it.
Kowalski fails with the takedown
and Tiger counters with a slapping leg kick.
Kowalski dives in and scores a takedown into Tiger's guard.
Tiger keeping moving, preventing Kowalski from controlling successfully.
Tiger is trying to stand up but he's not managed so far.
Tiger preventing the ground and pound from doing any damage.
Tiger uses the cage to get back to his feet.
Tiger throws a sloppy head kick and Kowalski moves out of range easily.
Kowalski gets his takedown attempt stuffed easily
and Tiger counters with a nice low kick that buckles Kowalski's knee momentarily.
The crowd are loving this. Great action here.
Kowalski changes levels and drives through with a really nice takedown into side control. Tiger looks really pissed at himself for not defending that better.
Tiger is trying to get back to his feet.
Kowalski wants to control for a moment but Tiger uses the opportunity to move back to half guard.
That's one minute gone in the round.
Tiger is trying to stand.
Kowalski is thwarting Tiger's attempts to control the position.
Kowalski sitting in half guard, looking to land shots. Tiger defending well though.
Tiger wants to get back to his feet.
Kowalski throwing shots but Tiger is blocking nicely.
Tiger is working for an escape here. He's hooked one of Kowalski's legs and he's managed to sneak out and take Kowalski's back!
Tiger slows the pace down here. Having a little breather whilst he's in a dominant position, looking to rest and regain some energy, ready to go for the finish.
Tiger is throwing punches to the body, looking to soften Kowalski up.
Tiger landing with strikes.
Tiger is looking cool and calm here, just waiting for a good opportunity to attack and finish the fight from this dominant position.
That's two minutes gone in the round.
Kowalski trying to control the action but Tiger just sinks the hooks in.
The ref warns both fighters not to hold the cage as they work up against the meshing.
Tiger slows the pace down here. Having a little breather whilst he's in a dominant position, looking to rest and regain some energy, ready to go for the finish.
Tiger is looking for the choke from the back position but Kowalski is controlling his hands well.
Fantastic stuff here - a very entertaining period of action, which has drawn cheers from the crowd.
Tiger is hanging on to Kowalski's back as he tries to escape.
Kowalski trying to control but he's just got himself in more trouble.
Kowalski tries to roll but Tiger sticks to his back.
You know, I was talking to some of our celebrities at ringside tonight and they were split right down the middle on who was going to win this fight.
That's three minutes gone in the round.
Kowalski staying busy and making it hard for Tiger to control.
Tiger struggling to land strikes to the head as Kowalski covers up.
Tiger just keeping the dominant position. He can't wait too long though, otherwise the referee will stand them back up.
You can see the frustration on Kowalski's face
He knows he is in trouble unless he improves his position sooner rather than later.
What can Kowalski do to escape this position? He's going to have to figure it out pretty quick if he wants to stay in the fight!
Tiger throws a big right hand but he misses and hits the mat. Ouch.
Tiger gets his hands free as Kowalski looks to control.
Tiger controlling the position well here. Kowalski rolled but Tiger kept the hooks locked in and stayed in the dominant position.
Tiger's corner are shouting for him to control the position and he seems happy to oblige.
That's four minutes gone in the round.
The ref stands the fighters back up, due to lack of action by Tony Tiger.
A good leg kick by Tiger.
The fans in attendance giving it up for the two fighters, who have really let it all hang out in the last minute or so!
As the round comes to an end the crowd are showing their appreciation for a great round of action.
Tiger throws a series of punches but Kowalski avoids them all with ease.
Kowalski with a poor takedown
and Tiger counters with an outside leg kick.
That's three failed takedown attempts in the round for Radek Kowalski. That's going to take a lot out of him.
Kowalski is breathing heavily.
Tiger scores with a leg kick.
And thats the end of the round the fighters go back to their corners.
Tony Tiger dominated that round.
The minute break is over - no more time for sponges and pep talks - back to the action!
Tiger throws a sloppy head kick and Kowalski moves out of range easily.
Kowalski looks frustrated there after his takedown attempt is stuffed easily.
Kowalski fails miserably with a takedown attempt.
Tiger gets the takedown into side control.
Kowalski is positioning himself to get back to half guard.
Kowalski on his back here. We all know that wrestlers don't like being on their back so let's see if Kowalski tries to get out of the position.
Tiger cracks Kowalski with a big elbow.
Kowalski tries to bench press Tiger off him but Tiger keeps the position.
Tiger decides to stand back up.
Tony Tiger is looking to throw some combinations by the looks of things.
Kowalski misses with a takedown
and Tiger connects with a straight left hand counter down the middle.
That's three failed takedown attempts in the round for Radek Kowalski. That's going to take a lot out of him.
The crowd cheering loudly, showing their appreciation for the quality fight we're seeing here.
Kowalski closes the distance and clinches up with Tiger, looking for a takedown. Kowalski pushes Tiger against the cage but Tiger circles to the side and manages to break the clinch.
Radek Kowalski seems to be the more aggressive standup fighter in this bout.
Both fighters are absolutely exhausted here.
That's one minute gone in the round.
Tiger's corner calls for a 1, 2 combination and Tiger duly obliges.

It looks like Radek Kowalski has been cut.
Tiger dips down and scores with a jab to the body.
Tiger throws a nice inside leg kick.
Tiger with a nice looking leg kick. You could hear that one land in a back row.
The crowd are loving this. Great action here.
Tiger throws a head kick that looked like it stung.
Tiger throws a head kick that misses.
Tiger lands with a nice body kick.
Kowalski takes a head kick and keeps coming.
Tiger goes for a high kick. It partially lands.
Tiger stuffs the takedown.
Tiger works over Kowalski's head and body with a nice combination.
Radek Kowalski's cut is getting worse.
Tiger connects with a hook to the side of his opponent's head.

Kowalski is rocked!
Tiger manages to get an easy takedown there - catching Kowalski on his heels. He'll look to pass Kowalski's guard now, I'm sure.
Tiger engaging in some classic timewasting tactics.
That's two minutes gone in the round.
Tiger looking to pass the guard.
Tiger controlling from the guard. I say controlling but really, he's stalling.
If this pace continues, the referee will definitely step in and force a standup.
Tony Tiger has forced the referee to step in and restart the fight on the feet.
A nice inside leg kick there by Tiger. That's going to slow Kowalski down.
Kowalski shoots in but Tiger avoids the takedown attempt easily.
Tiger throws a body kick that misses.
That's three minutes gone in the round.
Tiger throws a head kick that half lands.
Tiger throws a sloppy head kick and Kowalski moves out of range easily.
Tiger tries a head kick but it misses.
Tony Tiger seems to be getting the better of the standup.
Kowalski fails with a takedown attempt.
Tiger throws a head kick that misses and slips in the process. He scrambles back to his feet and the fighters circle.
Tiger closes the distance and after a bit of a stuggle, scores a takedown into Kowalski's guard.
Tiger passes into half guard.
Neither fighter is being very active at the moment, with Tiger in particular looking to stall.
Tiger has been the more effective fighter overall so far.
Tiger prevents Kowalski from improving his position.
That's four minutes gone in the round.
Tiger trying to control the pace.
The crowd cheering loudly, showing their appreciation for the quality fight we're seeing here.
Kowalski is staying active underneath Tiger, who seems content to just control the action from this position.
The ref stands the fighters back up, due to lack of action by Tony Tiger.
Tiger scores with a head kick.
Kowalski with a poor takedown
and Tiger counters with a head kick. That will keep Kowalski thinking before he tries any more sloppy attacks!
The crowd are going absolutely nuts as the round comes to an end - what a fantastic round of action!
Tiger throws a nice head kick!
Radek Kowalski's cut is bleeding quite badly. He's got to try and protect it.
Kowalski misses with a takedown attempt
and Tiger counters with a takedown into side control.
The referee tells the fighters to keep busy.
And thats the end of the round the fighters go back to their corners.
Tony Tiger showed his class in that round. I'd imagine he'll take it on all the scorecards.
The cut man is working on Radek Kowalski's cut.
That's time! Back to the action! This is the final round!
Kowalski shoots in looking for a double leg takedown. Tiger defends it nicely.
Kowalski slips a jab and a cross from Tiger.
Kowalski closes this distance looking for a takedown but Tiger circles away.
Tiger throws a body kick but he was well out of range there.
Kowalski blocks a head kick by Tiger.
Tiger displays good takedown defense there as he swats away a double leg from Kowalski.
That's three failed takedown attempts in the round for Radek Kowalski. That's going to take a lot out of him.
Kowalski shoots in for a takedown. He's persisting with it as Tiger sprawls well. Tiger wins this battle and keeps the fight standing. Kowalski gets slowly back to his feet.
Tiger shoots in for a takedown and gets it. Let's see what he's got on the mat.
Both fighters are breathing heavily.
Kowalski keeping moving, preventing Tiger from controlling successfully.
That's one minute gone in the round.
Tiger gets to his feet. Kowalski looking to butt scoot but the ref puts an end to that. On your feet son!
Tiger comes forward and lands a shot to the body, then darts back out of range.
Tiger throws out a powerful jab.
Kowalski has his takedown stuffed
and he gets countered with a snapping leg kick.
Tiger looking to score a takedown here. Kowalski is defending well but Tiger drives through and ends up in Kowalski's guard.
Tiger content to stall in guard here.
Tiger trying to pass the guard but can't manage it just yet.
Tiger stands and throws Kowalski's legs to the side, diving into side control.
The fans in attendance giving it up for the two fighters, who have really let it all hang out in the last minute or so!
Kowalski trying to remain calm as Tiger controls from the top position.
That's two minutes gone in the round.
Tiger working the head with strikes.
Tiger moving around in side mount but really he's just happy to control for now.
Kowalski gets back to half guard.
Tiger controlling the pace.
That's three minutes gone in the round.
Kowalski wants to control but Tiger is keeping busy.
Tiger content to sit in half guard and control for a moment.
OK we're going to have a standup here. Tony Tiger hasn't been effective enough on the ground and the referee wants a restart.
No luck for Kowalski with that takedown attempt.
Tiger shoots in looking for a single leg takedown. Kowalski is trying to defend but Tiger finishes it well and ends up in half guard. Let's see if he can advance position further.
Tiger slips a nice elbow through Kowalski's hands, connecting with Kowalski's forehead.
That's four minutes gone in the round.
Tiger with a momentary lay and pray from half guard.
Kowalski is looking to improve his position.
Tony Tiger is fighting for a decision - hopefully he's judged it right and he's actually winning the fight.
Tony Tiger has got the better of the ground game so far.
As the round comes to an end the crowd are showing their appreciation for a great round of action.
If this pace continues, the referee will definitely step in and force a standup.
Well, if Tiger is going to just lie there, perhaps we should talk about what we're having for dinner tonight
I'm having a ham and pineapple pizza
Yum. Can't wait.
Radek Kowalski has stepped it up - he knows he needs a finish here!
Wooooo! Give it up for these two warriors! They are putting on a show!
OK we're going to have a standup here. Tony Tiger hasn't been effective enough on the ground and the referee wants a restart.
Kowalski swings widly with a right hand
and Tiger counters with a straight right hand.
And that's the end of the fight!
Tony Tiger comfortably won the final round on my scorecard.
Well Tiger has outworked and out performed his opponent in all aspects of the game today. He was simply too good and the decision should be no more than a formality. Over to the ring announcer for the scorecards.
Ladies and gentlemen, after 3 rounds of action, we go to the scorecards for a decision.
Judge Daniel Blasius scores the fight 26:30
Judge Nard Betker scores the fight 26:30
Judge Albert Achterberg scores the fight 27:30
In favor of your winner, by unanimous decision... Tony Tiger!
|
|
|
|
|
|
|
|
|
|
|
|
|
|
|
|
|
|
|
|
|
|
|
| S |
C
A |
G |
S |
C
B |
G |
|
S |
C |
G |
|
energy
A | B |
|
hype
A | B |
|
pop
A | B |
|
mgr
A | B |
|
FIGHT
RATING
100% |
|
|
|
|
|
|
|
|
|
|
