 |
Camden Town PBP Commentary |
Undercard bout
|
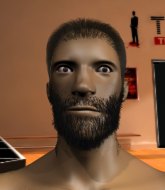
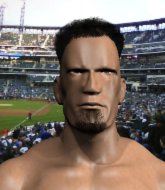
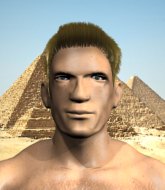
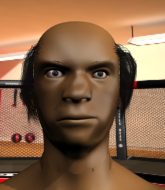
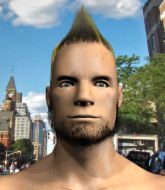
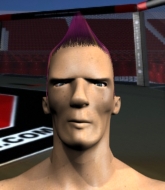
Coming up we have a welterweight MMA rules bout between Angus Macallan (ranked 0 p4p, 0 weight class) and Eric Bing (ranked 0 p4p, 0 weight class). We have two fighters making their debuts here, so let's see who comes out of this one with their first professional victory.
 |
|
 |
| 180 cm
18
175 lbs
0 - 0 - 0 |
|
170 cm
18
170 lbs
0 - 0 - 0 |
BJJ White Belt
Excellent MT
KO power |
|
BJJ Blue Belt
Dangerous knees
Solid chin |
|
| |
|
Ladies and gentlemen. This fight is 3 rounds, in the welterweight division.
Introducing the fighter to my left, fighting out of the red corner.
With a record of
0 - 0 - 0, fighting out of London, Angus Macallan!
And introducing the fighter to my right, fighting out of the blue corner.
With a record of
0 - 0 - 0, fighting out of London, Eric Bing!
The judges for this bout are James Ackerman, William Gold and Richard Clark.

The bell rings for round one and we are underway!

Macallan clinches.
A head punch blocked on the inside by Bing.
Bing comes over the top with an elbow. That landed flush.
Bing gets double underhooks to prevent a takedown attempt from Macallan.
Bing lands an elbow inside that Macallan shrugs off.

It looks like Angus Macallan has been cut.
Bing using the Thai clinch to land knees to the body.
Macallan throws a punch but it's blocked by Bing.
Fantastic stuff here - a very entertaining period of action, which has drawn cheers from the crowd.
Bing just leaning against Macallan, taking a breather.
Nice elbow from Bing.
Macallan takes an elbow to the forehead.
Macallan is breathing heavily.
Kneeeeees! The crowd are calling for knees to the body. Bing obliges.
Bing lands an elbow inside.
Bing scores a nice knee to the body.
Bing scores a nice knee to the body.
Bing lands a knee to the body.
Bing utilising his Muay Thai to score with a knee to the body.
Bing landing knees to the body. They look like they could hurt.
Bing landing some nice looking knees to the body.
Bing utilising his Muay Thai to score with a knee to the body.

That's one minute gone in the round.
Bing taking a break, stalling in the clinch.
Macallan takes a knee right on the jaw!
Bing lands a damaging elbow.
Bing lands a nice elbow.

Macallan is rocked!
Bing landing knees to the body. They look like they could hurt.
Bing putting his Muay Thai to good use. He has Macallan in a tight clinch and is doing some damage with knees to the body.
Bing lands a nice elbow from the clinch.
Oh Macallan is still all over the place! His legs are completely gone! Will he be able to recover?!!
Macallan takes an elbow to the forehead.
Bing lands an elbow that stopped Macallan in his tracks for a moment.
Bing pulls back and lands a big elbow that stuns Macallan! Bing unloads with more strikes and Macallan sinks to his knees! This one is all over!
Ladies and gentlemen, after 1:41 of round 1, we have a winner by way of TKO (Strikes). Eric Bing!
|
|
|
|
|
|
|
|
|
|
|
|
|
|
|
|
|
|
|
|
|
|
|
| S |
C
A |
G |
S |
C
B |
G |
|
S |
C |
G |
|
energy
A | B |
|
hype
A | B |
|
pop
A | B |
|
mgr
A | B |
|
FIGHT
RATING
100% |
|
|
|
|
|
|
|
Undercard bout
|
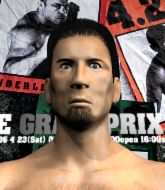
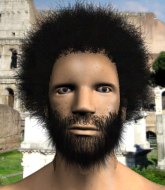
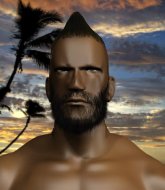
Coming up we have a lightweight MMA rules bout between Volk Khan (ranked 0 p4p, 0 weight class) and Cody Willis (ranked 0 p4p, 0 weight class). Man, I cannot wait for this one!
 |
|
 |
| 174 cm
26
162 lbs
7 - 0 - 0 |
|
173 cm
29
165 lbs
8 - 8 - 0 |
Abu Dhabi Champ
Solid boxing
Very quick |
|
BJJ Brown Belt
Excellent MT
Powerful |
|
| |
|
Ladies and gentlemen. This fight is 3 rounds, in the lightweight division.
Introducing the fighter to my left, fighting out of the red corner.
With a record of
7 - 0 - 0, fighting out of London, Volk Khan!
And introducing the fighter to my right, fighting out of the blue corner.
With a record of
8 - 8 - 0, fighting out of London, Cody Willis!
The judges for this bout are Steven Brown, Daniel Bishop and James Glass.
The bell rings for round one and we are underway!
Willis misses the jab.
Willis lands a jab to the head.
Khan ducks under a wild hook from Willis.
Willis stuns Khan with a nice body shot, before stepping back out of range.
Some wild striking there from Khan.
Nice uppercut there from Willis.
Khan throws a shot to the body.
Willis closes the distance and lands a one-two.

Khan looking to score a takedown here. Willis is defending well but Khan drives through and ends up in Willis's guard.
It looks like the ref is thinking about a standup.
Khan prevents Willis from getting back to his feet.

Willis escapes his hips to the side and looks to be working for an armbar. Khan gives him a little smile and shakes his head. No chance.
Willis is looking to stand up but Khan isn't so interested in that idea.
That's one minute gone in the round.
Khan pushes down on Willis's leg and manages to get into half guard.
Both fighters really going for it on the ground here!
Willis is trying to stand up here but Khan is controlling him well.

Khan is trying to work for a kimura but Willis is defending well.
The fighters are pressed up against the cage, both looking to find a bit of space to work.
Willis looks like he's trying to stand up.
The ref warns both fighters not to hold the cage as they work up against the meshing.
Khan thows a huge punch but Willis dodges it nicely.
Khan seems very keen to just sit and control from half guard but Willis does not like that idea so much and is remaining active off his back.
Khan is trying for a guillotine from the top but the pressure isn't in the right place so Willis is just riding it out for now. Khan eventually gives up the hold.
Khan tries to pass to full mount but Willis defends it.

That's two minutes gone in the round.
Khan lands strikes from half guard.
Khan not landing any meaningful shots this time.
Willis tries to roll over but Khan keeps him under control.
Khan wants to lay and pray for a moment but Willis keeps working.
Khan trying to mount his opponent but Willis defends it.
Khan slips a nice elbow through Willis's hands, connecting with Willis's forehead.
Khan seems like he's working for an arm triangle here. He's freed his trapped foot and he's rotating nicely. Willis is in big trouble! He's tapping out! This one is aaaaaaaaaaaall over!
Ladies and gentlemen, after 2:56 of round 1, we have a winner by way of Submission (Arm Triangle). Volk Khan!
|
|
|
|
|
|
|
|
|
|
|
|
|
|
|
|
|
|
|
|
|
|
|
| S |
C
A |
G |
S |
C
B |
G |
|
S |
C |
G |
|
energy
A | B |
|
hype
A | B |
|
pop
A | B |
|
mgr
A | B |
|
FIGHT
RATING
42% |
|
|
|
|
|
|
|
Undercard bout
|
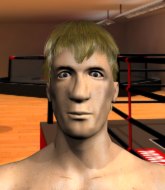
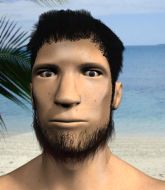
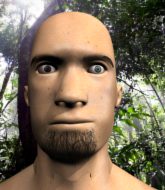
Coming up we have a middleweight MMA rules bout between Ben Knox (ranked 0 p4p, 0 weight class) and Padraig O Hare (ranked 0 p4p, 0 weight class). Knox comes to the cage accompanied by Cinderella Man - Eminem. Ben Knox has the better chin. Will he look to stand and bang today?
 |
|
 |
| 177 cm
22
185 lbs
9 - 6 - 0 |
|
190 cm
21
196 lbs
4 - 5 - 0 |
BJJ Blue Belt
Excellent boxer
Cardio machine |
|
BJJ Brown Belt
Excellent boxer
Heavy handed |
|
| |
|
Ladies and gentlemen. This fight is 3 rounds, in the middleweight division.
Introducing the fighter to my left, fighting out of the red corner.
With a record of
9 - 6 - 0, fighting out of London, Ben Knox!
And introducing the fighter to my right, fighting out of the blue corner.
With a record of
4 - 5 - 0, fighting out of London, Padraig O Hare!
The judges for this bout are Paul Tew, James Atkins and William Gold.
The bell rings for round one and we are underway!
Knox looks to land a left hand but O Hare moved out of range nicely.
O Hare shoots in looking for a takedown. Knox tries to sprawl out of it but O Hare keeps driving through. The fighters are pinned against the cage. Knox manages to get underhooks and after a bit of a struggle, circles away and we're back to standing.
Donk. Knox catches O Hare right on the button with a cross.
O Hare shoots in for a double leg but Knox sprawls well. That's going to sap some energy.
O Hare blocks a head kick by Knox.
Padraig O Hare seems to be the more aggressive standup fighter in this bout.
Nice straight punches there by Knox. You know Roy Jones Jr respects the hands of Knox.
O Hare avoids the body shot from Knox.
Knox feints a straight left to the body, then turns around with a flashy move and hits O Hares jaw with a dramatic spinning back fist!
O Hare closes the distance and lands a one-two.
That's one minute gone in the round.
Knox slaps away a takedown attempt from O Hare, before circling back to the center of the mat.
Ben Knox has stuffed three takedown attempts in the round now. That's going to take a lot out of Padraig O Hare.
O Hare shoots in looking for a takedown. Knox tries to sprawl out of it but O Hare keeps driving through. The fighters are pinned against the cage. Knox manages to get underhooks and after a bit of a struggle, circles away and we're back to standing.
A big left from Knox misses.
O Hare fails with a takedown attempt.
Knox tries to score with a leg kick but it misses it's target.
Knox slaps away a takedown attempt from O Hare, before circling back to the center of the mat.
That's two minutes gone in the round.
O Hare shoots in for a takedown but Knox shows good takedown defense there and keeps this one on the feet.
O Hare takes a body punch but keeps moving.

O Hare takes the fight into the clinch.

O Hare has picked Knox up - he's going for a ride! O Hare dumps his opponent to the mat with a thud and settles into half guard.
The referee looks like he's ready to step in and stand the fighters back up.
O Hare is trying to work for a kimura. This could be trouble! No, Knox has managed to free his arm - good work.
O Hare is looking for a kimura here.
We've seen a great period of action over the last minute or so - credit to both fighters for going all out!
O Hare is keen to just control but Knox is a slippery customer.

That's three minutes gone in the round.
Knox is looking to improve his position.
O Hare trying to control the action but Knox is working from the bottom.
O Hare is trying for a guillotine from the top but the pressure isn't in the right place so Knox is just riding it out for now. O Hare eventually gives up the hold.
Knox is looking for a sweep. O Hare is wise to his cunning plan and keeps the top position.

That's four minutes gone in the round.
Knox is staying active underneath O Hare, who seems content to just control the action from this position.
O Hare is trying to work for a kimura. This could be trouble! No, Knox has managed to free his arm - good work.
O Hare is trying to get back to his feet now but his leg is trapped.
Knox trying to control but O Hare postures up.
O Hare looking for a kimura but he'll have to free his other leg if he wants to finish that. Perhaps he's just using it as a distraction technique.
The crowd applaud the fighters efforts here as the round comes to an end.
O Hare is trying a forearm choke
I don't think that's going to do much at this level of the game.
And thats the end of the round the fighters go back to their corners.
A close round but Padraig O Hare will probably get the nod.
Well, the break between rounds is over. Let's get back to the scrappin!

O Hare looks for a takedown here. Will he get it? Knox is fending him off so far but O Hare persists. Nope, Knox circles away and we're back to standing.
Knox keeping a good distance there, avoiding the body shot.
O Hare shoots for a takedown but Knox saw that one coming a mile off and avoided it easily.
Knox misses with a straight left.
We've had a slow start to the round here - hopefully the action picks up.
Knox lands a really nice looking cross but O Hare seems unphased.
Knox misses with the combination.
Padraig O Hare is looking to throw some combinations by the looks of things.
O Hare throws a looping left and ducks down for a takedown. He's got his arms around Knox's waist but Knox gets an underhook and avoids the takedown by throwing O Hare off to one side.
Ben Knox has stuffed three takedown attempts in the round now. That's going to take a lot out of Padraig O Hare.
That's one minute gone in the round.
Knox misses with a hook. O Hare ducked under it nicely.
O Hare shoots in for a takedown. "I don't think so" says Knox as he avoids it easily.
Knox misses with a body punch
and O Hare counters with a one-two to the body.
A big right from Knox misses.
A head kick misses from Knox.
O Hare shoots in for a double leg but Knox sprawls well. That's going to sap some energy.
O Hare shoots in for a takedown and gets it. Let's see what he's got on the mat.
Knox might be looking to lock onto one of his opponent's long limbs for a submission, whilst we're on the ground.
Knox keeping moving, preventing O Hare from controlling successfully.
That's two minutes gone in the round.
O Hare drops back looking for a heel hook - he quickly realises he's not going to get it but Knox manages to dive on top of him before he can escape and now O Hare has Knox in his guard.
There's a bit of a scramble here and now O Hare is on top in guard.
Knox looking to hit a scissor sweep but O Hare is one step ahead there.
This has been an exciting period of action!
O Hare trying to control the position from guard on top but Knox is wriggling around, looking for whatever he can.
That's three minutes gone in the round.
Knox looking for a sweep. Not yet Knox, not yet.
O Hare passes into half guard.
O Hare is looking for a kimura but he's never going to get it from there.
O Hare trying to control the action but Knox is working from the bottom.
Knox trying to control but O Hare postures up.
That's four minutes gone in the round.
O Hare is stalling here. Knox is in no mood to hang around though. He's locked up a kimura from the bottom! O Hare seems to be keeping calm but he's forced to roll out of the hold and Knox has ended up in side control on the top. Nice work.
O Hare is looking for a sweep.
O Hare is moving his hips around well on the bottom and has managed to get back to half guard.
O Hare slips a foot under and gets full guard. Nice work.
O Hare had isolated an arm as going for a kimura. Knox defends it easily.
The fighters are pressed up against the cage, both looking to find a bit of space to work.
The crowd applaud the fighters efforts here as the round comes to an end.
O Hare wants to sweep here but Knox controlling him for the moment.
And thats the end of the round the fighters go back to their corners.
Padraig O Hare showed his class in that round. I'd imagine he'll take it on all the scorecards.
The corners get their ten second warning. Both fighters stand from their stools and stare eachother down, ready to get back to the action. Ladies and gentlemen, this is the final round!

O Hare keeping a good distance there, avoiding the body shot.
Knox wants to clinch.
Knox misses with a lunging right hand
and O Hare counters with a nice double leg into guard.
O Hare trying to control the position from guard on top but Knox is wriggling around, looking for whatever he can.
Knox lands a beautiful switch and he's in full mount! That could spell trouble for O Hare!

Knox gets to his feet and calls his opponent to stand. Here come the fireworks!
Knox throws a combination. O Hare tries to block but a couple of punches get through.
That's one minute gone in the round.
O Hare fakes high and swings low for a body shot but Knox manages to avoid it.
Knox tries to land with a swinging hook to the body but O Hare was well out of range. Poor timing from Knox.
O Hare fails miserably with a takedown attempt.
O Hare will need to tighten up his combinations if he doesn't want to gas himself out, swinging at thin air.
Knox paws at his opponent with the jab and then lunges in with a straight, right on the button.
O Hare misses with a takedown attempt. He shot from a bit too far out.
That's two minutes gone in the round.
The fight stays on the outside here - Knox looks like he's thinking about clinching though.
Ben Knox is winning the standup battle so far.
O Hare shoots in but no luck this time.
Ben Knox has stuffed three takedown attempts in the round now. That's going to take a lot out of Padraig O Hare.
Knox stuffs a takedown. It's all about dictating where the fight takes place and Knox wants it to stay on the feet.
O Hare shoots in but no luck this time.
O Hare avoids the clinch attempt nicely.
Knox tries to clinch up but O Hare circles away and keeps his distance.
Knox connects with a looping right hand.
That's three minutes gone in the round.
O Hare throws a monster uppercut resembling something out of street fighter but it doesn't land.
A telegraphed right hand from Knox misses the target.
O Hare shoots in for a takedown. He's persisting with it as Knox sprawls well. Knox wins this battle and keeps the fight standing. O Hare gets slowly back to his feet.
O Hare slips a jab from Knox.
Knox punishes O Hare's body with a nice straight punch.
O Hare shoots in for a takedown but Knox shows good takedown defense there and keeps this one on the feet.
Knox fakes low and throws an overhand right that catches O Hare on the side of the head.
That's four minutes gone in the round.
O Hare tries to score a power double leg takedown but Knox sees that one coming and sprawls well. That will dishearten O Hare somewhat.
O Hare takes a big intake of breath there - he's definitely tired.
O Hare keeping his hands up high there, blocking the jab from Knox.
Nice body punch from Knox.
O Hare fails with a takedown attempt from distance.
A telegraphed takedown attempt from O Hare is defended easily by Knox.
As the round comes to an end the crowd are showing their appreciation for a great round of action.
O Hare takes a punch right to his stomach. That took the wind out of him momentarily.
And that's the end of the fight!
Ben Knox showed his dominance in that final round.
I think O Hare has won this one but let's see whether the judges agree with me. Over to the ring announcer for the scorecards.
Ladies and gentlemen, after 3 rounds of action, we go to the scorecards for a decision.
Judge Paul Tew scores the fight for Padraig O Hare!
Judge James Atkins scores the fight for Ben Knox!
Judge William Gold scores the fight for Padraig O Hare!
Padraig O Hare wins by split decision!
|
|
|
|
|
|
|
|
|
|
|
|
|
|
|
|
|
|
|
|
|
|
|
| S |
C
A |
G |
S |
C
B |
G |
|
S |
C |
G |
|
energy
A | B |
|
hype
A | B |
|
pop
A | B |
|
mgr
A | B |
|
FIGHT
RATING
41% |
|
|
|
|
|
|
|
Undercard bout
|
Coming up we have a lightweight MMA rules bout between Nate Sorenson (ranked 0 p4p, 0 weight class) and Connor Cozad (ranked 0 p4p, 0 weight class). Both fighter's entrance songs getting the crowd jumping here.
 |
|
 |
| 175 cm
26
169 lbs
16 - 10 - 0 |
|
173 cm
24
158 lbs
8 - 7 - 0 |
Good wrestling
World class boxer
Very quick |
|
ADCC Champion
Good low kicks
Powerful |
|
| |
|
Ladies and gentlemen. This fight is 3 rounds, in the lightweight division.
Introducing the fighter to my left, fighting out of the red corner.
With a record of
16 - 10 - 0, fighting out of London, Nate Sorenson!
And introducing the fighter to my right, fighting out of the blue corner.
With a record of
8 - 7 - 0, fighting out of London, Connor Cozad!
The judges for this bout are Paul Tew, James Ackerman and Colin Fotheringham.
The bell rings for round one and we are underway!
Cozad connects with a slap. Keep your fist closed son.
Cozad misses with a body kick.
Sorenson waving his hands out in front of him, looking to distract Cozad.
A looping hook to the body misses from Cozad. Sorenson does a little dance to reset his feet.
A punch combination from Cozad misses.
No joy there for Sorenson, who threw a few shots but didn't land.
Cozad missing with a left hand there. Sorenson was out of range so wasted energy throwing that one.
Cozad throws a wild combination but nothing lands.
Sorenson swings away but doesn't land with a series of punches.
Sorenson goes for a spinning back kick but it misses.
The crowd cheers as Cozad lands an impressive looking overhand right. Sorenson doesn't seem phased though.
That's one minute gone in the round.
Cozad dodges the punch combination from Sorenson.
A head kick by Sorenson misses
and Cozad counters with a leg kick that reverborates around the arena.
Cozad fails with a takedown attempt.
Cozad takes a head kick and keeps coming.
A nice inside leg kick there by Sorenson. That's going to slow Cozad down.
Ouch! a nice leg kick from Cozad, right into the meat.
That's two minutes gone in the round.
Sorenson wants to clinch but Cozad slips to the side
and Cozad counters with a two punch combo.
Nate Sorenson is looking to keep the fight on the feet at all costs.
Sorenson gets caught napping as Cozad dives in and scores a takedown. Sorenson manages to retain guard.
It looks like the ref is thinking about a standup.

Cozad stands up from Sorenson's guard - Cozad perhaps looking for a knockout.
We've seen a great period of action over the last minute or so - credit to both fighters for going all out!
Cozad shoots in with a takedown attempt and he has Sorenson pinned against the cage. Sorenson gets the underhooks and manages to circle away.
Sorenson tries to clinch up.
That's three minutes gone in the round.
A solid leg kick lands there for Cozad.
Cozad will need to close the distance a bit before he attacks - that leg kick was thrown from too far away.
Sorenson ducks under a wild hook from Cozad.
Sorenson ducks under an overhand right and circles away with a smile on his face.
Cozad throws a low kick but Sorenson moves out of range easily.
Sorenson rushes forward with a series of wild hooks but Cozad moves out of range and avoids them all easily.
A combination from Cozad does no damage.
Sorenson darts in and out, connecting with a jab.
Sorenson fakes a jab and throws a low kick but Cozad checks it well.
That's four minutes gone in the round.
Sorenson misses with a jab and misses with a cross straight after too.
Sorenson lands a really nice looking cross but Cozad seems unphased.
Cozad is looking for a takedown here. He's shot in and has managed to get it, finishing up in Sorenson's half guard.
Sorenson trying to hold on to Cozad's head to control him but Cozad postures up.
Cozad tries to stand but his arm is trapped.
Sorenson wants to get back to his feet.
The crowd applaud the fighters efforts here as the round comes to an end.
Sorenson looking for submissions from an awkward position here.
Both fighters really going for it on the ground here!
Cozad is trying a forearm choke
I don't think that's going to do much at this level of the game.
Cozad is thinking about going for an arm triangle but he can't free his leg.
And thats the end of the round the fighters go back to their corners.
Connor Cozad dominated that round.
The fighters get back to their feet, the hooter sounds and we're back to the action!
Sorenson misses with a combination
and Cozad counters with a stiff right hand.
Cozad misses with a straight left.
Cozad fakes a jab and throws a low kick but Sorenson checks it well.
Sorenson throws a series of punches but Cozad avoids them all with ease.
Sorenson looks to land a combination but Cozad avoids it well.
Cozad wants to land a leg kick but Sorenson is out of range.
Sorenson throws a head kick that misses.
Danga de danga de dang - Sorenson scores with a four punch combination!
That's one minute gone in the round.
Cozad throws a series of punches but Sorenson moves out of range.
Sloppy strikes from Sorenson. Those never looked like landing.
Sorenson gets in close and instigates a clinch.
Sorenson wants to break free but Cozad has control.
Sorenson goes for a takedown in the clinch but Cozad prevents it.
Sorenson has had enough of the clinch and is looking to separate.
Cozad has double underhooks and is working for a body lock takedown. He's got it. The fighters land in half guard but Sorenson regains guard immediately.
Sorenson not looking particularly offensive just at the moment.
Sorenson will have to put a bit more behind his punches if he's going to do any damage from this position.
Cozad trying to control the position from guard on top but Sorenson is wriggling around, looking for whatever he can.
That's two minutes gone in the round.
Cozad stands up from Sorenson's guard - Cozad perhaps looking for a knockout.
Nate Sorenson is looking to throw some combinations by the looks of things.
Cozad gets the takedown into side control.
Wooooo! Give it up for these two warriors! They are putting on a show!
Cozad is looking to finish here, going for an Americana. Sorenson knows the correct defense though, so he's OK.
Cozad decides to stand back up.
Sorenson scores with a nice one two combo and darts back out of range to avoid anything coming in the opposite direction.
Sorenson looks to score with a combo but nothing lands.
That's three minutes gone in the round.
Cozad just misses with a punch to the body.
Cozad shoots in but no luck this time.
Sorenson lands with a slapping head kick.
Sorenson stuffs the takedown.
Cozad takes a kick to the body and keeps moving.
Cozad throws a combination but comes up with nothing but fresh air.
Sorenson connects with a solid leg kick.
Cozad misses with a hook.
Connor Cozad seems to be getting the better of the standup.
That's four minutes gone in the round.
Sorenson connects with a solid leg kick.
Sorenson showing good head movement there, avoiding the strikes from Cozad.
Cozad moves forwards but Sorenson connects with a nice, crisp jab.
Cozad tries a switch kick but it misses it's target.
Sorenson misses with a double jab
and Cozad counters with a straight right hand.
The crowd applaud the fighters efforts here as the round comes to an end.
Sorenson throws a hook but Cozad blocks it.
And thats the end of the round the fighters go back to their corners.
Connor Cozad showed his class in that round. I'd imagine he'll take it on all the scorecards.
The fighters' corners scream their final instructions, as the referee calls time. Here we go, back to the action! And we move into the final round!
Sorenson rushes forward with a series of wild hooks but Cozad moves out of range and avoids them all easily.
Sorenson blocks a jab.
Cozad misses with a jab and misses with a cross straight after too.
Sorenson uses good footwork to get in and out, landing a nice hook.
Cozad throws a combination that misses
and Cozad takes a counter punch right on the button for his troubles.
Sorenson throws a combination that misses
and Cozad makes him pay by landing a nice hook to the body before moving out of range.
Thud! ouch! good body kick from Sorenson - that will leave a mark!
Sorenson slaps away a takedown attempt from Cozad, before circling back to the center of the mat.
Cozad will need to tighten up his combinations if he doesn't want to gas himself out, swinging at thin air.
That's one minute gone in the round.
Cozad has his head slapped from side to side by a 3 punch combination. That must have hurt him.
Sorenson uses good footwork to avoid the strikes from Cozad.
Cozad works the jab nicely.
Cozad pushing out the jab but it's not landing.
Sorenson throws a nice looking combination but Cozad bobs and weaves to avoid any damage.
Sorenson throws a decent looking leg kick but it doesn't land clean.
That's two minutes gone in the round.
Cozad works the jab nicely.
Cozad ducks under a wild hook from Sorenson.
Cozad swings away with a leg kick that misses.
Sorenson throws a leg kick
and Cozad connects with a straight left hand counter down the middle.
Cozad avoids a punch combination nicely.
Sorenson throws a combination but comes up with nothing but fresh air.
No joy there for Cozad, who threw a few shots but didn't land.
That's three minutes gone in the round.
Sorenson scores with a jab. Cozad acknowledges it with a nod of the head.
Sorenson swings for the body but Cozad moves out of range.
Cozad manages to get an easy takedown there - catching Sorenson on his heels. He'll look to pass Sorenson's guard now, I'm sure.
Cozad stands up over Sorenson, holding his feet. He dives back in and lands a decent shot to the head.
Cozad stands up and looks to throw the legs aside to pass to side control. Sorenson swivels though and keeps the full guard.
Cozad gets to his feet - Sorenson follows without any prompting.
Sorenson misses with a few strikes there.
Nate Sorenson seems to be the more aggressive standup fighter in this bout.
Cozad misses with a kick to the body.
Cozad throws a nice looking combination but Sorenson bobs and weaves to avoid any damage.
That's four minutes gone in the round.
Jab by Sorenson.
Sorenson misses with a wild combination.
Cozad looks to land a combination but Sorenson avoids it well.
Cozad showing good head movement there, avoiding the strikes from Sorenson.
Cozad checks a low kick. Bone on bone - not my idea of a good time.
And that's the end of the fight!
Connor Cozad comfortably won the final round on my scorecard.
I've got Cozad winning every round here. Surely the decision will go his way and he'll pick up a well deserved decision victory. Over to the ring announcer for the scorecards.
Ladies and gentlemen, after 3 rounds of action, we go to the scorecards for a decision.
Judge Paul Tew scores the fight for Connor Cozad!
Judge James Ackerman scores the fight for Connor Cozad!
Judge Colin Fotheringham scores the fight for Connor Cozad!
Connor Cozad wins by unanimous decision!
|
|
|
|
|
|
|
|
|
|
|
|
|
|
|
|
|
|
|
|
|
|
|
| S |
C
A |
G |
S |
C
B |
G |
|
S |
C |
G |
|
energy
A | B |
|
hype
A | B |
|
pop
A | B |
|
mgr
A | B |
|
FIGHT
RATING
38% |
|
|
|
|
|
|
|
Undercard bout
|
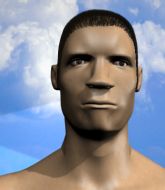
Coming up we have a super heavyweight MMA rules bout between Dave Jones (ranked 0 p4p, 0 weight class) and Shirley Crabtree Jr (ranked 0 p4p, 0 weight class). Jones comes to the cage accompanied by Yes. These two fighters really are very evenly matched on the feet - it will be fascinating to see who can assert themselves in that aspect of the fight.
 |
|
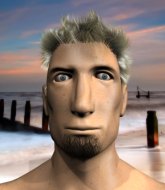 |
| 190 cm
26
290 lbs
12 - 9 - 1 |
|
190 cm
26
272 lbs
7 - 7 - 0 |
Dangerous GnP
Excellent boxer
Very quick |
|
Good wrestler
Decent boxing
Powerful |
|
| |
|
Ladies and gentlemen. This fight is 3 rounds, in the super heavyweight division.
Introducing the fighter to my left, fighting out of the red corner.
With a record of
12 - 9 - 1, fighting out of London, Dave Jones!
And introducing the fighter to my right, fighting out of the blue corner.
With a record of
7 - 7 - 0, fighting out of London, Shirley Crabtree Jr!
The judges for this bout are Chris Edwards, James Atkins and Steven Brown.
The bell rings for round one and we are underway!
Crabtree Jr checks a low kick from Jones.
Crabtree Jr throws a loose over hand right and dives in with a double leg takedown. Jones tries to sprawl but it's too late and the fighters hit the mat. Crabtree Jr is in Jones's guard.
Jones wants to sweep but no luck.
Crabtree Jr loading up with the ground and pound but he's missing more than he's landing in this flurry.
Jones looking to sweep here. No luck so far.
Crabtree Jr wants to pass the guard but Jones is keeping the position.
Jones wants to sweep here but Crabtree Jr controlling him for the moment.
Jones bucks up whilst keeping hold of a body lock, managing to reverse the position. Now he's in top in Crabtree Jr's guard.
Jones throwing shots from guard but he's hitting more mat than opponent.
Jones scoring with some ground and pound.
Wooooo! Give it up for these two warriors! They are putting on a show!
Crabtree Jr looking for a guillotine here but Jones defends easily.
Both fighters really going for it on the ground here!
Jones working some ground and pound from guard but it's not doing any damage.
Crabtree Jr wants to sweep here but Jones controlling him for the moment.
Crabtree Jr throwing his legs up looking for a triangle.
That's one minute gone in the round.
Crabtree Jr has a loose triangle. He'll be looking to tighten that up but Jones can see exactly what he's planning and manages to posture up and free himself.
Jones in full guard, throwing the ground and pound. No damage this time.
Jones working some strikes from top position.
Jones is in close to Crabtree Jr's body, working some short punches and elbows.
Jones got a little sloppy there for a moment and Crabtree Jr has worked his way into a loose triangle - can he finish it?! No, Jones has managed to get both his arms back between Crabtree Jr's legs - danger averted.
Jones with a flurry of punches that miss.
Crabtree Jr utilising some decent striking defenses from the guard, preventing the ground and pound.
Jones distracts Crabtree Jr with his right hand and drops a big elbow with his other arm.
This has been an exciting period of action!
Jones connects with a couple of short punches.
Crabtree Jr throwing strikes off his back to little effect.
Crabtree Jr has an omoplata and is looking to use it perhaps as a submission or perhaps to transition. Jones is in a bit of discomfort here, but he's managed to free himself and has dived into side control! That didn't work out too well for Crabtree Jr.
Jones is working Crabtree Jr over with some ground and pound from side control.
That's two minutes gone in the round.
Crabtree Jr takes an elbow right on the bridge of the nose and winces in pain.
Crabtree Jr tries to bench press Jones off him but Jones keeps the position.
Crabtree Jr is trying to buck Jones off.
Crabtree Jr tries to improve position but can't.
Jones has been looking to land a fair amount of strikes on the ground. He might be looking to soften his opponent up in order to work for a submission.
Jones moves into full mount!
The fighters are pressed up against the cage, both looking to find a bit of space to work.
Jones putting on the heat here with some good ground and pound!
Jones working the ground and pound effectively.
Jones pausing momentarily but resumes with a couple of decent strikes that do a bit of damage.
Crabtree Jr looks gassed!
Crabtree Jr is in all sorts of trouble here.
BOOM! Jones connects with a massive shot to the dome!
Jones cracks Crabtree Jr with a nasty head shot there - the crowd let out an audible gasp there, as the noise reverberated around the arena.
The ref warns both fighters not to hold the cage as they work up against the meshing.
That's three minutes gone in the round.
Jones landing strikes from the mount and Crabtree Jr is in trouble!
Jones loads up on a couple of big shots to the head that have Crabtree Jr scrambling to escape. He can't get free though and several more unanswered shots from Jones land to the head. The referee has no choice but to stop the fight. Jones stands and salutes the crowd.
Ladies and gentlemen, after 3:24 of round 1, we have a winner by way of TKO (Strikes). Dave Jones!
|
|
|
|
|
|
|
|
|
|
|
|
|
|
|
|
|
|
|
|
|
|
|
| S |
C
A |
G |
S |
C
B |
G |
|
S |
C |
G |
|
energy
A | B |
|
hype
A | B |
|
pop
A | B |
|
mgr
A | B |
|
FIGHT
RATING
82% |
|
|
|
|
|
|
|
Undercard bout
|
Coming up we have a super heavyweight MMA rules bout between Ivan Futcar (ranked 0 p4p, 0 weight class) and Tarzan Taborda (ranked 0 p4p, 0 weight class). Futcar comes to the cage accompanied by Motorhead - No Remorse. Taborda has chosen New Noise by Refused as his entrance music. Ivan Futcar could well score a knockout today. He has the power to get to Tarzan Taborda's chin.
 |
|
 |
| 222 cm
27
300 lbs
10 - 6 - 0 |
|
195 cm
29
274 lbs
13 - 5 - 1 |
Good wrestling
Excellent boxer
KO power |
|
Good wrestler
Excellent MT
Heavy handed |
|
| |
|
Ladies and gentlemen. This fight is 3 rounds, in the super heavyweight division.
Introducing the fighter to my left, fighting out of the red corner.
With a record of
10 - 6 - 0, fighting out of London, Ivan Futcar!
And introducing the fighter to my right, fighting out of the blue corner.
With a record of
13 - 5 - 1, fighting out of London, Tarzan Taborda!
The judges for this bout are James Atkins, Paul Tew and Sam Margolis.
The bell rings for round one and we are underway!
Taborda shoots for a double leg takedown but Futcar sprawls well. He's pushed Taborda's face into the mat and manages to get back to his feet relatively easily.
Taborda throws a jab but it's blocked by Futcar.
Taborda leaves Futcar with his face pressed against the mat as he sprawls beautifully, defending against a solid takedown attempt.
Taborda shoots in and drives through. Futcar sprawls well.
Futcar will have to do better than that with his takedown attempts.
Futcar slips a straight right by Taborda.
Futcar is looking to take this fight into the clinch.
Taborda changes levels and looks for a double leg takedown. Futcar tries to avoid it but Taborda manages to keep hold of a leg and drag Futcar to the ground. Futcar escapes though and pops straight back up to his feet.
Ivan Futcar has stuffed three takedown attempts in the round now. That's going to take a lot out of Tarzan Taborda.
A big right from Taborda misses.
That's one minute gone in the round.
Futcar fakes high and shoots in for a takedown but Taborda avoids it really well and circles away.
Taborda throws a hook but Futcar avoids it easily.
Futcar fails with a takedown attempt.
Taborda throws a series of punches but Futcar moves out of range.
Horrible takedown by Taborda or perhaps it was just good defense by Futcar which made him look bad.
That's two minutes gone in the round.
Taborda defends well against a solid takedown attempt from Futcar.
Futcar fakes high and shoots in for a takedown but Taborda avoids it really well and circles away.
Futcar takes a shot right to the liver - Bas would have been proud of that punch.
Taborda works Futcar's body with a nice hook.
Futcar is breathing heavily.
The crowd are loving this. Great action here.
Futcar on the wrong end of an overhand right that came out of nowhere.
That's three minutes gone in the round.
Taborda throws out a loose jab but Futcar uses good head movement to avoid it.
Taborda shoots in for a takedown. He's persisting with it as Futcar sprawls well. Futcar wins this battle and keeps the fight standing. Taborda gets slowly back to his feet.
Taborda throws a wild combination but nothing lands.
Futcar ducks under a wild hook from Taborda.
Futcar just misses with a punch to the body.
Futcar shoots in for a takedown - he's clinched up with Taborda but Taborda pushes him off and we're back to square one.
Taborda swings for the body but Futcar moves out of range.
That's four minutes gone in the round.
Taborda lunges in with swinging rights and lefts but Futcar circles away quickly and effectively.
Futcar tries for a takedown but Taborda circles away easily
so Taborda counters with a double leg into guard. Good agility.
We've had a lack of effective grappling in the last minute or so, which could well see a referee standup.
Futcar trying to keep a closed guard but Taborda is proving a slippery customer.
Taborda slips effortlessly into side control - very nice.
The crowd are loving this. Great action here.
Taborda decides to take the fight back to the feet.
As the round comes to an end the crowd are showing their appreciation for a great round of action.
Taborda throws out a loose jab but Futcar uses good head movement to avoid it.
And thats the end of the round the fighters go back to their corners.
Tarzan Taborda dominated that round.
Well, the break between rounds is over. Let's get back to the scrappin!
Futcar tries to clinch up
and Taborda counters with a nice double leg into side control. Futcar won't be happy with that.
Taborda wants to stand but Futcar has his arm trapped.
Futcar is trying to get back to half guard.
Taborda has had enough of the ground for now and decides to stand.
Futcar misses with a takedown attempt. He shot from a bit too far out.
Taborda pushing out the jab but it's not landing.
That's one minute gone in the round.
Futcar shoots in looking for a takedown. Taborda tries to sprawl out of it but Futcar keeps driving through. The fighters are pinned against the cage. Taborda manages to get underhooks and after a bit of a struggle, circles away and we're back to standing.

Taborda cracks Futcar with a big right hand that sends him crashing to the floor. Taborda has the opportunity to follow him to the ground but instead he's beckoning Futcar to stand back up!
It looks like Ivan Futcar has been cut.
Futcar closes this distance looking for a takedown but Taborda circles away.
That's three failed takedown attempts in the round for Ivan Futcar. That's going to take a lot out of him.
Taborda misses with a hook.
Taborda misses with a straight left.
Futcar fails with a takedown attempt from distance.
That's two minutes gone in the round.
We've seen a great period of action over the last minute or so - credit to both fighters for going all out!
Futcar shoots in with a takedown attempt and he has Taborda pinned against the cage. Taborda gets the underhooks and manages to circle away.
Taborda ducks down and throws a hook to the body.
Tarzan Taborda is looking to throw some combinations by the looks of things.
Both fighters are absolutely exhausted here.
Taborda with a body punch. A glancing blow.
Taborda sends Futcar crashing to the mat with a devastating uppercut! Taborda is motioning to the referee to let Futcar up. He wants to try and finish this one on the feet!
Futcar is rocked!
Taborda lands a big uppercut and this one is all over! His foe lies motionless on the canvas - a massive one punch knockout!
Ladies and gentlemen, after 2:52 of round 2, we have a winner by way of KO (Punch). Tarzan Taborda!
|
|
|
|
|
|
|
|
|
|
|
|
|
|
|
|
|
|
|
|
|
|
|
| S |
C
A |
G |
S |
C
B |
G |
|
S |
C |
G |
|
energy
A | B |
|
hype
A | B |
|
pop
A | B |
|
mgr
A | B |
|
FIGHT
RATING
48% |
|
|
|
|
|
|
|
Undercard bout
|
Coming up we have a featherweight MMA rules bout between Heikki Ramires (ranked 0 p4p, 0 weight class) and Hugo Stglitz (ranked 0 p4p, 0 weight class). Ramires kept the crowd waiting but all that was forgotten when his ring entrance music started. The incomparable musical genius that is Blitz - Someone's Gonna Die Tonight. Stglitz comes into a darkened arena with his song building. Feuer frei! kicks in, the lights come on and the crowd goes wild! What a showman! Man, I cannot wait for this one!
 |
|
 |
| 170 cm
25
155 lbs
14 - 6 - 0 |
|
180 cm
24
145 lbs
14 - 11 - 0 |
Abu Dhabi Champ
Excellent boxer
KO power |
|
BJJ Brown Belt
Excellent boxer
Powerful |
|
| |
|
Ladies and gentlemen. This fight is 3 rounds, in the featherweight division.
Introducing the fighter to my left, fighting out of the red corner.
With a record of
14 - 6 - 0, fighting out of Amsterdam, Heikki Ramires!
And introducing the fighter to my right, fighting out of the blue corner.
With a record of
14 - 11 - 0, fighting out of London, Hugo Stglitz!
The judges for this bout are Richard Clark, Sam Margolis and James Atkins.
The bell rings for round one and we are underway!
Stglitz takes a shot right to the bread basket.
Ramires throws a combination but it was largely blocked by Stglitz.
Ramires tries to bum rush Stglitz with a series of wild strikes but Stglitz uses good footwork to avoid the assault.
Ramires throws a monster uppercut resembling something out of street fighter but it doesn't land.
Ramires misses the shot to the body.
Stglitz looking to take his opponent's legs away with the low kicks.
Ramires uses some good footwork to avoid the body shot by Stglitz.
Ramires moving in and out of range nicely, whilst landing the scoring shot.
Stglitz moves away from the strike by Ramires.
Stglitz throws a hook but Ramires avoids it easily.
That's one minute gone in the round.
A bone on bone clash there as Ramires blocks the leg kick.
Ramires jabs Stglitz to the body, keeping him at a distance.
Stglitz goes for a spinning back kick but it misses.
Stglitz tries to check the leg kick but that clearly hurt him.
Ramires moves forwards but Stglitz connects with a nice, crisp jab.
Ramires avoids a lazy jab quite easily.
Stglitz throws a series of punches but Ramires moves out of range.
Stglitz is a painfully thin specimen of a man. You do wonder whether a good body kick would snap him clean in two.
Stglitz tries a head kick but it misses.
That's two minutes gone in the round.
Ramires missing with a left hand there. Stglitz was out of range so wasted energy throwing that one.
Like a baseball bat into the meat of his leg there - nice leg kick by Ramires.
Stglitz jabs Ramires to the body, keeping him at a distance.
Stglitz throws a leg kick that misses.
Ramires cracks Stglitz with a hook to the jaw. Both fighters smile at eachother and high-five before getting back down to business.
Stglitz misses with a double jab.
Ramires moves forwards but Stglitz connects with a nice, crisp jab.
Stglitz avoids the body shot from Ramires.
That's three minutes gone in the round.
Stglitz throws a lazy right hand but Ramires sees it coming a mile off and sidesteps it easily.
Both fighters are looking to counter, which isn't making for the most exciting fight in the world.
Stglitz uses good footwork to avoid the strikes from Ramires.
Stglitz misses with a right hand
and Ramires counters with a good right hand that lands right on the jaw.
A looping hook to the body misses from Ramires. Stglitz does a little dance to reset his feet.
Ramires scores with a jab to the jaw.
Ramires turns his hip over beautifully as he lands a nice leg kick.
Stglitz throws a leg kick that is checked
and Ramires counters with a nice uppercut.
Hugo Stglitz is looking to keep the fight on the feet at all costs.
That's four minutes gone in the round.
Ramires lands a jab.
Stglitz lands a head kick!
Stglitz bobs and weaves well there to avoid the strikes.
Ramires throws an off balance right hand
and Stglitz counters nicely by changing levels and landing a hook to the body.
The crowd applaud the fighters efforts here as the round comes to an end.
A head kick misses from Stglitz.
Ramires misses with a body shot. Nice footwork from Stglitz.
And thats the end of the round the fighters go back to their corners.
Heikki Ramires dominated that round.
The fighters get back to their feet, the hooter sounds and we're back to the action!
Stglitz swings for the body but Ramires moves out of range.
Sloppy strikes from Ramires. Those never looked like landing.
Ramires digs a good hook to Stglitz's body.
Ramires misses with a right hand
and Stglitz counters with a right hand to the body.
Stglitz gets to the clinch - let's see what his plan is here.
Stglitz working hard to break the clinch.
Stglitz is looking to break free of the clinch but Ramires has double underhooks.
Ramires prevents Stglitz from breaking the clinch.
Ramires has moved round to his opponent's back and is looking for a suplex! Oh snap! He's tossed Stglitz clear over his head and slammed him to the mat!
The referee is asking the fighters to pick up the pace.
Ramires throwing strikes from the back - he gets a warning from the referee for striking the back of the head but all these shots are hurting Stglitz!
The fighters are pressed up against the cage, both looking to find a bit of space to work.
That's one minute gone in the round.
Stglitz trying to control the hands but Ramires breaks the grip.
Ramires is working the ground and pound here and the referee is taking a close look at Stglitz. He must escape soon or this one will be stopped.
Ramires is working for a rear naked choke. Stglitz is not defending it well and Ramires has tightened it up quickly! This could be all over! Stglitz refuses to tap and goes to sleep, forcing the referee to intervene. A little trickle of blood came out of Stglitz's nose as his head slumped to the floor. That is naaaasty!
Ladies and gentlemen, after 1:29 of round 2, we have a winner by way of Submission (RNC). Heikki Ramires!
|
|
|
|
|
|
|
|
|
|
|
|
|
|
|
|
|
|
|
|
|
|
|
| S |
C
A |
G |
S |
C
B |
G |
|
S |
C |
G |
|
energy
A | B |
|
hype
A | B |
|
pop
A | B |
|
mgr
A | B |
|
FIGHT
RATING
42% |
|
|
|
|
|
|
|
Undercard bout
|
Coming up we have a featherweight MMA rules bout between Chris Bacon (ranked 0 p4p, 0 weight class) and Sloat Gresham (ranked 0 p4p, 0 weight class). Gresham has chosen Three Days Grace - Animal I Have Become as his entrance music. Man, I cannot wait for this one!
 |
|
 |
| 172 cm
25
152 lbs
15 - 6 - 0 |
|
173 cm
27
145 lbs
14 - 13 - 1 |
Good wrestling
World class boxer
Very quick |
|
Good wrestler
Dangerous knees
Powerful |
|
| |
|
Ladies and gentlemen. This fight is 5 rounds, for the featherweight championship of the world!
Introducing the champion to my left, fighting out of the red corner.
With a record of
15 - 6 - 0, fighting out of London, Chris Bacon!
And introducing the challenger to my right, fighting out of the blue corner.
With a record of
14 - 13 - 1, fighting out of London, Sloat Gresham!
The judges for this bout are Richard Clark, James Atkins and Daniel Bishop.
The bell rings for round one and we are underway!
Bacon lands a right hook to the body.
Gresham staying out of range there.
Gresham takes a shot to the nose. Hopefully that hasn't broken it.
Bacon swings and misses with a hook to the body.
A low kick from Bacon misses
and Gresham counters with a driving takedown into guard. Nice work there by Gresham.
We could do with one of the fighters taking the initiative a bit more on the ground - they're both waiting to capitalize on a mistake.
Gresham gets to his feet - Bacon follows without any prompting.
Gresham uses some good footwork to avoid the body shot by Bacon.
Some wild striking there from Bacon.
Bacon pushing out the jab but it's not landing.
Gresham displays some good footwork, moving neatly out of range as Bacon throws out the jab.
The fans in attendance giving it up for the two fighters, who have really let it all hang out in the last minute or so!
Bacon will need to tighten up his combinations if he doesn't want to gas himself out, swinging at thin air.
A solid leg kick lands there for Gresham.
That's one minute gone in the round.
Bacon throws a jab but it's blocked by Gresham.
Bacon throws a poor cross that misses
and Gresham counters into the clinch. Nicely done.
Bacon prevents the takedown attempt.
Bacon fails to land with a short punch on the inside.

Gresham breaks from the clinch.
Bacon swings and misses with a hook to the body.
Gresham uses decent footwork to sidestep a right hand from Bacon.
Bacon uses some good footwork to avoid the body shot by Gresham.
A decent looking cross lands there for Bacon.
Gresham tries a head kick but it misses.
A jab from Bacon misses.
That's two minutes gone in the round.
Bacon looks to score with a jab to the body but Gresham is just out of range.
Boom, another hit is landed. "You're gunna get knocked out" taunts Bacon, as that shot connected.
Gresham moves away from the strike by Bacon.
Gresham looks frustrated there after his takedown attempt is stuffed easily.
Bacon throws an off balance right hand
and Gresham counters with a straight right hand.
Gresham tries to clinch
and Bacon counters with a three punch combo that has Gresham backing up. Gresham nods at Bacon to acknowledge the strikes.
The fans in attendance giving it up for the two fighters, who have really let it all hang out in the last minute or so!
A swing and a miss from Bacon.
Bacon wants to land a leg kick but Gresham is out of range.
Bacon throws a combination but comes up with nothing but fresh air.
Bacon comes forward and lands a shot to the body, then darts back out of range.
Gresham tries to clinch up.
That's three minutes gone in the round.
Gresham tries to close the distance and clinch but Bacon swats him to one side with an open hand palm strike and circles away.
Bacon throws a nice looking combination but Gresham bobs and weaves to avoid any damage.
Gresham fails with a rather predictable takedown attempt.
Chris Bacon has stuffed three takedown attempts in the round now. That's going to take a lot out of Sloat Gresham.
Bacon lands a jab to Gresham's midsection.
Gresham throws a leg kick that misses.
Bacon scores with a punch to the head.
Gresham ducks under a wild hook from Bacon.
Gresham moves away from the strike by Bacon.
Gresham shoots in for a takedown. "Ole!" shouts Bacon as he jumps to the side.
Bacon's hands are dropping dangerously low here and Gresham connects clean with a right hook that sends him down to one knee! Bacon scrambles back to his feet.
That's four minutes gone in the round.
Gresham walks into a jab.
Gresham closes the distance and clinches up with Bacon, looking for a takedown. Gresham pushes Bacon against the cage but Bacon circles to the side and manages to break the clinch.
Gresham closes the distance but Bacon moves to the side
and Gresham takes a counter punch right on the button for his troubles.
Bacon will need to tighten up his combinations if he doesn't want to gas himself out, swinging at thin air.
Gresham scores with a push kick.
Gresham closes the distance and looks for a trip takedown... aaaand he's got it - Gresham lands in his opponent's guard.
This is a great period of action - very entertaining stuff!
As the round comes to an end the crowd are showing their appreciation for a great round of action.
Gresham throws a strike but Bacon rolls with it and manages to sweep. Now he's in guard on top.
And thats the end of the round the fighters go back to their corners.
Chris Bacon dominated that round.
The referee calls time. The cornermen exit stage left and we're back to business.
A shot to the body from Bacon misses
and Gresham connects with a straight left hand counter down the middle.
Bacon throws a right hand that misses
and Gresham counters with a nice low kick that buckles Bacon's knee momentarily.
Gresham gets a clinch.
Gresham pushes off and circles away, back to the middle of the mat.
Bacon misses with a straight left.
Gresham tries for a takedown but Bacon circles away easily
letting Bacon counter with a right hand.
Gresham tries to close the distance and clinch up but Bacon swats him away and circles back towards the center.
Gresham gets cracked with a nice right hand there by Bacon.
Bacon throws a lazy right hand but Gresham sees it coming a mile off and sidesteps it easily.
Gresham tries to clinch but Bacon is having none of it.
Gresham moves forwards but Bacon connects with a nice, crisp jab.
That's one minute gone in the round.
Bacon misses with a body shot.
Bacon looks to score with a jab to the body but Gresham is just out of range.
Gresham lands with a straight right. Bacon didn't see that one coming.
Bacon throws out a token jab with nothing on it.
Bacon feints a straight left to the body, then turns around with a flashy move and hits Greshams jaw with a dramatic spinning back fist!
Bacon ducks down and throws a hook to the body but Gresham moves away.
A big left from Bacon misses.
Gresham misses with a hook to the body
and Bacon counters with a crisp hook to the side of the head.
Bacon scores with a nice strike.
A right-left combo lands from Bacon.
Bacon looks to score with a jab to the body but Gresham is just out of range.
That's two minutes gone in the round.
Gresham tries a head kick but it misses.
Gresham moves into the clinch successfully.
Fantastic stuff here - a very entertaining period of action, which has drawn cheers from the crowd.
Bacon fails to land with a short punch on the inside.
Bacon pushes Gresham back against the cage and lands a hook to the side of the head.
Gresham manages to pull guard. Let's see whether he can land a sub off his back.
Gresham has a closed guard, preventing Bacon from standing up.
Gresham is throwing his legs up, looking for submissions. Bacon is aware though and is defending well.
The fighters are pressed up against the cage, both looking to find a bit of space to work.
Gresham throws his legs up looking for a submission but Bacon uses it to pass to side control.
That's three minutes gone in the round.
Bacon decides to stand back up.
Bacon throws an off balance right hand
letting Gresham counter with a right hand.
Decent striking displayed by Gresham there.
Chris Bacon is looking to keep the fight on the feet at all costs.
Bacon misses with a combination
and Gresham counters with a good low kick that Bacon was not able to check.
Bacon lands a right hook to the body.
Gresham scores with a shot to the body.
Bacon ducks low and lands a nice hook to the body of his opponent.
Gresham works Bacon's body with a nice hook.
That's four minutes gone in the round.
Gresham misses with an attempted mid kick.
Nice jab there from Gresham.
Bacon fails to land with a series of punches.
Gresham ducks down and throws a hook to the body but Bacon moves away.
The crowd cheers as Bacon lands an impressive looking overhand right. Gresham doesn't seem phased though.
Bacon throws a combination that misses
and he gets countered with a snapping leg kick.
The fans in attendance giving it up for the two fighters, who have really let it all hang out in the last minute or so!
Gresham shoots in with a takedown attempt and he has Bacon pinned against the cage. Bacon gets the underhooks and manages to circle away.
Gresham tries to close the distance and clinch up against the cage but Bacon paws at him with a jab and circles away.
Chris Bacon seems to be the more aggressive standup fighter in this bout.
As the round comes to an end the crowd are showing their appreciation for a great round of action.
Gresham slips a straight right by Bacon.
And thats the end of the round the fighters go back to their corners.
Chris Bacon dominated that second round.
That's the end of the round. The referee orders the cornermen out of the cage so we can get back down to business.
Bacon throws a combination that misses
and Gresham counters with a lovely straight right hand!
Bacon throws a nice looking combination but Gresham bobs and weaves to avoid any damage.
Bacon throws a jab but it's blocked by Gresham.
Gresham misses with an uppercut. Bacon saw that one coming.
Gresham scores with a head kick.
Bacon throws a series of punches but Gresham moves out of range.
Bacon defends well against a solid takedown attempt from Gresham.
Bacon connects with a hook to the side of his opponent's head.
Bacon falls off balance throwing a combination
and Gresham counters with a three punch combination, finished off with a leg kick. Nice work.
Bacon misses with a telegraphed body shot
and Gresham makes him pay by landing a thudding low kick.
That's one minute gone in the round.
Bacon looks to land a left hand but Gresham moved out of range nicely.
Bacon throws a looping overhand right but Gresham ducks down to avoid it.
Bacon throws a combination but comes up with nothing but fresh air.
Bacon misses with a hook
and Gresham counters with a left and a right that stings Bacon.
Chris Bacon is looking to throw some combinations by the looks of things.
Gresham defending well as Bacon loads up on a big left hand.
Bacon misses with a looping left.
Gresham shoots in for a double leg but Bacon sprawls well. That's going to sap some energy.
Gresham throws a feint and then finishes with a kick to the body.
Gresham connects with a looping left hand that seems like it dazed Bacon momentarily.
Nice takedown defense from Bacon. No joy for Gresham on that attempt.
Chris Bacon has stuffed three takedown attempts in the round now. That's going to take a lot out of Sloat Gresham.
Bacon moves into range and throws a lovely three punch combination.
That's two minutes gone in the round.
Gresham throws a right and a left that both miss.
Gresham moves away from the strike by Bacon.
Danga de danga de dang - Bacon scores with a four punch combination!
This is a great period of action - very entertaining stuff!
Gresham throws a series of punches but Bacon avoids them all with ease.
Bacon lands a slapping body shot.
Bacon will need to tighten up his combinations if he doesn't want to gas himself out, swinging at thin air.
Bacon lands with a cross.
Bacon lunges in with swinging rights and lefts but Gresham circles away quickly and effectively.
That's three minutes gone in the round.
Bacon misses the shot to the body.
This fight brought to you by 5M nutrition - it's mmmmm tasty. Nice jab by Bacon.
Bacon takes a jab right on the nose. That must have hurt but he shrugs his shoulders and looks to return the favor.
Gresham shoots in and drives through. Bacon sprawls well.
Chris Bacon is winning the standup battle so far.
Some bone on bone action there as Gresham checks a low kick. Luckily it wasn't a particularly hard one.
Gresham tries to shoot in for a takedown. He's got hold of a leg but Bacon swivels and escapes.
Bacon lands with an overhand left.
Gresham is on the wrong end of a nice combination from Bacon.

Gresham is rocked!
Bacon thuds a left hand into Gresham's body.
Gresham is still on wobbly legs! Can Bacon finish him?
Gresham takes a big intake of breath there - he's definitely tired.
We've seen a great period of action over the last minute or so - credit to both fighters for going all out!
Bacon fakes the body blow, causing Gresham to drop his hands! Left hook to the temple! Gresham goes stiff, and falls face first into the mat. Goodnight!
Ladies and gentlemen, after 4:01 of round 3, we have a winner by way of KO (Punch). Chris Bacon!
Chris Bacon retains his featherweight title!
|
|
|
|
|
|
|
|
|
|
|
|
|
|
|
|
|
|
|
|
|
|
|
| S |
C
A |
G |
S |
C
B |
G |
|
S |
C |
G |
|
energy
A | B |
|
hype
A | B |
|
pop
A | B |
|
mgr
A | B |
|
FIGHT
RATING
64% |
|
|
|
|
|
|
|
Co-main event
|
Coming up we have a featherweight MMA rules bout between David Miller (ranked 0 p4p, 0 weight class) and Sammy Bhuda (ranked 0 p4p, 0 weight class). Miller's entrance music is On to the Next One. A fine choice. Well, I have no idea who's going to take this one!
 |
|
 |
| 172 cm
25
147 lbs
13 - 5 - 0 |
|
170 cm
25
158 lbs
10 - 10 - 0 |
Powerful takedowns
Counter striker
Very strong |
|
Good wrestler
Excellent MT
Powerful |
|
| |
|
Ladies and gentlemen. This fight is 3 rounds, in the featherweight division.
Introducing the fighter to my left, fighting out of the red corner.
With a record of
13 - 5 - 0, fighting out of London, David Miller!
And introducing the fighter to my right, fighting out of the blue corner.
With a record of
10 - 10 - 0, fighting out of London, Sammy Bhuda!
The judges for this bout are William Gold, Chris Edwards and Donald Grub.
The bell rings for round one and we are underway!
Miller ducks down and throws a hook to the body but Bhuda moves away.
Miller misses with a body shot.
Miller misses with a takedown attempt
and Bhuda counters with a leg kick that reverborates around the arena.
Bhuda fails to land with a series of punches.
Bhuda lunges in with swinging rights and lefts but Miller circles away quickly and effectively.
Miller misses with an uppercut
and Bhuda counters with a two punch combo.
Bhuda throws a right and a left that both miss.
Bhuda closes the distance and presses his opponent up against the cage.
Bhuda breaks the clinch and we're back to striking at distance.
Miller changes levels and looks for a double leg takedown. Bhuda tries to avoid it but Miller manages to keep hold of a leg and drag Bhuda to the ground. Bhuda escapes though and pops straight back up to his feet.
Miller connects nicely with a jab. Noted by the judges no doubt.
Miller shoots in for a takedown. "Ole!" shouts Bhuda as he jumps to the side.
That's three failed takedown attempts in the round for David Miller. That's going to take a lot out of him.
That's one minute gone in the round.
Miller shoots in but doesn't get the takedown
and Bhuda finishes the little exchange by landing a big kick to the body.
Bhuda throws a combination but comes up with nothing but fresh air.
David Miller seems to be the more aggressive standup fighter in this bout.
Miller misses with a takedown attempt
and Bhuda counters with a left and a right that stings Miller.
Miller gets his takedown attempt stuffed easily
enabling Bhuda to counter with a crisp jab.
Bhuda uses good footwork to avoid the strikes from Miller.
Miller scores with a punch to the gut of his opponent.
Miller with a lazy takedown attempt
and Bhuda counters with a nice body kick.
Miller thows a left - swing and a miss!
That's two minutes gone in the round.
Bhuda fails with an attempt to clinch.
Sammy Bhuda is looking to keep the fight on the feet at all costs.
Bhuda throws a right and a left that both miss.
Bhuda fails to land with a series of punches.
Miller fakes high and swings low for a body shot but Bhuda manages to avoid it.
The fighters circle momentarily. Miller darts into range and connects with a nice straight punch.
Miller fails to land the takedown.
Miller misses with a body shot.
Bhuda throws a series of punches but Miller avoids them all with ease.
Bhuda closes the distance and clinches.
That's three minutes gone in the round.
Miller is fighting off a takedown attempt but Bhuda is just too persistent for him and manages to trip Miller to the mat. Miller regains guard as soon as the fighters hit the mat.
Bhuda postures up.
Miller looking for a guillotine here but Bhuda defends easily.
Bhuda stopping the sweep attempt from Miller.
The ref warns both fighters not to hold the cage as they work up against the meshing.
A big thud reverberates around the arena there as Bhuda accidentally thumps the mat. Hopefully he's not broken his hand.
Miller looking to sweep here. No luck so far.
Bhuda wants to control from the top but Miller keeps moving.
Miller wants to hit a switch here but Bhuda passes into full mount! Oh no, disaster for Miller there!
That's four minutes gone in the round.
Bhuda stands up from the dominant position. He obviously fancies his chances standing.
We've seen a great period of action over the last minute or so - credit to both fighters for going all out!
Miller has his takedown stuffed
and he gets countered with a snapping leg kick.
Miller shoots in but doesn't get the takedown
and Miller takes a counter punch right on the button for his troubles.
Bhuda throws a right hand that Miller ducks under and follows up with a left that Miller also avoids with ease.
Miller misses with a takedown
and Bhuda counters by clinching up.
As the round comes to an end the crowd are showing their appreciation for a great round of action.
Miller tries to jump guard but he falls flat on his backside. Bhuda smiles and moves away.
And thats the end of the round the fighters go back to their corners.
A close round but Sammy Bhuda will probably get the nod.
OK. That's time! The bell goes and we're back to the action.
Miller slips a jab and a cross from Bhuda.
Miller tries for a takedown but Bhuda circles away easily
and Bhuda counters with a series of strikes. Miller will be more careful next time no doubt.
Bhuda with a hook.
Miller ducks down and throws a hook to the body but Bhuda moves away.
Miller fails with the takedown
and Bhuda counters with a two punch combo.
Bhuda fakes a jab and scores with a low kick.
That's one minute gone in the round.
Bhuda fails to land with the punch combination there - jab, cross, hook, miss, miss, miss.
Bhuda rushes Miller and presses him up against the cage.
Bhuda breaks the clinch and we return to the middle of the mat.
Miller fakes high and shoots in for a takedown but Bhuda avoids it really well and circles away.
That's three failed takedown attempts in the round for David Miller. That's going to take a lot out of him.
Bhuda leaves Miller with his face pressed against the mat as he sprawls beautifully, defending against a solid takedown attempt.
Miller misses with a looping right.
A telegraphed takedown attempt from Miller is defended easily by Bhuda.
That's two minutes gone in the round.
Miller shoots in for a takedown. "I don't think so" says Bhuda as he avoids it easily.
Miller with a lazy takedown attempt
and Bhuda counters with a good right hand that lands right on the jaw.
Bhuda fails to land with a series of punches.
Miller drives through with a takedown into Bhuda's guard. Let's see what he can do from the top position.
Miller throws a big right hand that misses.
Bhuda bucks up whilst keeping hold of a body lock, managing to reverse the position. Now he's in top in Miller's guard.
Fantastic stuff here - a very entertaining period of action, which has drawn cheers from the crowd.
Miller looking to hit a scissor sweep but Bhuda is one step ahead there.
Both fighters are absolutely exhausted here.
That's three minutes gone in the round.
Bhuda gets to his feet and steps away from his opponent.
Bhuda throws a feint and then finishes with a kick to the body.
No joy there for Bhuda, who threw a few shots but didn't land.
Bhuda shuffles to his left behind two crisp jabs. Miller eats them both and turns towards Bhuda to reposition himself and eats a stinging right hand-left hook combo.
Miller misses with a kick to the body.
Miller is trying hard to land a takedown here. Bhuda sprawls well and keeps this one on the feet.
A telegraphed right hand from Miller misses the target.
Miller thows a body shot but no joy.
That's four minutes gone in the round.
Bhuda scores with a jab to the head.
Miller moves out of range of the body kick from Bhuda.
Miller gets his takedown attempt stuffed easily
and Bhuda counters with a body kick.
Sloppy strikes from Bhuda. Those never looked like landing.
Bhuda with a nice looking leg kick. You could hear that one land in a back row.
The crowd applaud the fighters efforts here as the round comes to an end.
Bhuda fakes a couple of low kicks, before throwing one on the third attempt. It connects and Miller has to reset his feet before getting ready to engage.
The fans in attendance giving it up for the two fighters, who have really let it all hang out in the last minute or so!
Miller shoots in but doesn't get the takedown
and Bhuda counters with a flying knee. Nice.
And thats the end of the round the fighters go back to their corners.
Sammy Bhuda showed his class in that round. I'd imagine he'll take it on all the scorecards.
The minute break is over - no more time for sponges and pep talks - back to the action! Let's get this one finished - here comes the final round!
Miller dives in and grabs Bhuda's left leg, looking for a takedown. Bhuda pushes down on Miller's head and hops out.
Miller avoids the head kick by Bhuda.
Miller avoids a punch combination nicely.
Miller misses the shot to the body.
Miller looks frustrated there after his takedown attempt is stuffed easily.
Bhuda shuffles to his left behind two crisp jabs. Miller eats them both and turns towards Bhuda to reposition himself and eats a stinging right hand-left hook combo.
Bhuda misses with a double jab.
Miller misses with a takedown
and Bhuda counters with a quick right hand to the jaw.
That's three failed takedown attempts in the round for David Miller. That's going to take a lot out of him.
That's one minute gone in the round.
Bhuda looks to score with a combo but nothing lands.
Miller fails with a takedown attempt.
Miller lands the left hand.
The sound of bone on bone echoes around the arena as Bhuda checks a leg kick.
Miller fails with a takedown attempt.
Bhuda scores with a one two! Miller had his feet all tangled up there and couldn't avoid the strikes.
That's two minutes gone in the round.
Miller throws a looping left and ducks down for a takedown. He's got his arms around Bhuda's waist but Bhuda gets an underhook and avoids the takedown by throwing Miller off to one side.
Both fighters are breathing heavily.
Bhuda connects with a crisp jab.
Miller looks for a takedown here. Will he get it? Bhuda is fending him off so far but Miller persists. Nope, Bhuda circles away and we're back to standing.
Miller fails with a takedown attempt from distance.
Miller takes a nasty kick to the mid section... That should keep him thinking. Does he try and block and risk a head kick landing?
Bhuda fails to land with a series of punches.
Miller with a poor takedown
and he gets countered with a snapping leg kick.
Bhuda cracks the inside of Miller's front leg.
That's three minutes gone in the round.
Bhuda shuffles to his left behind two crisp jabs. Miller eats them both and turns towards Bhuda to reposition himself and eats a stinging right hand-left hook combo.
Bhuda has Miller up against the cage in a clinch.
Miller tries to jump guard but he falls flat on his backside. Bhuda smiles and moves away.
Bhuda rushes forward with a series of wild hooks but Miller moves out of range and avoids them all easily.
Bhuda swings away but doesn't land with a series of punches.
Miller throws a looping left and ducks down for a takedown. He's got his arms around Bhuda's waist but Bhuda gets an underhook and avoids the takedown by throwing Miller off to one side.
That's four minutes gone in the round.
Bhuda stuffs the takedown.
Bhuda throws a head kick that misses.
Bhuda's corner calls for a 1, 2 combination and Bhuda duly obliges.
Miller throws a hook to the body but it doesn't connect.
Miller fails to land the takedown.
Bhuda throws a right and a left that Miller avoids nicely.
The crowd applaud the fighters efforts here as the round comes to an end.
Bhuda scores with a slapping inside leg kick.
Bhuda slips under a jab.
And that's the end of the fight!
Sammy Bhuda comfortably won the final round on my scorecard.
I've got Bhuda winning every round here. Surely the decision will go his way and he'll pick up a well deserved decision victory. Over to the ring announcer for the scorecards.
Ladies and gentlemen, after 3 rounds of action, we go to the scorecards for a decision.
Judge William Gold scores the fight for Sammy Bhuda!
Judge Chris Edwards scores the fight for Sammy Bhuda!
Judge Donald Grub scores the fight for Sammy Bhuda!
Sammy Bhuda wins by unanimous decision!
|
|
|
|
|
|
|
|
|
|
|
|
|
|
|
|
|
|
|
|
|
|
|
| S |
C
A |
G |
S |
C
B |
G |
|
S |
C |
G |
|
energy
A | B |
|
hype
A | B |
|
pop
A | B |
|
mgr
A | B |
|
FIGHT
RATING
48% |
|
|
|
|
|
|
|
Main event
|
Coming up we have a super heavyweight MMA rules bout between Hassan Al Aziz (ranked 0 p4p, 0 weight class) and Cloud Strife (ranked 0 p4p, 0 weight class). The crowd seem to be enjoying Strife's choice of entrance music: One Winged Angel by The Black Mages. Both fighters look pumped up here. Let's hope this is a good fight!
 |
|
 |
| 190 cm
28
282 lbs
22 - 10 - 0 |
|
201 cm
30
289 lbs
13 - 9 - 0 |
Good wrestling
Excellent boxer
Very quick |
|
Good wrestler
Excellent boxer
Powerful |
|
| |
|
Ladies and gentlemen. This fight is 5 rounds, for the super heavyweight championship of the world!
Introducing the champion to my left, fighting out of the red corner.
With a record of
22 - 10 - 0, fighting out of London, Hassan Al Aziz!
And introducing the challenger to my right, fighting out of the blue corner.
With a record of
13 - 9 - 0, fighting out of London, Cloud Strife!
The judges for this bout are Steven Brown, William Gold and Daniel Bishop.
The bell rings for round one and we are underway!
Strife throws a wild combination but nothing lands.
Strife avoids the body shot from Al Aziz.
Al Aziz throws a looping overhand right but Strife ducks down to avoid it.
A telegraphed right hand from Al Aziz misses the target.
Strife shoots in looking for a takedown but Al Aziz manages to keep the fight standing, pushing Strife's face into the canvas for good measure before circling away.
Al Aziz catches Strife with a nice straight right. He seems pissed - ooooh, it's on now! On like donkey kong!
Strife scores with a jab.
Al Aziz swings wildly with a right hand that was never going to find it's target.
Al Aziz misses with a few strikes there.
Strife takes a shot right to the liver - Bas would have been proud of that punch.
Wooooo! Give it up for these two warriors! They are putting on a show!
Strife fakes high and shoots in for a takedown but Al Aziz avoids it really well and circles away.
Al Aziz tries to land with a swinging hook to the body but Strife was well out of range. Poor timing from Al Aziz.
That's one minute gone in the round.
Al Aziz scores with a jab to the head.
Strife changes levels and drives through with a really nice takedown into side control. Al Aziz looks really pissed at himself for not defending that better.
Al Aziz is trying to stand back up. He's worked his way up against the cage but Strife has just dragged him back down to the mat.
Strife tries for a kimura but Al Aziz is defending well.
The fighters are pressed up against the cage, both looking to find a bit of space to work.
This has been an exciting period of action!
Al Aziz wants to get back to his feet but Strife drags him back down.
Strife tries to score with some ground and pound. Al Aziz controls his posture well this time though and the shots don't do any damage.
Al Aziz is trying to get back to his feet.
Strife tries for a kimura. Not really close to a finish though.
Al Aziz is trying to buck Strife off.
That's two minutes gone in the round.
Al Aziz on the wrong end of some ground and pound.
Strife working away diligently from side control. Landing strikes effectively there - that will score him some points on the judges scorecards.
Strife has the superior BJJ but he's also working some ground strikes into his gameplan.
Al Aziz is trying to buck Strife off.
Strife fails to land a wild elbow strike.
Al Aziz is trying to buck Strife off.
Al Aziz might be looking to lock onto one of his opponent's long limbs for a submission, whilst we're on the ground.
Strife looking for an arm triangle but it's way too loose to do anything.
Strife looking for an arm triangle but it's way too loose to do anything.
That's three minutes gone in the round.
Al Aziz is trying to get back to his feet.
Strife has had enough of the ground for now and decides to stand.
Al Aziz tries to close the distance and clinch up but Strife swats him away and circles back towards the center.
A big right from Strife misses.
Al Aziz scores with a nice head shot.
Al Aziz scores with a reasonable looking shot to the body. Strife doesn't seem bothered though.
Al Aziz looks to land a right hand but Strife moved out of range.
Al Aziz swings away but doesn't land with a series of punches.
That's four minutes gone in the round.
Al Aziz tries to close the distance and clinch up against the cage but Strife paws at him with a jab and circles away.
Al Aziz rushes forward with a series of wild hooks but Strife moves out of range and avoids them all easily.
This is a great period of action - very entertaining stuff!
Al Aziz jabs away that one connects to the head of his opponent.
Strife slips a straight right by Al Aziz.
Strife digs a good hook to Al Aziz's body.
This fight brought to you by 5M nutrition - it's mmmmm tasty. Nice jab by Strife.
Hassan Al Aziz seems to be the more aggressive standup fighter in this bout.
Al Aziz tries to keep at a distance but Strife has taken the fight into the clinch.

Al Aziz breaks from the clinch.
The crowd are going absolutely nuts as the round comes to an end - what a fantastic round of action!
Al Aziz stuffs the takedown.
Hassan Al Aziz has stuffed three takedown attempts in the round now. That's going to take a lot out of Cloud Strife.
Al Aziz misses with a body shot. Nice footwork from Strife.
Al Aziz stuffs the takedown attempt from Strife. Strife gets slowly back to his feet.
And thats the end of the round the fighters go back to their corners.
Hassan Al Aziz dominated that round.
That's the end of the round. The referee orders the cornermen out of the cage so we can get back down to business.
Al Aziz fakes a jab and then connects with a hook.
Strife ducks under a wild hook from Al Aziz.
Al Aziz is moving around nicely and scores here with a single head shot.
Al Aziz lunges in with an uppercut that skims his opponent's chin.
Al Aziz missing with a left hand there. Strife was out of range so wasted energy throwing that one.
Strife tries to close the distance and clinch up against the cage but Al Aziz paws at him with a jab and circles away.
Strife's hands are dropping dangerously low here and Al Aziz connects clean with a right hook that sends him down to one knee! Strife scrambles back to his feet.
Wooooo! Give it up for these two warriors! They are putting on a show!
Strife shoots in for a double leg but Al Aziz sprawls well. That's going to sap some energy.
A looping hook to the body misses from Al Aziz. Strife does a little dance to reset his feet.
No luck for Strife with that takedown attempt.
That's one minute gone in the round.
Al Aziz cracks a nice hook into Strife's ribs.
Strife is breathing heavily.
Strife moves away from the strike by Al Aziz.
Al Aziz bobs and weaves well there to avoid the strikes.
Strife is pinned up against the cage taking some big shots here. The referee is looking closely deciding whether he should stop the fight.
Cloud Strife is looking to throw some combinations by the looks of things.
Al Aziz comes forward and lands a shot to the body, then darts back out of range.
The crowd cheering loudly, showing their appreciation for the quality fight we're seeing here.
Strife moves away from the strike by Al Aziz.
Al Aziz takes a jab on the nose there. A little bit of blood seems to be coming out. Hopefully that won't affect his breathing.
Strife avoids the clinch attempt nicely.
Strife slips a straight right by Al Aziz.
Strife misses with a takedown
and Al Aziz counters with a nice jab to the body that keeps Strife thinking.
Hassan Al Aziz has stuffed three takedown attempts in the round now. That's going to take a lot out of Cloud Strife.
That's two minutes gone in the round.
Al Aziz lands a nice shot to the body.
Strife defending well as Al Aziz loads up on a big left hand.
Strife takes a body punch that cleary hurt but he's trying not to show any weakness.
Al Aziz comes forward and lands a shot to the body, then darts back out of range.

Al Aziz cracks Strife with a big right hand that sends him to the floor! Strife looks wobbly but he's sprung back up to his feet straight away
can Al Aziz finish him?
Strife is rocked!

It looks like Cloud Strife has been cut.
Al Aziz connects with a picture perfect right hand that knocks Strife out cold! This one is over in a flash!
Ladies and gentlemen, after 2:41 of round 2, we have a winner by way of KO (Punch). Hassan Al Aziz!
Hassan Al Aziz retains his super heavyweight title!
|
|
|
|
|
|
|
|
|
|
|
|
|
|
|
|
|
|
|
|
|
|
|
| S |
C
A |
G |
S |
C
B |
G |
|
S |
C |
G |
|
energy
A | B |
|
hype
A | B |
|
pop
A | B |
|
mgr
A | B |
|
FIGHT
RATING
71% |
|
|
|
|
|
|
|
|
|
|
