 |
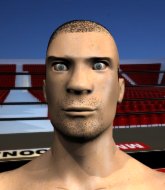
AFC 1: Amebi vs Williamson PBP Commentary |
Undercard bout
|
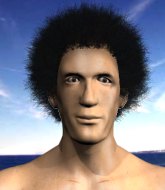
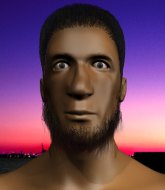
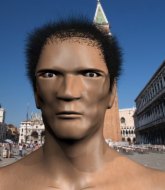
Coming up we have a lightweight MMA rules bout between Damon Weathers (ranked 0 p4p, 0 weight class) and Carl Eggson (ranked 0 p4p, 0 weight class). Damon Weathers is staring across the cage at his opponent, tweaking his nipples... Tweaking his own nipples that is.
 |
|
 |
| 180 cm
18
155 lbs
0 - 1 - 0 |
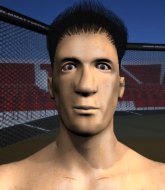
|
180 cm
27
149 lbs
5 - 6 - 0 |
BJJ White Belt
Brawler
KO power |
|
BJJ Blue Belt
Decent boxing
Knockout power |
|
| |
|
Ladies and gentlemen. This fight is 3 rounds, in the lightweight division.
Introducing the fighter to my left, fighting out of the red corner.
With a record of
0 - 1 - 0, fighting out of London, Damon Weathers!
And introducing the fighter to my right, fighting out of the blue corner.
With a record of
5 - 6 - 0, fighting out of London, Carl Eggson!
The judges for this bout are Steven Brown, Richard Clark and James Glass.

The bell rings for round one and we are underway!

Weathers closes the distance and pushes Eggson back into the cage.

Eggson has moved round to his opponent's back and is looking for a suplex! Oh snap! He's tossed Weathers clear over his head and slammed him to the mat!
Weathers holding both Eggson 's hands and preventing any damage.
Eggson lands a punch to the side of the head from the back.

Weathers is having to fend off submission attempts from Eggson, who is looking to sink in the choke. Eggson doesn't have the hooks in though and Weathers manages to reverse position! He's now on top, in his opponent's guard.
Eggson has the superior BJJ but he's also working some ground strikes into his gameplan.
Weathers tries to free his leg and advance position but Eggson is retaining full guard.

That's one minute gone in the round.

Eggson uses the cage to get back to his feet.
Weathers has his takedown stuffed
and Eggson counters with a nice double leg into side control. Weathers won't be happy with that.
Weathers taking punishment in the form of punches.
Weathers knows he needs to get back to his feet asap. He's simply no match for Eggson on the ground.
Weathers tries to bench press Eggson off him but Eggson keeps the position.
Eggson wants to lay and pray for a moment but Weathers keeps working.
Weathers tries to buck Eggson off but Eggson is having none of it.
Weathers on his back here. We all know that wrestlers don't like being on their back so let's see if Weathers tries to get out of the position.
Eggson stands up.
Weathers fails with the takedown
and Eggson counters with a nice shoot takedown that brings the fighters to the ground.
Wooooo! Give it up for these two warriors! They are putting on a show!
Eggson trying to control the position from guard on top but Weathers is wriggling around, looking for whatever he can.
Weathers has control of Eggson's left arm, preventing Eggson from doing any damage.
Weathers is breathing heavily.

That's two minutes gone in the round.
Eggson stands up and looks to throw the legs aside to pass to side control. Weathers swivels though and keeps the full guard.
Weathers is trying to control the position but Eggson postures up.
Eggson tries to free his leg and advance position but Weathers is retaining full guard.
The referee claps his hands together and tells the fighters to work.

The referee has ruled that neither fighter is active enough on the ground and has stood them back up.
Eggson misses with a takedown attempt

and Weathers counters with a nice single leg takedown and he's in Eggson's guard now.

Weathers drops back for a leg but he's not going to get it - he lets go and Eggson dives on top into guard.
Eggson throwing elbows and punches but not connecting, as Weathers works some decent striking defense from the bottom.
Eggson is trying to work a guillotine from the top, or something like that? Don't know how he thinks he's going to get a finish from there.

That's three minutes gone in the round.
Weathers is trying to control the position but Eggson postures up.
Eggson is working Weathers over from the guard. He should look to pass the guard and do a little more damage with these strikes.
Weathers utilising some decent striking defenses from the guard, preventing the ground and pound.
Eggson trying to control the position from guard on top but Weathers is wriggling around, looking for whatever he can.
Weathers is working the butterfly guard. He manages to land a nice scissor sweep and is now in half guard on the top. Nice move.
Weathers is sneakily working for an arm triangle but Eggson sees it coming and defends easily.
Weathers wants to work for an arm triangle but Eggson is really keeping half guard well and defending the submission attempt.

That's four minutes gone in the round.
The crowd are hurling abuse towards the fighters... You can hardly blame them though because there isn't a lot going on in the fight.
The fighters are battling for position here. Eggson manages to regain full guard. Nice work.
Eggson manages to sweep nicely, so he's now on top. Weathers manages to get himself to full guard.
Eggson wants to stand but Weathers has a closed guard, so he can't escape.
The ref warns both fighters not to hold the cage as they work up against the meshing.
Weathers is trying to control the position from the bottom.
As the round comes to an end the crowd are showing their appreciation for a great round of action.
Eggson controlling from the top position.
And thats the end of the round the fighters go back to their corners.
Carl Eggson dominated that round.
The referee calls time. The cornermen exit stage left and we're back to business.

Eggson shuffles to his left behind two crisp jabs. Weathers eats them both and turns towards Eggson to reposition himself and eats a stinging right hand-left hook combo.
Eggson with a poor takedown
and Weathers counters with a nice double leg into side control. Eggson won't be happy with that.
Eggson gets back to half guard.
Eggson gets full guard.

Weathers stands up from Eggson's guard - Weathers perhaps looking for a knockout.
Eggson drives through with a takedown into Weathers's guard. Let's see what he can do from the top position.
Fantastic stuff here - a very entertaining period of action, which has drawn cheers from the crowd.
Weathers controls Eggson momentarily but Eggson frees himself.
A real slowdown in the pace of the fight for a moment, as Weathers holds on and takes a little breather.
Both fighters are absolutely exhausted here.
That's one minute gone in the round.
Eggson with a flurry of punches that miss.
Eggson gets to his feet. Weathers looking to butt scoot but the ref puts an end to that. On your feet son!
Weathers gets a clinch.

Weathers breaks from the clinch.
Weathers fails with the takedown

and Eggson counters into the clinch. Nicely done.
Eggson misses with a knee strike.
Eggson jumps guard but Weathers stands there with Eggson around his waist. Eggson gives up and drops back to his feet. We remain in the clinch.
Eggson effectively controlling the action here.
That's two minutes gone in the round.
Eggson is trying to work out of this bad position, with his back against the cage.
Eggson fails to land with a short punch on the inside.
Stalling in the clinch from Weathers.
Eggson has had enough of the clinch and is looking to separate.
Eggson fails to pull guard.
Damon Weathers has stuffed three takedown attempts in the round now. That's going to take a lot out of Carl Eggson.
Eggson tries for a takedown. No joy.
Weathers breaks from the clinch.
Weathers gets a double leg takedown into Eggson's guard.
Eggson looking for a guillotine here but Weathers defends easily.
Weathers advances to half guard.
The fighters are pressed up against the cage, both looking to find a bit of space to work.
That's three minutes gone in the round.
Weathers is trying a forearm choke
I don't think that's going to do much at this level of the game.
Weathers is working for submissions here but there's nothing on.
Weathers is looking to pass Eggson's guard but actually Eggson recovers to full guard.
That's four minutes gone in the round.
The crowd are starting to boo a lack of action.
Eggson is active off his back here, looking for submissions.
Weathers has to be careful here, sitting in the guard of a superior BJJ player.
Weathers tries to free his leg and advance position but Eggson is retaining full guard.
Eggson working from the bottom, still in full guard. He's managed to get a loose triangle. Weathers doesn't seem to be doing much to defend here, obviously he feels comfortable in the position. Weathers manages to throw the legs off his shoulder and he's back into guard - no problem.
Weathers passes Eggson's left leg - he's now in half guard.
As the round comes to an end the crowd are showing their appreciation for a great round of action.
Eggson looking for submissions off his back.
And thats the end of the round the fighters go back to their corners.
A close second round but Carl Eggson will probably get the nod - 10:9.
That's time! Weathers's corner gives him a slap on the ass as he gets ready to fight. This is the final round!

Eggson misses with a takedown
so Weathers counters with a double leg into guard. Good agility.
Weathers got a little sloppy there for a moment and Eggson has worked his way into a loose triangle - can he finish it?! No, Weathers has managed to get both his arms back between Eggson's legs - danger averted.
Weathers drops back for a leg! It's a sloppy attempt though and Weathers jumps back into guard quickly, to retain the dominant position.
Weathers wants to get up but he can't break Eggson's closed guard. He needs to be careful trying to break the legs open, as he's open to submissions here.
Weathers is holding a leg here, probably looking for an ankle lock - he drops back and goes for it! Eggson is in trouble! Is it all over??? No! Eggson has escaped and now he's on top!
Eggson in full guard, throwing the ground and pound. No damage this time.
Both fighters are breathing heavily.
That's one minute gone in the round.
Eggson trying to control the position from guard on top but Weathers is wriggling around, looking for whatever he can.
Eggson drops back for a leg but he's not going to get it - he lets go and Weathers dives on top into guard.
Eggson is looking for a guillotine. You can't force these things though and Weathers defends well.
Weathers gets to his feet and steps away from his opponent.
Eggson gets caught on his heels momentarily as he allows Weathers to score an easy takedown into full guard.
Eggson controls Weathers momentarily but Weathers frees himself.
That's two minutes gone in the round.
Weathers looking to pass the guard.
Weathers is looking to advance position but Eggson has hit a scissor sweep - now he's on top in mount!
Weathers is in all sorts of trouble here.
Weathers tries to hold on but Eggson postures up.
That's three minutes gone in the round.
Eggson working away from the top, dropping strikes.
Weathers really trying hard to get back to half guard here.
Eggson controlling from mount.
Weathers is looking to improve his position but Eggson isn't that keen on the idea.
Eggson with some aggressive grappling here. He's looking for submissions here, rather than waiting for the opportunity to counter.
That's four minutes gone in the round.
Weathers wriggling around on the bottom manages to avoid the strikes thrown by Eggson.
Weathers is writhing around trying to get back to his feet.
Eggson has control of Weathers's right arm, working for a kimura. It's a bit of a token attempt though and Weathers regains control of the situation pretty easily.
Eggson trying to control but he's not successful this time.
And that's the end of the fight!
Damon Weathers showed his dominance in that final round.
I think Eggson has won this one but let's see whether the judges agree with me. Over to the ring announcer for the scorecards.
Ladies and gentlemen, after 3 rounds of action, we go to the scorecards for a decision.
Judge Steven Brown scores the fight 28:29
Judge Richard Clark scores the fight 28:29
Judge James Glass scores the fight 28:29
In favor of your winner, by unanimous decision... Carl Eggson!
|
|
|
|
|
|
|
|
|
|
|
|
|
|
|
|
|
|
|
|
|
|
|
| S |
C
A |
G |
S |
C
B |
G |
|
S |
C |
G |
|
energy
A | B |
|
hype
A | B |
|
pop
A | B |
|
mgr
A | B |
|
FIGHT
RATING
64% |
|
|
|
|
|
|
|
Undercard bout
|
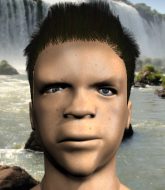
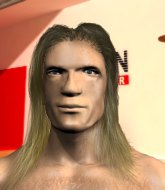
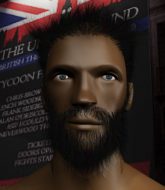
Coming up we have a heavyweight MMA rules bout between Jonathan King (ranked 0 p4p, 0 weight class) and Immaeatyou Destroyer (ranked 0 p4p, 0 weight class). The atmosphere really building for this one as we go over to our ring announcer for the fighter introductions!
 |
|
 |
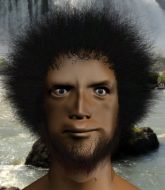
| 181 cm
18
230 lbs
0 - 1 - 0 |
|
190 cm
21
220 lbs
0 - 1 - 0 |
BJJ Blue Belt
Counter striker
Good in bed |
|
BJJ Blue Belt
Brawler
Solid chin |
|
| |
|
Ladies and gentlemen. This fight is 3 rounds, in the heavyweight division.
Introducing the fighter to my left, fighting out of the red corner.
With a record of
0 - 1 - 0, fighting out of London, Jonathan King!
And introducing the fighter to my right, fighting out of the blue corner.
With a record of
0 - 1 - 0, fighting out of London, Immaeatyou Destroyer!
The judges for this bout are Daniel Bishop, James Atkins and Chris Edwards.
The bell rings for round one and we are underway!
Destroyer lands with a shot to the body.
Destroyer feints and as King raises his hands in defense, Destroyer changes levels and drives through with a takedown into guard.
King can't do much from the bottom at the moment, as Destroyer controls the pace.
Destroyer stopping the sweep attempt from King.
King throwing his legs up looking for a triangle.
Destroyer wants to pass the guard but King is keeping the position.
Destroyer not doing a lot at the moment. He'll have to show some more aggression or the fight will get stood up.
If this pace continues, the referee will definitely step in and force a standup.
Destroyer wants to stand but King is controlling his posture from full guard.
That's one minute gone in the round.
Destroyer wants to control from the top but King keeps moving.

Immaeatyou Destroyer has forced the referee to step in and restart the fight on the feet.
Destroyer scores with a slapping inside leg kick.
Destroyer gets in close and instigates a clinch.
King drops down for a takedown but doesn't get it.
Stalling in the clinch from Destroyer.
King is pressed up against the cage. Destroyer has hold of a leg and is looking to drag King down to the mat. King avoids the attempt though and has circled away. We're back to striking at a distance.
Destroyer shoots in and gets a takedown into half guard. Destroyer showed some decent athleticism there.
That's two minutes gone in the round.
Destroyer landing with strikes to the body and head, softening up his opponent.
King trying to hold on to Destroyer's head to control him but Destroyer postures up.
The ref warns both fighters not to hold the cage as they work up against the meshing.
King looking to work for a kimura from the bottom.
King is breathing heavily.
Destroyer trying to control the action but King is working from the bottom.
King is looking for a sweep. Destroyer is wise to his cunning plan and keeps the top position.
Destroyer is looking for a kimura but King is holding onto that half guard position, so it's hard for Destroyer to get the leverage.
Destroyer wants to stand up but King has a hold of him and won't allow it.
That's three minutes gone in the round.
King trying to control from the bottom.
King is looking to regain full guard. Not this time though.
Destroyer lands with an elbow from half guard - that looked like it hurt.
Destroyer works his way into side control.
King is trying to get back to half guard. He's pushing on Destroyer's leg. He's managed it. Nice work.
Destroyer is keen to just control but King is a slippery customer.
The fighters are battling for position here. King manages to regain full guard. Nice work.
That's four minutes gone in the round.
Destroyer preventing the sweep.
Destroyer seems content to control from guard here. He's going to have to remain active though if he doesn't want to get stood back up.
King not looking particularly offensive just at the moment.
King has a butterfly guard looking to sweep but Destroyer has passed into side control.
Destroyer landing a few strikes.
King tries to buck Destroyer off but Destroyer is having none of it.
Destroyer controlling from side mount.
King is looking for a sweep.
And thats the end of the round the fighters go back to their corners.
Immaeatyou Destroyer dominated that round.
OK. That's time! The bell goes and we're back to the action.
King gets tackled into the cage by Destroyer. Destroyer maintains the clinch.
King jumps guard but Destroyer stands there with King around his waist. King gives up and drops back to his feet. We remain in the clinch.
Destroyer is pushing King up against the cage, for a bit of lean and pray action. Action being used the in the loosest possible sense of the word.
Destroyer wants a takedown but no success here.
King could do with loosing a few pounds - he looks very soft around the mid section, to put it politely.
Destroyer lands a left hand.
Destroyer is looking for a takedown up against the cage. King gets underhooks though and prevents the takedown attempt.
We've had a slow start to the round here - hopefully the action picks up.
Destroyer displaying some good clinch control by pressing King up against the cage.
King goes for a takedown in the clinch but Destroyer prevents it.
That's one minute gone in the round.
Destroyer decides to pull guard.
Destroyer wants to stand but King is controlling the position.
Destroyer is breathing heavily.
King is frustrating his opponent with some stalling tactics from top position.
The fighters are pressed up against the cage, both looking to find a bit of space to work.
Destroyer keeping moving, preventing King from controlling successfully.
King slips nicely into half guard.
Destroyer trying to control but King postures up.
That's two minutes gone in the round.
The crowd are showing their displeasure at the lack of action as loud boos ring out around the arena.
King tries to pass to full mount but Destroyer defends it.
Destroyer is looking to escape.
King looks over to his corner - he wants some instructions but his corner are not responding.
Destroyer is looking to improve his position.
Destroyer really doesn't want to stay on the ground with King. If he can't get it back to his feet, it's only a matter of time before he'll be tapping out.
King is keen to just control but Destroyer is a slippery customer.
That's three minutes gone in the round.
Neither fighter is doing enough for the referee's liking and he's decided to stand them back up.
King misses with a takedown
and Destroyer counters with a takedown into side control.
That's three failed takedown attempts in the round for Jonathan King. That's going to take a lot out of him.
Destroyer working hard here to secure a kimura but he's not really in the right position for it.
King sneaks back into half guard.
King gets back to full guard.
King keeping full guard, as Destroyer tries to pass.
Destroyer postures up in King's guard and throws a big left but King blocks it.
That's four minutes gone in the round.
King trying to keep a closed guard but Destroyer is proving a slippery customer.
Destroyer avoids a guillotine attempt easily.
Destroyer stands up from guard. Let's bang!
King with a lazy takedown attempt
and Destroyer counters with a kick to the head that grazes his opponent. King is lucky that one didn't land flush.
Destroyer forces King back against the cage and clinches.
King drops to a knee looking for a takedown but Destroyer gets the underhooks and prevents it.

Destroyer escapes the clinch and we're back to striking.
And thats the end of the round the fighters go back to their corners.
Immaeatyou Destroyer showed his class in that round. I'd imagine he'll take it on all the scorecards.
The minute break is over - no more time for sponges and pep talks - back to the action! This is the final round!
King avoids the body shot from Destroyer.
Destroyer looking for a takedown here - he's got it.
Destroyer got a little sloppy there for a moment and King has worked his way into a loose triangle - can he finish it?! No, Destroyer has managed to get both his arms back between King's legs - danger averted.
King is trying to control the position from the bottom.
Destroyer looking to pass the guard.
King has a closed guard, preventing Destroyer from standing up.
King bucks up whilst keeping hold of a body lock, managing to reverse the position. Now he's in top in Destroyer's guard.
Both fighters are breathing heavily.
That's one minute gone in the round.
King trying to control but Destroyer is working from the bottom.
Destroyer is trying to keep King in close.
King trying to control but Destroyer is working from the bottom.
Destroyer looking for a sweep. Not yet Destroyer, not yet.
The referee must be thinking about standing these guys back up.
Destroyer keeping moving, preventing King from controlling successfully.
That's two minutes gone in the round.
My god... these two guys really need to pick up the pace or everyone will leave to go get a beer.

The ref stands the fighters back up because Jonathan King just wasn't active enough.
Destroyer has closed the distance and engaged King in a clinch.
Destroyer trying to stall but King improves his position.
Destroyer manages to break the clinch.
Destroyer gets in close and instigates a clinch.
Destroyer jumps guard but King stands there with Destroyer around his waist. Destroyer gives up and drops back to his feet. We remain in the clinch.
King can't get the takedown.
Destroyer gets control of King's arms and successfully pulls guard. Destroyer will no doubt be looking for submissions off his back.
King trying to control but Destroyer is working from the bottom.
King advances position into side control!
Immaeatyou Destroyer has got the better of the ground game so far.
That's three minutes gone in the round.
King tries for a kimura. Not really close to a finish though.
King working away.
King trying to control the position but Destroyer is working away.
King is really struggling to control Destroyer but he's trying to hold on to the position.
That's four minutes gone in the round.
The crowd are hurling abuse towards the fighters... You can hardly blame them though because there isn't a lot going on in the fight.
Destroyer manages to get one leg in to regain half guard.
Destroyer is looking to sinch up a guillotine here but King pulls his head out easily.
Destroyer trying to control here but he's found himself mounted! Oh no!
Destroyer is trying to escape the mount.
Jonathan King has stepped it up - he knows he needs a finish here!
The crowd thankful this round is nearly over.
King looking to control and managing it successfully.
And that's the end of the fight!
I would just about give that final round to Immaeatyou Destroyer.
Well Destroyer has outworked and out performed his opponent in all aspects of the game today. He was simply too good and the decision should be no more than a formality. Over to the ring announcer for the scorecards.
Ladies and gentlemen, after 3 rounds of action, we go to the scorecards for a decision.
Judge Daniel Bishop scores the fight 27:30
Judge James Atkins scores the fight 27:30
Judge Chris Edwards scores the fight 27:30
In favor of your winner, by unanimous decision... Immaeatyou Destroyer!
|
|
|
|
|
|
|
|
|
|
|
|
|
|
|
|
|
|
|
|
|
|
|
| S |
C
A |
G |
S |
C
B |
G |
|
S |
C |
G |
|
energy
A | B |
|
hype
A | B |
|
pop
A | B |
|
mgr
A | B |
|
FIGHT
RATING
40% |
|
|
|
|
|
|
|
Undercard bout
|
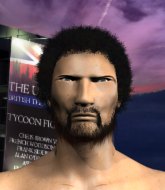
Coming up we have a heavyweight MMA rules bout between Osei Osei Okpara (ranked 0 p4p, 0 weight class) and Watib Jesoulair (ranked 0 p4p, 0 weight class). Jesoulair has chosen Sexion d´Assaut-Desole as his entrance music, which hasn't gone down very well with the crowd. We have two fighters making their debuts here, so let's see who comes out of this one with their first professional victory.
 |
|
 |
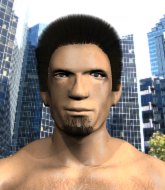
| 195 cm
20
220 lbs
0 - 0 - 0 |
|
185 cm
18
232 lbs
0 - 0 - 0 |
BJJ Blue Belt
Brawler
Insanely flexible |
|
BJJ White Belt
Decent boxing
Experienced |
|
| |
|
Ladies and gentlemen. This fight is 3 rounds, in the heavyweight division.
Introducing the fighter to my left, fighting out of the red corner.
With a record of
0 - 0 - 0, fighting out of London, Osei Osei Okpara!
And introducing the fighter to my right, fighting out of the blue corner.
With a record of
0 - 0 - 0, fighting out of London, Watib Jesoulair!
The judges for this bout are James Atkins, Donald Grub and Daniel Bishop.
The bell rings for round one and we are underway!
Okpara throws the left hand but Jesoulair avoids the punch easily.
Okpara swings widly with a right hand
and Jesoulair counters with a three punch combination, finished off with a leg kick. Nice work.
A jab from Okpara finds it's way through Jesoulair's defenses.
Jesoulair blocks a head kick by Okpara.
Okpara connects with a picture perfect right hand that knocks Jesoulair out cold! This one is over in a flash!
Ladies and gentlemen, after 0:15 of round 1, we have a winner by way of KO (Punch). Osei Osei Okpara!
|
|
|
|
|
|
|
|
|
|
|
|
|
|
|
|
|
|
|
|
|
|
|
| S |
C
A |
G |
S |
C
B |
G |
|
S |
C |
G |
|
energy
A | B |
|
hype
A | B |
|
pop
A | B |
|
mgr
A | B |
|
FIGHT
RATING
100% |
|
|
|
|
|
|
|
Undercard bout
|
Coming up we have a middleweight MMA rules bout between Ryan Potter (ranked 0 p4p, 0 weight class) and Ted Henderson (ranked 0 p4p, 0 weight class). We have two fighters making their debuts here, so let's see who comes out of this one with their first professional victory.
 |
|
 |
| 180 cm
18
175 lbs
0 - 0 - 0 |
|
179 cm
18
185 lbs
0 - 0 - 0 |
BJJ Purple Belt
Counter striker
KO power |
|
Good wrestler
Basic striking
Tends to cut |
|
| |
|
Ladies and gentlemen. This fight is 3 rounds, in the middleweight division.
Introducing the fighter to my left, fighting out of the red corner.
With a record of
0 - 0 - 0, fighting out of London, Ryan Potter!
And introducing the fighter to my right, fighting out of the blue corner.
With a record of
0 - 0 - 0, fighting out of London, Ted Henderson!
The judges for this bout are Donald Grub, Richard Clark and William Gold.
The bell rings for round one and we are underway!
Henderson shoots in for a takedown and gets it.
Potter moves into full guard.
The fighters are pressed up against the cage, both looking to find a bit of space to work.
Potter has thrown up a leg looking for a triangle. Henderson doesn't defend quickly enough and Potter has managed to lock this one up! Can Henderson escape?! NO! He's tapping out! Damn, that was a quick submission - congrats to Potter on a fantastic submission victory.
Ladies and gentlemen, after 0:28 of round 1, we have a winner by way of Submission (Triangle). Ryan Potter!
|
|
|
|
|
|
|
|
|
|
|
|
|
|
|
|
|
|
|
|
|
|
|
| S |
C
A |
G |
S |
C
B |
G |
|
S |
C |
G |
|
energy
A | B |
|
hype
A | B |
|
pop
A | B |
|
mgr
A | B |
|
FIGHT
RATING
73% |
|
|
|
|
|
|
|
Undercard bout
|
|
|
|
Undercard bout
|
Coming up we have a light heavyweight MMA rules bout between Ben King (ranked 0 p4p, 0 weight class) and Francis Begbie (ranked 0 p4p, 0 weight class). We have two fighters making their debuts here, so let's see who comes out of this one with their first professional victory.
 |
|
 |
| 191 cm
18
203 lbs
0 - 0 - 0 |
|
183 cm
25
205 lbs
0 - 0 - 0 |
BJJ White Belt
Excellent boxer
Cuts easily |
|
BJJ Blue Belt
Decent knees
Tends to cut |
|
| |
|
Ladies and gentlemen. This fight is 3 rounds, in the light heavyweight division.
Introducing the fighter to my left, fighting out of the red corner.
With a record of
0 - 0 - 0, fighting out of London, Ben King!
And introducing the fighter to my right, fighting out of the blue corner.
With a record of
0 - 0 - 0, fighting out of London, Francis Begbie!
The judges for this bout are Steven Brown, Donald Grub and Andrew Berry.
The bell rings for round one and we are underway!
Begbie moves into the clinch.
Begbie looking to throw knees to the head but King is blocking nicely.
King is trying to break free.
Begbie drops down looking for an ankle pick but King pulls his leg out and moves away.
Begbie clinches.
Begbie using the Thai plumb to throw knees but King has his back arched nicely, preventing the strike.
King is trying to break free.
Begbie utilising his Muay Thai to score with a knee to the body.
King looks like he'd prefer to be striking at range right now.
Some stalling of biblical proportions here from Begbie.
The crowd are getting on Begbie's back here. They're not happy about his lack of aggression in the clinch.
Begbie scores with a knee to the head.
Begbie scores a nice knee to the body.
A knee to the head by Begbie.

It looks like Ben King has been cut.
Begbie tries to land a knee to the head but King blocks with his arms.
The pace slowing considerably in the clinch, as Begbie takes a break from that fighting nonsense to think about the finer things in life.
A knee to the head by Begbie.
King is breathing heavily.
King is trying to force a seperation but Begbie has the dominant position.
King is pressed up against the cage. Begbie has hold of a leg and is looking to drag King down to the mat. King avoids the attempt though and has circled away. We're back to striking at a distance.
King swinging wildly here.
Ben King is looking to keep the fight on the feet at all costs.
That's one minute gone in the round.
Begbie closes the distance and clinches.
Begbie with the Thai clinch, lands a knee to the head.
Begbie dictating the pace here, as the fighters clinch against the cage.
Begbie lands a knee to the head there! That was nasty!
King takes a knee right on the jaw!
Begbie unloads a knee to the mid-section. King lets out a prehistoric sounding urrrrgh.
Begbie lands a good knee to the midsection. King won't want to take too many of those.
King is looking to break free of the clinch but Begbie has double underhooks.
Begbie tries to score a body lock takedown but King shows good agility there to stay on his feet.
Ben King has stuffed three takedown attempts in the round now. That's going to take a lot out of Francis Begbie.
Begbie lands a knee to the body.
Begbie lands a knee to the head there! That was nasty!
Begbie scores with a knee to the head.
Begbie is stalling here. The referee will be looking to step in if he doesn't pick up the pace.
King wants to break free but Begbie has control.
Begbie landing knees to the head.
King prevents a takedown attempt there.
A knee to the head by Begbie.
That's two minutes gone in the round.
King wants to push off and get back to the center of the mat but Begbie has him pressed against the cage.
Begbie wants a takedown but no success here.
Begbie with the Thai clinch. He's looking to land a big knee but he's not managed it this time.
Begbie with the Thai clinch, lands a knee to the head.
King is trying to work out of this bad position, with his back against the cage.
King takes a knee right on the jaw!
Begbie with an attempt at a knee that misses.
Begbie scores with a knee to the head.
Begbie misses with a knee strike.
Begbie effectively controlling the action here.
Begbie connects with a nasty looking knee right to King's face.
King tries to circle away but Begbie has him pinned against the cage.
A knee to the head by Begbie.
Begbie landing knees to the body.
Begbie has King pressed up against the cage and is working for takedown. King manages to improve position though and keeps the fight standing.
King wants to break free. God knows he wants to breaaaak freeee.
King takes a knee right on the jaw!
Begbie connects with a nasty looking knee right to King's face.
Begbie landing knees to the head.
Begbie working King over with knees to the body.
Begbie with the Thai clinch, lands a knee to the head.
That's three minutes gone in the round.
King takes a knee to the side of the body.
Begbie with a knee to the head.
Begbie with the Thai clinch, lands a knee to the head.
Begbie tries a knee to the head but he's missed.
Begbie scores a nice knee to the body.
A frustrated look appears on King's face as he tries to break the clinch.
Begbie landing knees to the head.
Begbie with the Thai clinch, lands a knee to the head.
King prevents a takedown attempt there.
Begbie using the Thai plumb to throw knees but King has his back arched nicely, preventing the strike.
A frustrated look appears on King's face as he tries to break the clinch.
Begbie connects with a knee to the head.
King takes a knee right on the jaw!
Begbie connects with a nasty looking knee right to King's face.
Begbie using the Thai plumb to throw knees but King has his back arched nicely, preventing the strike.
Begbie lands a nice knee to the body.
Begbie tries a knee to the head but King blocks it.
Kneeeeees! The crowd are calling for knees to the body. Begbie obliges.
King takes a knee right on the jaw!
Begbie using the Thai plumb to throw knees but King has his back arched nicely, preventing the strike.
That's four minutes gone in the round.
There's not a lot going on here and the crowd are letting the fighters know they're not willing to tolerate a lack of action.
Begbie lands a knee to the head.
Begbie connects with a nasty looking knee right to King's face.
Begbie tries to land a knee to the head but King blocks with his arms.
Begbie scores with a knee to the head.
Begbie can't get the takedown.
Begbie connects with a knee to the head.
Begbie lands a knee to the head there! That was nasty!
Knees to the body from Begbie.
Begbie scores with a knee to the head.
Begbie stalling.
Begbie connects with a knee to the head.
Begbie connects with a knee to the head.
Begbie with the Thai clinch. He's looking to land a big knee but he's not managed it this time.
King is trying to break the clinch but Begbie has him pressed against the cage.
The referee is keeping an eye on Begbie - much more stalling and he will separate the fighters.
King takes a knee right on the jaw!
The crowd thankful this round is nearly over.
Begbie lands a knee to the head there! That was nasty!
Begbie throws a knee to the head but misses.
A frustrated look appears on King's face as he tries to break the clinch.
Begbie utilising his Muay Thai to score with a knee to the body.
And thats the end of the round the fighters go back to their corners.
Francis Begbie dominated that round.
The cut man is working on Ben King's cut.
That's the end of the round. The referee orders the cornermen out of the cage so we can get back down to business.
Begbie throws a half hearted mid kick.
Begbie has King up against the cage in a clinch.
Begbie lands a knee to the head there! That was nasty!
King letting Begbie take a breather here.
Begbie scores with a knee to the head.
King wants to break the clinch but can't.
Begbie with the Thai clinch, lands a knee to the head.
Begbie with a knee to the head.
Begbie throws a knee to the head but misses.
Begbie tries to land a knee to the head but misses.
We've had a slow start to the round here - hopefully the action picks up.
King tries to break the clinch but Begbie is controlling the position.
Begbie landing knees to the head.
A knee to the head by Begbie.
Begbie is trying to work for a single leg takedown but King pulls him back up using the underhooks.
King wants to break free but Begbie has control.
Begbie scores with a knee to the head.
Begbie with the Thai clinch. He's looking to land a big knee but he's not managed it this time.
Both fighters are absolutely exhausted here.
That's one minute gone in the round.
Begbie landing knees to the head.
Begbie lands a knee to the head there! That was nasty!
Begbie with the Thai clinch, lands a knee to the head.
Begbie putting his Muay Thai to good use. He has King in a tight clinch and is doing some damage with knees to the body.
King tries to break free but Begbie pushes him back against the cage.
Begbie tries to land a knee to the head but King blocks with his arms.
King is looking to break free of the clinch but Begbie has double underhooks.
King takes a knee right on the jaw!
Begbie misses with a knee strike.
King wants to get back to striking at distance but Begbie won't allow it.
Begbie connects with a nasty looking knee right to King's face.
Begbie looking for a takedown.
King is trying to break free.
King gets underhooks to prevent Begbie's takedown attempt.
Ben King has stuffed three takedown attempts in the round now. That's going to take a lot out of Francis Begbie.
King takes a knee right on the jaw!
Begbie crunches a lovely knee into King's ribcage.
Begbie using the Thai plumb to throw knees but King has his back arched nicely, preventing the strike.
King stops a takedown attempt from Begbie.
Begbie tries a knee to the head but King blocks it.
Begbie tries to score a body lock takedown but King shows good agility there to stay on his feet.
Begbie lands a knee to the head there! That was nasty!
That's two minutes gone in the round.
The crowd are hurling abuse towards the fighters... You can hardly blame them though because there isn't a lot going on in the fight.
Begbie connects with a nasty looking knee right to King's face.
Begbie looking to throw knees to the head but King is blocking nicely.
Begbie throws a vicious knee straight up the middle but King blocks it with crossed arms.
King tries to break the clinch but Begbie is controlling the position.
Begbie unloads a knee to the mid-section.
Begbie landing knees to the head.
Begbie looking to throw knees to the head but King is blocking nicely.
Begbie utilising his Muay Thai to score with a knee to the body.
Begbie with the Thai clinch, lands a knee to the head.
Begbie lands a knee to the body.
King is pressed up against the cage. Begbie has hold of a leg and is looking to drag King down to the mat. King avoids the attempt though and has circled away. We're back to striking at a distance.
Begbie moves into the clinch successfully.
King tries to circle away but Begbie has him pinned against the cage.
Begbie lands a nice knee to the body.
Begbie prevents King from breaking the clinch.
Begbie throws a vicious knee straight up the middle but King blocks it with crossed arms.
Begbie tries for a takedown but King manages to get underhooks.
Begbie using the Thai plumb to throw knees but King has his back arched nicely, preventing the strike.
Begbie lands a knee to the head.
Begbie connects with a knee to the head.
That's three minutes gone in the round.
Begbie with a knee to the head.
Begbie throws a vicious knee straight up the middle but King blocks it with crossed arms.
Begbie connects with a knee to the head.
Begbie with a knee to the head.
Begbie putting his Muay Thai to good use. He has King in a tight clinch and is doing some damage with knees to the body.
Begbie drops down looking for an ankle pick but King pulls his leg out and moves away.
Begbie instigates a clinch.
Begbie lands a knee to the head.
Begbie taking a breather.
King working hard to break the clinch.
A frustrated look appears on King's face as he tries to break the clinch.
Begbie with the Thai clinch, lands a knee to the head.
Begbie with the Thai clinch, lands a knee to the head.
Begbie utilising his Muay Thai to score with a knee to the body.
The referee calls for Begbie to work.
That's four minutes gone in the round.
There's not a lot going on here and the crowd are letting the fighters know they're not willing to tolerate a lack of action.
Begbie lands a knee to the head there! That was nasty!
Begbie lands a knee to the head there! That was nasty!
King is trying to break free.
Begbie lands a good knee to the midsection. King won't want to take too many of those.
Begbie keeps control of King as he tries to wriggle out of the double underhooks.
Knees in the clinch landing for Begbie.
Begbie with the Thai clinch, lands a knee to the head.
Begbie looking to throw knees to the head but King is blocking nicely.
King is trying to work out of this bad position, with his back against the cage.
Begbie landing some nice looking knees to the body.
Begbie using the Thai plumb to throw knees but King has his back arched nicely, preventing the strike.
King takes a knee right on the jaw!
A knee to the head by Begbie.
Begbie keeps control of King as he tries to wriggle out of the double underhooks.
Begbie connects with a knee to the head.
Boooooooooooooooooooo!!! God, this has been a terrible round. Come on you two, sort yourselves out!
Begbie lands a knee to the head.
King has had enough of the clinch but Begbie keeps him there for the moment.
Begbie crunches a lovely knee into King's ribcage.
Begbie with a knee to the head.
King looks like he'd prefer to be striking at range right now.
And thats the end of the round the fighters go back to their corners.
Francis Begbie showed his class in that round. I'd imagine he'll take it on all the scorecards.
The cut man is working on Ben King's cut.
That's the end of the interval. I'm sure that seemed a lot quicker than a minute for our two fighters! Back to the action. Ladies and gentlemen, this is the final round!
Begbie is looking to take this fight into the clinch.
King throws a right hand that Begbie ducks under and follows up with a left that Begbie also avoids with ease.
Begbie walks into a straight right hand from King.
Begbie shoots in looking for a takedown. King tries to sprawl out of it but Begbie keeps driving through. The fighters are pinned against the cage. King manages to get underhooks and after a bit of a struggle, circles away and we're back to standing.
Nice sprawl there from King as Begbie shoots in.
Begbie tries to close the distance and clinch up but King swats him away and circles back towards the center.
Begbie closes this distance looking for a takedown but King circles away.
Ben King has stuffed three takedown attempts in the round now. That's going to take a lot out of Francis Begbie.
Both fighters are breathing heavily.
We've had a slow start to the round here - hopefully the action picks up.
King swings wildly with a couple of big hooks
and Begbie counters with a nice low kick that buckles King's knee momentarily.
Begbie throws a head kick that connects with a bit of head and a bit of hand.
Begbie closes the distance and presses his opponent up against the cage.
A bit of stalling here from Begbie.
Knees in the clinch landing for Begbie.
That's one minute gone in the round.
King takes a knee right on the jaw!
Begbie with a knee to the head.
King looks like he'd prefer to be striking at range right now.
Begbie working King over with knees to the body.
Begbie is stalling here.
Begbie using the Thai clinch to land knees to the body.
King is trying to push Begbie away but Begbie has him pressed against the cage, so he's going nowhere.
King is trying to force a seperation but Begbie has the dominant position.
Begbie connects with a knee to the head.
Begbie putting his Muay Thai to good use. He has King in a tight clinch and is doing some damage with knees to the body.
Begbie with an attempt at a knee that misses.
Begbie misses with a knee strike.
Begbie with an attempt at a knee that misses.
Begbie leaning his opponent against the cage.
Begbie drops down looking for an ankle pick but King pulls his leg out and moves away.
Begbie fails in his attempt to clinch.
That's two minutes gone in the round.
The crowd are starting to boo a lack of action.
Begbie tries to clinch up.
Begbie moves in looking to clinch but King pushes him off.
Begbie gets in close and instigates a clinch.
Kneeeeees! The crowd are calling for knees to the body. Begbie obliges.
Begbie connects with a nasty looking knee right to King's face.
Begbie lands a knee to the head.
Begbie with an attempt at a knee that misses.
Begbie has a body lock and is looking for a takedown. King is bouncing around trying to prevent the takedown and somehow he has indeed managed to stay on his feet.
Begbie throws a knee to the head but misses.
Begbie landing knees to the head.
King is trying to break the clinch but Begbie has him pressed against the cage.
Begbie scores a nice knee to the body.
Begbie misses with a knee strike.
King takes a knee right on the jaw!
Begbie drops down looking for an ankle pick but King pulls his leg out and moves away.
Begbie clinches up against the cage.
That's three minutes gone in the round.
King wants to get back to striking at distance but Begbie won't allow it.
Begbie lands a knee to the head.
King is trying to break the clinch but Begbie has him pressed against the cage.
King wants to push off and get back to the center of the mat but Begbie has him pressed against the cage.
Begbie is stalling here.
Knees to the body from Begbie.
Begbie looking to throw knees to the head but King is blocking nicely.
Begbie landing knees to the body. They look like they could hurt.
King wants to get back to striking at distance but Begbie won't allow it.
King stops a takedown attempt from Begbie.
Begbie tries to land a knee to the head but King blocks with his arms.
Begbie tries to score a body lock takedown but King shows good agility there to stay on his feet.
Begbie lands a knee to the head.
Begbie tries a knee to the head but King blocks it.
King takes a knee right on the jaw!
King wants to break the clinch but can't.
Begbie throws a knee to the head but misses.
Begbie lands a knee to the head there! That was nasty!
Francis Begbie is fighting for a decision here - he's started to take the cautious approach.
That's four minutes gone in the round.
Well. There's a bit of a lull in the action here and the crowd are starting to get restless.
Begbie landing knees to the head.
Begbie taking a breather.
King takes a knee right on the jaw!
Begbie tries a knee to the head but King blocks it.
King is trying to break the clinch but Begbie is controlling him.
King working hard to break the clinch.
Begbie connects with a nasty looking knee right to King's face.
Begbie stalling here - the referee won't stand for too much of that.
King takes a knee right on the jaw!
Begbie lands a knee to the head.
Begbie misses with a knee to the head.
King tries to break free but Begbie pushes him back against the cage.
Boooooooooooooooooooo!!! God, this has been a terrible round. Come on you two, sort yourselves out!
King is trying to break the clinch but Begbie is controlling him.
Begbie lands a knee to the body.
Ben King has stepped it up - he knows he needs a finish here!
King wants to break the clinch but can't.
A knee to the head by Begbie.
King wants to break the clinch but can't.
And that's the end of the fight!
Francis Begbie comfortably won the final round on my scorecard.
I've got Begbie winning every round here. Surely the decision will go his way and he'll pick up a well deserved decision victory. Over to the ring announcer for the scorecards.
Ladies and gentlemen, after 3 rounds of action, we go to the scorecards for a decision.
Judge Steven Brown scores the fight 27:30
Judge Donald Grub scores the fight 27:30
Judge Andrew Berry scores the fight 27:30
In favor of your winner, by unanimous decision... Francis Begbie!
|
|
|
|
|
|
|
|
|
|
|
|
|
|
|
|
|
|
|
|
|
|
|
| S |
C
A |
G |
S |
C
B |
G |
|
S |
C |
G |
|
energy
A | B |
|
hype
A | B |
|
pop
A | B |
|
mgr
A | B |
|
FIGHT
RATING
28% |
|
|
|
|
|
|
|
Co-main event
|
|
|
|
Main event
|
Coming up we have a welterweight MMA rules bout between Kofi Amebi (ranked 0 p4p, 0 weight class) and Simon Williamson (ranked 0 p4p, 0 weight class). We have two fighters making their debuts here, so let's see who comes out of this one with their first professional victory.
 |
|
 |
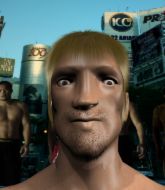
| 182 cm
19
168 lbs
0 - 0 - 0 |
|
170 cm
25
170 lbs
0 - 0 - 0 |
BJJ White Belt
Excellent boxer
Big right hand |
|
Good wrestler
Counter striker
Determined |
|
| |
|
Ladies and gentlemen. This fight is 3 rounds, in the welterweight division.
Introducing the fighter to my left, fighting out of the red corner.
With a record of
0 - 0 - 0, fighting out of London, Kofi Amebi!
And introducing the fighter to my right, fighting out of the blue corner.
With a record of
0 - 0 - 0, fighting out of London, Simon Williamson!
The judges for this bout are Colin Fotheringham, James Glass and James Atkins.
The bell rings for round one and we are underway!
Williamson ducks down and throws a hook to the body but Amebi moves away.
Amebi keeping a good distance there, avoiding the body shot.
Amebi misses with a takedown attempt
and Williamson counters with a takedown into full mount! That could mean trouble for Amebi!
Williamson is thinking about an arm triangle here, looking to tighten it up before moving to side control. Amebi can see it coming though and defends well with a couple of strikes to the head and some good arm positioning.
The fighters are pressed up against the cage, both looking to find a bit of space to work.
Amebi tries to lock up and control but Williamson gives him a forearm to the face and pushes him away.
Williamson has control of Amebi's right arm, working for a kimura. It's a bit of a token attempt though and Amebi regains control of the situation pretty easily.
The fans in attendance giving it up for the two fighters, who have really let it all hang out in the last minute or so!
Williamson working for a submission but Amebi is keeping him at bay.
Williamson is thinking about an arm triangle here, looking to tighten it up before moving to side control. Amebi can see it coming though and defends well with a couple of strikes to the head and some good arm positioning.
Williamson looks like he's working for a submission but he's not found anything just yet.
That's one minute gone in the round.
Amebi is writhing around trying to get back to his feet.
Amebi knows he needs to get back to his feet asap. He's simply no match for Williamson on the ground.
Williamson is working to isolate an arm here. It's a telegraphed submission attempt but he's gone for it anyway - and he's got it! Williamson extends the arm and Amebi is forced to tap!
Ladies and gentlemen, after 1:33 of round 1, we have a winner by way of Submission (Armbar). Simon Williamson!
|
|
|
|
|
|
|
|
|
|
|
|
|
|
|
|
|
|
|
|
|
|
|
| S |
C
A |
G |
S |
C
B |
G |
|
S |
C |
G |
|
energy
A | B |
|
hype
A | B |
|
pop
A | B |
|
mgr
A | B |
|
FIGHT
RATING
100% |
|
|
|
|
|
|
|
|
|
|

