 |
KOF.45 - The Takeover PBP Commentary |
Undercard bout
|
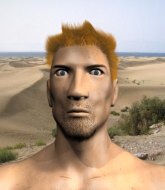
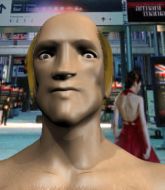
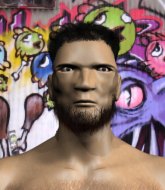
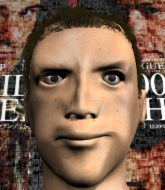
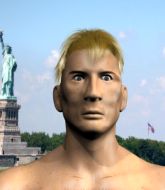
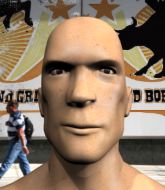
Coming up we have a welterweight MMA rules bout between Real Dragon (ranked 0 p4p, 0 weight class) and Yuam Laigo (ranked 0 p4p, 0 weight class). Both fighters look pumped up here. Let's hope this is a good fight!
 |
|
 |
| 180 cm
23
170 lbs
3 - 4 - 0 |
|
178 cm
22
179 lbs
2 - 3 - 0 |
BJJ Blue Belt
Good kicks
Experienced |
|
BJJ Blue Belt
Solid Muay Thai
Knockout power |
|
| |
|
Ladies and gentlemen. This fight is 3 rounds, in the welterweight division.
Introducing the fighter to my left, fighting out of the red corner.
With a record of
3 - 4 - 0, fighting out of Tokyo, Real Dragon!
And introducing the fighter to my right, fighting out of the blue corner.
With a record of
2 - 3 - 0, fighting out of Tokyo, Yuam Laigo!
The judges for this bout are Yuuki Gou, Yukihiro Yamamoto and Kenichi Hosakawa.

The bell rings for round one and we are underway!
Dragon misses with a body kick.
Yuam Laigo seems to be the more aggressive standup fighter in this bout.
Laigo is looking to take this fight into the clinch.
Laigo is looking to clinch.
Dragon looks to land a body kick but Laigo moved away.
Dragon lands with a slapping head kick.
Dragon lands with a kick to the ribs.
Laigo fails in his attempt to clinch.
Dragon cracks the inside of Laigo's front leg.
Laigo tries to clinch but Dragon is having none of it.

Dragon gets in close and instigates a clinch.

Dragon manages to break the clinch.
Laigo wants to clinch but Dragon slips to the side
and Dragon counters with a kick to the head that grazes his opponent. Laigo is lucky that one didn't land flush.
Laigo throws a leg kick
and Dragon finishes the little exchange by landing a big kick to the body.
This is a great period of action - very entertaining stuff!
Laigo closes the distance but Dragon moves to the side
and he gets countered with a snapping leg kick.
Laigo looks gassed!
Laigo wants to clinch but Dragon slips to the side
and Dragon counters by clinching up.
Laigo's corner calls for him to break the clinch, which he does.
Dragon pushes Laigo up against the ropes in a clinch.
Dragon pushes off and circles away, back to the middle of the mat.

That's one minute gone in the round.
Dragon circles away from the clinch attempt
and Dragon counters with a nice low kick that buckles Laigo's knee momentarily.
Dragon rushes Laigo and presses him up against the ropes.
Laigo has had enough of the clinch and is looking to separate.
Dragon landing knees to the body.
Dragon misses the knee to the body. Nice hip positioning from Laigo.
Laigo on the defensive, avoiding the knees to the body.
Dragon trying to land knees to the body.
Dragon breaks from the clinch.
Laigo looks to clinch
and Dragon counters with a head kick.
The crowd cheering loudly, showing their appreciation for the quality fight we're seeing here.
Laigo moves forwards but Dragon connects with a nice, crisp jab.
Both fighters circling slowly here as the pace drops. Hopefully one of them does someth.. OOOHHHH!!!! Dragon throws an absolute beast of a head kick! Laigo is done! He's out cold, twisted and contorted up against the ropes! Wow!
Ladies and gentlemen, after 1:46 of round 1, we have a winner by way of KO (Head Kick). Real Dragon!
|
|
|
|
|
|
|
|
|
|
|
|
|
|
|
|
|
|
|
|
|
|
|
| S |
C
A |
G |
S |
C
B |
G |
|
S |
C |
G |
|
energy
A | B |
|
hype
A | B |
|
pop
A | B |
|
mgr
A | B |
|
FIGHT
RATING
100% |
|
|
|
|
|
|
|
Undercard bout
|
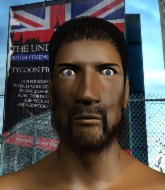
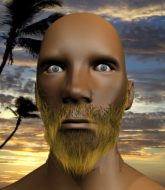
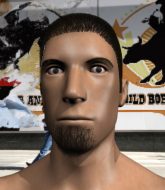
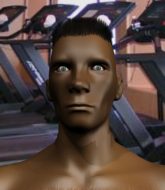
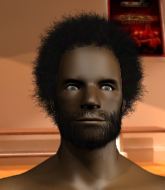
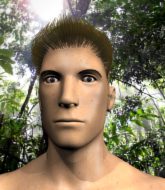
Coming up we have a light heavyweight MMA rules bout between Hu Hichu (ranked 0 p4p, 0 weight class) and Kenji Tamura (ranked 0 p4p, 0 weight class). Kenji Tamura has the better chin. Will he look to stand and bang today?
 |
|
 |
| 190 cm
19
200 lbs
4 - 1 - 0 |
|
185 cm
19
200 lbs
5 - 2 - 0 |
BJJ Purple Belt
Brawler
Intelligent |
|
BJJ White Belt
Good kicks
Solid chin |
|
| |
|
Ladies and gentlemen. This fight is 3 rounds, in the light heavyweight division.
Introducing the fighter to my left, fighting out of the red corner.
With a record of
4 - 1 - 0, fighting out of Tokyo, Hu Hichu!
And introducing the fighter to my right, fighting out of the blue corner.
With a record of
5 - 2 - 0, fighting out of Tokyo, Kenji Tamura!
The judges for this bout are Taro Takaoka, Shigeki Sano and Yasuomi Hirokawa.
The bell rings for round one and we are underway!
Hichu looks to land a combination but Tamura avoids it well.
Hichu swings wildly with a right hand that was never going to find it's target.
Tamura throws a leg kick which misses Hichu's front leg but catches the back leg as Hichu tries to avoid it.
Tamura misses with a half-hearted attempt at a head kick.
Hu Hichu seems to be the more aggressive standup fighter in this bout.
Hichu lands a two punch combo.

It looks like Kenji Tamura has been cut.
Hichu scores with a nice looking left hook and follows it up with an uppercut!
The fans in attendance giving it up for the two fighters, who have really let it all hang out in the last minute or so!
Tamura uses good footwork to avoid the strikes from Hichu.
Tamura fakes with the hands and throws a leg kick but Hichu is out of range.
Tamura misses with a half-hearted attempt at a head kick.
Tamura throws a nice looking combination but Hichu bobs and weaves to avoid any damage.
Tamura lands a high kick!
Hichu thows a body shot but no joy.
Tamura tries a switch kick but it misses it's target.
Hichu will need to tighten up his combinations if he doesn't want to gas himself out, swinging at thin air.
Tamura dodges the punch combination from Hichu.
That's one minute gone in the round.
Hichu goes to the watering hole and comes back with a big thumbs up from the judges as he scores a three punch combo.
Hichu displaying good standup as he scores with a three punch combination.
Tamura misses with a half-hearted attempt at a head kick.
Hichu changes levels and looks for a double leg takedown. Tamura tries to avoid it but Hichu manages to keep hold of a leg and drag Tamura to the ground. Tamura escapes though and pops straight back up to his feet.
Tamura slips a jab and a cross from Hichu.
Hichu just misses with a punch to the body.
Tamura missing with a left hand there. Hichu was out of range so wasted energy throwing that one.
Hichu throws a series of punches but Tamura moves out of range.
Hichu throws a leg kick
and Tamura counters with an inside leg kick.
Hichu throws a monster uppercut resembling something out of street fighter but it doesn't land.

That's two minutes gone in the round.
Tamura motions for Hichu to come forward. Tamura throws a leg kick but it misses it's target.
Hichu falls off balance throwing a combination
and Tamura counters with a nice body kick.
Hichu is breathing heavily.
The crowd cheering loudly, showing their appreciation for the quality fight we're seeing here.
Tamura tries a head kick but it misses.
A telegraphed right hand from Hichu misses the target.

Tamura lands a big head kick that sends Hichu tumbling to the mat! Tamura takes a step backwards and waves Hichu back to his feet - he wants the finish!
It looks like Hu Hichu has been cut.
Hichu throws a shot from downtown. Tamura moves away and avoids it.
Tamura fails to land with the punch combination there - jab, cross, hook, miss, miss, miss.
Tamura throws a nice looking combination but Hichu bobs and weaves to avoid any damage.
Nice uppercut there from Hichu.
Tamura just misses with a punch to the body.
Tamura misses with a jab, cross combination.

That's three minutes gone in the round.
Nice uppercut lands for Tamura. That snapped Hichu's head back.
Some wild striking there from Tamura.
Hichu stalks Tamura and leaps in with a furious combination of punches. Uppercuts and crosses smash into Tamura's face. Tamura staggers backwards, shaken.
Hichu swinging wilding here.
Hichu throws a series of strikes that have Tamura backpedaling.
That has opened up Kenji Tamura's cut even more.
Tamura throws a combination but comes up with nothing but fresh air.
Hichu throws a right and a left that Tamura avoids nicely.
Tamura on the wrong end of a vicious looking body shot.
A punch lands to the side of Tamura 's head but he takes it in his stride.

That's four minutes gone in the round.
Nice uppercut lands for Hichu. That snapped Tamura's head back.
We've seen a great period of action over the last minute or so - credit to both fighters for going all out!
Hichu getting the better of the striking in that exchange.
Tamura uses decent footwork to sidestep a right hand from Hichu.
Tamura slips a jab and a cross from Hichu.
Tamura on the wrong end of a decent looking cross there.
Hichu misses with a double jab
and Tamura counters with a stiff right hand.
Hichu throws a predictable looking body shot
and Tamura counters with a massive head kick! KABOOM! Hichu is out cold! A devastating KO!
Ladies and gentlemen, after 4:45 of round 1, we have a winner by way of KO (Head Kick). Kenji Tamura!
|
|
|
|
|
|
|
|
|
|
|
|
|
|
|
|
|
|
|
|
|
|
|
| S |
C
A |
G |
S |
C
B |
G |
|
S |
C |
G |
|
energy
A | B |
|
hype
A | B |
|
pop
A | B |
|
mgr
A | B |
|
FIGHT
RATING
68% |
|
|
|
|
|
|
|
Undercard bout
|
Coming up we have a light heavyweight MMA rules bout between Masaaki Free trade (ranked 0 p4p, 0 weight class) and Rufus Hitzlspergher (ranked 0 p4p, 0 weight class). Masaaki Free trade has the edge in experience - let's see if he can make that count tonight.
 |
|
 |
| 175 cm
22
205 lbs
4 - 3 - 0 |
|
188 cm
19
200 lbs
2 - 3 - 0 |
Good takedowns
Counter striker
Very quick |
|
BJJ Blue Belt
Brawler
Determined |
|
| |
|
Ladies and gentlemen. This fight is 3 rounds, in the light heavyweight division.
Introducing the fighter to my left, fighting out of the red corner.
With a record of
4 - 3 - 0, fighting out of Tokyo, Masaaki Free trade!
And introducing the fighter to my right, fighting out of the blue corner.
With a record of
2 - 3 - 0, fighting out of Tokyo, Rufus Hitzlspergher!
The judges for this bout are Tatsuya Matsuyama, Kenichi Hosakawa and Yuuki Gou.
The bell rings for round one and we are underway!
Hitzlspergher misses with a jab, cross combination.
Hitzlspergher throws an overhand right that lands on Free trade's shoulder, as Free trade tries to avoid the shot.
Hitzlspergher misses with a wild combination.
Hitzlspergher is looking to clinch.
Hitzlspergher fails in his attempt to clinch.
Hitzlspergher tries to clinch but Free trade is having none of it.
Free trade takes one on the chin but keeps coming.

Free trade gets a takedown into half guard.

Free trade is trying for a guillotine from the top but the pressure isn't in the right place so Hitzlspergher is just riding it out for now. Free trade eventually gives up the hold.
Free trade wants to take a breather but Hitzlspergher is having none of it.
That's one minute gone in the round.
Free trade is looking for an arm triangle, whilst trying to pass to side control. Hitzlspergher doesn't seem that keen to cooperate though. No luck this time Free trade.
Hitzlspergher is defending against the submission attempts here by Free trade.
Hitzlspergher is working for an escape here. He's hooked one of Free trade's legs and he's managed to sneak out and take Free trade's back!
That's two minutes gone in the round.
A few boos can be heard. I'm sure they will multiply if the fighters don't pick up the pace.
Free trade is really stuck here.
Hitzlspergher biding his time, controlling Free trade.
The fighters are tangled up in the ropes here. We might need a restart if the fighters can't break free themselves.
Hitzlspergher is trying to stick to Free trade's back but Free trade is turning into Hitzlspergher. He's managed to reverse the position - now he's in Hitzlspergher's guard. Polite applause from the crowd in appreciation of some nice Jiu Jitsu by Free trade.
Free trade passes Hitzlspergher's right leg, so he's now in half guard.
Free trade is looking for a kimura. It's going to be difficult to finish that from half guard though and Hitzlspergher defends it well.
Free trade is looking for an arm triangle, whilst trying to pass to side control. Hitzlspergher doesn't seem that keen to cooperate though. No luck this time Free trade.
That's three minutes gone in the round.
Free trade seems to be working for a kimura but Hitzlspergher defends the submission attempt.
Hitzlspergher is trying to control but can't.
The fighters are trapped in the ropes so we're going to have a reposition here. The ref calls for a break and repositions the fighters in the center of the ring.
Hitzlspergher tries to roll over but Free trade keeps him under control.
Free trade seems to be working for a kimura but Hitzlspergher defends the submission attempt.
Free trade could do with loosing a few pounds - he looks very soft around the mid section, to put it politely.
That's four minutes gone in the round.
There's not a lot going on here and the crowd are letting the fighters know they're not willing to tolerate a lack of action.
Free trade is looking for a kimura but Hitzlspergher is holding onto that half guard position, so it's hard for Free trade to get the leverage.
Hitzlspergher really doesn't want to stay on the ground with Free trade. If he can't get it back to his feet, it's only a matter of time before he'll be tapping out.
Free trade not landing any meaningful shots this time.

The referee decides to stand the fighters back up.
Hitzlspergher misses with the combination.
Hitzlspergher is looking to clinch but Free trade is avoiding it.
Hitzlspergher is looking to clinch but Free trade is avoiding it.
Hitzlspergher misses with an uppercut.
Hitzlspergher lands a left and a right that send Free trade crashing to the mat, dazed. Hitzlspergher thinks about following him to the mat but decides to wave him back up to his feet!
And thats the end of the round the fighters go back to their corners.
Rufus Hitzlspergher dominated that round.
That's time! Free trade's corner gives him a slap on the ass as he gets ready to fight.

Hitzlspergher moves in close and cracks Free trade with a massive right hand! Free trade, frozen momentarily in time, tumbles to the canvas, already out cold! A brutal knockout by Hitzlspergher!
Ladies and gentlemen, after 0:05 of round 2, we have a winner by way of KO (Punch). Rufus Hitzlspergher!
|
|
|
|
|
|
|
|
|
|
|
|
|
|
|
|
|
|
|
|
|
|
|
| S |
C
A |
G |
S |
C
B |
G |
|
S |
C |
G |
|
energy
A | B |
|
hype
A | B |
|
pop
A | B |
|
mgr
A | B |
|
FIGHT
RATING
100% |
|
|
|
|
|
|
|
Undercard bout
|
Coming up we have a welterweight MMA rules bout between Chanarong Dhanarajata (ranked 0 p4p, 0 weight class) and Dick Hickman (ranked 0 p4p, 0 weight class). Dhanarajata kept the crowd waiting but all that was forgotten when his ring entrance music started. The incomparable musical genius that is Jorge Quintero. Dick Hickman is staring across the ring at his opponent, tweaking his nipples.
 |
|
 |
| 181 cm
23
171 lbs
5 - 2 - 0 |
|
183 cm
23
171 lbs
3 - 1 - 0 |
BJJ Blue Belt
Solid Muay Thai
KO power |
|
BJJ Blue Belt
Good low kicks
Granite chin |
|
| |
|
Ladies and gentlemen. This fight is 3 rounds, in the welterweight division.
Introducing the fighter to my left, fighting out of the red corner.
With a record of
5 - 2 - 0, fighting out of Tokyo, Chanarong Dhanarajata!
And introducing the fighter to my right, fighting out of the blue corner.
With a record of
3 - 1 - 0, fighting out of Tokyo, Dick Hickman!
The judges for this bout are Shirou Masuda, Yukihiro Shimada and Taro Takaoka.
The bell rings for round one and we are underway!
Dhanarajata misses with a kick to the body.
Dhanarajata misses with a hook. Hickman ducked under it nicely.
Dhanarajata throws a head kick but Hickman moves out of range.
A decent looking cross lands there for Hickman.
It looks like Chanarong Dhanarajata has been cut.
Hickman slips in close and lands a nice hook before moving back out of range.
Dhanarajata throws the left hand but Hickman avoids the punch easily.
Hickman cracks Dhanarajata with a good shot that sees him stumbling back into the ropes.

Dhanarajata is rocked!
Dhanarajata uses good head movement to avoid the hook from Hickman.
Oh Dhanarajata is still all over the place! His legs are completely gone! Will he be able to recover?!!
Chanarong Dhanarajata seems to be the more aggressive standup fighter in this bout.
A big right from Hickman misses.
Dhanarajata misses with a hook. Hickman ducked under it nicely.
Hickman throws a big shot that misses.
Dhanarajata seems to have got his legs back now.
Hickman feints and then cracks Dhanarajata's leading leg with a nice low kick. He's obviously looking to slow Dhanarajata down.
Dhanarajata wants to clinch up but Hickman keeps it at a distance.
Dhanarajata looking to throw a kick but he's pulled out of it.
Today's fight clock is brought to you by... OOOH that's a huge shot by Hickman! Dhanarajata is in big trouble here - the ref steps in to save him and this one is all over!
Ladies and gentlemen, after 0:47 of round 1, we have a winner by way of TKO (Strikes). Dick Hickman!
|
|
|
|
|
|
|
|
|
|
|
|
|
|
|
|
|
|
|
|
|
|
|
| S |
C
A |
G |
S |
C
B |
G |
|
S |
C |
G |
|
energy
A | B |
|
hype
A | B |
|
pop
A | B |
|
mgr
A | B |
|
FIGHT
RATING
100% |
|
|
|
|
|
|
|
Undercard bout
|
Coming up we have a light heavyweight MMA rules bout between David Haye (ranked 0 p4p, 0 weight class) and Croatian Sensation (ranked 0 p4p, 0 weight class). Sensation has chosen Wild boys as his entrance music. David Haye had a look across the ring there at his opponent. He definitely means business
 |
|
 |
| 196 cm
19
209 lbs
4 - 5 - 0 |
|
188 cm
23
210 lbs
6 - 4 - 0 |
BJJ Blue Belt
Brawler
Good chin |
|
BJJ White Belt
Good kicks
Knockout power |
|
| |
|
Ladies and gentlemen. This fight is 3 rounds, in the light heavyweight division.
Introducing the fighter to my left, fighting out of the red corner.
With a record of
4 - 5 - 0, fighting out of Tokyo, David Haye!
And introducing the fighter to my right, fighting out of the blue corner.
With a record of
6 - 4 - 0, fighting out of Tokyo, Croatian Sensation!
The judges for this bout are Kenichi Hosakawa, Yukihiro Yamamoto and Shigeki Sano.
The bell rings for round one and we are underway!
Haye scores with a decent looking hook.
It looks like Croatian Sensation has been cut.
Haye avoids the head kick by Sensation.
Sensation has his head slapped from side to side by a 3 punch combination. That must have hurt him.
Haye waving his hands out infront of him, looking to distract Sensation.
Sensation walks into a stiff left hand from Haye.
A punch combination from Sensation misses.
Sensation throws a jab when Haye was well out of range.
Sensation swinging wilding here.
Haye slips a jab and a cross from Sensation.
Sensation misses the shot to the body.
Haye lands with a precision combination! Left, right, uppercut and Sensation falls flat on his face, eyes wide open but he's out!
Ladies and gentlemen, after 0:31 of round 1, we have a winner by way of KO (Punches). David Haye!
|
|
|
|
|
|
|
|
|
|
|
|
|
|
|
|
|
|
|
|
|
|
|
| S |
C
A |
G |
S |
C
B |
G |
|
S |
C |
G |
|
energy
A | B |
|
hype
A | B |
|
pop
A | B |
|
mgr
A | B |
|
FIGHT
RATING
100% |
|
|
|
|
|
|
|
Undercard bout
|
Coming up we have a heavyweight MMA rules bout between Yuri Gagarin (ranked 0 p4p, 0 weight class) and andy toole (ranked 0 p4p, 0 weight class). andy toole told me before the fight that he's been watching a lot of DVDs so let's see if that helps him in this one! I can't wait to find out!
 |
|
 |
| 190 cm
22
265 lbs
4 - 1 - 0 |
|
189 cm
22
246 lbs
5 - 12 - 0 |
BJJ Blue Belt
Excellent boxer
Granite chin |
|
BJJ Blue Belt
Decent boxing
Knockout power |
|
| |
|
Ladies and gentlemen. This fight is 3 rounds, in the heavyweight division.
Introducing the fighter to my left, fighting out of the red corner.
With a record of
4 - 1 - 0, fighting out of Tokyo, Yuri Gagarin!
And introducing the fighter to my right, fighting out of the blue corner.
With a record of
5 - 12 - 0, fighting out of Tokyo, andy toole!
The judges for this bout are Shigeki Fujiwara, Yuuki Gou and Yasuomi Hirokawa.
The bell rings for round one and we are underway!
Gagarin lands a left and a right that send toole crashing to the mat, dazed. Gagarin thinks about following him to the mat but decides to wave him back up to his feet!
toole is rocked!
It looks like andy toole has been cut.
toole shoots in looking for a double leg takedown. Gagarin defends it nicely.
toole is still on wobbly legs! Can Gagarin finish him?
Excellent takedown into side control there by toole.
toole seems to have recovered his senses.
The fighters are tangled up in the ropes here. We might need a restart if the fighters can't break free themselves.
The fans in attendance giving it up for the two fighters, who have really let it all hang out in the last minute or so!
Gagarin tries to work a leg under to get back to half guard but toole wriggles his own leg back out and remains in side control.
toole working the strikes but Gagarin uses the opportunity to regain half guard.
toole trying to control from half guard but Gagarin is working away.
toole tries to stand but can't do so whilst Gagarin controls his leg.
Gagarin is trying is best to control the position here.
toole lands strikes from half guard.
Gagarin regains full guard, whilst avoiding punches from toole.
That's one minute gone in the round.
Gagarin working the defensive guard well to avoid strikes from toole.
toole in full guard, throwing the ground and pound. No damage this time.
Gagarin preventing the ground and pound from doing any damage.
toole is working the ground and pound from guard. He might want to try advancing position though to get more of an impact.
toole thows a big elbow that misses.
Gagarin has toole pulled in close to control his posture.
toole throws and elbow that misses. Gagarin uses the momentum to reverse the position. He's now in toole's guard. Nice move by Gagarin!
The fighters are trapped in the ropes so we're going to have a reposition here. The ref calls for a break and repositions the fighters in the center of the ring.
toole will have to put a bit more behind his punches if he's going to do any damage from this position.
That's two minutes gone in the round.

Gagarin stands up from guard. Let's bang!
Gagarin swats away the attempt to clinch by toole.
toole throws a looping left and ducks down for a takedown. He's got his arms around Gagarin's waist but Gagarin gets an underhook and avoids the takedown by throwing toole off to one side.
toole looks gassed!
Gagarin keeps the fight on the outside.
Gagarin looks to land a combination but toole avoids it well.
toole tries to clinch but Gagarin is having none of it.
toole fails in his attempt to clinch.
Gagarin throws a series of punches but toole moves out of range.
Gagarin scores with a jab to the head.
Gagarin lands a jab-cross combination.
Yuri Gagarin is looking to keep the fight on the feet at all costs.
Wooooo! Give it up for these two warriors! They are putting on a show!
A jab lands there for Gagarin.
That has opened up andy toole's cut even more.
Gagarin scores with a jab to the body.
Gagarin comes forward and lands a shot to the body, then darts back out of range.
Gagarin lands three nice shots there - that looked like it hurt!
Gagarin cracks toole with a right hand to the side of the head.
Gagarin lands a big right hand and follows it up with an uppercut. Oh and another big punch and a knee - toole can't take much more of this! Another big shot to the jaw from Gagarin and toole drops to the floor. Beaten and bloodied - he had enough there. A vicious beatdown by Gagarin.
Ladies and gentlemen, after 3:01 of round 1, we have a winner by way of TKO (Strikes). Yuri Gagarin!
|
|
|
|
|
|
|
|
|
|
|
|
|
|
|
|
|
|
|
|
|
|
|
| S |
C
A |
G |
S |
C
B |
G |
|
S |
C |
G |
|
energy
A | B |
|
hype
A | B |
|
pop
A | B |
|
mgr
A | B |
|
FIGHT
RATING
99% |
|
|
|
|
|
|
|
Undercard bout
|
Coming up we have a light heavyweight MMA rules bout between Chan Chun (ranked 0 p4p, 0 weight class) and Masaharu Homma (ranked 0 p4p, 0 weight class). Chan Chun has the edge in experience - let's see if he can make that count tonight.
 |
|
 |
| 200 cm
21
217 lbs
5 - 1 - 0 |
|
194 cm
22
205 lbs
4 - 0 - 0 |
BJJ Blue Belt
Basic striking
Experienced |
|
BJJ White Belt
Good kicks
Powerful |
|
| |
|
Ladies and gentlemen. This fight is 3 rounds, in the light heavyweight division.
Introducing the fighter to my left, fighting out of the red corner.
With a record of
5 - 1 - 0, fighting out of Tokyo, Chan Chun!
And introducing the fighter to my right, fighting out of the blue corner.
With a record of
4 - 0 - 0, fighting out of Tokyo, Masaharu Homma!
The judges for this bout are Ren Mimura, Shirou Masuda and Hirohito Nitta.
The bell rings for round one and we are underway!
Homma tries to close the distance and clinch up against the ropes but Chun paws at him with a jab and circles away.
Homma tries to clinch there but Chun circles away.
Chun lands a right hook to the body.
Homma misses with a half-hearted attempt at a head kick.
The fight stays on the outside here - Homma looks like he's thinking about clinching though.
Homma throws the kick towards the body but Chun avoids it.
Chun misses with a body shot. Nice footwork from Homma.
Chun keeps the fight on the outside.
Homma fails with an attempt to clinch.
Homma rushes Chun and pushes him back against the ropes in a clinch.
Homma throws an elbow but it's blocked.
Homma blocks an uppercut.
Chun is trying to force a seperation but Homma has the dominant position.
Chun is trying to work for a single leg takedown but Homma pulls him back up using the underhooks.
Homma creates a bit of distance and throws an elbow that only just misses.
Homma pushes off an throws an elbow but Chun leans to the side and avoids it. We're back to clinching against the ropes.
We've had a slow start to the round here - hopefully the action picks up.
Chun cracks Homma with a nice body shot.
Chun misses with some punches.
Homma lands an elbow just above Chun 's eye.
Chun is working for a takedown up against the ropes. He can't get it on this occasion though.
Homma lands a glancing elbow in the clinch.
Chun tries to pull guard but Homma holds him up against the ropes and eventually Chun drops back down to his feet.
That's three failed takedown attempts in the round for Chan Chun. That's going to take a lot out of him.
Homma lands an elbow inside.
Chun wants to break the clinch but can't.
Nice elbow from Homma.
Chun misses with a hook to the ribs.
That's one minute gone in the round.
Homma lands an elbow just above Chun 's eye.
Homma pushes off an throws an elbow but Chun leans to the side and avoids it. We're back to clinching against the ropes.
Chun gets control of Homma's arms and successfully pulls guard. Chun will no doubt be looking for submissions off his back.
Chun wants to sweep here but Homma controlling him for the moment.
Chun has a closed guard, preventing Homma from standing up.
Homma avoids a guillotine attempt easily.
Chun is working an open guard here, looking to improve his position. No doubt that will leave him open to counters but at least he's being more offensive.
Chun controls Homma momentarily but Homma frees himself.
Chun keeping moving, preventing Homma from controlling successfully.
That's two minutes gone in the round.
The crowd are hurling abuse towards the fighters... You can hardly blame them though because there isn't a lot going on in the fight.
Homma controls from within his opponent's guard.
Homma would like to get this fight back to the feet but can't get free from the closed guard.
Chun manages to land a sweep and now he's in mount on top!
Chun jumps to the side looking to secure the arm triangle
. Ooooh, that looks tight
Homma is gargling but he's managed to escape! Nice work there by Homma and Chun has given up the dominant position trying to land that submission.
Homma keeping his opponent close.
That's three minutes gone in the round.
Chun throws an elbow but Homma slips to the side and avoids it well.
Chun is trying to get an arm triangle but Homma is defending well.
Chun in side control lands a nice looking series of punches and elbows.
The fighters are trapped in the ropes so we're going to have a reposition here. The ref calls for a break and repositions the fighters in the center of the ring.
Chun has knee on belly and moves into mount.
Chun jumps to the side looking to secure the arm triangle
. Ooooh, that looks tight
Homma is gargling but he's managed to escape! Nice work there by Homma and Chun has given up the dominant position trying to land that submission.
Chun is breathing heavily.
Chun is working Homma over with some ground and pound from side control.
That's four minutes gone in the round.
Chun throws a strike aimed at the side of Homma's head but Homma avoids it well.
Homma wants to escape from the position here - easier said than done!
Chun in side control, trying to ground and pound but not landing this time.
Homma defending against the ground and pound.
Chun fails to land a wild elbow strike.
Chun working the body and head with strikes.
Chun has been looking to land a fair amount of strikes on the ground. He might be looking to soften his opponent up in order to work for a submission.
Chun thinks about going for a far side armbar but bails out and retains the dominant position instead.
Chun thinks about going for a far side armbar but bails out and retains the dominant position instead.
The referee has ruled that neither fighter is active enough on the ground and has stood them back up.
Crack! A monster head kick from Homma and Chun falls like a tree - timbeeeeeeeeeeerrrr! A highlight reel knockout by Homma!
Ladies and gentlemen, after 4:58 of round 1, we have a winner by way of KO (Head Kick). Masaharu Homma!
|
|
|
|
|
|
|
|
|
|
|
|
|
|
|
|
|
|
|
|
|
|
|
| S |
C
A |
G |
S |
C
B |
G |
|
S |
C |
G |
|
energy
A | B |
|
hype
A | B |
|
pop
A | B |
|
mgr
A | B |
|
FIGHT
RATING
41% |
|
|
|
|
|
|
|
Undercard bout
|
Coming up we have a heavyweight MMA rules bout between Nathan Jones (ranked 0 p4p, 0 weight class) and Trevor Price (ranked 0 p4p, 0 weight class). Both fighters look fresh as a daisy as they make their way towards the ring.
 |
|
 |
| 204 cm
22
280 lbs
4 - 0 - 0 |
|
195 cm
20
260 lbs
4 - 0 - 0 |
BJJ Blue Belt
Counter striker
Good chin |
|
BJJ Blue Belt
Excellent boxer
Heavy handed |
|
| |
|
Ladies and gentlemen. This fight is 3 rounds, in the heavyweight division.
Introducing the fighter to my left, fighting out of the red corner.
With a record of
4 - 0 - 0, fighting out of Tokyo, Nathan Jones!
And introducing the fighter to my right, fighting out of the blue corner.
With a record of
4 - 0 - 0, fighting out of Tokyo, Trevor Price!
The judges for this bout are Tatsuya Matsuyama, Shigeki Fujiwara and Hirohito Nitta.
The bell rings for round one and we are underway!
Jones ducks under a wild hook from Price.
Price slips a straight right by Jones.
Jones swings for the body but Price moves out of range.
Price avoids the clinch attempt nicely.
Price lands a nice shot that snaps Jones's head back.
Nice jab there from Price.
Price throws a decent looking leg kick but it doesn't land clean.
Jones dives in and grabs Price's left leg, looking for a takedown. Price pushes down on Jones's head and hops out.
That's one minute gone in the round.
Jones defending well as Price loads up on a big left hand.
Jones moves out of range as Price strikes.
Price cracks Jones with a good shot that sees him stumbling back into the ropes.
It looks like Nathan Jones has been cut.
Jones shoots in but Price avoids the takedown attempt easily.
Jones misses with a body shot.
Price throws an overhand right that lands on Jones's shoulder, as Jones tries to avoid the shot.
That's two minutes gone in the round.
Jones moves out of range as Price strikes.
Price thows a left - swing and a miss!
Jones connects with a body shot.
Jones throws a combination but it was largely blocked by Price.
Jones ducks under a wild hook from Price.
Jones thows a left - swing and a miss!
Jones misses with a low kick.
That's three minutes gone in the round.
Price throws a wild combination but nothing lands.
Price throws a hook but Jones blocks it.
Jones slips under a jab.
Jones shoots for a double leg takedown but Price sprawls well. He's pushed Jones's face into the mat and manages to get back to his feet relatively easily.
That's three failed takedown attempts in the round for Nathan Jones. That's going to take a lot out of him.
Price missing with a left hand there. Jones was out of range so wasted energy throwing that one.
Price just misses with a punch to the body.
That's four minutes gone in the round.
A lull in the action here being met with boos from the crowd.
Price displays some good footwork, moving neatly out of range as Jones throws out the jab.
Trevor Price seems to be the more aggressive standup fighter in this bout.
Price thows a body shot but no joy.
Price misses with a straight left.
Price misses with an uppercut.
Jones misses with a double jab
and Price counters with a leg kick.
Price throws a looping overhand right but Jones ducks down to avoid it.
And thats the end of the round the fighters go back to their corners.
Trevor Price dominated that round.
The cut man is working on Nathan Jones's cut.
That's the end of the interval. I'm sure that seemed a lot quicker than a minute for our two fighters! Back to the action.
Price thows a left - swing and a miss!
Jones throws a right and a left that Price avoids nicely.
Price throws a hook to the body but it doesn't connect.
Jones ducks under a wild hook from Price.
Both fighters are looking to counter, which isn't making for the most exciting fight in the world.
Price throws the left hand but Jones avoids the punch easily.
We've had a slow start to the round here - hopefully the action picks up.
Jones is looking to take this fight into the clinch.
Jones doesn't succeed with the takedown
and Price counters with a stiff right hand.
That's one minute gone in the round.
Jones feints and then dives in with a takedown. That was a long way out but the feint bought him enough time to close the distance and complete the takedown. Now we'll play guard for a bit and see who can get the better of that position.
The fighters are tangled up in the ropes here. We might need a restart if the fighters can't break free themselves.
Price looking for a sweep. Not yet Price, not yet.
Jones landing with the ground and pound.
Price is working the butterfly guard. He manages to land a nice scissor sweep and is now in half guard on the top. Nice move.
Jones slips a foot under and gets full guard. Nice work.
That's two minutes gone in the round.
Jones is working from a closed guard but he's struggling to control his opponent.
Price stopping the sweep attempt from Jones.
Jones has his hands on Price's head, controlling the position.
That's three minutes gone in the round.
Price is taking a break and basically stalling. The referee will not allow him to do that for long.
Price is looking to stand up but Jones won't let him.
Jones wants to stand and escape but Price is having none of it.
That's four minutes gone in the round.
Well. There's a bit of a lull in the action here and the crowd are starting to get restless.
Price trying to control the position from guard on top but Jones is wriggling around, looking for whatever he can.
The referee decides to stand the fighters back up.
Jones looks to land a right hand but Price moved out of range.
Trevor Price is looking to keep the fight on the feet at all costs.
The crowd thankful this round is nearly over.
Price is the aggressor but that punch slipped nicely by Jones.
And thats the end of the round the fighters go back to their corners.
A close second round but Trevor Price will probably get the nod - 10:9.
The cut man is working on Nathan Jones's cut.
The fighters get back to their feet, the hooter sounds and we're back to the action! This is the final round!

Jones feints and then dives in with a takedown. That was a long way out but the feint bought him enough time to close the distance and complete the takedown. Now we'll play guard for a bit and see who can get the better of that position.
Price keeping moving, preventing Jones from controlling successfully.
Jones lands a couple of elbows.
Jones advances position into side control!
Jones working the ground and pound from side control.
Jones creates some space and throws a big elbow, but Price sees it coming and moves his head just enough to avoid the strike.
Jones sitting in side control, looking to soften his opponent up with elbows and hammerfists but Price is avoiding damage well and looking to escape the position.
Jones landing with strikes to the head and body from side control.
Jones lands an elbow.
That's one minute gone in the round.
Price prevents Jones from moving into mount.
Price tries to improve position but can't.
Price takes a big intake of breath there - he's definitely tired.
Jones controls the position from side control.
Jones misses with a strike but at least he's keeping busy, looking to cause some damage - that will still help him when it comes to the judges scorecards.
Jones creates some space and throws a big elbow, but Price sees it coming and moves his head just enough to avoid the strike.
Jones cracks Price with an elbow. That is naaassty.
Jones tries to land with some ground and pound but misses.
Price is looking to regain half guard here but Jones keeps moving and retains side control.
Jones controls the position.
That's two minutes gone in the round.
The crowd are hurling abuse towards the fighters... You can hardly blame them though because there isn't a lot going on in the fight.
Price on the wrong end of some ground and pound.
Jones trying to control the position but Price is working away.
The strikes coming from Jones are missing the target in this wave of attacks.
Jones misses with the ground and pound.
Price dodges the ground and pound from Jones.
Jones working the head with strikes.
Price struggling a bit here.
Price dodges the ground and pound from Jones.
The strikes coming from Jones are missing the target in this wave of attacks.
That's three minutes gone in the round.
The referee has ruled that neither fighter is active enough on the ground and has stood them back up.
Jones blocks a jab.
Jones with a body punch. A glancing blow.
A swing and a miss from Jones.
Jones defending well as Price loads up on a big left hand.
A really sloppy takedown attempt there from Jones.
Price fails to land with the punch combination there - jab, cross, hook, miss, miss, miss.
Trevor Price is fighting for a decision here - he's started to take the cautious approach.
That's four minutes gone in the round.
Jones closes the distance and clinches.
Nathan Jones has stepped it up - he knows he needs a finish here!
Jones looking for a takedown.
Price gets double underhooks to prevent a takedown attempt from Jones.
That's three failed takedown attempts in the round for Nathan Jones. That's going to take a lot out of him.
Jones has managed to pull guard. Let's see whether he can work an aggressive guard. It will also be interesting to see what tactics Price uses from the top position.
Jones is avoiding any damage by keeping wrist control.
Jones is trying to keep Price in close.
And that's the end of the fight!
Nathan Jones showed his dominance in that final round.
I think Price has won this one but let's see whether the judges agree with me. Over to the ring announcer for the scorecards.
Ladies and gentlemen, after 3 rounds of action, we go to the scorecards for a decision.
Judge Tatsuya Matsuyama scores the fight 29:28
Judge Shigeki Fujiwara scores the fight 29:29
Judge Hirohito Nitta scores the fight 29:29
The fight is ruled a majority draw!
|
|
|
|
|
|
|
|
|
|
|
|
|
|
|
|
|
|
|
|
|
|
|
| S |
C
A |
G |
S |
C
B |
G |
|
S |
C |
G |
|
energy
A | B |
|
hype
A | B |
|
pop
A | B |
|
mgr
A | B |
|
FIGHT
RATING
26% |
|
|
|
|
|
|
|
Co-main event
|
Coming up we have a light heavyweight MMA rules bout between Hank Brun (ranked 0 p4p, 0 weight class) and Alessio Fuschini (ranked 0 p4p, 0 weight class). Brun's ring entrance music is that housewives' favourite, "Pump Up the Jam" by The Lost Fingers. There are an array of beautiful celebrities at ringside tonight! I wonder if any of them paid for their tickets.
 |
|
 |
| 193 cm
23
212 lbs
8 - 1 - 0 |
|
187 cm
24
214 lbs
9 - 3 - 0 |
BJJ Blue Belt
Brawler
Granite chin |
|
BJJ Blue Belt
Decent boxing
Powerful |
|
| |
|
Ladies and gentlemen. This fight is 3 rounds, in the light heavyweight division.
Introducing the fighter to my left, fighting out of the red corner.
With a record of
8 - 1 - 0, fighting out of Tokyo, Hank Brun!
And introducing the fighter to my right, fighting out of the blue corner.
With a record of
9 - 3 - 0, fighting out of Tokyo, Alessio Fuschini!
The judges for this bout are Kenichi Hosakawa, Yuuki Gou and Ren Mimura.
The bell rings for round one and we are underway!
Brun lands with a nice combination. Fuschini backs away looking to recover.
Fuschini throws out a token jab with nothing on it.
Fuschini throws a combination but it was largely blocked by Brun.
Brun falls off balance throwing a combination
and Fuschini counters with a nice jab to the body that keeps Brun thinking.
Brun lands with a nice combination. Fuschini backs away looking to recover.
The fans in attendance giving it up for the two fighters, who have really let it all hang out in the last minute or so!
Brun takes a jab right on the nose. That must have hurt but he shrugs his shoulders and looks to return the favor.
Fuschini finds nothing but air with that leg kick attempt.
Fuschini throws a leg kick that misses.
Brun walks straight into a jab right on the nose. That one stung - he's blinking and trying to clear his head.
A punch lands to the side of Fuschini 's head but he takes it in his stride.
Fuschini looks to land a combination but Brun avoids it well.
Brun jabs at Fuschini's body.
Brun looks to land a right hand but Fuschini moved out of range.
Fuschini sizes up Brun with a pawing jab and scores with a straight right down the middle.
Brun misses with a combination
letting Fuschini counter with a right hand.
Brun throws a shot from downtown. Fuschini moves away and avoids it.
Brun throws a head kick but Fuschini moves out of range.
Brun scores with a sloppy punch to the body. Not much technique there but it did the business.
Brun misses with a kick to the body.
Brun slips a straight right by Fuschini.
That's one minute gone in the round.
Fuschini looking to throw a kick but he's pulled out of it.
Brun misses with a combination
and Fuschini counters with a nice uppercut.
Brun lands an overhand left. A wild punch that just about connected.
Brun misses with an uppercut. Fuschini saw that one coming.
Fuschini throws a series of punches but Brun avoids them all with ease.
Brun moves into range and throws a combination. A nice jab followed by a hook to the body.
Fuschini lands with a nice low kick. That'll leave a bruise.
Brun takes a hook to the side of the head. I wonder if that's got his ears ringing.
This has been an exciting period of action!
Brun swings and misses with a shot to the body
and Fuschini cracks him with a counter punch right on the button.
Brun is rocked!
Brun is breathing heavily.
Fuschini lands with a big right hook that stumbles Brun - he's out on his feet here! Fuschini follows up with another monster hook that separates Brun from consciousness! Brun falls, almost in slow motion to the canvas! Fuschini stands and admires his work as the crowd go wild.
Ladies and gentlemen, after 1:40 of round 1, we have a winner by way of KO (Punches). Alessio Fuschini!
|
|
|
|
|
|
|
|
|
|
|
|
|
|
|
|
|
|
|
|
|
|
|
| S |
C
A |
G |
S |
C
B |
G |
|
S |
C |
G |
|
energy
A | B |
|
hype
A | B |
|
pop
A | B |
|
mgr
A | B |
|
FIGHT
RATING
100% |
|
|
|
|
|
|
|
Main event
|
Coming up we have a light heavyweight MMA rules bout between Beleg Kutalion (ranked 0 p4p, 0 weight class) and Graham Wellington (ranked 0 p4p, 0 weight class). Wellington has chosen Scary as his entrance music. Beleg Kutalion has the better chin. Will he look to stand and bang today?
 |
|
 |
| 195 cm
25
215 lbs
8 - 0 - 0 |
|
190 cm
20
218 lbs
9 - 2 - 0 |
BJJ Brown Belt
Basic striking
Experienced |
|
BJJ Blue Belt
Good kicks
Powerful |
|
| |
|
Ladies and gentlemen. This fight is 5 rounds, for the light heavyweight championship of the world!
Introducing the champion to my left, fighting out of the red corner.
With a record of
8 - 0 - 0, fighting out of Tokyo, Beleg Kutalion!
And introducing the challenger to my right, fighting out of the blue corner.
With a record of
9 - 2 - 0, fighting out of Tokyo, Graham Wellington!
The judges for this bout are Hirohito Nitta, Ren Mimura and Shirou Masuda.
The bell rings for round one and we are underway!
Kutalion shoots for a double leg takedown but Wellington sprawls well. He's pushed Kutalion's face into the mat and manages to get back to his feet relatively easily.
Wellington throws a leg kick that misses.
Kutalion dives in and grabs Wellington's left leg, looking for a takedown. Wellington pushes down on Kutalion's head and hops out.
Wellington misses with a hook.
Kutalion tries to close the distance and clinch but Wellington swats him to one side with an open hand palm strike and circles away.
Kutalion tries for a takedown but Wellington sees it coming a mile off and avoids it easily.
That's three failed takedown attempts in the round for Beleg Kutalion. That's going to take a lot out of him.
Wellington tries a switch kick but it misses it's target.
Kutalion looks for a takedown here. Will he get it? Wellington is fending him off so far but Kutalion persists. Nope, Wellington circles away and we're back to standing.
Wellington stuffs the takedown attempt from Kutalion. Kutalion gets slowly back to his feet.
Kutalion fails with the takedown.
We've had a slow start to the round here - hopefully the action picks up.
Kutalion fails with the takedown.
Kutalion drops his hands momentarily and Wellington needs no second invitation. He sets himself and throws a perfect high kick, that clips Kutalion just on the top of the head. Kutalion drops like a sack of potatoes to the canvas, out cold! Oooooooh yeah! Stick a fork in Kutalion - he's done!
Ladies and gentlemen, after 1:01 of round 1, we have a winner by way of KO (Head Kick). Graham Wellington! Graham Wellington retains his light heavyweight title!
|
|
|
|
|
|
|
|
|
|
|
|
|
|
|
|
|
|
|
|
|
|
|
| S |
C
A |
G |
S |
C
B |
G |
|
S |
C |
G |
|
energy
A | B |
|
hype
A | B |
|
pop
A | B |
|
mgr
A | B |
|
FIGHT
RATING
31% |
|
|
|
|
|
|
|
|
|
|
