 |
PFC 1 PBP Commentary |
Undercard bout
|
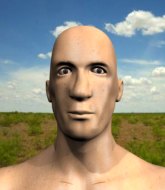
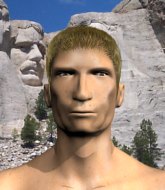
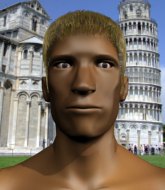
Coming up we have a heavyweight MMA rules bout between John Goon (ranked 0 p4p, 0 weight class) and Gregory The Giraffe (ranked 0 p4p, 0 weight class). The Giraffe has chosen The Little Things as his entrance music, which hasn't gone down very well with the crowd. This should be a great matchup!
 |
|
 |
| 213 cm
21
234 lbs
0 - 1 - 0 |
|
195 cm
22
250 lbs
1 - 0 - 0 |
BJJ Purple Belt
Counter striker
Self confident |
|
BJJ White Belt
Good kicks
Tends to cut |
|
| |
|
Ladies and gentlemen. This fight is 3 rounds, in the heavyweight division.
Introducing the fighter to my left, fighting out of the red corner.
With a record of
0 - 1 - 0, fighting out of Sydney, John Goon!
And introducing the fighter to my right, fighting out of the blue corner.
With a record of
1 - 0 - 0, fighting out of Sydney, Gregory The Giraffe!
The judges for this bout are John Mangel, Damien Edna and Skip Squint.

The bell rings for round one and we are underway!
Goon lands with a head kick! That's gotta hurt.

It looks like Gregory The Giraffe has been cut.
The Giraffe wants to clinch.
The Giraffe scores with a push kick.
This is a great period of action - very entertaining stuff!
Goon takes a step back and watches a body kick go sailing past his mid section.
The Giraffe is looking to clinch but Goon is avoiding it.
The Giraffe misses with a straight right.
The Giraffe lets loose with a powerful body kick. Goon will feel that in the morning.
Goon is breathing heavily.
Goon moves out of range of the body kick.
The Giraffe fails in his attempt to clinch.
Goon wants to clinch up but The Giraffe keeps it at a distance.
The Giraffe throws a body kick that misses.

The Giraffe closes the distance and presses his opponent up against the cage.
The Giraffe landing knees to the head.
It looks like John Goon has been cut.
The Giraffe using the Thai clinch to land knees to the body.
The Giraffe misses with a knee to the head.
Goon takes a knee right on the jaw!
The Giraffe connects with a nasty looking knee right to Goon's face.
The Giraffe landing knees to the head.

That's one minute gone in the round.
The Giraffe unloads a knee to the mid-section. Goon lets out a prehistoric sounding urrrrgh.
The Giraffe landing knees to the body. They look like they could hurt.
A knee to the head by The Giraffe.
The Giraffe landing knees to the body. They look like they could hurt.
The Giraffe slowing the pace effectively.
Goon is working for a takedown up against the cage. He can't get it on this occasion though.
The Giraffe lands a knee to the head.
Goon on the defensive, avoiding the knees to the body.
The Giraffe connects with a nasty looking knee right to Goon's face.
The Giraffe unloads a knee to the mid-section. Goon lets out a prehistoric sounding urrrrgh.
Goon on the defensive, avoiding the knees to the body.

The Giraffe breaks the clinch.
Goon misses with a takedown attempt. He shot from a bit too far out.
The Giraffe is looking to take this fight into the clinch.
The Giraffe throws a series of punches but Goon avoids them all with ease.

That's two minutes gone in the round.
The Giraffe stuffs the takedown attempt from Goon. Goon gets slowly back to his feet.
That's three failed takedown attempts in the round for John Goon. That's going to take a lot out of him.
The Giraffe scores with a kick to the midsection.
The Giraffe drives through and clinches with Goon against the cage.
Goon really does look like a pencil wearing a pair of gloves. Let's hope he has a gameplan to suit that ridiculous body shape.
Goon fails to pull guard.
The Giraffe landing some nice looking knees to the body.
Goon takes a knee right on the jaw!
Goon tries for a takedown. No joy.
The Giraffe pressing his opponent against the cage.
Goon jumps guard but The Giraffe stands there with Goon around his waist. Goon gives up and drops back to his feet. We remain in the clinch.
Stalling in the clinch from The Giraffe.
The Giraffe tries to land a knee to the head but Goon blocks with his arms.
Goon managing to block the knees to the body from The Giraffe.
The Giraffe with the Thai clinch. He's looking to land a big knee but he's not managed it this time.
Goon jumps guard but his hands slip and he falls flat on his back. Well, he's made himself look a right mug there, as The Giraffe walks away with a smile on his face. Goon gets slowly back to his feet and shakes his head.

That's three minutes gone in the round.
The fight stays on the outside here - Goon looks like he's thinking about clinching though.
The Giraffe darts in trying to clinch

so Goon counters with a double leg into guard. Good agility.

Goon drops back, looking for a kneebar! The Giraffe looks panicked! The fighters roll across the mat, one looking to finish, one looking to escape. The Giraffe looks to have wriggled free... Yes, he's got his leg free and he's dived into side control! Good work there from The Giraffe!
Goon is looking to regain half guard here but The Giraffe keeps moving and retains side control.

That's four minutes gone in the round.
Goon is putting a lot of effort into getting back to his feet here.
Goon tries to get back to half guard but can't.
And thats the end of the round the fighters go back to their corners.
Gregory The Giraffe dominated that round.
Both fighters have cut men working on them during the interval.
Well, the break between rounds is over. Let's get back to the scrappin!

The Giraffe is looking to take this fight into the clinch.
The Giraffe throws a lazy head kick
and Goon counters with a takedown into full mount! That could mean trouble for The Giraffe!
The Giraffe blocking the ground and pound.
Goon sitting in mount, just looking to control for the moment.
The Giraffe wants to try and get back to his feet.
Both fighters are absolutely exhausted here.
That's one minute gone in the round.
Goon controlling the position easily from mount.
Goon is looking to secure an arm. He's managed it! He's pivoting for an armbar - that looks tight! But The Giraffe has managed to get out of it and now he's in a dominant position. Nice work from The Giraffe!
That's two minutes gone in the round.
The crowd are showing their displeasure at the lack of action as loud boos ring out around the arena.
The Giraffe postures up.
The ref warns both fighters not to hold the cage as they work up against the meshing.
The Giraffe wants to get up but he can't break Goon's closed guard. He needs to be careful trying to break the legs open, as he's open to submissions here.
That's three minutes gone in the round.
Goon is trying to control the position but The Giraffe postures up.
The Giraffe really doesn't want to stay on the ground with Goon. If he can't get it back to his feet, it's only a matter of time before he'll be tapping out.
Goon lands a decent punch to the body there.
Goon trying to punch from his back but it's not doing any damage.
The Giraffe must be cautious of submissions here, given that his opponent has the superior Jiu Jitsu.
Goon wants to sweep but no luck.
Goon is pulling down on The Giraffe's head to control his posture.
That's four minutes gone in the round.
A lull in the action here being met with boos from the crowd.
Goon is trying to control the position from the bottom.

It looks like we're going to have a standup here. Neither fighter is doing enough on the ground.

The Giraffe throws a head kick that lands with a deafening thwack! The crowd roars as Goon stumbles backwards and falls to the mat. The Giraffe follows into mount!

Goon is rocked!
Goon wants to hold on but The Giraffe pushes him away.
Oh Goon is still in real trouble! Will he be able to recover?!!

The Giraffe gets to his feet and calls his opponent to stand. Here come the fireworks!
And thats the end of the round the fighters go back to their corners.
Gregory The Giraffe showed his class in that round. I'd imagine he'll take it on all the scorecards.
Both fighters have cut men working on them during the interval.
The referee calls time. The cornermen exit stage left and we're back to business. This is the final round!

The Giraffe moves into range and clinches up with Goon.
Goon seems to have got his legs back now.
The Giraffe escapes the clinch and we're back to striking.
Goon will have to do better than that with his takedown attempts.
Goon lands a nice looking body kick.
The Giraffe tries to clinch up
and Goon counters with a left and a right that stings The Giraffe.
Goon avoids the head kick by The Giraffe.
Goon gets a takedown into half guard.
The Giraffe is refusing to be controlled, as Goon sits in half guard.
Both fighters are breathing heavily.
That's one minute gone in the round.
Goon has freed up his trapped foot and advances to mount.
Poor strikes thrown by Goon there. More accuracy and less frantic strikes would help!
That's two minutes gone in the round.
The crowd are getting on the fighters' backs, as the pace has dropped off in the last minute or so.
The Giraffe is trying to get back to his feet but can't.
The Giraffe is squirming around, avoiding Goon's attempts to control the action.
Goon looking to finish with strikes here!
That's three minutes gone in the round.
Goon trying to control but The Giraffe is having none of it.
Goon thowing strikes but they're hitting the gloves, not doing any damage.
That's four minutes gone in the round.
A lull in the action here being met with boos from the crowd.
Goon throwing sloppy strikes here. Perhaps if he tightened up his striking from such a dominant position, he'd be able to finish easier.
Goon will need to keep those long limbs tucked in whilst he's on the ground, to prevent any submissions.
Goon goes for an armbar but he's fallen flat on his backside there and now The Giraffe is on top in guard.
The crowd thankful this round is nearly over.
Goon is working from a closed guard but he's struggling to control his opponent.
And that's the end of the fight!
John Goon showed his dominance in that final round.
I think The Giraffe has won this one but let's see whether the judges agree with me. Over to the ring announcer for the scorecards.
Ladies and gentlemen, after 3 rounds of action, we go to the scorecards for a decision.
Judge John Mangel scores the fight for Gregory The Giraffe!
Judge Damien Edna scores the fight for Gregory The Giraffe!
Judge Skip Squint scores the fight for Gregory The Giraffe!
Gregory The Giraffe wins by unanimous decision!
|
|
|
|
|
|
|
|
|
|
|
|
|
|
|
|
|
|
|
|
|
|
|
| S |
C
A |
G |
S |
C
B |
G |
|
S |
C |
G |
|
energy
A | B |
|
hype
A | B |
|
pop
A | B |
|
mgr
A | B |
|
FIGHT
RATING
60% |
|
|
|
|
|
|
|
Undercard bout
|
Coming up we have a welterweight MMA rules bout between Sando Han (ranked 0 p4p, 0 weight class) and Sonny Dunlop (ranked 0 p4p, 0 weight class). I can't wait for this one - let's get the fighter introductions out of the way and get this one started!
 |
|
 |
| 181 cm
19
174 lbs
2 - 5 - 0 |
|
180 cm
22
180 lbs
0 - 0 - 0 |
BJJ Blue Belt
Brawler
Good chin |
|
BJJ Blue Belt
Brawler
Granite chin |
|
| |
|
Ladies and gentlemen. This fight is 3 rounds, in the welterweight division.
Introducing the fighter to my left, fighting out of the red corner.
With a record of
2 - 5 - 0, fighting out of Sydney, Sando Han!
And introducing the fighter to my right, fighting out of the blue corner.
With a record of
0 - 0 - 0, fighting out of Sydney, Sonny Dunlop!
The judges for this bout are Damien Edna, Steve Erwin and Donatello Bradman.
The bell rings for round one and we are underway!
Han looks to score with a combo but nothing lands.
Han lands three nice shots there - that looked like it hurt!
It looks like Sonny Dunlop has been cut.
Han throws a right and a left that Dunlop avoids nicely.
Some wild striking there from Han.
Han ducks down and throws a hook to the body but Dunlop moves away.
Dunlop throws a wild combination but nothing lands.
Sonny Dunlop seems to be the more aggressive standup fighter in this bout.
Dunlop moves into the clinch successfully.
Han keeps control of Dunlop as he tries to wriggle out of the double underhooks.
Dunlop prevents Han from breaking the clinch.
Dunlop prevents the takedown attempt.
Dunlop breaks the clinch and we're back to striking at distance.
Dunlop fails to land with a series of punches.
Han closes the distance and pushes Dunlop back into the cage.
Han wants a takedown but no success here.
Han prevents Dunlop from breaking the clinch.
Han breaks the clinch and we return to the middle of the mat.
Some wild striking there from Dunlop.
Han scores with a shot to the body.
Fantastic stuff here - a very entertaining period of action, which has drawn cheers from the crowd.
Dunlop forces Han back against the cage and clinches.
Dunlop is trying to break free.
Han breaks the clinch and we return to the middle of the mat.
Dunlop throws a left and a right that both miss
and Han cracks him with a counter punch right on the button.
Han keeping a good distance there, avoiding the body shot.
Han getting the better of the striking in that exchange.
Dunlop looks gassed!
That's one minute gone in the round.
Han lands a jab to the head.
Han on the wrong end of a nice hook.
Dunlop fails to land with a series of punches.
Han tries to clinch but Dunlop is having none of it.
Dunlop throws a combination but comes up with nothing but fresh air.
Dunlop slips a jab and a cross from Han.
No joy there for Han, who threw a few shots but didn't land.
Han lands a jab. Then a cross. Then finally a nice hook to the body. Good work there by Han.
It's a brutal combination of punches from Han! Dunlop is backing up but he can't get away as Han lands with one final shot to the jaw that drops Dunlop and ends the fight. Great knockout.
Ladies and gentlemen, after 1:31 of round 1, we have a winner by way of TKO (Punches). Sando Han!
|
|
|
|
|
|
|
|
|
|
|
|
|
|
|
|
|
|
|
|
|
|
|
| S |
C
A |
G |
S |
C
B |
G |
|
S |
C |
G |
|
energy
A | B |
|
hype
A | B |
|
pop
A | B |
|
mgr
A | B |
|
FIGHT
RATING
100% |
|
|
|
|
|
|
|
Undercard bout
|
Coming up we have a heavyweight MMA rules bout between Will Wilde (ranked 0 p4p, 0 weight class) and Antonio Maia (ranked 0 p4p, 0 weight class). Both fighters look fresh as a daisy as they make their way towards the cage.
 |
|
 |
| 195 cm
18
265 lbs
0 - 0 - 0 |
|
190 cm
22
255 lbs
2 - 1 - 0 |
BJJ Purple Belt
Brawler
Granite chin |
|
BJJ Brown Belt
Brawler
Granite chin |
|
| |
|
Ladies and gentlemen. This fight is 3 rounds, in the heavyweight division.
Introducing the fighter to my left, fighting out of the red corner.
With a record of
0 - 0 - 0, fighting out of Sydney, Will Wilde!
And introducing the fighter to my right, fighting out of the blue corner.
With a record of
2 - 1 - 0, fighting out of Sydney, Antonio Maia!
The judges for this bout are Hugh Johnson, Damien Edna and Summer Carpenter.
The bell rings for round one and we are underway!
Maia tries to close the distance and clinch up against the cage but Wilde paws at him with a jab and circles away.
Maia will have to do better than that with his takedown attempts.
Maia fails with a takedown attempt from distance.
Maia will need to tighten up his combinations if he doesn't want to gas himself out, swinging at thin air.
Maia bobbing and weaving well here. And he's unloaded with a massive right hand that drops Wilde! He dives into his guard looking to finish!
It looks like Will Wilde has been cut.
The crowd cheering loudly, showing their appreciation for the quality fight we're seeing here.
Maia is trying to work a guillotine from the top, or something like that? Don't know how he thinks he's going to get a finish from there.
Wilde looking for submissions from the bottom here. Moving his hips around, possibly looking for an armbar.
Maia drops back looking for a leg! Wilde is in trouble here! The fighters roll with the hold and Wilde manages to kick Maia off! Maia jumps back into Wilde's guard.
Wilde had isolated an arm as going for an omaplata. Maia is defending the submission well but is in a very vulnerable position. Wilde Is leaning forward trying to finish the omaplata but decides to abandon it, and take Maia's back instead.
The fighters are pressed up against the cage, both looking to find a bit of space to work.
Wilde is working hard for the rear naked choke here.
I really don't envy Maia right now.
Maia breaks Wilde's hooks off and manages to turn into his guard.
That's one minute gone in the round.
Maia avoids a guillotine attempt easily.
Maia wants to pass the guard but Wilde is keeping the position.
Maia is trying to work a guillotine from the top, or something like that? Don't know how he thinks he's going to get a finish from there.
Maia looks gassed!
Wilde looking for submissions off his back, moving his hips, looking for an opening.
Wilde working from the bottom, still in full guard. He's managed to get a loose triangle. Maia doesn't seem to be doing much to defend here, obviously he feels comfortable in the position. Maia manages to throw the legs off his shoulder and he's back into guard - no problem.
The fighters are starting to perspire pretty heavily.
Maia drops back for a leg! It's a sloppy attempt though and Maia jumps back into guard quickly, to retain the dominant position.
Maia avoids a guillotine attempt easily.
Maia chips away with some ground and pound.
That's two minutes gone in the round.
Maia drops back looking for a leg! Wilde is in trouble here! The fighters roll with the hold and Wilde manages to kick Maia off! Maia jumps back into Wilde's guard.
Maia avoids a guillotine attempt easily.
Maia is looking to work some ground and pound but Wilde has wrist control.
Wilde is looking for a triangle but Maia pushes his legs off easily.
Maia passes Wilde's right leg, so he's now in half guard.
Wilde is looking to sinch up a gullotine here but Maia pulls his head out easily.
Maia is keeping good posture, landing some ground and pound.
Maia is looking for a kimura here.
Wilde is looking to sinch up a gullotine here but Maia pulls his head out easily.
That's three minutes gone in the round.
Maia is trying to work for a kimura but Wilde is defending well.
Wilde is looking to improve his position.
Wilde looking for submissions off his back.
Wilde looking for submissions from an awkward position here.
The ref warns both fighters not to hold the cage as they work up against the meshing.
Maia seems like he's working for an arm triangle here. He's freed his trapped foot and he's rotating nicely. Wilde is in big trouble! He's tapping out! This one is aaaaaaaaaaaall over!
Ladies and gentlemen, after 4:04 of round 1, we have a winner by way of Submission (Arm Triangle). Antonio Maia!
|
|
|
|
|
|
|
|
|
|
|
|
|
|
|
|
|
|
|
|
|
|
|
| S |
C
A |
G |
S |
C
B |
G |
|
S |
C |
G |
|
energy
A | B |
|
hype
A | B |
|
pop
A | B |
|
mgr
A | B |
|
FIGHT
RATING
76% |
|
|
|
|
|
|
|
Undercard bout
|
Coming up we have a light heavyweight MMA rules bout between Akihito Tatsuhiko (ranked 0 p4p, 0 weight class) and Mezar Mynzek (ranked 0 p4p, 0 weight class). Akihito Tatsuhiko has the better chin. Will he look to stand and bang today?
 |
|
 |
| 188 cm
22
208 lbs
1 - 1 - 0 |
|
185 cm
19
205 lbs
3 - 6 - 0 |
BJJ White Belt
Excellent boxer
Cuts easily |
|
BJJ Purple Belt
Counter striker
Knockout power |
|
| |
|
Ladies and gentlemen. This fight is 3 rounds, in the light heavyweight division.
Introducing the fighter to my left, fighting out of the red corner.
With a record of
1 - 1 - 0, fighting out of Sydney, Akihito Tatsuhiko!
And introducing the fighter to my right, fighting out of the blue corner.
With a record of
3 - 6 - 0, fighting out of Sydney, Mezar Mynzek!
The judges for this bout are John Mangel, Steve Erwin and Eliza Hachem.
The bell rings for round one and we are underway!
Tatsuhiko fakes a head punch and goes low to the body. Nicely done.
Tatsuhiko misses with a wild combination.
Tatsuhiko clinches with his opponent.
With the fighters clinched against the cage, Tatsuhiko creates a bit of distance for himself and scores with a nice uppercut.
Mynzek is trying to drag Tatsuhiko to the mat but Tatsuhiko just about manages to keep his footing. He used the cage to his advantage there.
Tatsuhiko is looking to break free of the clinch but Mynzek has double underhooks.
Tatsuhiko wants to break free. God knows he wants to breaaaak freeee.
Mynzek tries to pull guard but Tatsuhiko holds him up against the cage and eventually Mynzek drops back down to his feet.
Tatsuhiko prevents the takedown attempt.
Akihito Tatsuhiko has stuffed three takedown attempts in the round now. That's going to take a lot out of Mezar Mynzek.
Tatsuhiko can't break the clinch.
Tatsuhiko wants to get back to striking at distance but Mynzek won't allow it.
Tatsuhiko pushes off and circles away, back to the middle of the mat.
A left and a right from Tatsuhiko both land. Nice combination.
Tatsuhiko lunges at Mynzek with a hook that half lands and is half blocked by Mynzek's hand.
Mynzek is rocked!
The crowd cheering loudly, showing their appreciation for the quality fight we're seeing here.
Tatsuhiko pulls out of a head kick attempt.
Mynzek is still on wobbly legs! Can Tatsuhiko finish him?
Tatsuhiko fails to land with a series of punches.
Mynzek seems to have recovered his senses.
Tatsuhiko scores with a hook to the body. Mynzek takes a step back and tries to catch his breath.
That's one minute gone in the round.
Tatsuhiko cracks a nice hook into Mynzek's ribs.
Mynzek looks gassed!
Mynzek fails with a takedown attempt from distance.
Tatsuhiko fakes a head punch and goes low to the body. Nicely done.
Tatsuhiko cracks Mynzek with a hook to the temple - Mynzek is on wobbly legs here! Tatsuhiko swarms him with hook after hook, landing with each one! Mynzek falls to the canvas face first and the referee dives in to stop the fight! Tatsuhiko wins by TKO!
Ladies and gentlemen, after 1:19 of round 1, we have a winner by way of TKO (Punches). Akihito Tatsuhiko!
|
|
|
|
|
|
|
|
|
|
|
|
|
|
|
|
|
|
|
|
|
|
|
| S |
C
A |
G |
S |
C
B |
G |
|
S |
C |
G |
|
energy
A | B |
|
hype
A | B |
|
pop
A | B |
|
mgr
A | B |
|
FIGHT
RATING
100% |
|
|
|
|
|
|
|
Undercard bout
|
Coming up we have a light heavyweight MMA rules bout between Lawrence Cohen (ranked 0 p4p, 0 weight class) and Haydos Belfort (ranked 0 p4p, 0 weight class). I'm sure you'll be fascinated to know that I was talking to some pointless Z list celebrity before the fight and he thought that Haydos Belfort was going to win. Let's see if he was right.
 |
|
 |
| 185 cm
23
210 lbs
1 - 3 - 0 |
|
189 cm
18
205 lbs
0 - 0 - 0 |
BJJ Blue Belt
Solid boxing
Big right hand |
|
BJJ Blue Belt
Brawler
Very confident |
|
| |
|
Ladies and gentlemen. This fight is 3 rounds, in the light heavyweight division.
Introducing the fighter to my left, fighting out of the red corner.
With a record of
1 - 3 - 0, fighting out of Sydney, Lawrence Cohen!
And introducing the fighter to my right, fighting out of the blue corner.
With a record of
0 - 0 - 0, fighting out of Sydney, Haydos Belfort!
The judges for this bout are Summer Carpenter, Winston Howard and Hugh Johnson.
The bell rings for round one and we are underway!
Cohen looking for a takedown here - he's got it.
Belfort utilising some decent striking defenses from the guard, preventing the ground and pound.
Belfort is looking to get back to his feet but can't, whilst Cohen is controlling him.
Belfort throws his legs up looking for a submission but Cohen uses it to pass to side control.
Belfort looks gassed!
Cohen decides to take the fight back to the feet.
The fight stays on the outside here - Cohen looks like he's thinking about clinching though.
Cohen changes levels and drives through with a really nice takedown into side control. Belfort looks really pissed at himself for not defending that better.
The fighters are pressed up against the cage, both looking to find a bit of space to work.
Cohen sitting in side control, looking to soften his opponent up with elbows and hammerfists but Belfort is avoiding damage well and looking to escape the position.
Belfort dodges the ground and pound from Cohen.
Cohen has control of an arm but Belfort manages to advance to Cohen's back!
Cohen trying desperately to keep hold of the dominant position.
That's one minute gone in the round.
Even with his hooks in, Cohen manages to miss with strikes from the back.
The ref warns both fighters not to hold the cage as they work up against the meshing.
Cohen controlling the position well here. Belfort rolled but Cohen kept the hooks locked in and stayed in the dominant position.
Cohen throwing sloppy strikes.
Cohen missing with strikes.
Cohen misses with punches from the back.
Cohen biding his time, looking for the opening.
Belfort has his hands over his head blocking the strikes from Cohen.
Belfort is very frustrated here, being controlled quite effectively by Cohen.
Cohen has been looking to land a fair amount of strikes on the ground. He might be looking to soften his opponent up in order to work for a submission.
That's two minutes gone in the round.
The crowd are starting to boo a lack of action.
Cohen missing with strikes from the back.
Cohen is looking cool and calm here, just waiting for a good opportunity to attack and finish the fight from this dominant position.
Cohen missing with strikes from the back.
So, who will make the next big move? In this position it could be crucial.
Cohen working for the choke.
That's three minutes gone in the round.
Belfort is being controlled on the ground here - he must escape this position otherwise surely the end is near.
Belfort avoids the strikes from Cohen.
Cohen has the hooks sunk in and you can see the will to fight slowly draining out of Belfort's body.
Cohen is looking to finish the fight by rear naked choke. Belfort knows exactly what he's got planned though, so he's defending well. Maybe a few strikes would soften Belfort for a finish.
Belfort covering up well under a barage of strikes.
That's four minutes gone in the round.
The crowd are getting on the fighters' backs, as the pace has dropped off in the last minute or so.
Cohen misses with a punch to the head.
Cohen slows the pace down here. Having a little breather whilst he's in a dominant position, looking to rest and regain some energy, ready to go for the finish.
Cohen thows a huge left but connects with the canvas and not his opponent.
Cohen has good solid back control here.
Cohen is working really hard to secure the rear naked choke. Belfort defends successfully for a significant amount of time. Both fighters are looking very determined.
Belfort tries to escape the position.
Belfort is persisting with the attempt to improve his position.
And thats the end of the round the fighters go back to their corners.
Lawrence Cohen dominated that round.
Well, the break between rounds is over. Let's get back to the scrappin!
Cohen shoots in but no luck this time.
Cohen tries to clinch but Belfort is having none of it.
The fight stays on the outside here - Cohen looks like he's thinking about clinching though.
Cohen misses with a takedown attempt. He shot from a bit too far out.
Belfort with a lazy takedown attempt
and Cohen counters with a takedown into full mount! That could mean trouble for Belfort!
Cohen with the ground and pound from mount.
Cohen sends his fist crashing into the mat - the crowd let out a collective ooooooh. Let's hope he's not broken it!
Cohen misses with a series of strikes from mount. He'll no doubt be working on his ground and pound when he gets back to the gym.
Cohen controlling his opponent.
Cohen trying to control but he's not successful this time.
Cohen thowing strikes but they're hitting the gloves, not doing any damage.
Belfort is breathing heavily.
That's one minute gone in the round.
Cohen unloads with some shots from mount but Belfort bucks and avoids them well.
Cohen unloads with some shots from mount but Belfort bucks and avoids them well.
Cohen thowing shots but they're missing.
Cohen unloads with some shots from mount but Belfort bucks and avoids them well.
Belfort tries to lock up and control but Cohen gives him a forearm to the face and pushes him away.
Cohen misses with a head shot.
Cohen tries to control but Belfort wriggling away.
Belfort working to try and regain half guard.
That's two minutes gone in the round.
The crowd are hurling abuse towards the fighters... You can hardly blame them though because there isn't a lot going on in the fight.
Belfort avoids a series of strikes thrown by Cohen.
Cohen takes a little breather and maintains the position. The referee will be looking for him to stay active from such a dominant position though.
Cohen throws an elbow from mount that misses. Lucky escape for Belfort because Cohen loaded up on that one.
Cohen controlling his opponent.
Cohen sends his fist crashing into the mat - the crowd let out a collective ooooooh. Let's hope he's not broken it!
Cohen controlling from mount.
Cohen throwing shots from mount but they're not landing.
That's three minutes gone in the round.
Cohen controlling the pace for now.
The referee stands the fighters back up. Lawrence Cohen just wasn't active enough from the dominant position.
Cohen forces Belfort back against the cage and clinches.
Belfort prevents the takedown attempt.
That's three failed takedown attempts in the round for Lawrence Cohen. That's going to take a lot out of him.
Belfort is trying to break free.
Cohen with a knee to the head.
Cohen manages to break the clinch.
Cohen fails in his attempt to clinch.
Cohen shoots in for a takedown but Belfort shows good takedown defense.
Cohen gets the takedown into side control.
That's four minutes gone in the round.
Cohen staying calm.
You can see the frustration on Belfort's face, being in this tough position on the bottom.
Belfort might have to switch it up a bit here because his efforts to control Cohen kaven't been going to plan, at least at the current moment in time.
Belfort tries to work a leg under to get back to half guard but Cohen wriggles his own leg back out and remains in side control.
Cohen thinks about going for a far side armbar but bails out and retains the dominant position instead.
Lawrence Cohen overall seems to be getting the better of the ground position in the fight so far.
Cohen decides to stand up, so the ref orders Belfort to his feet.
And thats the end of the round the fighters go back to their corners.
Lawrence Cohen dominated that second round.
The minute break is over - no more time for sponges and pep talks - back to the action! This is the final round!
Cohen feints and then dives in with a takedown. That was a long way out but the feint bought him enough time to close the distance and complete the takedown. Now we'll play guard for a bit and see who can get the better of that position.
Cohen trying to control but Belfort is working from the bottom.
Belfort wants to sweep but no luck.
Cohen postures up in Belfort's guard and throws a big left but Belfort blocks it.
Cohen looking to control the position here, rather than advance.
Cohen slips nicely into half guard.
Belfort is trying to stand back up but Cohen is controlling him
Belfort takes a big intake of breath there - he's definitely tired.
That's one minute gone in the round.
Nice strikes from Cohen there.
Cohen wants to stand but Belfort has hold of a leg and an arm, so he's trapped for now.
Belfort avoiding damage under a succession of punches from Cohen.
Belfort is looking to get back to is feet but Cohen passes into side control.
Cohen misses with the ground and pound.
Belfort tries to bench press Cohen off him but Cohen keeps the position.
Cohen decides to stand back up.
The fight stays on the outside here - Cohen looks like he's thinking about clinching though.
Cohen drops Belfort with a left right combo! Cohen follows him down to the ground into side control.
It looks like Haydos Belfort has been cut.
Cohen is trying to get an arm triangle but Belfort is defending well.
That's two minutes gone in the round.
Belfort is working hard to escape and get back to his feet. After a battle for position, Cohen asserts his dominance and retains side control.
You can see the frustration on Belfort's face as Cohen controls the position.
Cohen is looking to take a break and control but Belfort is keeping him honest, looking to work from the bottom.
Cohen is trying to land an Americana. He has the arm isolated but Belfort is keeping cool and he's avoided the danger for now.
This is a great period of action - very entertaining stuff!
Cohen creates some space and throws a big elbow, but Belfort sees it coming and moves his head just enough to avoid the strike.
That's three minutes gone in the round.
Belfort is trying to get back to half guard.
Cohen looking to punish the body of his opponent here but Belfort is avoiding damage well.
It looks like we're going to have a standup here. Neither fighter is doing enough on the ground.
Belfort circles away from the clinch attempt.
Cohen moves into the clinch.
Cohen changes levels and goes for a takedown here. Belfort fights it off and pushes away nicely.
Belfort takes a thudding leg kick, right into the meat of the thigh.
That's four minutes gone in the round.
Cohen shoots in for a takedown. "I don't think so" says Belfort as he avoids it easily.
Cohen scores a trip takedown into side control. Nice.
Belfort throws a couple of strikes even though he's not really in a good position to do so.
Belfort is moving his hips around well on the bottom and has managed to get back to half guard.
Belfort is defending against the submission attempts here by Cohen.
Cohen throws a strike but Belfort avoids it easily and moves to full guard.
The crowd applaud the fighters efforts here as the round comes to an end.
Cohen won't allow Belfort to get back to his feet.
Haydos Belfort has stepped it up - he knows he needs a finish here!
Lawrence Cohen is fighting for a decision here - he's started to take the cautious approach.
Cohen decides he's had enough of playing guard and decides to stand. Come on Belfort, up you get!
And that's the end of the fight!
Lawrence Cohen showed his dominance in that final round.
Well Cohen has outscored his opponent in every aspect of the fight today. Only a scarily incompetent judge or two will keep him from a well deserved win... Over to the ring announcer for the scorecards.
Ladies and gentlemen, after 3 rounds of action, we go to the scorecards for a decision.
Judge Summer Carpenter scores the fight for Lawrence Cohen!
Judge Winston Howard scores the fight for Lawrence Cohen!
Judge Hugh Johnson scores the fight for Lawrence Cohen!
Lawrence Cohen wins by unanimous decision!
|
|
|
|
|
|
|
|
|
|
|
|
|
|
|
|
|
|
|
|
|
|
|
| S |
C
A |
G |
S |
C
B |
G |
|
S |
C |
G |
|
energy
A | B |
|
hype
A | B |
|
pop
A | B |
|
mgr
A | B |
|
FIGHT
RATING
29% |
|
|
|
|
|
|
|
Undercard bout
|
|
|
|
Undercard bout
|
Coming up we have a middleweight MMA rules bout between Jack Ripper (ranked 0 p4p, 0 weight class) and Baekjae Kim (ranked 0 p4p, 0 weight class). Kim has chosen CANON in D Korean Version (with gayageum) as his entrance music, which hasn't gone down very well with the crowd. I'm sure you'll be fascinated to know that I was talking to some pointless Z list celebrity before the fight and he thought that Baekjae Kim was going to win. Let's see if he was right.
 |
|
 |
| 185 cm
20
185 lbs
1 - 0 - 0 |
|
178 cm
20
185 lbs
1 - 1 - 0 |
BJJ Purple Belt
Counter striker
KO power |
|
BJJ Purple Belt
Counter striker
Solid chin |
|
| |
|
Ladies and gentlemen. This fight is 3 rounds, in the middleweight division.
Introducing the fighter to my left, fighting out of the red corner.
With a record of
1 - 0 - 0, fighting out of Sydney, Jack Ripper!
And introducing the fighter to my right, fighting out of the blue corner.
With a record of
1 - 1 - 0, fighting out of Sydney, Baekjae Kim!
The judges for this bout are Bruno Hogan, Damien Edna and Hugh Johnson.
The bell rings for round one and we are underway!
Ripper shoots in but no luck this time.
A head kick misses from Ripper.
Ripper is looking to clinch.
Kim pushes Ripper up against the cage in a clinch.
Kim stalling.
Ripper tries for a takedown. No joy.
Ripper tries for a takedown but Kim manages to get underhooks.
That's three failed takedown attempts in the round for Jack Ripper. That's going to take a lot out of him.
Kim pulls Ripper into guard.
Kim is trying to keep Ripper in close.
Kim tries to land a sweep but no joy.
There's a bit of a scramble here and now Kim is on top in guard.
Ripper throwing his legs up looking for a triangle.
The fighters are pressed up against the cage, both looking to find a bit of space to work.
Ripper is breathing heavily.
That's one minute gone in the round.
Kim is trying to work a guillotine from the top, or something like that? Don't know how he thinks he's going to get a finish from there.
Kim trying to land body shots but he keeps hitting the mat.
Kim chips away with some ground and pound.
Kim throwing shots from guard but he's hitting more mat than opponent.
The ref warns both fighters not to hold the cage as they work up against the meshing.
Kim stands up and looks to throw the legs aside to pass to side control. Ripper swivels though and keeps the full guard.
Kim drops back looking for a leg! Ripper is in trouble here! The fighters roll with the hold and Ripper manages to kick Kim off! Kim jumps back into Ripper's guard.
Kim controls from within his opponent's guard.
That's two minutes gone in the round.
A few boos can be heard. I'm sure they will multiply if the fighters don't pick up the pace.
Kim's corner are shouting for him to control the position and he seems happy to oblige.
Ripper has his foot on Kim's thigh. He's trying to push off and get in position for a triangle, I think. Kim works his way back into a safe position though.
Kim postures up and scores with a shot to the body and a follow up elbow to the head.
Kim is stalling in the full guard.
Kim stands up and looks to throw the legs aside to pass to side control. Ripper swivels though and keeps the full guard.
That's three minutes gone in the round.
Ripper keeping moving, preventing Kim from controlling successfully.
Ripper throwing his legs up looking for a triangle.
Kim is working Ripper over from the guard. He should look to pass the guard and do a little more damage with these strikes.
Kim slips nicely into half guard.
Kim is pressing down on Ripper's thigh, looking to free his foot. Ripper is holding on for now.
Kim is nestled in close to Ripper, controlling him well. He's worked in a nice elbow to the side of the head as well, for good measure.
Kim wants to take a breather but Ripper is having none of it.
That's four minutes gone in the round.
Kim stalling.
Kim has the superior BJJ but he's also working some ground strikes into his gameplan.
Kim lands with an elbow from half guard - that looked like it hurt.
Kim is trying to work for a kimura. He's got his hands clasped together - this could be trouble! No, Ripper has managed to free his arm - good work.
Kim is controlling the pace.
The crowd thankful this round is nearly over.
Ripper is looking to get full guard. It looks like he might be successful but at the last minute Kim jumps into side control!
And thats the end of the round the fighters go back to their corners.
Baekjae Kim dominated that round.
That's time! Ripper's corner gives him a slap on the ass as he gets ready to fight.
Ripper darts in trying to clinch
and Kim decides to take the opportunity to score a takedown. He's landed in Ripper's guard.
Kim in full guard, throwing the ground and pound. No damage this time.
Kim drops back, looking for a kneebar! Ripper looks panicked! The fighters roll across the mat, one looking to finish, one looking to escape. Ripper looks to have wriggled free... Yes, he's got his leg free and he's dived into side control! Good work there from Ripper!
Ripper working hard here to secure a kimura but he's not really in the right position for it.
Both fighters are absolutely exhausted here.
Ripper goes for an armbar here - this could be all over! But no, Kim has escaped beautifully and is now on top in side control! Oh, that's unlucky for Ripper but great work by Kim.
That's one minute gone in the round.
Check out the look on Kim's face as he threw that strike - that's one determined fighter!
Kim is working to tighten is grip on Ripper's neck. He's isolated an arm and is working for an arm triangle. Ripper has recognised the danger and is trying to turn with the submission but Kim is really squeezing tight and eventually Ripper passes out! Kim breaks the hold and jumps onto the cage to celebrate! Submission of the night, I'd say!
Ladies and gentlemen, after 1:31 of round 2, we have a winner by way of Submission (Arm Triangle). Baekjae Kim!
|
|
|
|
|
|
|
|
|
|
|
|
|
|
|
|
|
|
|
|
|
|
|
| S |
C
A |
G |
S |
C
B |
G |
|
S |
C |
G |
|
energy
A | B |
|
hype
A | B |
|
pop
A | B |
|
mgr
A | B |
|
FIGHT
RATING
44% |
|
|
|
|
|
|
|
Undercard bout
|
|
|
|
Co-main event
|
Coming up we have a lightweight MMA rules bout between Izzy Clutch (ranked 0 p4p, 0 weight class) and Scootsie Doubleday (ranked 0 p4p, 0 weight class). This should be a great matchup!
 |
|
 |
| 178 cm
21
155 lbs
1 - 0 - 0 |
|
175 cm
22
158 lbs
2 - 1 - 1 |
BJJ Blue Belt
Counter striker
Prefers ground |
|
BJJ Blue Belt
Excellent boxer
Solid chin |
|
| |
|
Ladies and gentlemen. This fight is 3 rounds, in the lightweight division.
Introducing the fighter to my left, fighting out of the red corner.
With a record of
1 - 0 - 0, fighting out of Sydney, Izzy Clutch!
And introducing the fighter to my right, fighting out of the blue corner.
With a record of
2 - 1 - 1, fighting out of Sydney, Scootsie Doubleday!
The judges for this bout are Eliza Hachem, Bruno Hogan and Donatello Bradman.
The bell rings for round one and we are underway!
Doubleday misses with a double jab.
Doubleday fakes a jab and throws a low kick but Clutch checks it well.
Clutch takes a shot right to the bread basket.
Doubleday fails with an attempt to clinch.
Doubleday fails to land with a series of punches.
Doubleday closes the distance and lands a vicious right hand that drops Clutch! Doubleday dives in looking to finish! Clutch is still trying to defend himself but he's taking too many shots and the referee has no choice but to stop the fight!
Ladies and gentlemen, after 0:18 of round 1, we have a winner by way of TKO (Strikes). Scootsie Doubleday!
|
|
|
|
|
|
|
|
|
|
|
|
|
|
|
|
|
|
|
|
|
|
|
| S |
C
A |
G |
S |
C
B |
G |
|
S |
C |
G |
|
energy
A | B |
|
hype
A | B |
|
pop
A | B |
|
mgr
A | B |
|
FIGHT
RATING
79% |
|
|
|
|
|
|
|
Main event
|
|
|
|
|
|
|
