 |
NJE 1: The Big Bang PBP Commentary |
Undercard bout
|
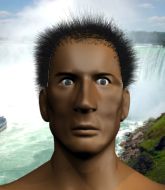
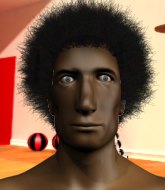
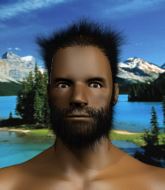
Coming up we have a light heavyweight MMA rules bout between Ratto Macfedries (ranked 0 p4p, 0 weight class) and Teruo Nakamura (ranked 0 p4p, 0 weight class). Teruo Nakamura has the eye of the tiger tonight.
 |
|
 |
| 193 cm
18
205 lbs
1 - 10 - 0 |
|
185 cm
18
200 lbs
1 - 1 - 0 |
BJJ White Belt
Solid Muay Thai
KO power |
|
BJJ Blue Belt
Counter striker
Granite chin |
|
| |
|
Ladies and gentlemen. This fight is 3 rounds, in the light heavyweight division.
Introducing the fighter to my left, fighting out of the red corner.
With a record of
1 - 10 - 0, fighting out of Tokyo, Ratto Macfedries!
And introducing the fighter to my right, fighting out of the blue corner.
With a record of
1 - 1 - 0, fighting out of Tokyo, Teruo Nakamura!
The judges for this bout are Yasuomi Hirokawa, Shigeki Fujiwara and Yuuki Gou.

The bell rings for round one and we are underway!
Nakamura swats away the attempt to clinch by Macfedries.
Nice sprawl there from Macfedries as Nakamura shoots in.
Macfedries tries a switch kick but it misses it's target.
Macfedries stuffs the takedown attempt from Nakamura. Nakamura gets slowly back to his feet.
Macfedries throws a head kick that misses.
We've had a slow start to the round here - hopefully the action picks up.
Macfedries throws a head kick that misses and slips in the process. He scrambles back to his feet and the fighters circle.
Both fighters are looking to counter, which isn't making for the most exciting fight in the world.
Nakamura fails to land the takedown.
Ratto Macfedries has stuffed three takedown attempts in the round now. That's going to take a lot out of Teruo Nakamura.

That's one minute gone in the round.
Nakamura will have to do better than that with his takedown attempts.
Nakamura has a takedown stuffed.
Macfedries throws a head kick that misses and slips in the process. He scrambles back to his feet and the fighters circle.
Macfedries pulls out of a head kick attempt.
Macfedries misses with a low kick.
Macfedries tries a switch kick but it misses it's target.

That's two minutes gone in the round.
The crowd are hurling abuse towards the fighters... You can hardly blame them though because there isn't a lot going on in the fight.
Macfedries doesn't manage to clinch there - Nakamura circles away.

Nakamura closes the distance and clinches up, looking for a takedown. He shifts his weight and gets a nice trip into half guard.

Nakamura wants to work for an arm triangle but Macfedries is really keeping half guard well and defending the submission attempt.
Nakamura looks gassed!
Nakamura missing with some ground and pound from the half guard.
Nakamura throwing punches and elbows but they're not doing any damage.
Macfedries is trying to stand.
Nakamura is trying for a guillotine from the top but the pressure isn't in the right place so Macfedries is just riding it out for now. Nakamura eventually gives up the hold.
Nakamura thows a huge punch but Macfedries dodges it nicely.
Nakamura has the superior BJJ but he's also working some ground strikes into his gameplan.

That's three minutes gone in the round.
Macfedries is trying to stand.
Nakamura prevents Macfedries from improving his position.
The fighters are pressed up against the cage, both looking to find a bit of space to work.

Neither fighter is doing enough for the referee's liking and he's decided to stand them back up.
Macfedries throws out a powerful jab.

It looks like Teruo Nakamura has been cut.
Ratto Macfedries is looking to keep the fight on the feet at all costs.
Nakamura avoids the head kick by Macfedries.
Macfedries tries a switch kick but it misses it's target.
Macfedries throws a nice inside leg kick.

That's four minutes gone in the round.
Macfedries connects nicely with a jab. Noted by the judges no doubt.
Macfedries throws a nice inside leg kick.
We've seen a great period of action over the last minute or so - credit to both fighters for going all out!
Macfedries throws a head kick that misses and slips in the process. He scrambles back to his feet and the fighters circle.
Macfedries throws a sloppy head kick and Nakamura moves out of range easily.
Macfedries throws a sloppy head kick and Nakamura moves out of range easily.
Macfedries tries a switch kick but it misses it's target.
Macfedries wants to clinch up but Nakamura keeps it at a distance.
And thats the end of the round the fighters go back to their corners.
Ratto Macfedries dominated that round.
The cut man is working on Teruo Nakamura's cut.
That's the end of the round. The referee orders the cornermen out of the cage so we can get back down to business.

Nakamura takes a head kick and keeps coming.
Macfedries tries a head kick but it misses.
Nakamura changes levels and looks for a double leg takedown. Macfedries tries to avoid it but Nakamura manages to keep hold of a leg and drag Macfedries to the ground. Macfedries escapes though and pops straight back up to his feet.
Macfedries tries a head kick but it misses.
Macfedries throws a hook but Nakamura avoids it easily.
Both fighters are absolutely exhausted here.
Macfedries looks for the body kick but Nakamura saw that one coming.
A decent looking body kick lands there for Macfedries.
That's one minute gone in the round.
Macfedries throws a head kick that misses and slips in the process. He scrambles back to his feet and the fighters circle.
Nakamura avoids the head kick by Macfedries.
Nakamura shoots in for a takedown. "Ole!" shouts Macfedries as he jumps to the side.
A head kick misses from Macfedries.
A head kick misses from Macfedries.
That's two minutes gone in the round.
Neither fighter has done anything of merit for a good minute or two here and the crowd are not happy about it.
Nakamura fails with a rather predictable takedown attempt.
Ratto Macfedries has stuffed three takedown attempts in the round now. That's going to take a lot out of Teruo Nakamura.
Macfedries tries to close the distance and clinch but Nakamura swats him to one side with an open hand palm strike and circles away.
A jab from Macfedries misses.
A head kick misses from Macfedries.
Teruo Nakamura is looking to throw some combinations by the looks of things.
Macfedries misses with a half-hearted attempt at a head kick.
That's three minutes gone in the round.
Nakamura avoids the head kick by Macfedries.
Nakamura keeps the fight on the outside.
Nice takedown defense from Macfedries. No joy for Nakamura on that attempt.
Macfedries misses with a looping left.
Macfedries throws a head kick that misses and slips in the process. He scrambles back to his feet and the fighters circle.
Macfedries lands a head kick!
That's four minutes gone in the round.
Macfedries tries a head kick but it misses.
Ratto Macfedries seems to be the more aggressive standup fighter in this bout.
Macfedries misses with a head kick.
Macfedries tries a head kick but it misses.
Macfedries gets taken down but at least he's managed to land in guard.
The crowd thankful this round is nearly over.
Nakamura lands a couple of decent looking shots.
And thats the end of the round the fighters go back to their corners.
Ratto Macfedries dominated that second round.
The cut man is working on Teruo Nakamura's cut.
That's time! Back to the action! This is the final round!

A head kick misses from Macfedries.
Macfedries missing with a left hand there. Nakamura was out of range so wasted energy throwing that one.
Macfedries misses with a head kick.
Macfedries stuffs the takedown attempt from Nakamura. Nakamura gets slowly back to his feet.
Nakamura shoots in for a double leg but Macfedries sprawls well. That's going to sap some energy.
We've had a slow start to the round here - hopefully the action picks up.
Macfedries fails in his attempt to clinch.
Both fighters are breathing heavily.
That's one minute gone in the round.
Macfedries throws a head kick that misses.
Macfedries fails to land with the punch combination there - jab, cross, hook, miss, miss, miss.
Nakamura shoots in but no luck this time.
Ratto Macfedries has stuffed three takedown attempts in the round now. That's going to take a lot out of Teruo Nakamura.
Nakamura moves away from the strike by Macfedries.
Macfedries misses with a head kick.
Macfedries throws a head kick that misses and slips in the process. He scrambles back to his feet and the fighters circle.
That's two minutes gone in the round.
My god... these two guys really need to pick up the pace or everyone will leave to go get a beer.
Macfedries throws a head kick but Nakamura moves out of range.
No luck for Nakamura with that takedown attempt.
Macfedries pulls out of a head kick attempt.
Macfedries pulls out of a head kick attempt.
Nakamura staying out of range there.
That's three minutes gone in the round.
Nakamura shoots in but no luck this time.
Nakamura changes levels and looks for a double leg takedown. Macfedries tries to avoid it but Nakamura manages to keep hold of a leg and drag Macfedries to the ground. Macfedries escapes though and pops straight back up to his feet.
Teruo Nakamura has stepped it up - he knows he needs a finish here!
Macfedries throws a quick head kick that skims the top of Nakamura's head.
Macfedries misses with a head kick.
Macfedries lands a head kick. Nakamura smiles back at him and beckons him forward.
Macfedries looks to land a left hand but Nakamura moved out of range nicely.
That's four minutes gone in the round.
Nakamura shoots in for a double leg but Macfedries sprawls well. That's going to sap some energy.
Macfedries throws a head kick but Nakamura moves out of range.
Nakamura looks for a takedown here. Will he get it? Macfedries is fending him off so far but Nakamura persists. Nope, Macfedries circles away and we're back to standing.
Nakamura avoids the head kick by Macfedries.
Boooooooooooooooooooo!!! God, this has been a terrible round. Come on you two, sort yourselves out!
The fighters circling - Macfedries throws out the jab but it was never going to land.
Ratto Macfedries is fighting for a decision here - he's started to take the cautious approach.
Ratto Macfedries is winning the standup battle so far.
Nice sprawl there from Macfedries as Nakamura shoots in.
And that's the end of the fight!
Ratto Macfedries showed his dominance in that final round.
Well I reckon that's a shut out for Macfedries, winning every round. Will the judges agree? They are the ones who matter, even if they are often depressingly incompetent. Over to the ring announcer for the scorecards.
Ladies and gentlemen, after 3 rounds of action, we go to the scorecards for a decision.
Judge Yasuomi Hirokawa scores the fight 30:27
Judge Shigeki Fujiwara scores the fight 30:27
Judge Yuuki Gou scores the fight 30:27
In favor of your winner, by unanimous decision... Ratto Macfedries!
|
|
|
|
|
|
|
|
|
|
|
|
|
|
|
|
|
|
|
|
|
|
|
| S |
C
A |
G |
S |
C
B |
G |
|
S |
C |
G |
|
energy
A | B |
|
hype
A | B |
|
pop
A | B |
|
mgr
A | B |
|
FIGHT
RATING
20% |
|
|
|
|
|
|
|
Undercard bout
|
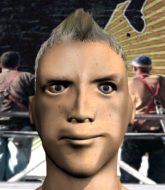
Coming up we have a middleweight MMA rules bout between Sasuke Yumikuri (ranked 0 p4p, 0 weight class) and Kazuo Hata (ranked 0 p4p, 0 weight class). Hata is bobbing his head along to his entrance song: DJ Shadow - Stem. Sasuke Yumikuri has the better chin. Will he look to stand and bang today?
 |
|
 |
| 181 cm
22
189 lbs
0 - 0 - 0 |
|
190 cm
22
190 lbs
2 - 2 - 0 |
BJJ Purple Belt
Brawler
Intelligent |
|
BJJ Blue Belt
Counter striker
Likes ground |
|
| |
|
Ladies and gentlemen. This fight is 3 rounds, in the middleweight division.
Introducing the fighter to my left, fighting out of the red corner.
With a record of
0 - 0 - 0, fighting out of Tokyo, Sasuke Yumikuri!
And introducing the fighter to my right, fighting out of the blue corner.
With a record of
2 - 2 - 0, fighting out of Tokyo, Kazuo Hata!
The judges for this bout are Shirou Masuda, Yukihiro Shimada and Hirohito Nitta.
The bell rings for round one and we are underway!
Yumikuri bobs and weaves into range and then changes levels and scores with a nice takedown into side control.
Yumikuri tries to move into full mount but can't pass Hata's legs.
Hata is looking for a sweep.
Yumikuri looking to control but instead Hata has slipped a leg in, to regain half guard.
Hata is looking to regain full guard. Not this time though.
Hata actively working from the bottom here.
Yumikuri wants to work for an arm triangle but Hata is really keeping half guard well and defending the submission attempt.
Hata is staying active underneath Yumikuri, who seems content to just control the action from this position.
Well, the referee has seen enough. Neither fighter is active enough on the ground so he's stood them back up.

Hata rushes Yumikuri and presses him up against the cage.
Yumikuri turns his back and goes for a hip toss. It's a bit messy but it gets the job done and Yumikuri manages to end up in side control.
Hata manages to get one leg in to regain half guard.
Yumikuri is looking to take a break and control but Hata is keeping him honest, looking to work from the bottom.
Hata is looking to sinch up a gullotine here but Yumikuri pulls his head out easily.
That's one minute gone in the round.
Hata looking for submissions off his back.
Hata looking for submissions off his back.
Hata looks gassed!
Hata wants to get back to full guard.
Yumikuri is keen to just control but Hata is a slippery customer.
Yumikuri is working for a submission here. He's got hold of the far side arm and he's looking for a kimura. He's cranking on the arm and he's got it! Hata is tapping out! Ouch, that looked like it hurt!
Ladies and gentlemen, after 1:57 of round 1, we have a winner by way of Submission (Kimura). Sasuke Yumikuri!
|
|
|
|
|
|
|
|
|
|
|
|
|
|
|
|
|
|
|
|
|
|
|
| S |
C
A |
G |
S |
C
B |
G |
|
S |
C |
G |
|
energy
A | B |
|
hype
A | B |
|
pop
A | B |
|
mgr
A | B |
|
FIGHT
RATING
54% |
|
|
|
|
|
|
|
Undercard bout
|
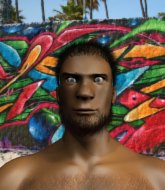
Coming up we have a middleweight MMA rules bout between Juan Konzaga (ranked 0 p4p, 0 weight class) and Peter Johnz (ranked 0 p4p, 0 weight class). Fingers crossed for an exciting fight - I'm sure both fighters are looking for a nice under the table bonus!
 |
|
 |
| 186 cm
21
188 lbs
0 - 0 - 0 |
|
177 cm
18
184 lbs
1 - 1 - 0 |
BJJ Blue Belt
Basic striking
Self confident |
|
BJJ Blue Belt
Counter striker
Determined |
|
| |
|
Ladies and gentlemen. This fight is 3 rounds, in the middleweight division.
Introducing the fighter to my left, fighting out of the red corner.
With a record of
0 - 0 - 0, fighting out of Tokyo, Juan Konzaga!
And introducing the fighter to my right, fighting out of the blue corner.
With a record of
1 - 1 - 0, fighting out of Tokyo, Peter Johnz!
The judges for this bout are Yasuomi Hirokawa, Kenichi Hosakawa and Shigeki Fujiwara.
The bell rings for round one and we are underway!
Konzaga takes the fight into the clinch.
Konzaga lands a knee to the head.
It looks like Peter Johnz has been cut.
Konzaga misses with a knee strike.
Konzaga using the Thai plumb to throw knees but Johnz has his back arched nicely, preventing the strike.
Konzaga with an attempt at a knee that misses.
Konzaga tries to land a knee to the head but misses.
Johnz avoiding damage as Konzaga throws knees to the body.
Konzaga displaying some good clinch control by pressing Johnz up against the cage.
Johnz on the defensive, avoiding the knees to the body.
Johnz fails to pull guard.
Johnz tries to pull guard but can't drag his opponent to the mat. Konzaga just stands there and leans against the cage.
The pace slowing considerably in the clinch, as Konzaga takes a break from that fighting nonsense to think about the finer things in life.
That's one minute gone in the round.
Konzaga using the Thai plumb to throw knees but Johnz has his back arched nicely, preventing the strike.
Konzaga misses with a knee strike.
Konzaga throws a vicious knee straight up the middle but Johnz blocks it with crossed arms.
Konzaga tries a knee to the head but he's missed.
Konzaga tries a knee to the head but Johnz blocks it.
Konzaga is breathing heavily.
Konzaga with the Thai clinch. He's looking to land a big knee but he's not managed it this time.
Konzaga tries a knee to the head but he's missed.
Konzaga looking to throw knees to the head but Johnz is blocking nicely.
Johnz on the defensive, avoiding the knees to the body.
Konzaga throws a vicious knee straight up the middle but Johnz blocks it with crossed arms.
Johnz jumps guard but Konzaga stands there with Johnz around his waist. Johnz gives up and drops back to his feet. We remain in the clinch.
Juan Konzaga has stuffed three takedown attempts in the round now. That's going to take a lot out of Peter Johnz.
Johnz tightens his grip and picks Konzaga up, before dumping him to the ground. Konzaga manages to land in guard.
Konzaga looking to control but Johnz passes into half guard.
Konzaga is trying to maintain the position but Johnz is very close to passing his half guard.
That's two minutes gone in the round.
Konzaga is looking for a sweep. Johnz is wise to his cunning plan and keeps the top position.
Johnz seems very keen to just sit and control from half guard but Konzaga does not like that idea so much and is remaining active off his back.
Johnz wants to work for an arm triangle but Konzaga is really keeping half guard well and defending the submission attempt.
Konzaga throws a strike from the bottom that misses.
Konzaga trying to hold on to Johnz's head to control him but Johnz postures up.
It looks like we're going to have a standup here. Neither fighter is doing enough on the ground.
Johnz shoots in for a takedown. "I don't think so" says Konzaga as he avoids it easily.
That's three minutes gone in the round.
Konzaga tries to close the distance and clinch up but Johnz swats him away and circles back towards the center.
Konzaga tries to clinch up.
Konzaga has managed to clinch.
Konzaga landing knees to the head.
Johnz jumps guard but Konzaga stands there with Johnz around his waist. Johnz gives up and drops back to his feet. We remain in the clinch.
Konzaga connects with a nasty looking knee right to Johnz's face.
Konzaga is struggling to control the position.
Konzaga misses with a knee to the head.
Konzaga looking to throw knees to the head but Johnz is blocking nicely.
Johnz jumps guard but Konzaga stands there with Johnz around his waist. Johnz gives up and drops back to his feet. We remain in the clinch.
Konzaga with the Thai clinch. He's looking to land a big knee but he's not managed it this time.
That's four minutes gone in the round.
The crowd are showing their displeasure at the lack of action as loud boos ring out around the arena.
Konzaga with the Thai clinch. He's looking to land a big knee but he's not managed it this time.
Johnz tries to take the fight to the ground by pulling guard but can't manage it.
Konzaga tries to land a knee to the head but misses.
Konzaga missing with knees to the body.
Konzaga with the Thai clinch. He's looking to land a big knee but he's not managed it this time.
Konzaga tries a knee to the head but he's missed.
Johnz managing to block the knees to the body from Konzaga.
Konzaga tries to land a knee to the head but misses.
Johnz manages to pull guard. Let's see whether he can land a sub off his back.
Konzaga passes Johnz's left leg - he's now in half guard.
The crowd thankful this round is nearly over.
Johnz wants to get back to full guard.
And thats the end of the round the fighters go back to their corners.
Juan Konzaga dominated that round.
The cut man is working on Peter Johnz's cut.
The referee calls time. The cornermen exit stage left and we're back to business.
Johnz chopped to the floor by a nice leg kick but he springs right back up before Konzaga can pounce on him.
Johnz throws a looping left and ducks down for a takedown. He's got his arms around Konzaga's waist but Konzaga gets an underhook and avoids the takedown by throwing Johnz off to one side.
Konzaga gets to the clinch - let's see what his plan is here.
Konzaga crunches a lovely knee into Johnz's ribcage.
Konzaga stalling here - the referee won't stand for too much of that.
Konzaga looking to throw knees to the head but Johnz is blocking nicely.
Konzaga with the Thai clinch. He's looking to land a big knee but he's not managed it this time.
Konzaga using the Thai plumb to throw knees but Johnz has his back arched nicely, preventing the strike.
Johnz tries to pull guard but Konzaga won't allow it.
Konzaga tries a knee to the head but he's missed.
Konzaga misses with a knee to the head.
Konzaga throws a knee to the head but misses.
Both fighters are absolutely exhausted here.
Johnz jumps guard and drags Konzaga to the mat. He's obviously going to be looking for submissions off his back.
Konzaga wants to control from the top but Johnz keeps moving.
That's one minute gone in the round.
Konzaga passes Johnz's left leg - he's now in half guard.
Johnz on the receiving end of some nice ground and pound.
Johnz tries to get to full guard but Konzaga has control of the leg.
Konzaga is trying to control the action in half guard but Johnz is working away on the bottom, looking perhaps to get back to full guard.
That's two minutes gone in the round.
The crowd are starting to boo a lack of action.
Konzaga lands with a punch from half guard.
Konzaga stops Johnz from getting back to his feet.
Konzaga is looking for an arm triangle, whilst trying to pass to side control. Johnz doesn't seem that keen to cooperate though. No luck this time Konzaga.
Johnz is looking for a sweep. Konzaga is wise to his cunning plan and keeps the top position.
Johnz makes his way to full guard. A much better position for Johnz.
Konzaga is just sitting in guard, looking to avoid any submissions.
That's three minutes gone in the round.
Konzaga thinks about going for a leg but decides against it, in order to maintain the position.
Konzaga avoids a guillotine attempt easily.
Konzaga in full guard, throwing the ground and pound. No damage this time.
Johnz avoiding any damage from the ground and pound.

Konzaga stands up from guard. Let's bang!
That's four minutes gone in the round.
My god... these two guys really need to pick up the pace or everyone will leave to go get a beer.
The fight stays on the outside here - Konzaga looks like he's thinking about clinching though.
Konzaga throws a quick head kick that skims the top of Johnz's head.
Johnz swats away the attempt to clinch by Konzaga.
Johnz throws a looping left and ducks down for a takedown. He's got his arms around Konzaga's waist but Konzaga gets an underhook and avoids the takedown by throwing Johnz off to one side.
Juan Konzaga has stuffed three takedown attempts in the round now. That's going to take a lot out of Peter Johnz.
Johnz bobs and weaves into range and then changes levels and scores with a nice takedown into side control.
Konzaga gets one leg under and gets the fight to half guard.
The crowd thankful this round is nearly over.
Konzaga is looking to sinch up a gullotine here but Johnz pulls his head out easily.
Johnz is thwarting Konzaga's attempts to control the position.
And thats the end of the round the fighters go back to their corners.
Juan Konzaga dominated that second round.
The cut man is working on Peter Johnz's cut.
The corners get their ten second warning. Both fighters stand from their stools and stare eachother down, ready to get back to the action. So, we enter the final round. Let's see if either fighter can bring us a finish, or whether we're going to the judges scorecards.
Johnz closes the distance and clinches up with Konzaga, looking for a takedown. Johnz pushes Konzaga against the cage but Konzaga circles to the side and manages to break the clinch.
Konzaga is looking to take this fight into the clinch.
Konzaga drives through and clinches with Johnz against the cage.
Konzaga connects with a knee to the head.
The fighters are pressed against the cage, as the pace of the fight slows.
Konzaga with an attempt at a knee that misses.
Both fighters are breathing heavily.
We've had a slow start to the round here - hopefully the action picks up.
Konzaga landing knees to the body. They look like they could hurt.
Konzaga using the Thai plumb to throw knees but Johnz has his back arched nicely, preventing the strike.
Konzaga throws an elbow but it misses.
Johnz fails to pull the fight into his guard.
That's one minute gone in the round.
Konzaga throws a vicious knee straight up the middle but Johnz blocks it with crossed arms.
Konzaga lands a knee to the body.
Konzaga tries to land a knee to the head but misses.
Johnz wants a takedown but no success here.
Juan Konzaga has stuffed three takedown attempts in the round now. That's going to take a lot out of Peter Johnz.
Konzaga avoiding damage.
Konzaga tries a knee to the head but he's missed.
Konzaga with the Thai clinch. He's looking to land a big knee but he's not managed it this time.
Konzaga throws a knee to the head but misses.
Konzaga has Johnz pushed against the cage.
Johnz jumps guard but Konzaga stands there with Johnz around his waist. Johnz gives up and drops back to his feet. We remain in the clinch.
Johnz fails to pull guard.
Konzaga tries a knee to the head but Johnz blocks it.
That's two minutes gone in the round.
The crowd are showing their displeasure at the lack of action as loud boos ring out around the arena.
Konzaga stalling.
Konzaga landing knees to the head.
Konzaga throws an elbow that misses.
Johnz drops down for a takedown but doesn't get it.
Konzaga throws a knee to the head but misses.
Konzaga looking to throw knees to the head but Johnz is blocking nicely.
Johnz tries to take the fight to the ground by pulling guard but can't manage it.
Konzaga lands a nice knee to the body.
Konzaga tries to land a knee to the head but misses.
Konzaga taking a breather.
Konzaga misses with a knee to the head.
That's three minutes gone in the round.
Johnz goes for a takedown in the clinch but Konzaga prevents it.
Konzaga connects with a knee to the head.
Konzaga with the Thai clinch. He's looking to land a big knee but he's not managed it this time.
Konzaga lands a knee to the body.
Konzaga tries to land a knee to the head but Johnz blocks with his arms.
Konzaga misses with a knee to the head.
Konzaga is trying to slow down the pace of the fight but Johnz is keeping busy.
Johnz fails to pull guard.
Konzaga misses with a knee to the head.
Konzaga scores with a knee to the head.
That's four minutes gone in the round.
The crowd are showing their displeasure at the lack of action as loud boos ring out around the arena.
Konzaga landing some nice looking knees to the body.
Konzaga misses with a knee to the head.
Konzaga using the Thai plumb to throw knees but Johnz has his back arched nicely, preventing the strike.
Konzaga using the Thai plumb to throw knees but Johnz has his back arched nicely, preventing the strike.
Konzaga with an attempt at a knee that misses.
Konzaga misses with a knee strike.
Johnz jumps guard but Konzaga stands there with Johnz around his waist. Johnz gives up and drops back to his feet. We remain in the clinch.
Konzaga with the Thai clinch, lands a knee to the head.
Konzaga tries to land a knee to the head but Johnz blocks with his arms.
Johnz takes an elbow to the forehead.
Boooooooooooooooooooo!!! God, this has been a terrible round. Come on you two, sort yourselves out!
Konzaga throws a vicious knee straight up the middle but Johnz blocks it with crossed arms.
The fighters are pressed against the cage, as the pace of the fight slows.
Peter Johnz has stepped it up - he knows he needs a finish here!
Juan Konzaga is fighting for a decision here - he's started to take the cautious approach.
Johnz throws a vicious knee straight up the middle but Konzaga blocks it with crossed arms.
And that's the end of the fight!
Juan Konzaga showed his dominance in that final round.
Well I reckon that's a shut out for Konzaga, winning every round. Will the judges agree? They are the ones who matter, even if they are often depressingly incompetent. Over to the ring announcer for the scorecards.
Ladies and gentlemen, after 3 rounds of action, we go to the scorecards for a decision.
Judge Yasuomi Hirokawa scores the fight 30:27
Judge Kenichi Hosakawa scores the fight 30:27
Judge Shigeki Fujiwara scores the fight 30:27
In favor of your winner, by unanimous decision... Juan Konzaga!
|
|
|
|
|
|
|
|
|
|
|
|
|
|
|
|
|
|
|
|
|
|
|
| S |
C
A |
G |
S |
C
B |
G |
|
S |
C |
G |
|
energy
A | B |
|
hype
A | B |
|
pop
A | B |
|
mgr
A | B |
|
FIGHT
RATING
26% |
|
|
|
|
|
|
|
Undercard bout
|
|
|
|
Co-main event
|
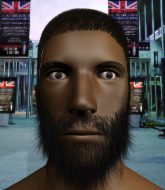
Coming up we have a light heavyweight MMA rules bout between Sean Ustorf (ranked 0 p4p, 0 weight class) and Michael Trine (ranked 0 p4p, 0 weight class). These two fighters really are very evenly matched on the feet - it will be fascinating to see who can assert themselves in that aspect of the fight.
 |
|
 |
| 200 cm
19
210 lbs
1 - 3 - 0 |
|
180 cm
19
205 lbs
3 - 2 - 0 |
BJJ White Belt
Counter striker
KO power |
|
BJJ Blue Belt
Counter striker
Determined |
|
| |
|
Ladies and gentlemen. This fight is 3 rounds, in the light heavyweight division.
Introducing the fighter to my left, fighting out of the red corner.
With a record of
1 - 3 - 0, fighting out of Tokyo, Sean Ustorf!
And introducing the fighter to my right, fighting out of the blue corner.
With a record of
3 - 2 - 0, fighting out of Tokyo, Michael Trine!
The judges for this bout are Ren Mimura, Shigeki Fujiwara and Yukihiro Shimada.
The bell rings for round one and we are underway!
Ustorf throws a body kick that misses.
Ustorf fails with the takedown.
Ustorf uses some good footwork to avoid the body shot by Trine.
Michael Trine seems to be the more aggressive standup fighter in this bout.
Ustorf tests Trine's chin there with a solid looking shot.
Ustorf throws a body kick but he was well out of range there.
Ustorf pulls out of a head kick attempt.
Trine shoots in but no luck this time.
Ustorf throws a body punch but Trine moves out of range.
We've had a slow start to the round here - hopefully the action picks up.
Trine throws out a token jab with nothing on it.
Ustorf throws a head kick that misses.
Ustorf swings away but doesn't land with a series of punches.
Trine lands with a slapping head kick.
It looks like Sean Ustorf has been cut.
That's one minute gone in the round.
Ustorf defending well as Trine loads up on a big left hand.
Ustorf lands with an overhand left.
A really sloppy takedown attempt there from Ustorf.
Ustorf staying out of range there.
Ustorf misses with a few strikes there.
Trine is the aggressor but that punch slipped nicely by Ustorf.
Ustorf tries a head kick but it misses.
Ustorf works his jab well there, keeping his opponent at a distance.
Trine keeps the fight on the outside.
Trine pivots, looking for a leg kick but Ustorf is out of range and Trine settles back down.
That's two minutes gone in the round.
Neither fighter has done anything of merit for a good minute or two here and the crowd are not happy about it.
Trine throws a chopping leg kick but Ustorf manages to avoid taking any serious damage.
Ustorf slips under a jab from Trine.
Ustorf shoots in and gets a takedown into half guard. Ustorf showed some decent athleticism there.
Ustorf seems very keen to just sit and control from half guard but Trine does not like that idea so much and is remaining active off his back.
Ustorf is looking for an arm triangle, whilst trying to pass to side control. Trine doesn't seem that keen to cooperate though. No luck this time Ustorf.
Ustorf content to control rather than advance.
Trine is on the bottom, trying to hold on to half guard. He's throwing a few small shots here, to keep his opponent honest.
The ref warns both fighters not to hold the cage as they work up against the meshing.
That's three minutes gone in the round.
Ustorf trying to control the action but Trine is working from the bottom.
Trine regains full guard. Nicely done.
Ustorf avoids a guillotine attempt easily.
Trine looking to sweep here. No luck so far.
Trine trying to control the position here.
Ustorf sitting in guard here, content to control.
Trine trying to control the position.
Trine keeping moving, preventing Ustorf from controlling successfully.
That's four minutes gone in the round.
Trine has a closed guard, preventing Ustorf from standing up.
Trine escapes his hips to the side and looks to be working for an armbar. Ustorf gives him a little smile and shakes his head. No chance.
Trine keeping moving, preventing Ustorf from controlling successfully.
Trine manages to land a sweep and now he's in mount on top!
Ustorf is trying to escape the mount.
The fighters are starting to get a bit slippery now, which will make submissions a bit more difficult.
Trine avoids the attempt from Ustorf to control.
You get the feeling that Ustorf really doesn't like being in this position too much.
And thats the end of the round the fighters go back to their corners.
Michael Trine dominated that round.
The cut man is working on Sean Ustorf's cut.
The fighters get back to their feet, the hooter sounds and we're back to the action!
Trine throws a monster uppercut resembling something out of street fighter but it doesn't land.
Ustorf throws a series of punches but Trine moves out of range.
Trine tries to grapple but his opponent circles
and Ustorf counters with a left and a right that stings Trine.
Ustorf throws a series of punches but Trine avoids them all with ease.
Ustorf misses with a jab and misses with a cross straight after too.
Trine catches Ustorf with a nice straight right. He seems pissed - ooooh, it's on now! On like donkey kong!
Ustorf misses with a series of wild punches.
Ustorf tries to clinch but Trine is having none of it.
That's one minute gone in the round.
A nice combination there by Ustorf.
Ustorf looks shocked there as he takes a right hand to the temple.
Trine darts in trying to clinch
and Ustorf counters with a three punch combo that has Trine backing up. Trine nods at Ustorf to acknowledge the strikes.
Ustorf cracks Trine with a good shot that sees him stumbling back into the cage.
Trine bobbing and weaving, closes the distance and lands a hook to the side of Ustorf's head.
Trine dodges the punch combination from Ustorf.
Ustorf's corner calls for a 1,2 combination and Ustorf duly obliges.
Ustorf throws a combination but comes up with nothing but fresh air.
That's two minutes gone in the round.
Ustorf feints and as Trine raises his hands in defense, Ustorf changes levels and drives through with a takedown into guard.
Wooooo! Give it up for these two warriors! They are putting on a show!
Ustorf wants to control from the top but Trine keeps moving.
Ustorf preventing the sweep.
Trine working a defensive guard here.
Trine lands a beautiful switch and he's in full mount! That could spell trouble for Ustorf!
Ustorf tries to hold on but Trine postures up.
Both fighters are absolutely exhausted here.
Trine cracks Ustorf with a nasty head shot there - the crowd let out an audible gasp there, as the noise reverberated around the arena.
Trine trying to control but Ustorf is having none of it.
Trine landing strikes from the mount and Ustorf is in trouble!
That's three minutes gone in the round.
Trine lands a couple of nice shots there from mount.
Ustorf is working to get back to half guard.
Trine lands a nice shot to the head.

Ustorf is rocked!
Ustorf knows he needs to get back to his feet asap. He's simply no match for Trine on the ground.
Trine breaks from Ustorf's wrist control and lands an elbow.
Oh Ustorf is still in real trouble! Will he be able to recover?!!
The fighters are pressed up against the cage, both looking to find a bit of space to work.
Trine looking to finish here with some ground and pound. He lands one big shot that has Ustorf covering up... and two more big strikes land, forcing the referee to step in and put and end to proceedings! This fight is all over!
Ladies and gentlemen, after 3:45 of round 2, we have a winner by way of TKO (Strikes). Michael Trine!
|
|
|
|
|
|
|
|
|
|
|
|
|
|
|
|
|
|
|
|
|
|
|
| S |
C
A |
G |
S |
C
B |
G |
|
S |
C |
G |
|
energy
A | B |
|
hype
A | B |
|
pop
A | B |
|
mgr
A | B |
|
FIGHT
RATING
40% |
|
|
|
|
|
|
|
Main event
|
|
|
|
|
|
|
