 |
CHOKE Shine Tour Vol. 7 PBP Commentary |
Undercard bout
|
Coming up we have a lightweight MMA rules bout between Trent Colton (ranked 0 p4p, 0 weight class) and Genaro Munoz (ranked 0 p4p, 0 weight class). Both fighters look fresh as a daisy as they make their way towards the ring.
 |
|
 |
| 170 cm
23
160 lbs
5 - 2 - 0 |
|
178 cm
23
156 lbs
4 - 4 - 0 |
BJJ Purple Belt
Brawler
Experienced |
|
BJJ Blue Belt
Excellent MT
Solid chin |
|
| |
|
Ladies and gentlemen. This fight is 3 rounds, in the lightweight division.
Introducing the fighter to my left, fighting out of the red corner.
With a record of
5 - 2 - 0, fighting out of Tokyo, Trent Colton!
And introducing the fighter to my right, fighting out of the blue corner.
With a record of
4 - 4 - 0, fighting out of Tokyo, Genaro Munoz!
The judges for this bout are Yasuomi Hirokawa, Shigeki Fujiwara and Taro Takaoka.

The bell rings for round one and we are underway!
Colton shoots in for a double leg but Munoz sprawls well. That's going to sap some energy.
Colton misses with a double jab.
Genaro Munoz seems to be the more aggressive standup fighter in this bout.
Colton looks to score with a jab to the body but Munoz is just out of range.

Munoz pushes Colton up against the ropes in a clinch.
Colton wants to strike at distance but he can't break free of the clinch.
Colton tries to pull guard but can't drag his opponent to the mat. Munoz just stands there and leans against the ropes.
Munoz misses with a knee to the head.
Colton stalling in the clinch.
Munoz using the Thai plumb to throw knees but Colton has his back arched nicely, preventing the strike.
Munoz stops a takedown attempt from Colton.
That's three failed takedown attempts in the round for Trent Colton. That's going to take a lot out of him.
Colton dodges an elbow strike from Munoz.
Munoz keeps control of Colton as he tries to wriggle out of the double underhooks.
Colton wants to break free. God knows he wants to breaaaak freeee.
Munoz with the Thai clinch. He's looking to land a big knee but he's not managed it this time.
Munoz with the Thai clinch. He's looking to land a big knee but he's not managed it this time.
Munoz keeps control of Colton as he tries to wriggle out of the double underhooks.
Colton fails to pull guard.
Munoz with a knee to the head.

It looks like Trent Colton has been cut.
Colton has had enough of the clinch but Munoz keeps him there for the moment.
Munoz with a knee to the head.
Munoz misses with a knee to the head.
A knee to the head by Munoz.
Munoz throws a vicious knee straight up the middle but Colton blocks it with crossed arms.
Colton tries to land knees in the clinch but Munoz avoids the damage to the body.
Colton wants a takedown but no success here.
Munoz looking to throw knees to the head but Colton is blocking nicely.
Munoz scores a nice knee to the body.
Colton wants to get back to striking at distance but Munoz won't allow it.
Munoz throws a vicious knee straight up the middle but Colton blocks it with crossed arms.
Colton goes for a takedown attempt but Munoz pushes him away and we're back to fighting at a distance.
Colton is breathing heavily.

That's one minute gone in the round.
Colton tries for a takedown but Munoz sees it coming a mile off and avoids it easily.
Munoz gets a clinch.
Munoz throws a vicious knee straight up the middle but Colton blocks it with crossed arms.
Colton wants a takedown but no success here.
Munoz tries to land a knee to the head but misses.
Munoz comes over the top with an elbow. That landed flush.
Munoz looking to throw knees to the head but Colton is blocking nicely.
Munoz lands a glancing elbow in the clinch.
Knees in the clinch landing for Munoz.
Munoz scores with a knee to the head.
Munoz unloads a knee to the mid-section. Colton lets out a prehistoric sounding urrrrgh.
Munoz with an attempt at a knee that misses.
Munoz tries a knee to the head but he's missed.
Munoz lands a nice knee to the body.
Munoz throws a vicious knee straight up the middle but Colton blocks it with crossed arms.
A short right from Colton.
Munoz with the Thai clinch. He's looking to land a big knee but he's not managed it this time.
Colton missing with knees to the body.
Munoz connects with a nasty looking knee right to Colton's face.
Munoz crunches a lovely knee into Colton's ribcage.
Munoz lands a knee to the head there! That was nasty!
Colton is trying to break free.

That's two minutes gone in the round.
Knees to the body from Munoz.

Colton manages to pull guard. Let's see whether he can land a sub off his back.
Munoz won't allow Colton to get back to his feet.

Colton throwing his legs up looking for a triangle.
Colton has a loose triangle. He'll be looking to tighten that up but Munoz can see exactly what he's planning and manages to posture up and free himself.

Munoz gets to his feet - Colton follows without any prompting.
Munoz doesn't manage to clinch there - Colton circles away.
Munoz rushes Colton and pushes him back against the ropes in a clinch.
Munoz throws a vicious knee straight up the middle but Colton blocks it with crossed arms.
Colton pushes off an throws an elbow but Munoz leans to the side and avoids it. We're back to clinching against the ropes.
Colton changes levels and goes for a takedown here. Munoz fights it off and pushes away nicely.

That's three minutes gone in the round.
Munoz rushes Colton and pushes him back against the ropes in a clinch.
Munoz lands with a left to the head.
Munoz using the Thai clinch to land knees to the body.
Munoz lands a glancing elbow in the clinch.
Munoz connects with a nasty looking knee right to Colton's face.
Munoz lands a knee to the head there! That was nasty!
Munoz gets an overhook and lands an elbow to the side of the head.
Munoz tries to land a knee to the head but misses.
Munoz landing knees to the head.
Colton can't break the clinch.
Knees in the clinch landing for Munoz.
Munoz landing knees to the head.
Munoz using the Thai plumb to throw knees but Colton has his back arched nicely, preventing the strike.
Munoz with the Thai clinch. He's looking to land a big knee but he's not managed it this time.
Colton tries a knee to the head but he's missed.
Munoz using the Thai plumb to throw knees but Colton has his back arched nicely, preventing the strike.
Munoz lands a knee to the head there! That was nasty!

Colton manages to break the clinch.
Colton closes the distance and clinches up with Munoz, looking for a takedown. Colton pushes Munoz against the ropes but Munoz circles to the side and manages to break the clinch.
Munoz is looking to clinch.

That's four minutes gone in the round.
Munoz tries to close the distance and clinch up against the ropes but Colton paws at him with a jab and circles away.
Munoz wants to clinch.
Colton keeps the fight on the outside.
Munoz tries to clinch up but Colton circles away and keeps his distance.
Colton keeps the fight on the outside.
Munoz lands with a kick to the temple. Colton shrugs as if to say "is that all you've got?"
Munoz is looking to clinch.
Colton looks frustrated there after his takedown attempt is stuffed easily.
Munoz scores with a reasonable looking shot to the body. Colton doesn't seem bothered though.
Munoz drives through and clinches with Colton against the ropes.
Munoz connects with a nasty looking knee right to Colton's face.
Munoz lands an elbow just above Colton 's eye.
Munoz blocks a couple of punches on the inside.
Colton tries to jump guard but he falls flat on his backside. Munoz smiles and moves away.
Colton keeps the fight on the outside.
And thats the end of the round the fighters go back to their corners.
Genaro Munoz dominated that round.
The cut man is working on Trent Colton's cut.
That's the end of the round. The referee orders the cornermen out of the ring so we can get back down to business.

Munoz wants to clinch.
Colton fails in his attempt to clinch.
Munoz darts in and clinches Colton up against the ropes.
Munoz misses with a knee strike.
Colton is trying to slow down the pace in the clinch, to catch his breath.
Munoz tries to land a knee to the head but misses.
Munoz working on landing some head shots here - that one got through nicely.
Munoz misses with a knee to the head.
Munoz misses with a knee to the head.
Colton manages to break the clinch.
Colton looks to score with a jab to the body but Munoz is just out of range.
Colton misses with a takedown attempt - Munoz sprawls well and throws a nice strike on the way out which just misses.
Both fighters are absolutely exhausted here.
We've had a slow start to the round here - hopefully the action picks up.
Munoz stalks Colton and leaps in with a furious combination of punches. Uppercuts and crosses smash into Colton's face. Colton staggers backwards, shaken.
Colton keeps the fight on the outside.
Colton is looking to take this fight into the clinch.
Munoz has managed to clinch.
That's one minute gone in the round.
Munoz landing knees to the head.
Munoz with the Thai clinch. He's looking to land a big knee but he's not managed it this time.
A knee to the head by Munoz.
Colton takes a knee right on the jaw!
A knee to the head by Munoz.
Munoz landing knees to the body. They look like they could hurt.
Munoz is pressed up against the ropes. Colton has hold of a leg and is looking to drag Munoz down to the mat. Munoz avoids the attempt though and has circled away. We're back to striking at a distance.
A head kick from Munoz lands but Colton takes it in his stride.
Munoz misses with a body shot. Nice footwork from Colton.
The fight stays on the outside here - Munoz looks like he's thinking about clinching though.
Colton shoots in but Munoz avoids the takedown attempt easily.
That's three failed takedown attempts in the round for Trent Colton. That's going to take a lot out of him.
Colton tries to close the distance and clinch up but Munoz swats him away and circles back towards the center.
Munoz instigates a clinch.
Munoz with the Thai clinch. He's looking to land a big knee but he's not managed it this time.
Munoz with a knee to the head.
Munoz tries a knee to the head but Colton blocks it.
Munoz landing some nice looking knees to the body.
Colton wants to push off and get back to the center of the mat but Munoz has him pressed against the ropes.
That's two minutes gone in the round.
The crowd are starting to boo a lack of action.
Colton takes an elbow to the forehead.
With the fighters clinched against the ropes, Munoz creates a bit of distance for himself and scores with a nice uppercut.
Munoz tries to land a knee to the head but misses.
Colton drops down looking for an ankle pick but Munoz pulls his leg out and moves away.
Colton throws a combination that misses
and Munoz counters by moving into the clinch. Good anticipation by Munoz.
Munoz lands an elbow inside that Colton shrugs off.
A knee to the head by Munoz.
Munoz connects with a knee to the head.
Colton wants a takedown.
Munoz connects with a nasty looking knee right to Colton's face.
Munoz unloads a knee to the mid-section. Colton lets out a prehistoric sounding urrrrgh.
Munoz using the Thai plumb to throw knees but Colton has his back arched nicely, preventing the strike.
Munoz tries to land a knee to the head but Colton blocks with his arms.
Colton wants to break free but Munoz has control.
Munoz tries to land a knee to the head but Colton blocks with his arms.
Colton is trying to break free.
Munoz with a knee to the head.
Munoz landing knees to the body.
Colton tries to pull guard but Munoz holds him up against the ropes and eventually Colton drops back down to his feet.
Colton wants to strike at distance but he can't break free of the clinch.
Munoz lands a nice elbow from the clinch.
Munoz landing some nice looking knees to the body.
That's three minutes gone in the round.
Colton avoids the elbow strike from Munoz, against the ropes.
Munoz blocks an uppercut.
Colton takes an elbow to the forehead.
Colton has a body lock and is looking for a takedown. Munoz is bouncing around trying to prevent the takedown and somehow he has indeed managed to stay on his feet.
Colton looking to stall.
Munoz misses with a knee strike.
A knee to the head by Munoz.
Munoz lands a nice uppercut.
Colton is trying to break the clinch but Munoz has him pressed against the ropes.
Munoz lands a right hand that snaps the head of Colton backwards.
Munoz with an attempt at a knee that misses.
Munoz landing knees to the head.
Colton manages to pull guard.
Colton is looking to stand up but Munoz isn't so interested in that idea.
Colton tries to land a sweep but no joy.
Colton is active off his back here, looking for submissions.
Colton is working an open guard so Munoz takes the opportunity to get back to his feet.
That's four minutes gone in the round.
A few boos can be heard. I'm sure they will multiply if the fighters don't pick up the pace.
Colton tries to close the distance and clinch up but Munoz swats him away and circles back towards the center.
Munoz moves into the clinch successfully.
A knee to the head by Munoz.
Munoz tries a knee to the head but Colton blocks it.
Colton tries to pull guard but Munoz holds him up against the ropes and eventually Colton drops back down to his feet.
Munoz connects with a knee to the head.
Munoz throws a knee to the head but misses.
Colton wants to break free. God knows he wants to breaaaak freeee.
Munoz lands a knee to the head.
Munoz tries a knee to the head but he's missed.
Munoz lands a knee to the body.
Knees to the body from Munoz.
Colton drops down for a takedown but doesn't get it.
Munoz prevents the takedown attempt.
The crowd thankful this round is nearly over.
Munoz throws a knee to the head but misses.
Munoz on the defensive, avoiding the knees to the body.
Colton using the Thai plumb to throw knees but Munoz has his back arched nicely, preventing the strike.
Munoz connects with a knee to the head.
And thats the end of the round the fighters go back to their corners.
Genaro Munoz showed his class in that round. I'd imagine he'll take it on all the scorecards.
The cut man is working on Trent Colton's cut.
The corners get their ten second warning. Both fighters stand from their stools and stare eachother down, ready to get back to the action. Let's hear some noise people - this is the final round!

Munoz looks to clinch
and Colton counters by moving into the clinch. Good anticipation by Colton.
Colton misses with an elbow over the top.
Colton tries to break the clinch but Munoz is controlling the position.
Munoz throws an elbow but it's blocked.
Munoz misses with a knee to the head.
Colton tries to pull guard but can't drag his opponent to the mat. Munoz just stands there and leans against the ropes.
Munoz lands an elbow that stopped Colton in his tracks for a moment.
Munoz tries a knee to the head but he's missed.
Munoz landing knees to the head.
Munoz misses with a knee strike.
Colton wants to push off and get back to the center of the mat but Munoz has him pressed against the ropes.
Colton wants to break free. God knows he wants to breaaaak freeee.
Colton fails to pull the fight into his guard.
Knees in the clinch landing for Munoz.
Munoz with an attempt at a knee that misses.
Colton breaks the clinch and we're back to striking at distance.
We've had a slow start to the round here - hopefully the action picks up.
Munoz looking to throw a kick but he's pulled out of it.
Munoz tries to close the distance and clinch up against the ropes but Colton paws at him with a jab and circles away.
Munoz tries to clinch up but Colton circles away and keeps his distance.
Colton closes the distance and looks for a trip takedown... aaaand he's got it - Colton lands in his opponent's guard.
Both fighters are breathing heavily.
Colton tries to free his leg and advance position but Munoz is retaining full guard.
That's one minute gone in the round.
Munoz wriggles free and stands up.
Colton misses with a two punch combination.
Munoz tries to close the distance and clinch up against the ropes but Colton paws at him with a jab and circles away.
Munoz fails in his attempt to clinch.
Munoz tries to close the distance and clinch up but Colton swats him away and circles back towards the center.
Munoz tries to clinch but is not successful on this occasion.
Some wild striking there from Colton.
Munoz drives through and clinches with Colton against the ropes.
Munoz misses with a knee strike.
Munoz tries a knee to the head but Colton blocks it.
Colton has had enough of the clinch but Munoz keeps him there for the moment.
Munoz prevents a takedown attempt there.
That's three failed takedown attempts in the round for Trent Colton. That's going to take a lot out of him.
Colton tries to pull guard but Munoz holds him up against the ropes and eventually Colton drops back down to his feet.
That's two minutes gone in the round.
Munoz misses with a knee strike.
Colton is trying to work out of this bad position, with his back against the ropes.
Munoz comes over the top with an elbow. That landed flush.
Munoz using the Thai plumb to throw knees but Colton has his back arched nicely, preventing the strike.
Munoz misses with a knee to the head.
Colton tries to jump guard but he falls flat on his backside. Munoz smiles and moves away.
Colton looks for a takedown but Munoz sprawls well.
Munoz avoids the head kick by Colton.
Munoz closes the distance looking to clinch
and Colton counters with a shoot takedown into half guard.
Munoz won't allow Colton to pass to mount.
Colton prevents Munoz from standing back up.
That's three minutes gone in the round.
Munoz is defending against the submission attempts here by Colton.
Colton prevents Munoz from standing back up.
Colton decides to stand up and try his luck on the feet.
Munoz doesn't manage to clinch there - Colton circles away.
Munoz tries to clinch up.
Munoz tries to close the distance and clinch up but Colton swats him away and circles back towards the center.
Colton keeps the fight on the outside.
Munoz wants to clinch.
Munoz moves in looking to clinch but Colton pushes him off.
That's four minutes gone in the round.
The crowd are showing their displeasure at the lack of action as loud boos ring out around the arena.
Munoz is looking to clinch.
Munoz scores with the left hand. Colton knows he should have avoided that one.
Genaro Munoz is looking to keep the fight on the feet at all costs.
The fight stays on the outside here - Munoz looks like he's thinking about clinching though.
Munoz is looking to clinch but Colton is avoiding it.
Munoz tries to clinch up.
Colton swats away the attempt to clinch by Munoz.
Colton tries to close the distance and clinch up against the ropes but Munoz paws at him with a jab and circles away.
Munoz tries to clinch there but Colton circles away.
Munoz fails in his attempt to clinch.
Trent Colton is looking to throw some combinations by the looks of things.
Colton tries a switch kick but it misses it's target.
Munoz fakes with an overhand right and moves in to clinch with Colton, pushing him back against the ropes.
Munoz with an attempt at a knee that misses.
Trent Colton has stepped it up - he knows he needs a finish here!
Munoz looking to throw knees to the head but Colton is blocking nicely.
Colton throws a vicious knee straight up the middle but Munoz blocks it with crossed arms.
And that's the end of the fight!
Trent Colton showed his dominance in that final round.
I think Munoz has won this one but let's see whether the judges agree with me. Over to the ring announcer for the scorecards.
Ladies and gentlemen, after 3 rounds of action, we go to the scorecards for a decision.
Judge Yasuomi Hirokawa scores the fight 28:29
Judge Shigeki Fujiwara scores the fight 28:29
Judge Taro Takaoka scores the fight 28:29
In favor of your winner, by unanimous decision... Genaro Munoz!
|
|
|
|
|
|
|
|
|
|
|
|
|
|
|
|
|
|
|
|
|
|
|
| S |
C
A |
G |
S |
C
B |
G |
|
S |
C |
G |
|
energy
A | B |
|
hype
A | B |
|
pop
A | B |
|
mgr
A | B |
|
FIGHT
RATING
49% |
|
|
|
|
|
|
|
Undercard bout
|
Coming up we have a welterweight MMA rules bout between Chips Salsa (ranked 0 p4p, 0 weight class) and Aoki King (ranked 0 p4p, 0 weight class). King has chosen I Believe I can Fly as his entrance music, which hasn't gone down very well with the crowd. There are an array of beautiful celebrities at ringside tonight! I wonder if any of them paid for their tickets.
 |
|
 |
| 185 cm
19
170 lbs
6 - 4 - 0 |
|
190 cm
19
174 lbs
5 - 4 - 0 |
BJJ Blue Belt
Brawler
Cuts easily |
|
BJJ Purple Belt
Brawler
Knockout power |
|
| |
|
Ladies and gentlemen. This fight is 3 rounds, in the welterweight division.
Introducing the fighter to my left, fighting out of the red corner.
With a record of
6 - 4 - 0, fighting out of Tokyo, Chips Salsa!
And introducing the fighter to my right, fighting out of the blue corner.
With a record of
5 - 4 - 0, fighting out of Tokyo, Aoki King!
The judges for this bout are Tatsuya Matsuyama, Shirou Masuda and Taro Takaoka.
The bell rings for round one and we are underway!
Salsa fails miserably with a takedown attempt.
Excellent takedown into side control there by Salsa.
Salsa tries to get to his feet but King is in the middle of advancing position himself and ends up with Salsa in his guard.
The fighters are trapped in the ropes so we're going to have a reposition here. The ref calls for a break and repositions the fighters in the center of the ring.
King striking off his back but it's not causing Salsa any problems.
King can't do much from the bottom at the moment, as Salsa controls the pace.
Salsa has gone for a leg lock! King slips out almost immediately though and dives into Salsa's guard.
King tries to free his leg and advance position but Salsa is retaining full guard.
Salsa escapes his hips to the side and looks to be working for an armbar. King gives him a little smile and shakes his head. No chance.
That's one minute gone in the round.
Salsa is striking but King is not phased and passes to half guard.
King content to sit in half guard and control for a moment.
King is looking to take a break and control but Salsa is keeping him honest, looking to work from the bottom.
King might have to switch it up a bit here because his efforts to control Salsa kaven't been going to plan, at least at the current moment in time.
King seems to be working for a kimura but Salsa defends the submission attempt.
That's two minutes gone in the round.
Well. There's a bit of a lull in the action here and the crowd are starting to get restless.
King is thwarting Salsa's attempts to control the position.
King controlling the action here.
King thows a huge punch but Salsa dodges it nicely.
King controlling the pace.
That's three minutes gone in the round.
Salsa holds on for dear life, maintaining half guard for now.
Salsa is trying to control but can't.
King passes to side control.
Salsa is looking for a sweep.
King throws a strike aimed at the side of Salsa's head but Salsa avoids it well.
King looks gassed!
Salsa is not content to let King control the position.
That's four minutes gone in the round.
The crowd are hurling abuse towards the fighters... You can hardly blame them though because there isn't a lot going on in the fight.
You can see the frustration on Salsa's face, being in this tough position on the bottom.
Salsa manages to land a sweep and he's now on top! Lovely Jiu Jitsu!
Salsa is looking for a kimura here.
The crowd thankful this round is nearly over.
Salsa is working for a kimura but King is defending it quite comfortably.
And thats the end of the round the fighters go back to their corners.
A close round but Aoki King will probably get the nod.
That's time! Salsa's corner gives him a slap on the ass as he gets ready to fight.
Salsa gets taken down but at least he's managed to land in guard.
Salsa lands a beautiful switch and he's in full mount! That could spell trouble for King!
King is looking to get to half guard.
King is breathing heavily.
Salsa throws an elbow from mount that misses. Lucky escape for King because Salsa loaded up on that one.
That's one minute gone in the round.
Salsa tries to control but King wriggling away.
Salsa throwing sloppy strikes here. Perhaps if he tightened up his striking from such a dominant position, he'd be able to finish easier.
Salsa can't quite control the action as he would like just now, as King is looking to escape.
Salsa controlling the pace for now.
Salsa looking to ground and pound his opponent to a finish here.
That's two minutes gone in the round.
The crowd are starting to boo a lack of action.
King tries to reverse the position but Salsa maintains control.
Salsa throws an elbow from mount that misses. Lucky escape for King because Salsa loaded up on that one.
King defends a decent attempt at a guillotine from Salsa.
Salsa sitting in mount, just looking to control for the moment.
King wants to control but Salsa is having none of it.
That's three minutes gone in the round.
King really trying hard to get back to half guard here.
King takes a big shot to the head but keeps on trying to improve his position.
King can't escape the position.
Salsa sitting in mount, just looking to control for the moment.
Salsa is still in mount, landing shots to his trapped opponent. King can't stay in a position like this for much longer.
That's four minutes gone in the round.
The crowd are getting on the fighters' backs, as the pace has dropped off in the last minute or so.
Salsa throws some wild stikes that King manages to avoid easily.
King is trying to reverse the position but instead Salsa has taken his back - oops!
Salsa is looking to control King but King is wriggling around and keeping busy.
Salsa has the hooks in. King is trying to push off one leg but he has to do so cautiously to avoid being submitted.
Salsa looking for the choke but no joy.
Salsa keeps control of the position as King tries to break free.
And thats the end of the round the fighters go back to their corners.
Chips Salsa dominated that second round.
The corners get their ten second warning. Both fighters stand from their stools and stare eachother down, ready to get back to the action. This is the final round!
Salsa scores with a three punch combo!
King drives through with a really nice takedown into side control.
Salsa is looking to regain half guard here but King keeps moving and retains side control.
King works a knee to the body and follows up with a nice elbow to the head.
King trying to control the action but Salsa is working from the bottom.
Salsa wants to control but King postures up.
Both fighters are breathing heavily.
That's one minute gone in the round.
Salsa is trying to get back to half guard.
King creates some space and throws a big elbow, but Salsa sees it coming and moves his head just enough to avoid the strike.
You can see the frustration on Salsa's face, being in this tough position on the bottom.

It looks like we're going to have a standup here. Neither fight is doing enough on the ground.
Salsa displaying good standup as he scores with a three punch combination.
Salsa ducks down and throws a hook to the body.
Salsa scores with a takedown into King's guard.
There's a bit of a scramble here and now King is on top in guard.
That's two minutes gone in the round.
Salsa trying to control the position.
King sneaks a leg through and gets to half guard. That was like a knife through butter how easily he passed Salsa's guard.
King wants to take a breather but Salsa is having none of it.
King is pressing down on Salsa's thigh, looking to free his foot. Salsa is holding on for now.
That's three minutes gone in the round.
King is persisting with the attempt to improve his position.
The fighters are tangled up in the ropes here. We might need a restart if the fighters can't break free themselves.
King wants to lay and pray for a moment but Salsa keeps working.
Salsa is looking for a sweep. King is wise to his cunning plan and keeps the top position.
Neither fighter is doing enough for the referee's liking and he's decided to stand them back up.
Salsa lets the fists fly and connects with a left straight followed by a right hook.
Salsa moves into range and clinches up with King.
King tries to jump guard but he falls flat on his backside. Salsa smiles and moves away.
Salsa shoots in for a takedown and gets it. Let's see what he's got on the mat.
That's four minutes gone in the round.
King trying to control the position.
Salsa works a leg free and moves into half guard.
Salsa decides he's had enough of the ground and stands up.
King swats away the attempt to clinch by Salsa.
King misses with a takedown attempt
and Salsa counters with a nice body kick.
Salsa clinches with his opponent.
Salsa digs a right hand into King's ribs. Those have got to be taking their toll on King's gas tank.
Salsa manages to pull guard. Let's see whether he can land a sub off his back.
Salsa keeping moving, preventing King from controlling successfully.
And that's the end of the fight!
Chips Salsa showed his dominance in that final round.
Well Salsa has outscored his opponent in every aspect of the fight today. Only a scarily incompetent judge or two will keep him from a well deserved win... Over to the ring announcer for the scorecards.
Ladies and gentlemen, after 3 rounds of action, we go to the scorecards for a decision.
Judge Tatsuya Matsuyama scores the fight 30:27
Judge Shirou Masuda scores the fight 30:28
Judge Taro Takaoka scores the fight 29:28
In favor of your winner, by unanimous decision... Chips Salsa!
|
|
|
|
|
|
|
|
|
|
|
|
|
|
|
|
|
|
|
|
|
|
|
| S |
C
A |
G |
S |
C
B |
G |
|
S |
C |
G |
|
energy
A | B |
|
hype
A | B |
|
pop
A | B |
|
mgr
A | B |
|
FIGHT
RATING
28% |
|
|
|
|
|
|
|
Undercard bout
|
Coming up we have a middleweight MMA rules bout between Tyson Rios (ranked 0 p4p, 0 weight class) and Yoshida Satoru (ranked 0 p4p, 0 weight class). Rios kept the crowd waiting but all that was forgotten when his ring entrance music started. The incomparable musical genuis that is Their Law . Yoshida Satoru has the power to score a knockout today if he connects clean with Tyson Rios's chin.
 |
|
 |
| 175 cm
22
195 lbs
6 - 3 - 0 |
|
180 cm
20
185 lbs
3 - 0 - 0 |
BJJ Blue Belt
Basic striking
Experienced |
|
BJJ Purple Belt
Basic striking
Determined |
|
| |
|
Ladies and gentlemen. This fight is 3 rounds, in the middleweight division.
Introducing the fighter to my left, fighting out of the red corner.
With a record of
6 - 3 - 0, fighting out of Tokyo, Tyson Rios!
And introducing the fighter to my right, fighting out of the blue corner.
With a record of
3 - 0 - 0, fighting out of Tokyo, Yoshida Satoru!
The judges for this bout are Yukihiro Shimada, Shirou Masuda and Yukihiro Yamamoto.
The bell rings for round one and we are underway!
Satoru checks a leg kick.
Satoru dodges the punch combination from Rios.
Rios throws a series of punches but Satoru moves out of range.
Satoru ducks under a wild hook from Rios.
Rios fakes the leg kick and cracks Satoru in the body.
Nice takedown defense from Rios. No joy for Satoru on that attempt.
Satoru throws a looping left and ducks down for a takedown. He's got his arms around Rios's waist but Rios gets an underhook and avoids the takedown by throwing Satoru off to one side.
Rios scores with a big left there. The judges will like that one.
Satoru shoots in but Rios avoids the takedown attempt easily.
Tyson Rios has stuffed three takedown attempts in the round now. That's going to take a lot out of Yoshida Satoru.
Rios looking for a takedown here - he's got it.
Rios could do with loosing a few pounds - he looks very soft around the mid section, to put it politely.
Satoru not looking particularly offensive just at the moment.
The fighters are trapped in the ropes so we're going to have a reposition here. The ref calls for a break and repositions the fighters in the center of the ring.
Satoru working for a triangle but Rios defends it easily.
Satoru looking for a sweep. Not yet Satoru, not yet.
That's one minute gone in the round.
Satoru looking for a guillotine here but Rios defends easily.
Rios wants to stand but Satoru has a closed guard, so he can't escape.
Rios postures up in Satoru's guard and throws a big left but Satoru blocks it.
Rios would like to get this fight back to the feet but can't get free from the closed guard.
Rios is trying to tuck his arms in to keep them safe but Satoru has managed to isolate one of them and has got a loose triangle. Rios is looking to defend but Satoru has done well to lock his legs together - this could be big trouble for Rios! Satoru pulls down on the head and a little smile comes across his face - he knows he's got it. Yep, Rios taps out and this one is all over!
Ladies and gentlemen, after 2:03 of round 1, we have a winner by way of Submission (Triangle). Yoshida Satoru!
|
|
|
|
|
|
|
|
|
|
|
|
|
|
|
|
|
|
|
|
|
|
|
| S |
C
A |
G |
S |
C
B |
G |
|
S |
C |
G |
|
energy
A | B |
|
hype
A | B |
|
pop
A | B |
|
mgr
A | B |
|
FIGHT
RATING
44% |
|
|
|
|
|
|
|
Undercard bout
|
Coming up we have a middleweight MMA rules bout between Hitsomiru Tamaka (ranked 0 p4p, 0 weight class) and Osuka Kasumia (ranked 0 p4p, 0 weight class). Osuka Kasumia told me before the fight that he's been watching a lot of DVDs so let's see if that helps him in this one! I can't wait to find out!
 |
|
 |
| 195 cm
23
199 lbs
2 - 1 - 0 |
|
185 cm
23
185 lbs
4 - 3 - 0 |
BJJ Purple Belt
Excellent MT
Good chin |
|
BJJ Blue Belt
Brawler
Granite chin |
|
| |
|
Ladies and gentlemen. This fight is 3 rounds, in the middleweight division.
Introducing the fighter to my left, fighting out of the red corner.
With a record of
2 - 1 - 0, fighting out of Tokyo, Hitsomiru Tamaka!
And introducing the fighter to my right, fighting out of the blue corner.
With a record of
4 - 3 - 0, fighting out of Tokyo, Osuka Kasumia!
The judges for this bout are Taro Takaoka, Shigeki Fujiwara and Ren Mimura.
The bell rings for round one and we are underway!
Kasumia throws out a token jab with nothing on it.
Kasumia throws a head kick but Tamaka moves out of range.
Kasumia wants to clinch up but Tamaka keeps it at a distance.
Kasumia moves out of range of the body kick from Tamaka.
Tamaka explodes with a nice body kick and back out of range. Nice work.
Kasumia walks forward, straight into a front kick from Tamaka.
Kasumia looks gassed!
Tamaka with a nice cross.
Tamaka moves into range and lands a nice body kick.
The crowd cheering loudly, showing their appreciation for the quality fight we're seeing here.
Ouch! a nice leg kick from Tamaka, right into the meat.
Kasumia tries to check the leg kick but that clearly hurt him.
A nice inside leg kick there by Tamaka. That's going to slow Kasumia down.
Tamaka changes levels and scores with a jab to the body.
That's a knee to de groin and it's over and out! Kasumia crumples to the ground after an illegal strike from Tamaka - the referee stops the clock and Kasumia gets 5 minutes to recover from that one. "I'm sorry" says Tamaka. Kasumia manages to get back to his feet and the fight resumes.
Kasumia on the wrong end of a kick to the body.
Tamaka connects with a solid leg kick.
Tamaka scores with a push kick.
Tamaka lands a head kick. Kasumia smiles back at him and beckons him forward.
Tamaka lands a jab to Kasumia's midsection.
Tamaka buckles his opponent's knee momentarily with a nice leg kick.
That's one minute gone in the round.
Tamaka lands a nice looking body shot.
Tamaka lands with a straight right. Kasumia didn't see that one coming.
Tamaka throws a right high kick that is partially blocked by Kasumia.
Kasumia stumbles momentarily as he takes a strong leg kick from Tamaka.
A thudding body kick lands there by Tamaka!
Like a baseball bat into the meat of his leg there - nice leg kick by Tamaka.
Kasumia throws a jab when Tamaka was well out of range.
Kasumia throws a leg kick that is checked
and Tamaka counters with a leg kick that reverborates around the arena.
Tamaka cracks a nice hook into Kasumia's ribs.
Tamaka scores with the left hand. Kasumia knows he should have avoided that one.
Ooooh, nice body kick lands from Tamaka. Kasumia shrugs it off though.
Tamaka throws a body kick that sends a sickening thudding noise reverberating around the arena.
The crowd cheering loudly, showing their appreciation for the quality fight we're seeing here.
Tamaka keeps Kasumia at a distance using the push kick.
Tamaka connects with a leg kick. He turned his hip over nicely there.
Osuka Kasumia seems to be the more aggressive standup fighter in this bout.
Tamaka closes the distance and clinches.
Kasumia has developed a nice purple lump on his ribcage, as a result of some heavy body kicks from Tamaka.
That's two minutes gone in the round.
Tamaka unloads a knee to the mid-section. Kasumia lets out a prehistoric sounding urrrrgh.
Kasumia's leg has a nasty welt from taking a succession of leg kicks. That must be slowing him down.
Tamaka scores a nice knee to the body.
Tamaka landing knees to the body. They look like they could hurt.
Tamaka unloads a knee to the mid-section. Kasumia lets out a prehistoric sounding urrrrgh.
Tamaka landing knees to the body.
Tamaka lands a nice knee to the body.
Tamaka using the Thai clinch to land knees to the body.
Knees in the clinch landing for Tamaka.
Tamaka throws an elbow but it's blocked.
Kasumia is looking to break free of the clinch but Tamaka has double underhooks.
Kasumia managing to block the knees to the body from Tamaka.
Tamaka lands a damaging elbow.
Kasumia drops to a knee looking for a takedown but Tamaka gets the underhooks and prevents it.
Tamaka landing knees to the head.
Kasumia has had enough of the clinch but Tamaka keeps him there for the moment.
Kasumia wants to break the clinch but can't.
Tamaka landing some nice looking knees to the body.
Tamaka lands a knee to the body.
Tamaka breaks the clinch and we're back to striking at distance.
That's three minutes gone in the round.
Tamaka uses good footwork to avoid the strikes from Kasumia.
Tamaka lands with a straight right. Kasumia didn't see that one coming.
Kasumia fails to land with the punch combination there - jab, cross, hook, miss, miss, miss.
Kasumia takes a body punch but keeps moving.
Kasumia on the receiving end of a decent leg kick there by Tamaka. Tamaka obviously looking to wear him down.
Tamaka lands a high kick!
Kasumia looks to throw a body kick
and Tamaka counters with a good, hard body kick but Kasumia shrugs it off.
Kasumia with a jab.
Kasumia walks forward, straight into a front kick from Tamaka.
Kasumia fails in his attempt to clinch.
A kick lands to the mid section there for Tamaka.
Some wild striking there from Kasumia.
Hitsomiru Tamaka is looking to keep the fight on the feet at all costs.
Nice sprawl there from Tamaka as Kasumia shoots in.
That's four minutes gone in the round.
The crowd are starting to boo a lack of action.
Tamaka explodes with a nice body kick and back out of range. Nice work.
Tamaka scoring well with a low kick there.
Tamaka throws a nice outside leg kick.
Kasumia gets off balance looking for a body kick
and Tamaka counters with a nice leg kick.
Tamaka scores with a one two! Kasumia had his feet all tangled up there and couldn't avoid the strikes.
Tamaka displaying good standup as he scores with a three punch combination.
Kasumia misses with a double jab.
Kasumia sees a low kick coming and goes to check it, but it's actually a body kick and it thuds into his unprotected ribs.
Tamaka throws a jab, cross combination which is slipped
and Kasumia counters with a nice double leg into guard.
Tamaka uses the ropes to get back to his feet.
Kasumia throws a jab, cross combination which is slipped
and Tamaka counters with a lovely straight right hand!
The crowd are going absolutely nuts as the round comes to an end - what a fantastic round of action!
Kasumia looks to clinch
and Tamaka counters with a head kick. That will keep Kasumia thinking before he tries any more sloppy attacks!
Tamaka clinches with his opponent.
Tamaka looking to throw knees to the head but Kasumia is blocking nicely.
Kasumia wants to push off and get back to the center of the mat but Tamaka has him pressed against the ropes.
And thats the end of the round the fighters go back to their corners.
Hitsomiru Tamaka dominated that round.
The minute break is over - no more time for sponges and pep talks - back to the action!
Nice body kick there by Tamaka.
Kasumia throws a solid leg kick but Tamaka takes the impact on his shin and smiles at Kasumia.
Kasumia throws a combination that misses
and Tamaka counters nicely by changing levels and landing a hook to the body.
Tamaka instigates a clinch.
Tamaka tries a knee to the head but he's missed.
Tamaka breaks the clinch.
Like a baseball bat into the meat of his leg there - nice leg kick by Tamaka.
Tamaka is looking to wear down Kasumia with body shots, infact he's throwing more body shots than head shots at the moment.
Tamaka's corner calls for a 1-2. Tamaka obliges with the 1 part as he scores the single shot and moves back out of range.
Kasumia will have to do better than that with his takedown attempts.
Tamaka scores with a reasonable looking shot to the body. Kasumia doesn't seem bothered though.
A left and a right from Tamaka both land. Nice combination.
Tamaka throws a wild body kick that Kasumia sees coming a mile off.
Kasumia throws a combination that misses
and Tamaka counters with a two punch combo.
Both fighters are absolutely exhausted here.
Kasumia throws a left and a right that both miss
and Tamaka counters with a shot to the ribs. That looked like it hurt.
Tamaka with a nice looking leg kick. You could hear that one land in a back row.
Hitsomiru Tamaka is winning the standup battle so far.
Tamaka avoids the head kick by Kasumia.
That's one minute gone in the round.
Tamaka lands a high kick!
Kasumia steps to his left, right into the path of a big body kick from Tamaka. That one must have hurt.
A low kick from Kasumia misses
and Tamaka counters with a crisp hook to the side of the head.
Kasumia misses the jab.
Tamaka lands a nice leg kick that just misses Kasumia's sensitive parts.
Kasumia shoots in but Tamaka avoids the takedown attempt easily.
Tamaka scores with a punch to the gut of his opponent.
Kasumia on the wrong end of a kick to the body.
Kasumia misses with a jab and misses with a cross straight after too.
Kasumia sees a low kick coming and goes to check it, but it's actually a body kick and it thuds into his unprotected ribs.
Nice body punch from Tamaka.
Like a baseball bat into the meat of his leg there - nice leg kick by Tamaka.
Kasumia finds nothing but air with that leg kick attempt.
That's two minutes gone in the round.
Tamaka lands a nice looking body shot.
Tamaka misses with a series of wild punches.
Kasumia throws a jab but it's blocked by Tamaka.
Tamaka connects with a leg kick. He turned his hip over nicely there.
Tamaka misses with a head kick.
Kasumia misses with a double jab
and Tamaka counters with an outside leg kick.
Tamaka misses with the body kick
and Kasumia connects with a straight left hand counter down the middle.
An inside leg kick lands from Tamaka.
Tamaka lands a high kick!
Kasumia fails with an attempt to clinch.
Tamaka wants to slow Kasumia down by chopping away at his legs.
Tamaka throws a hook to the body but it doesn't connect.
That's three minutes gone in the round.
Tamaka uses decent footwork to sidestep a right hand from Kasumia.
A head kick by Kasumia misses
and Tamaka counters with a big head kick but Kasumia shrugs it off.
Kasumia throws a lazy head kick
and Tamaka counters with a stiff right hand.
Nice body kick there by Tamaka.
Tamaka throws a jab to the body, straight down the pipe. Boom. That sent Kasumia stumbling backwards but he manages to regain his composure quickly.
Kasumia closes the distance looking to clinch
and Tamaka connects with a straight left hand counter down the middle.
Kasumia tries to clinch but Tamaka is having none of it.
Tamaka scores with a leg kick.
Tamaka lands a powerful looking uppercut that connected with his opponent's jaw.
Tamaka thuds his shin into the meat of Kasumia's side.
Tamaka is really dominating this fight. Is there anything that Kasumia can do to turn this around?
Tamaka with a nice looking leg kick. You could hear that one land in a back row.
Tamaka throws a nice inside leg kick.
Kasumia shoots in and drives through. Tamaka sprawls well.
Hitsomiru Tamaka has stuffed three takedown attempts in the round now. That's going to take a lot out of Osuka Kasumia.
That's four minutes gone in the round.
Tamaka misses with the combination.
Tamaka lands with a head kick! That's gotta hurt.
Tamaka throws a leg kick but Kasumia checks it.
Kasumia lands a head kick!
Tamaka looking to take his opponent's legs away with the low kicks.
Kasumia misses with a combination
and Tamaka makes the exchange count by landing a cracking kick to the body. Kasumia really felt that one!
Tamaka connects with a high kick.
Tamaka slips a straight right by Kasumia.
Tamaka lands a kick to the ribs of his opponent. Nice work there - in and out in a flash.
A head kick by Kasumia misses
and Tamaka counters with a nice leg kick.
Kasumia takes a nice looking leg kick right on the meat of his thigh there.
And thats the end of the round the fighters go back to their corners.
Hitsomiru Tamaka dominated that second round.
That's time! Back to the action! This is the final round!
Kasumia closes the distance but Tamaka moves to the side
and Tamaka counters with a slapping leg kick.
Tamaka scores with a slapping inside leg kick.
Kasumia misses with a few strikes there.
Tamaka instigates a clinch.
Tamaka crunches a lovely knee into Kasumia's ribcage.
Tamaka using the Thai plumb to throw knees but Kasumia has his back arched nicely, preventing the strike.
Kasumia goes for a takedown in the clinch but Tamaka prevents it.
Tamaka lands a nice knee to the body.
Tamaka breaks the clinch and we return to the middle of the mat.
Tamaka throws a nice inside leg kick.
Tamaka stuffs the takedown attempt from Kasumia. Kasumia gets slowly back to his feet.
Tamaka moves into the clinch successfully.
Both fighters are breathing heavily.
Tamaka lands a knee to the body.
Tamaka landing some nice looking knees to the body.
Kasumia wants to break free but Tamaka has control.
That's one minute gone in the round.
Tamaka unloads a knee to the mid-section. Kasumia lets out a prehistoric sounding urrrrgh.
Kasumia wants to break free. God knows he wants to breaaaak freeee.
Tamaka lands a knee to the body.
Kasumia wants to break the clinch but can't.
Tamaka using the Thai clinch to land knees to the body.
Tamaka lands a knee to the body.
Kasumia wants to push off and get back to the center of the mat but Tamaka has him pressed against the ropes.
Tamaka trying to land knees to the body.
Tamaka missing with knees to the body.
Kasumia breaks the clinch and we're back to striking at distance.
Kasumia throws a hook but Tamaka avoids it easily.
Kasumia throws a leg kick
and Tamaka counters with a left and a right that stings Kasumia.
Tamaka throws a head kick that looked like it stung.
Tamaka tries to land a body kick
and Kasumia counters with a nice shoot takedown that brings the fighters to the ground.
Kasumia stands up and looks to throw the legs aside to pass to side control. Tamaka swivels though and keeps the full guard.
Tamaka has his hands on Kasumia's head, controlling the position.
That's two minutes gone in the round.
Tamaka scrambles and gets back to his feet.
Tamaka tries to close the distance and clinch up but Kasumia swats him away and circles back towards the center.
Kasumia throws a combination that misses
and Tamaka counters with a nice body kick.
Tamaka connects with a high kick.
Kasumia chopped to the floor by a nice leg kick but he springs right back up before Tamaka can pounce on him.
Kasumia closes the distance looking to clinch
and Tamaka counters with a nice leg kick.
Kasumia attempts a leg kick but it's missed by a good margin.
Tamaka looking to take his opponent's legs away with the low kicks.
Tamaka lands with a kick to the temple. Kasumia shrugs as if to say "is that all you've got?"
That's three minutes gone in the round.
Tamaka connects with a high kick.
Kasumia throws a hook but Tamaka avoids it easily.
Kasumia throws a sloppy head kick
and Tamaka counters with a nice body kick.
Tamaka cracks the inside of Kasumia's front leg.
Kasumia misses with a body shot
and Tamaka counters with a kick to the head that grazes his opponent. Kasumia is lucky that one didn't land flush.
Kasumia tries to close the distance and clinch up but Tamaka swats him away and circles back towards the center.
A shot to de liver by Tamaka. Beautiful body shot.
Tamaka thows a left - swing and a miss!
Kasumia tries to clinch up but Tamaka circles away and keeps his distance.
A nice inside leg kick there by Kasumia. That's going to slow Tamaka down.
Kasumia on the wrong end of a kick to the body.
Tamaka checks a low kick from Kasumia.
Tamaka chopping away at his opponent's legs.
Tamaka lands with a slapping head kick.
That's four minutes gone in the round.
Tamaka circles away from the clinch attempt.
Kasumia throws a right hand that Tamaka ducks under and follows up with a left that Tamaka also avoids with ease.
Tamaka scores with a jab. Kasumia acknowledges it with a nod of the head.
A head kick from Tamaka lands but Kasumia takes it in his stride.
Nice takedown defense from Tamaka. No joy for Kasumia on that attempt.
Hitsomiru Tamaka has stuffed three takedown attempts in the round now. That's going to take a lot out of Osuka Kasumia.
Tamaka avoids the clinch attempt nicely.
Tamaka stuffs the takedown.
Tamaka connects with a crisp jab.
Tamaka throws a head kick that Kasumia semi-blocks.
Kasumia misses with a hook to the body
and Tamaka makes him pay by landing a thudding low kick.
Tamaka defending well as Kasumia loads up on a big left hand.
Osuka Kasumia has stepped it up - he knows he needs a finish here!
Kasumia missing with a left hand there. Tamaka was out of range so wasted energy throwing that one.
Tamaka connects with a high kick.
Kasumia wants to clinch up but Tamaka keeps it at a distance.
And that's the end of the fight!
Hitsomiru Tamaka showed his dominance in that final round.
Well I reckon that's a shut out for Tamaka, winning every round. Will the judges agree? They are the ones who matter, even if they are often depressingly incompetent. Over to the ring announcer for the scorecards.
Ladies and gentlemen, after 3 rounds of action, we go to the scorecards for a decision.
Judge Taro Takaoka scores the fight 30:27
Judge Shigeki Fujiwara scores the fight 30:27
Judge Ren Mimura scores the fight 30:27
In favor of your winner, by unanimous decision... Hitsomiru Tamaka!
|
|
|
|
|
|
|
|
|
|
|
|
|
|
|
|
|
|
|
|
|
|
|
| S |
C
A |
G |
S |
C
B |
G |
|
S |
C |
G |
|
energy
A | B |
|
hype
A | B |
|
pop
A | B |
|
mgr
A | B |
|
FIGHT
RATING
83% |
|
|
|
|
|
|
|
Undercard bout
|
Coming up we have a welterweight MMA rules bout between Troll Skog (ranked 0 p4p, 0 weight class) and Risto Ryhti (ranked 0 p4p, 0 weight class). Troll Skog had a look across the ring there at his opponent. He definitely means business
 |
|
 |
| 185 cm
22
178 lbs
4 - 2 - 0 |
|
175 cm
23
179 lbs
5 - 2 - 0 |
BJJ Purple Belt
Basic striking
Big heart |
|
BJJ Blue Belt
Brawler
Solid chin |
|
| |
|
Ladies and gentlemen. This fight is 3 rounds, in the welterweight division.
Introducing the fighter to my left, fighting out of the red corner.
With a record of
4 - 2 - 0, fighting out of Tokyo, Troll Skog!
And introducing the fighter to my right, fighting out of the blue corner.
With a record of
5 - 2 - 0, fighting out of Tokyo, Risto Ryhti!
The judges for this bout are Taro Takaoka, Shigeki Sano and Ren Mimura.
The bell rings for round one and we are underway!
A head kick from Skog lands but Ryhti takes it in his stride.
Skog has closed the distance and engaged Ryhti in a clinch.
Ryhti content to slow the pace in the clinch.
Skog is trying to work for a single leg takedown but Ryhti pulls him back up using the underhooks.
Skog trying to stall but Ryhti improves his position.
Skog changes levels and goes for a takedown here. Ryhti fights it off and pushes away nicely.
Ryhti closes the distance but Skog moves to the side
and Skog counters with a head kick.
Ryhti has managed to clinch.
Skog trying to land knees to the body.
Ryhti digs a right hand into Skog's ribs. Those have got to be taking their toll on Skog's gas tank.
Skog tries for a takedown but Ryhti manages to get underhooks.
That's three failed takedown attempts in the round for Troll Skog. That's going to take a lot out of him.
Skog tries to take the fight to the ground by pulling guard but can't manage it.
Skog tries to pull guard but can't drag his opponent to the mat. Ryhti just stands there and leans against the ropes.
An uppercut to the body lands inside from Ryhti.
Skog drops down for a takedown but doesn't get it.
Ryhti scores with an uppercut up the middle.
Skog jumps guard and drags Ryhti to the mat. He's obviously going to be looking for submissions off his back.
Ryhti tries to stand but Skog is controlling from the bottom.
Skog is working an open guard here, looking to improve his position. No doubt that will leave him open to counters but at least he's being more offensive.
That's one minute gone in the round.
Ryhti trying to stand up but can't free himself from Skog's guard.
Ryhti gets to his feet. Skog looking to butt scoot but the ref puts an end to that. On your feet son!
Ryhti tries to clinch
and Skog counters with a kick to the head that grazes his opponent. Ryhti is lucky that one didn't land flush.
Skog circles away from the clinch attempt
letting Skog counter with a right hand.
Ryhti ducks under a wild hook from Skog.
Ryhti moves into range and clinches up with Skog.
Ryhti avoiding damage.
The pace slowing considerably in the clinch, as Skog takes a break from that fighting nonsense to think about the finer things in life.
Skog wants to push off and get back to the center of the mat but Ryhti has him pressed against the ropes.
Skog stalls.
That's two minutes gone in the round.
Skog is looking for a takedown up against the ropes. Ryhti gets underhooks though and prevents the takedown attempt.
Skog is breathing heavily.
Ryhti escapes the clinch and we're back to striking.
Ryhti gets in close and instigates a clinch.
Ryhti breaks the clinch and we return to the middle of the mat.
Skog looks to land a right hand but Ryhti moved out of range.
Ryhti drives through with a really nice takedown into side control.
Ryhti decides to stand back up. Ryhti steps back and let's Skog get back to his feet.
Ryhti fails to land with the punch combination there - jab, cross, hook, miss, miss, miss.
Ryhti slips a jab and a cross from Skog.
Skog misses with a combination
and Ryhti counters with a three punch combo that has Skog backing up. Skog nods at Ryhti to acknowledge the strikes.
Fantastic stuff here - a very entertaining period of action, which has drawn cheers from the crowd.
Ryhti tries to close the distance and clinch up but Skog swats him away and circles back towards the center.
Ryhti moves in looking to clinch but Skog pushes him off.
Ryhti tries to grapple but his opponent circles
and Skog counters by clinching up.
That's three minutes gone in the round.
Ryhti is leaning against Skog and scores with a nice uppercut to the body.
Ryhti breaks the clinch and we return to the middle of the mat.
Ryhti clinches.
Ryhti digs a right hand underneath Skog's ribcage. Skog let out a lung full of air as it connected.
Both guys are working to get underhooks.
Skog tries to pull guard but Ryhti won't allow it.
Ryhti looking to stall.
Skog using the Thai plumb to throw knees but Ryhti has his back arched nicely, preventing the strike.
Ryhti is trying to stall.
Ryhti escapes the clinch and we're back to striking.
Ryhti misses with a double jab
and Skog counters into the clinch. Nicely done.
Ryhti cracks Skog with a nice body shot.
The pace slowing considerably in the clinch, as Ryhti takes a break from that fighting nonsense to think about the finer things in life.
That's four minutes gone in the round.
Ryhti trying to stall but Skog improves his position.
The ref breaks the fighters up, due to lack of action by Risto Ryhti.
Skog circles away from the clinch attempt.
Risto Ryhti seems to be the more aggressive standup fighter in this bout.
Ryhti tries to clinch but is not successful on this occasion.
The fight stays on the outside here - Ryhti looks like he's thinking about clinching though.
A nice combination there by Skog.
Ryhti digs a good body shot into Skog's ribs.
Ryhti closes the distance but Skog moves to the side
and Skog holds on and brings the fighters into a clinch.
Ryhti breaks the clinch and we return to the middle of the mat.
The crowd applaud the fighters efforts here as the round comes to an end.
Skog gets caught flat footed, as Ryhti shoots in with a quick takedown into guard.
Skog wants to sweep here but Ryhti controlling him for the moment.
Ryhti stands up from guard. Let's bang!
And thats the end of the round the fighters go back to their corners.
Risto Ryhti dominated that round.
The corners get their ten second warning. Both fighters stand from their stools and stare eachother down, ready to get back to the action.
Skog with a poor takedown
and Ryhti counters with a takedown into side control.
Ryhti decides to stand up, so the ref orders Skog to his feet.
Ryhti tries to clinch
and Skog counters by moving into the clinch.
Skog is working for takedown but Ryhti is calmly controlling the position for now.
Ryhti lands with a right to the head.
Ryhti avoiding damage.
Ryhti lands a body shot.
Skog tries for a takedown. No joy.
That's three failed takedown attempts in the round for Troll Skog. That's going to take a lot out of him.
Come on Ryhti - let's have some action - none of this stalling nonsense.
Both guys are working to get underhooks.
Both fighters are absolutely exhausted here.
Skog drops down for a takedown but doesn't get it.
The fighters are starting to perspire pretty heavily.
Skog tries to jump guard but he falls flat on his backside. Ryhti smiles and moves away.
Ryhti has Skog up against the ropes in a clinch.
That's one minute gone in the round.
Ryhti is pressed up against the ropes. Skog has hold of a leg and is looking to drag Ryhti down to the mat. Ryhti avoids the attempt though and has circled away. We're back to striking at a distance.
Ryhti moves into range and clinches up with Skog.
Stalling in the clinch from Ryhti.
Ryhti is trying to slow down the pace of the fight but Skog is keeping busy.
Ryhti stalling the fight.
The ref breaks the fighters up, due to lack of action by Risto Ryhti.
Ryhti darts in trying to clinch
and Skog counters into the clinch. Nicely done.
Both guys are working to get underhooks.
Ryhti trying to stall but Skog improves his position.
Ryhti leaning against his opponent.
Skog throws a nice elbow but it doesn't land.
The is referee keeping an eye on Ryhti - much more stalling and he will separate the fighters.
Skog misses with some punches.
Skog missing with knees to the body.
That's two minutes gone in the round.
Ryhti lands an uppercut.
The fighters are pressed against the ropes, as the pace of the fight slows.
The crowd are getting on Ryhti's back here. They're not happy about his lack of aggression in the clinch.
Skog tries to land a knee to the head but Ryhti blocks with his arms.
Ryhti breaks the clinch and we return to the middle of the mat.
Ryhti scores with a hook.
A slow jab from Skog misses its intended target.
Ryhti drives through and clinches with Skog against the ropes.
Ryhti breaks the clinch.
Skog tries to clinch up.
Skog on the wrong end of a nice hook.
Skog gets cracked there but stands up to it.
Ryhti tries to clinch
enabling Skog to counter with a crisp jab.
Ryhti tries to clinch but Skog moves out of range.
That's three minutes gone in the round.
Ryhti tries to grapple but his opponent circles
and Skog counters by moving into the clinch. Good anticipation by Skog.
Ryhti pressing his opponent against the ropes.
Ryhti is looking to control Skog's arms but Skog gets an underhook and turns him. Now Ryhti has his back to the ropes.
Ryhti blocks an elbow strike.
Skog prevents Ryhti from breaking the clinch.
Skog goes for a takedown in the clinch but Ryhti prevents it.
Ryhti stalling in the clinch but Skog improves position.
Skog misses with an elbow over the top.
Ryhti stalling in the clinch.
Ryhti breaks from the clinch.
Skog doesn't succeed with the takedown
and Ryhti counters by clinching up.
That's four minutes gone in the round.
Ryhti stalling in the clinch.
Ryhti trying to stall but Skog improves his position.
The ref breaks the fighters up, due to lack of action by Risto Ryhti.
Good exchange - Ryhti coming out on top.
Skog throws a jab but it's blocked by Ryhti.
Skog gets the takedown into side control.
Ryhti is trying to buck Skog off.
Skog content to control the pace. The referee will try and keep them active though.
Skog wants to control but Ryhti is keeping him busy.
And thats the end of the round the fighters go back to their corners.
Risto Ryhti showed his class in that round. I'd imagine he'll take it on all the scorecards.
That's time! Skog's corner gives him a slap on the ass as he gets ready to fight. This is the final round!
Ryhti clinches but Skog breaks the clinch
and Skog moves into the clinch.
Ryhti leaning his opponent against the ropes.
Skog pulls guard.
Skog is working an open guard so Ryhti takes the opportunity to get back to his feet.
Skog scores with a slapping inside leg kick.
Some wild striking there from Skog.
Skog misses with an uppercut.
Skog misses with a few strikes there.
Ryhti moves into the clinch.
Ryhti is trying to slow down the pace in the clinch, to catch his breath.
Both fighters are breathing heavily.
Ryhti gets double underhooks to prevent a takedown attempt from Skog.
That's one minute gone in the round.
Skog missing with knees to the body.
The fighters are pressed against the ropes, as the pace of the fight slows.
A right handed body shot lands from Ryhti.
Ryhti escapes the clinch and we're back to striking.
Skog avoids the head kick by Ryhti.
Ryhti is looking to clinch.
Skog misses with a takedown attempt
and Ryhti counters by moving into the clinch.
Ryhti avoiding damage.
Ryhti escapes the clinch and we're back to striking.
Ryhti tries to clinch but Skog is having none of it.
Skog tries to close the distance and clinch up against the ropes but Ryhti paws at him with a jab and circles away.
That's two minutes gone in the round.
There's not a lot going on here and the crowd are letting the fighters know they're not willing to tolerate a lack of action.
Skog misses with a straight right.
Skog avoids the clinch attempt nicely.
Ryhti clinches but Skog breaks the clinch
and Skog counters with a head kick. That will keep Ryhti thinking before he tries any more sloppy attacks!
Skog decides to change it up a bit and drives through with a nice takedown into half guard.
Ryhti pushes Skog off looking to stand but Skog dives back in and keeps control.
Skog is looking to take a break and control but Ryhti is keeping him honest, looking to work from the bottom.
Ryhti looks like he's trying to stand up.
Skog wants to lay and pray for a moment but Ryhti keeps working.
Skog looking for a kimura but he'll have to free his other leg if he wants to finish that. Perhaps he's just using it as a distraction technique.
That's three minutes gone in the round.
Ryhti tries to kick Skog off but Skog keeps his base steady and stays in half guard.
Skog has freed up his trapped foot and advances to mount.
Ryhti tries to buck Skog off but he can't manage it.
Both fighters really going for it on the ground here!
Ryhti tries to buck Skog off but Skog takes his back!
Skog is looking to control Ryhti but Ryhti is wriggling around and keeping busy.
Ryhti trying to get back to his feet but Skog is in full control for now.
Troll Skog has stepped it up - he knows he needs a finish here!
That's four minutes gone in the round.
A lull in the action here being met with boos from the crowd.
A lull in the action here.
Ryhti is trying to get back to his feet but he's not managed it yet.
Skog seems to be going for a rear naked choke. He has an arm under Ryhti's chin but Ryhti turns very nicely into Skog's guard. Good BJJ skills being displayed there by Ryhti.
Skog is active off his back here, looking for submissions.
The crowd thankful this round is nearly over.
Well, the referee has seen enough. Neither fighter is active enough on the ground so he's stood them back up.
Ryhti has taken the fight to the clinch.
And that's the end of the fight!
That was a close round. You could make an argument for either fighter but I would give it to Troll Skog.
I think Ryhti has won this one but let's see whether the judges agree with me. Over to the ring announcer for the scorecards.
Ladies and gentlemen, after 3 rounds of action, we go to the scorecards for a decision.
Judge Taro Takaoka scores the fight 28:29
Judge Shigeki Sano scores the fight 28:29
Judge Ren Mimura scores the fight 28:29
In favor of your winner, by unanimous decision... Risto Ryhti!
|
|
|
|
|
|
|
|
|
|
|
|
|
|
|
|
|
|
|
|
|
|
|
| S |
C
A |
G |
S |
C
B |
G |
|
S |
C |
G |
|
energy
A | B |
|
hype
A | B |
|
pop
A | B |
|
mgr
A | B |
|
FIGHT
RATING
61% |
|
|
|
|
|
|
|
Undercard bout
|
Coming up we have a lightweight MMA rules bout between Micky Elder (ranked 0 p4p, 0 weight class) and Miyamoto Musashi (ranked 0 p4p, 0 weight class). Chooooooooon! I think Elder might be my favorite fighter, now he's come out to Enter Sandman. Musashi has chosen Andrea Bocelli- Time to Say Goodbye as his entrance music. The crowd giving both fighters a great reception on their way into the arena. That's good to see.
 |
|
 |
| 168 cm
19
162 lbs
4 - 2 - 0 |
|
182 cm
19
170 lbs
3 - 1 - 0 |
BJJ Blue Belt
Brawler
Good chin |
|
BJJ Purple Belt
Brawler
Tends to cut |
|
| |
|
Ladies and gentlemen. This fight is 3 rounds, in the lightweight division.
Introducing the fighter to my left, fighting out of the red corner.
With a record of
4 - 2 - 0, fighting out of Tokyo, Micky Elder!
And introducing the fighter to my right, fighting out of the blue corner.
With a record of
3 - 1 - 0, fighting out of Tokyo, Miyamoto Musashi!
The judges for this bout are Tatsuya Matsuyama, Taro Takaoka and Yasuomi Hirokawa.
The bell rings for round one and we are underway!
Musashi ducks down and throws a hook to the body but Elder moves away.
Elder connects with a lovely right hand, straight down the pipe.

Musashi is rocked!
It looks like Miyamoto Musashi has been cut.
Nice defenses there by Musashi.
Elder fails to land with the punch combination there - jab, cross, hook, miss, miss, miss.
Elder wants to clinch up but Musashi keeps it at a distance.
Elder misses with the combination.
Musashi connects with a jab.
Musashi thows a body shot but no joy.
Elder gets to the clinch - let's see what his plan is here.
Musashi breaks the clinch.
Elder misses with a kick to the body.
Elder will need to tighten up his combinations if he doesn't want to gas himself out, swinging at thin air.
Elder is looking to clinch but Musashi is avoiding it.
Musashi uses good footwork to avoid the strikes from Elder.
Elder uses good footwork to get in and out and land a nice right hand before Musashi has time to react.
Musashi is still on wobbly legs! Can Elder finish him?
Elder wants to clinch up but Musashi keeps it at a distance.
Elder fails with a rather predictable takedown attempt.
Musashi seems to have recovered his senses.
That's one minute gone in the round.
Elder tries to close the distance and clinch up against the ropes but Musashi paws at him with a jab and circles away.
Elder instigates a clinch.
Elder breaks the clinch and we're back to striking at distance.
Elder has taken the fight to the clinch.
Musashi wants to break free but Elder has control.
Musashi has picked Elder up - he's going for a ride! Musashi dumps his opponent to the mat with a thud and settles into half guard.
Musashi wants to pass to mount but Elder is defending the position.
Elder gets back to full guard.
The fighters are tangled up in the ropes here. We might need a restart if the fighters can't break free themselves.
Musashi drops back for a leg but he's not going to get it - he lets go and Elder dives on top into guard.
Musashi seems keen to control rather than go for a submission, at least for now.
That's two minutes gone in the round.
Musashi is looking for a triangle but Elder pushes his legs off easily.
Musashi is trying to control the position but Elder postures up.
Elder tries to stand but Musashi is controlling from the bottom.
Musashi looking to sweep here. No luck so far.
The fighters are trapped in the ropes so we're going to have a reposition here. The ref calls for a break and repositions the fighters in the center of the ring.
Elder throws and elbow that misses. Musashi uses the momentum to reverse the position. He's now in Elder's guard. Nice move by Musashi!
Elder looking to sweep using the butterfly guard but Musashi puts pay to that idea as he passes nicely into half guard.
That's three minutes gone in the round.
Musashi wants to free his trapped foot but Elder is holding on for dear life with his legs.
Elder is controlling Musashi's position as best he can from this difficult position.
Musashi trying to advance position but Elder counters by regaining guard.
Elder controls Musashi momentarily but Musashi frees himself.
Elder looking for submissions from the bottom here. Moving his hips around, possibly looking for an armbar.
Musashi sneaks a leg through and gets to half guard. That was like a knife through butter how easily he passed Elder's guard.
Elder knows he needs to get back to his feet asap. He's simply no match for Musashi on the ground.
That's four minutes gone in the round.
A lull in the action here being met with boos from the crowd.
Musashi is looking to take a break and control but Elder is keeping him honest, looking to work from the bottom.
Musashi is working for a kimura but Elder is defending it quite comfortably.
Musashi looks gassed!
Musashi moves into full mount! Elder won't be happy about that!
Elder is trying desperately to improve position.
Musashi working to secure an arm triangle but it's not happening for him just yet.
And thats the end of the round the fighters go back to their corners.
That was a close round but I would say that Micky Elder will probably get the nod.
The cut man is working on Miyamoto Musashi's cut.
That's the end of the round. The referee orders the cornermen out of the ring so we can get back down to business.
Elder waving his hands out infront of him, looking to distract Musashi.
Musashi has his takedown stuffed
and Elder counters with a nice body shot.
Elder has his head snapped back a nice jab. A little nod from Elder there as he acknowledges the shot.
Elder misses with a body shot
and Musashi counters with a driving takedown into guard. Nice work there by Musashi.
Musashi looking to pass the guard.
Elder is looking to stand back up... there's a bit of a scramble and Musashi dives into side control.
Elder is trying to control Musashi's posture but Musashi avoids it.
Musashi is breathing heavily.
That's one minute gone in the round.
Musashi is looking to take a break and control but Elder is keeping him honest, looking to work from the bottom.
Elder might be looking to lock onto one of his opponent's long limbs for a submission, whilst we're on the ground.
Elder tries to escape but Musashi is in control.
The referee decides to stand the fighters back up.
Elder rushes Musashi and presses him up against the ropes.
Elder tries to take the fight to the ground by pulling guard but can't manage it.
That's two minutes gone in the round.
Neither fighter has done anything of merit for a good minute or two here and the crowd are not happy about it.
Elder breaks the clinch and we return to the middle of the mat.
Elder tries to grapple but his opponent circles
and Musashi decides to take the opportunity to score a takedown. He's landed in Elder's guard.
Musashi looking to sit in guard and control but Elder gets the butterfly guard and sweeps. He's now in the guard on the top.
Elder won't allow Musashi to sweep him here.
Elder has decided he wants to stand but the closed guard of Musashi is proving hard to escape from.
Musashi has a butterfly guard looking to sweep but Elder has passed into side control.
You can see the frustration on Musashi's face, being in this tough position on the bottom.
That's three minutes gone in the round.
Musashi manages to get one leg in to regain half guard.
Musashi regains full guard. Nicely done.
Elder has decided he wants to stand but the closed guard of Musashi is proving hard to escape from.
Musashi had isolated an arm as going for an omaplata. Elder is defending the submission well but is in a very vulnerable position. Musashi Is leaning forward trying to finish the omaplata but decides to abandon it, and take Elder's back instead.
Musashi is working hard for the rear naked choke here.
That's four minutes gone in the round.
Musashi has his opponent's back but Elder is looking to stand. He manages to get to his feet and shakes off Musashi.
Elder lands with a straight right. Musashi didn't see that one coming.
Nice jab there from Elder.
Elder wants to clinch.
Musashi circles away from the clinch attempt
and Musashi counters with a one-two to the body.
Musashi swings for the body but Elder moves out of range.
Elder looks to land a right hand but Musashi moved out of range.
Good leg kick by Elder there. It's the ones that make that thud noise that hurt and that was an almighty thud.
The crowd applaud the fighters efforts here as the round comes to an end.
Musashi avoids a punch combination nicely.
Elder tries to clinch up
and Musashi counters nicely by changing levels and landing a hook to the body.
And thats the end of the round the fighters go back to their corners.
Miyamoto Musashi showed his class in that round. I'd imagine he'll take it on all the scorecards.
The cut man is working on Miyamoto Musashi's cut.
That's the end of the round. The referee orders the cornermen out of the ring so we can get back down to business. Let's hear some noise people - this is the final round!
Elder swings and misses with a shot to the body
and Musashi cracks him with a counter punch right on the button.
Micky Elder is looking to throw some combinations by the looks of things.
Elder will need to tighten up his combinations if he doesn't want to gas himself out, swinging at thin air.
Elder has his takedown stuffed
enabling Musashi to counter with a crisp jab.
Musashi looks to land a combination. Elder sees it coming but can only parry a couple of the shots.
Musashi keeps his opponent at a distance with a nice jab.
Elder jabbing away but nothing is landing.
Musashi takes a really solid shot there but just smiles back and shrugs his shoulders.
Musashi clobbers Elder with an overhand right that has the crowd gasping. That made a horrendous noise.
Musashi slips a jab from Elder.
Elder tries to clinch
and Musashi counters with an outside leg kick.
Micky Elder seems to be the more aggressive standup fighter in this bout.
Elder jabbing away but nothing is landing.
Musashi clobbers Elder with an overhand right that has the crowd gasping. That made a horrendous noise.
Musashi displays some good footwork, moving neatly out of range as Elder throws out the jab.
Musashi lands a really nice looking cross but Elder seems unphased.
That's one minute gone in the round.
Musashi slips under a jab.
Both fighters are breathing heavily.
Musashi gets a clinch.
Elder tries to break the clinch but Musashi is controlling the position.
Elder looking for a takedown.
Musashi is using his reach advantage to land shots from outside his opponent's range.
Musashi breaks the clinch and we're back to striking at distance.
Elder tries to check the leg kick but that clearly hurt him.
Musashi throws a nice looking combination but Elder bobs and weaves to avoid any damage.
Elder jabbing away but nothing is landing.
Musashi throws a right hand that Elder ducks under and follows up with a left that Elder also avoids with ease.
Musashi pushes Elder up against the ropes in a clinch.
Musashi tries to score a body lock takedown but Elder shows good agility there to stay on his feet.
Elder drops down looking for an ankle pick but Musashi pulls his leg out and moves away.
That's three failed takedown attempts in the round for Micky Elder. That's going to take a lot out of him.
Musashi darts in and lands a nice takedown into half guard.
That's two minutes gone in the round.
Elder tries to kick Musashi off but Musashi keeps his base steady and stays in half guard.
Musashi wants to control but Elder is keeping him busy.
Musashi moves nicely into side control.
Musashi is working for what looks like an arm triangle here. Elder is trying to escape and Musashi transitions quickly into an armbar! He's slapped it on tight and Elder is forced to tap! Nice work there by Musashi! Very nice indeed!
Ladies and gentlemen, after 2:54 of round 3, we have a winner by way of Submission (Armbar). Miyamoto Musashi!
|
|
|
|
|
|
|
|
|
|
|
|
|
|
|
|
|
|
|
|
|
|
|
| S |
C
A |
G |
S |
C
B |
G |
|
S |
C |
G |
|
energy
A | B |
|
hype
A | B |
|
pop
A | B |
|
mgr
A | B |
|
FIGHT
RATING
95% |
|
|
|
|
|
|
|
Undercard bout
|
Coming up we have a bantamweight MMA rules bout between Klaus VonMueller (ranked 0 p4p, 0 weight class) and Andrew Andrews (ranked 0 p4p, 0 weight class). Both fighters look fresh as a daisy as they make their way towards the ring.
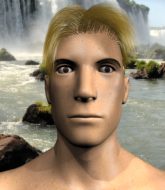 |
|
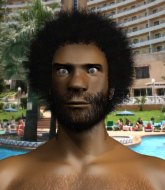 |
| 167 cm
23
135 lbs
5 - 3 - 0 |
|
162 cm
22
138 lbs
5 - 2 - 0 |
BJJ Blue Belt
Excellent boxer
Experienced |
|
BJJ Purple Belt
Counter striker
Solid chin |
|
| |
|
Ladies and gentlemen. This fight is 3 rounds, in the bantamweight division.
Introducing the fighter to my left, fighting out of the red corner.
With a record of
5 - 3 - 0, fighting out of Tokyo, Klaus VonMueller!
And introducing the fighter to my right, fighting out of the blue corner.
With a record of
5 - 2 - 0, fighting out of Tokyo, Andrew Andrews!
The judges for this bout are Shirou Masuda, Taro Takaoka and Yasuomi Hirokawa.
The bell rings for round one and we are underway!
Andrews staying out of range there.
Andrews avoids a punch combination nicely.
VonMueller swinging wilding here.
Andrews avoids the body shot from VonMueller.
VonMueller misses with a half-hearted attempt at a head kick.
Klaus VonMueller seems to be the more aggressive standup fighter in this bout.
VonMueller misses with a body shot. Nice footwork from Andrews.
VonMueller swings wildly with a hook that is half blocked by Andrews.
VonMueller throws a head kick that connects with a bit of head and a bit of hand.
Andrews takes a step back and watches a body kick go sailing past his mid section.
VonMueller misses with an uppercut. Andrews saw that one coming.
Andrews pushes VonMueller up against the ropes in a clinch.
VonMueller wants to push off and get back to the center of the mat but Andrews has him pressed against the ropes.
VonMueller wants to push off and get back to the center of the mat but Andrews has him pressed against the ropes.
VonMueller wants to break the clinch but can't.
Andrews prevents VonMueller from breaking the clinch.
VonMueller breaks from the clinch.
Andrews blocks a head kick by VonMueller.
The crowd cheers as VonMueller lands an impressive looking overhand right. Andrews doesn't seem phased though.
That's one minute gone in the round.
Andrews takes a head kick and keeps coming.
Andrews shoots in but no luck this time.
Andrews tries to close the distance and clinch up but VonMueller swats him away and circles back towards the center.
VonMueller throws a low kick, looking for Andrews's leg but Andrews calmly moves out of range.
Andrews shoots in looking for a takedown. VonMueller tries to sprawl out of it but Andrews keeps driving through. The fighters are pinned against the ropes. VonMueller manages to get underhooks and after a bit of a struggle, circles away and we're back to standing.
VonMueller lands a nice looking body shot.
VonMueller throws an uppercut from half a mile away. Andrews sees it coming and avoids it easily.
A head kick misses from VonMueller.
VonMueller misses with an uppercut.
Andrews blocks a jab.
VonMueller lands three nice shots there - that looked like it hurt!
Andrews uses decent footwork to sidestep a right hand from VonMueller.
VonMueller lands a glancing blow to the side of Andrews's head.
Andrews is looking to clinch but VonMueller is avoiding it.
That's two minutes gone in the round.
Andrews on the wrong end of a decent looking cross there.
Andrews pushes VonMueller up against the ropes in a clinch.
VonMueller is trying to work out of this bad position, with his back against the ropes.
VonMueller is trying to break the clinch but Andrews has him pressed against the ropes.
VonMueller wants to break the clinch but can't.
VonMueller wants to break free but Andrews has control.
VonMueller is looking to break free of the clinch but Andrews has double underhooks.
VonMueller wants to break free but Andrews has control.
Andrews is trying to stall.
VonMueller tries to break the clinch but Andrews is controlling the position.
VonMueller breaks from the clinch.
VonMueller misses with a body shot. Nice footwork from Andrews.
Andrews scores with a nice takedown into half guard. Let's see what he's got on the ground.
VonMueller won't allow Andrews to pass to mount.
Andrews scoring with strikes to the body and head.
Andrews drops an elbow to the side of VonMueller's head.
Andrews is trying to work for a kimura. He's got his hands clasped together - this could be trouble! No, VonMueller has managed to free his arm - good work.
That's three minutes gone in the round.
Andrews stops VonMueller from getting back to his feet.
Andrews passes the guard and advances to mount!
Andrews scoring with strikes but VonMueller is staying in there.
You get the feeling that VonMueller really doesn't like being in this position too much.
Andrews landing shots from mount.
Andrews working for a submission but VonMueller is keeping him at bay.
Andrews looks gassed!
VonMueller is trying to get to the ropes to help him get back to his feet.
Andrews landing shots from mount.
A nice elbow there by Andrews.
VonMueller trying desperately to get to his feet.
That's four minutes gone in the round.
Andrews has the superior BJJ but he's also working some ground strikes into his gameplan.
Andrews looking to control but VonMueller is working nicely, looking to advance position himself.
VonMueller is trying to stand but he's not in a good position to be doing that! Andrews has taken his back!
VonMueller holding both Andrews 's hands and preventing any damage.
VonMueller trying desperately to get back to his feet here but he's not having any joy at all. He's going to tire himself out if he's not careful.
And thats the end of the round the fighters go back to their corners.
Klaus VonMueller dominated that round.
That's time! VonMueller's corner gives him a slap on the ass as he gets ready to fight.
A punch combination from VonMueller misses.
VonMueller loads up on a big right hand but Andrews slips the punch.
VonMueller throws out a loose jab but Andrews uses good head movement to avoid it.
Andrews clinches up with VonMueller and pushes him back against the ropes.
Andrews escapes the clinch and we're back to striking.
VonMueller tries a switch kick but it misses it's target.
VonMueller misses with a hook. Andrews ducked under it nicely.
VonMueller scores with a nice looking left hook and follows it up with an uppercut!
VonMueller looks to land a right hand but Andrews moved out of range.
Andrews looks for a takedown but VonMueller sprawls well.
Andrews slips under a jab.
Andrews moves out of range as VonMueller strikes.
VonMueller misses with a body kick.
VonMueller rushes forward with a series of wild hooks but Andrews moves out of range and avoids them all easily.
Both fighters are absolutely exhausted here.
That's one minute gone in the round.
VonMueller checks a leg kick nicely.
Andrews slips under a jab.
Andrews takes a shot right to the bread basket.
VonMueller throws a shot from downtown. Andrews moves away and avoids it.
VonMueller keeps the fight on the outside.
Andrews tries to clinch but is not successful on this occasion.
Andrews avoids the head kick by VonMueller.
VonMueller throws a right and a left that Andrews avoids nicely.
Andrews doesn't manage to clinch there - VonMueller circles away.
VonMueller takes one on the button.
VonMueller swings wildly with a right hand that was never going to find it's target.
Andrews scores a trip takedown into side control. Nice.
Andrews advances to full mount.
Both fighters really going for it on the ground here!
Andrews breaks from VonMueller's wrist control and lands an elbow.
The fighters are trapped in the ropes so we're going to have a reposition here. The ref calls for a break and repositions the fighters in the center of the ring.
That's two minutes gone in the round.
Andrews landing strikes from the mount.
VonMueller really wants to buck Andrews off and get back to his feet.
Andrews jumps to side control looking for an arm triangle but VonMueller manages to avoid the submission attempt.
VonMueller tries to escape but Andrews is in control.
Andrews is putting a hurting on VonMueller here, landing some big shots from side control.
Andrews prevents VonMueller from escaping the position.
That's three minutes gone in the round.
Andrews tries for a kimura but VonMueller is defending well.
VonMueller is not content to let Andrews control the position.
Andrews working the ground and pound.
Andrews advances to full mount.
VonMueller is not a happy chappy
he wants out of there.
Andrews with some aggressive grappling here. He's looking for submissions here, rather than waiting for the opportunity to counter.
VonMueller tries to buck Andrews off but he can't manage it.
That's four minutes gone in the round.
Andrews looking to finish VonMueller with some ground and pound. This is bad for VonMueller!
VonMueller wants to try and get back to his feet.
Andrews with good strikes from the mount here!
Andrews has control of VonMueller's right arm, working for a kimura. It's a bit of a token attempt though and VonMueller regains control of the situation pretty easily.
Andrews looking to ground and pound his opponent to a finish here.
And thats the end of the round the fighters go back to their corners.
Andrew Andrews showed his class in that round. I'd imagine he'll take it on all the scorecards.
The fighters get back to their feet, the hooter sounds and we're back to the action! This is the final round!
VonMueller waving his hands out infront of him, looking to distract Andrews.
VonMueller throws an uppercut from half a mile away. Andrews sees it coming and avoids it easily.
Andrews takes one on the button.
VonMueller waving his hands out infront of him, looking to distract Andrews.
VonMueller throws a monster uppercut resembling something out of street fighter but it doesn't land.
VonMueller throws an overhand right that lands on Andrews's shoulder, as Andrews tries to avoid the shot.
VonMueller misses with a straight left.
VonMueller throws a right and a left that Andrews avoids nicely.
Andrews takes one on the button.
VonMueller scores with a nice one two combo and darts back out of range to avoid anything coming in the opposite direction.
Both fighters are breathing heavily.
VonMueller moves out of range as Andrews strikes.
VonMueller digs a good hook to Andrews's body.
VonMueller will need to tighten up his combinations if he doesn't want to gas himself out, swinging at thin air.
Andrews closes the distance and clinches.
That's one minute gone in the round.
VonMueller wants to strike at distance but he can't break free of the clinch.
VonMueller manages to break the clinch.
VonMueller swinging wilding here.
The fighters circling - VonMueller throws out the jab but it was never going to land.
VonMueller checks a low kick. Bone on bone - not my idea of a good time.
Andrews takes a jab right on the nose. That must have hurt but he shrugs his shoulders and looks to return the favor.
Andrews ducks under a wild hook from VonMueller.
VonMueller misses with a body shot. Nice footwork from Andrews.
Andrews has taken the fight to the clinch.
Andrews lands with a short shot to the head.
VonMueller can't break the clinch.
VonMueller has had enough of the clinch but Andrews keeps him there for the moment.
VonMueller wants to break the clinch but can't.
That's two minutes gone in the round.
Well. There's a bit of a lull in the action here and the crowd are starting to get restless.
VonMueller is trying to break free.
Andrews tries to stall but VonMueller uses the opportunity to gain a better position.
VonMueller is trying to break free.
Andrews manages to pull guard.
VonMueller stands up from guard. Let's bang!
Andrews rushes VonMueller and pushes him back against the ropes in a clinch.
VonMueller wants to strike at distance but he can't break free of the clinch.
Andrews decides to pull guard.
Andrews working a defensive guard here.
VonMueller is looking to stand up but Andrews won't let him.
VonMueller preventing the sweep.
Andrews has a closed guard, preventing VonMueller from standing up.
VonMueller won't allow Andrews to sweep him here.
That's three minutes gone in the round.
VonMueller wants to stand but Andrews has a closed guard, so he can't escape.
Neither fighter is doing enough for the referee's liking and he's decided to stand them back up.
A telegraphed right hand from VonMueller misses the target.
VonMueller tries a switch kick but it misses it's target.
Andrews clinches.
Andrews jumps guard but VonMueller stands there with Andrews around his waist. Andrews gives up and drops back to his feet. We remain in the clinch.
VonMueller wants to break free but Andrews has control.
VonMueller wants to break free but Andrews has control.
VonMueller is trying to break the clinch but Andrews has him pressed against the ropes.
A bit of stalling here from Andrews.
Andrews wants to push off and get back to the center of the mat but VonMueller has him pressed against the ropes.
VonMueller wants to get back to striking at distance but Andrews won't allow it.
VonMueller is trying to work out of this bad position, with his back against the ropes.
That's four minutes gone in the round.
Neither fighter has done anything of merit for a good minute or two here and the crowd are not happy about it.
VonMueller wants to break free. God knows he wants to breaaaak freeee.
Andrews is trying to slow down the pace of the fight but VonMueller is keeping busy.
VonMueller breaks the clinch and we're back to striking at distance.
Klaus VonMueller is looking to throw some combinations by the looks of things.
Andrews takes one to the chin there.
VonMueller misses with a hook.
Andrews on the wrong end of a nice jab.
Andrews walks into a straight right hand from VonMueller.
VonMueller misses with a looping right.
Andrews drops his hands momentarily and VonMueller takes advantage with a crisp shot to the head.
VonMueller misses with a head kick.
VonMueller scores with a reasonable looking shot to the body. Andrews doesn't seem bothered though.
Andrews displays some good footwork, moving neatly out of range as VonMueller throws out the jab.
VonMueller throws the kick towards the body but Andrews avoids it.
And that's the end of the fight!
Klaus VonMueller showed his dominance in that final round.
I think VonMueller has won this one but let's see what the judges have to say. Over to the ring announcer for the scorecards.
Ladies and gentlemen, after 3 rounds of action, we go to the scorecards for a decision.
Judge Shirou Masuda scores the fight 29:28
Judge Taro Takaoka scores the fight 29:28
Judge Yasuomi Hirokawa scores the fight 29:28
In favor of your winner, by unanimous decision... Klaus VonMueller!
|
|
|
|
|
|
|
|
|
|
|
|
|
|
|
|
|
|
|
|
|
|
|
| S |
C
A |
G |
S |
C
B |
G |
|
S |
C |
G |
|
energy
A | B |
|
hype
A | B |
|
pop
A | B |
|
mgr
A | B |
|
FIGHT
RATING
49% |
|
|
|
|
|
|
|
Undercard bout
|
Coming up we have a welterweight MMA rules bout between Davy Geerts (ranked 0 p4p, 0 weight class) and Augustus Moukari (ranked 0 p4p, 0 weight class). The crowd seem to be enjoying Moukari's choice of entrance music: Sunblock - I'll Be Ready. Augustus Moukari has the better chin. Will he look to stand and bang today?
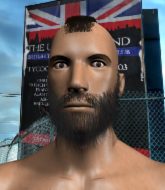 |
|
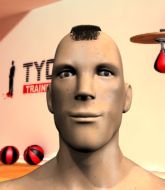 |
| 175 cm
20
170 lbs
9 - 4 - 0 |
|
180 cm
22
180 lbs
5 - 1 - 0 |
BJJ Purple Belt
Improved boxing
Experienced |
|
BJJ Purple Belt
Solid Muay Thai
Powerful |
|
| |
|
Ladies and gentlemen. This fight is 3 rounds, in the welterweight division.
Introducing the fighter to my left, fighting out of the red corner.
With a record of
9 - 4 - 0, fighting out of Tokyo, Davy Geerts!
And introducing the fighter to my right, fighting out of the blue corner.
With a record of
5 - 1 - 0, fighting out of Tokyo, Augustus Moukari!
The judges for this bout are Hirohito Nitta, Yasuomi Hirokawa and Shirou Masuda.
The bell rings for round one and we are underway!
Geerts lands an overhand left. A wild punch that just about connected.
Geerts checks the leg kick.
Geerts tries to shoot in for a takedown. He's got hold of a leg but Moukari swivels and escapes.
Geerts with a hook.
It looks like Augustus Moukari has been cut.
Moukari tries to close the distance and clinch up against the ropes but Geerts paws at him with a jab and circles away.
Moukari lands a brutal head kick. Geerts looks out on his feet and Moukari throws more strikes until the ref is forced to stop the fight!
Ladies and gentlemen, after 0:18 of round 1, we have a winner by way of TKO (Kick and Punches). Augustus Moukari!
|
|
|
|
|
|
|
|
|
|
|
|
|
|
|
|
|
|
|
|
|
|
|
| S |
C
A |
G |
S |
C
B |
G |
|
S |
C |
G |
|
energy
A | B |
|
hype
A | B |
|
pop
A | B |
|
mgr
A | B |
|
FIGHT
RATING
100% |
|
|
|
|
|
|
|
Co-main event
|
Coming up we have a welterweight MMA rules bout between Ike Uchimata (ranked 0 p4p, 0 weight class) and Leonid Kulminator (ranked 0 p4p, 0 weight class). Uchimata comes to the ring accompanied by Dropkick Murphys - Famous for nothing. Kulminator is bouncing up and down as he enters the arena, backed by ZZ-No way out. Both fighter's entrance songs getting the crowd jumping here.
 |
|
 |
| 185 cm
21
177 lbs
5 - 2 - 0 |
|
175 cm
21
170 lbs
6 - 1 - 0 |
BJJ Blue Belt
Counter striker
Granite chin |
|
BJJ Blue Belt
Counter striker
Solid chin |
|
| |
|
Ladies and gentlemen. This fight is 3 rounds, in the welterweight division.
Introducing the fighter to my left, fighting out of the red corner.
With a record of
5 - 2 - 0, fighting out of Tokyo, Ike Uchimata!
And introducing the fighter to my right, fighting out of the blue corner.
With a record of
6 - 1 - 0, fighting out of Tokyo, Leonid Kulminator!
The judges for this bout are Kenichi Hosakawa, Shigeki Sano and Hirohito Nitta.
The bell rings for round one and we are underway!
Nice uppercut lands for Kulminator. That snapped Uchimata's head back.
Kulminator lands with a straight right. Uchimata didn't see that one coming.
Uchimata takes a shot to the body in his stride.
Kulminator misses with the combination.
Uchimata takes one on the chin but keeps coming.
Uchimata swings away with a body shot that misses
and Kulminator counters with a straight punch to the midsection.
The fighters circle momentarily. Kulminator darts into range and connects with a nice straight punch.
Uchimata gets his takedown attempt stuffed easily
and Kulminator counters with a straight punch to the midsection.
Kulminator lands a jab to Uchimata's midsection.
That's one minute gone in the round.
Uchimata shapes like he's going to throw a leg kick but settles back down.
Uchimata misses with a hook. Kulminator ducked under it nicely.
Ike Uchimata seems to be the more aggressive standup fighter in this bout.
Uchimata misses with a combination
letting Kulminator counter with a right hand.
Kulminator circles away from the clinch attempt.
Uchimata misses with a combination
letting Kulminator counter with a right hand.
Uchimata uses some good footwork to avoid the body shot by Kulminator.
Uchimata throws a hook but Kulminator avoids it easily.
Oooooooooooh, not good. A low kick from Uchimata lands where it shouldn't have, right in the... well, you know what he did? He kicked him in the penis. He's injured, injured bad. The referee sends both fighters to their corners and Kulminator has 5 minutes to recover. He's OK now though... a thumbs up from Kulminator and we're back underway with a touch of gloves.
That's two minutes gone in the round.
Well. There's a bit of a lull in the action here and the crowd are starting to get restless.
Kulminator stuns Uchimata with a nice body shot, before stepping back out of range.
A big right from Uchimata misses.
Uchimata tries for a takedown but Kulminator circles away easily
and Kulminator makes him pay by landing a nice hook to the body before moving out of range.
Uchimata shoots in but doesn't get the takedown
and Kulminator counters with a left to the body.
That's three failed takedown attempts in the round for Ike Uchimata. That's going to take a lot out of him.
Kulminator scores with a punch to the gut of his opponent.
Uchimata misses with a combination
and Uchimata takes a counter punch right on the button for his troubles.
Uchimata walks into a left hand.
Kulminator is throwing a lot of body shots here, looking to wear down Uchimata rather than just go for the knockout.
That's three minutes gone in the round.
Uchimata takes one to the side of the head.
Kulminator thows a body shot but no joy.
Kulminator misses the shot to the body.
Uchimata shoots and misses
and Kulminator counters with a nice jab to the body that keeps Uchimata thinking.
Uchimata is breathing heavily.
Kulminator keeping his hands up high there, blocking the jab from Uchimata.
Leonid Kulminator is looking to keep the fight on the feet at all costs.
Uchimata misses with a takedown attempt
and Kulminator connects with a straight left hand counter down the middle.
A jab from Kulminator finds it's way through Uchimata's defenses.
Uchimata swings wildly with a couple of big hooks
and Kulminator counters with a straight punch to the midsection.
Uchimata has his takedown stuffed
and Kulminator counters with a one-two to the body.
That's four minutes gone in the round.
Kulminator throws a shot to the body.
Kulminator catches Uchimata with a nice straight right. He seems pissed - ooooh, it's on now! On like donkey kong!
Kulminator swats away the attempt to clinch by Uchimata.
Kulminator with a nice cross.
Kulminator scores with a body shot.
This is turning into a torrid day at the office for Uchimata. He's trying desperately to land a takedown but he's failing miserably and getting slapped silly on the feet to compound his misery.
Kulminator lands a slapping body shot.
The crowd cheering loudly, showing their appreciation for the quality fight we're seeing here.
Kulminator changes levels and scores with a jab to the body.
The crowd applaud the fighters efforts here as the round comes to an end.
Uchimata takes a shot right to the liver - Bas would have been proud of that punch.
And thats the end of the round the fighters go back to their corners.
Leonid Kulminator dominated that round.
The referee calls time. The cornermen exit stage left and we're back to business.
Uchimata swings wildly with a couple of big hooks
and Kulminator counters with a straight right hand.
Kulminator looks to score with a jab to the body but Uchimata is just out of range.
Leonid Kulminator seems to be getting the better of the standup.
Kulminator ducks down and throws a hook to the body.
Uchimata misses with a double jab
and Kulminator counters with a nice body shot.
Kulminator takes a swing at Uchimata's ribcage but misses.
Kulminator scores with a hook.
Uchimata doesn't succeed with the takedown
and Kulminator makes him pay by landing a nice hook to the body before moving out of range.
Kulminator misses with a series of wild punches.
Both fighters are absolutely exhausted here.
That's one minute gone in the round.
Uchimata misses with a combination
and Kulminator counters with a right hand to the body.
Kulminator throws a nice hook to the body that draws an oooh from the crowd.
Kulminator punishes Uchimata's body with a nice straight punch.
Uchimata falls off balance throwing a combination
and Kulminator counters with a lovely shot to the body.
Kulminator fakes low and throws an overhand right that catches Uchimata on the side of the head.
Uchimata misses the body punch
and Kulminator counters with a nice uppercut.
Kulminator scores with a straight right hand, right through his opponent's guard.
Uchimata ducks right into an uppercut from Kulminator.
That's two minutes gone in the round.
Nice body punch from Kulminator.
Kulminator paws at his opponent with the jab and then lunges in with a straight, right on the button.
Kulminator has used his reach advantage pretty well so far tonight.
Kulminator lands with a shot to the body.
Kulminator scores with a sloppy punch to the body. Not much technique there but it did the business.
Kulminator lets the fists fly and connects with a left straight followed by a right hook.
Kulminator ducks down and throws a hook to the body but Uchimata moves away.
Ike Uchimata is looking to throw some combinations by the looks of things.
A low kick from Uchimata misses
and Kulminator counters with a three punch combination, finished off with a leg kick. Nice work.
The crowd are loving this. Great action here.
Uchimata shoots and misses
and Kulminator counters with a right hand to the body.
Uchimata tries for a takedown but Kulminator circles away easily
and Kulminator makes him pay by landing a nice hook to the body before moving out of range.
That's three failed takedown attempts in the round for Ike Uchimata. That's going to take a lot out of him.
That's three minutes gone in the round.
Kulminator with a body punch. A glancing blow.
Kulminator throws a jab to the body, straight down the pipe. Boom. That sent Uchimata stumbling backwards but he manages to regain his composure quickly.
Kulminator swings and misses with a hook to the body.
Kulminator with a body punch. A glancing blow.
Kulminator scores with a sloppy punch to the body. Not much technique there but it did the business.
Kulminator throws a hard body shot but it just misses.
Uchimata misses with a combination
and Kulminator counters with a lovely shot to the body.
That's four minutes gone in the round.
Kulminator listening to his corner there, landing a nice uppercut.
Uchimata ducks right into an uppercut from Kulminator.
Uchimata takes a solid shot to the body. That one hurt him but he's trying not to show it.
A decent looking cross lands there for Kulminator.
Kulminator changes levels and scores with a jab to the body.
Uchimata throws a leg kick
and Kulminator counters with a quick right hand to the jaw.
Kulminator goes to the watering hole and comes back with a big thumbs up from the judges as he scores a three punch combo.
The crowd applaud the fighters efforts here as the round comes to an end.
Uchimata misses with a takedown attempt
and Kulminator makes him pay by landing a nice hook to the body before moving out of range.
The fans in attendance giving it up for the two fighters, who have really let it all hang out in the last minute or so!
Uchimata takes a solid shot to the body. That one hurt him but he's trying not to show it.
Uchimata misses with a leg kick
and Kulminator counters with a good right hand that lands right on the jaw.
And thats the end of the round the fighters go back to their corners.
Leonid Kulminator showed his class in that round. I'd imagine he'll take it on all the scorecards.
The minute break is over - no more time for sponges and pep talks - back to the action! So, we enter the final round. Let's see if either fighter can bring us a finish, or whether we're going to the judges scorecards.
Kulminator misses with a jab, cross combination.
This entire fight has taken place on the feet so far and you wonder whether Uchimata might be better served trying to take this one to the ground because he's losing the standup battle so far.
A right-left combo lands from Kulminator.
Uchimata takes a shot right to the bread basket.
Uchimata missing with a left hand there. Kulminator was out of range so wasted energy throwing that one.
Kulminator works Uchimata's body with a nice hook.
Kulminator scores with the left hand. Uchimata knows he should have avoided that one.
Kulminator lands a nice hook to Uchimata's body. Uchimata takes it in his stride and looks to land his own strikes.
Uchimata closes the distance looking to clinch
and Kulminator makes him pay by landing a nice hook to the body before moving out of range.
Both fighters are breathing heavily.
That's one minute gone in the round.
Uchimata avoids the body shot from Kulminator.
Kulminator avoids a lazy jab quite easily.
Kulminator fakes high and swings low for a body shot but Uchimata manages to avoid it.
Kulminator lands a nice shot that snaps Uchimata's head back.
Uchimata misses with a looping right.
Kulminator digs a good body shot into Uchimata's ribs.
A shot to de liver by Kulminator. Beautiful body shot.
Uchimata misses with a half-hearted attempt at a head kick.
Kulminator fakes high and swings low for a body shot but Uchimata manages to avoid it.
That's two minutes gone in the round.
Uchimata takes a punch to the jaw and another one to the bread basket.
Kulminator lands with a shot to the body.
Uchimata tries to clinch up but Kulminator circles away and keeps his distance.
Uchimata avoids the body shot from Kulminator.
Kulminator thows a body shot but no joy.
Kulminator scores with a sloppy punch to the body. Not much technique there but it did the business.
Uchimata throws a combination that misses
and Kulminator counters with a lovely straight right hand!
Uchimata misses with a takedown attempt
and Kulminator counters with a two punch combo.
Kulminator lets the fists fly and connects with a left straight followed by a right hook.
Kulminator slips under a jab.
That's three minutes gone in the round.
Kulminator fakes a head punch and goes low to the body. Nicely done.
A low kick from Uchimata misses
and Kulminator counters with a straight punch to the midsection.
Kulminator scores with a body shot.
Kulminator digs a good hook to Uchimata's body.
Uchimata misses with a leg kick
and Kulminator counters with a straight punch to the midsection.
Kulminator lunges in with an uppercut that skims his opponent's chin.
Kulminator wings a very wild body shot but it does the job and lands to the midsection.
Kulminator stuns Uchimata with a nice body shot, before stepping back out of range.
Kulminator throws a two punch combo that lands nicely.
That's four minutes gone in the round.
Uchimata throws a head kick that misses
and Kulminator connects with a straight left hand counter down the middle.
Uchimata throws a left and a right that both miss
and Kulminator counters with a crisp hook to the side of the head.
Kulminator lands with a shot to the body.
Kulminator lands a glancing blow to the side of Uchimata's head.
The crowd are loving this. Great action here.
Kulminator lands a jab, followed by a cross and another cross, as Uchimata backs up against the ropes.
Ike Uchimata has stepped it up - he knows he needs a finish here!
Kulminator throws a shot to the body.
Kulminator lands a jab to Uchimata's midsection.
As the round comes to an end the crowd are showing their appreciation for a great round of action.
Kulminator thuds a left hand into Uchimata's body.
Kulminator throws a shot to the body.
And that's the end of the fight!
Leonid Kulminator comfortably won the final round on my scorecard.
Well Kulminator has outworked and out performed his opponent in all aspects of the game today. He was simply too good and the decision should be no more than a formality. Over to the ring announcer for the scorecards.
Ladies and gentlemen, after 3 rounds of action, we go to the scorecards for a decision.
Judge Kenichi Hosakawa scores the fight 24:30
Judge Shigeki Sano scores the fight 24:30
Judge Hirohito Nitta scores the fight 24:30
In favor of your winner, by unanimous decision... Leonid Kulminator!
|
|
|
|
|
|
|
|
|
|
|
|
|
|
|
|
|
|
|
|
|
|
|
| S |
C
A |
G |
S |
C
B |
G |
|
S |
C |
G |
|
energy
A | B |
|
hype
A | B |
|
pop
A | B |
|
mgr
A | B |
|
FIGHT
RATING
59% |
|
|
|
|
|
|
|
Main event
|
Coming up we have a welterweight MMA rules bout between Jimmy Cheeseburger (ranked 0 p4p, 0 weight class) and David Durrant (ranked 0 p4p, 0 weight class). Cheeseburger comes to the ring accompanied by Alice In Chains - Rooster. David Durrant has the power to score a knockout today if he connects clean with Jimmy Cheeseburger's chin.
 |
|
 |
| 178 cm
20
170 lbs
8 - 2 - 0 |
|
170 cm
23
175 lbs
8 - 3 - 0 |
BJJ Purple Belt
Brawler
Experienced |
|
BJJ Purple Belt
Basic striking
Determined |
|
| |
|
Ladies and gentlemen. This fight is 3 rounds, for the welterweight championship of the world!
Introducing the champion to my left, fighting out of the red corner.
With a record of
8 - 2 - 0, fighting out of Tokyo, Jimmy Cheeseburger!
And introducing the challenger to my right, fighting out of the blue corner.
With a record of
8 - 3 - 0, fighting out of Tokyo, David Durrant!
The judges for this bout are Yukihiro Yamamoto, Kenichi Hosakawa and Hirohito Nitta.
The bell rings for round one and we are underway!
Cheeseburger will need to tighten up his combinations if he doesn't want to gas himself out, swinging at thin air.
Cheeseburger throws a monster uppercut resembling something out of street fighter but it doesn't land.
Cheeseburger shoots in with a takedown attempt and he has Durrant pinned against the cage. Durrant gets the underhooks and manages to circle away.
Durrant scores with a takedown into Cheeseburger's guard.
The fighters are trapped in the ropes so we're going to have a reposition here. The ref calls for a break and repositions the fighters in the center of the ring.
Durrant trying to control but Cheeseburger is working from the bottom.
Durrant postures up.
Cheeseburger had isolated an arm as going for an omaplata. Durrant is defending the submission well but is in a very vulnerable position. Cheeseburger Is leaning forward trying to finish the omaplata but decides to abandon it, and take Durrant's back instead.
Cheeseburger gets his hands free as Durrant looks to control.
Cheeseburger is working for the rear naked choke. He has one arm under the chin but Durrant has hold of the other arm. A bit of a stalemate here.
Durrant rolls and manages to get back to half guard. Nicely done.
That's one minute gone in the round.
Durrant looking to work for a kimura from the bottom.
Durrant looking for submissions off his back.
Durrant is trying to control but can't.
Durrant tries to get to full guard but Cheeseburger has control of the leg.
Durrant won't allow Cheeseburger to pass to mount.
It looks like we're going to have a standup here. Neither fight is doing enough on the ground.
Cheeseburger throws an overhand right that lands on Durrant's shoulder, as Durrant tries to avoid the shot.
Donk. Cheeseburger catches Durrant right on the button with a cross.
Danga de danga de dang - Cheeseburger scores with a four punch combination!
That's two minutes gone in the round.
Durrant with a lazy takedown attempt
and Cheeseburger counters with a crisp hook to the side of the head.
Cheeseburger gets a takedown into half guard.
Cheeseburger prevents Durrant from standing back up.
Cheeseburger is looking to pass Durrant's guard but actually Durrant recovers to full guard.
Cheeseburger trying to control the position from guard on top but Durrant is wriggling around, looking for whatever he can.
Durrant is active off his back here, looking for submissions.
Durrant working for submissions but it's allowed Cheeseburger to get to half guard.
Durrant looks gassed!
That's three minutes gone in the round.
Cheeseburger wants to take a breather but Durrant is having none of it.
Durrant looking for submissions from an awkward position here.
Cheeseburger wants to take a breather but Durrant is having none of it.
Cheeseburger is going to have to think about doing something other than just controlling because Durrant is managing to avoid having the position dictated to him.
Ground and pound from Cheeseburger.
Cheeseburger looking to pass the half guard. Not this time.
Cheeseburger is keen to just control but Durrant is a slippery customer.
Cheeseburger trying to control from Durrant's half guard. Durrant has other ideas though and has regained full guard.
The referee has ruled that neither fighter is active enough on the ground and has stood them back up.
Durrant drives through with a takedown into guard.
That's four minutes gone in the round.
Cheeseburger is working from a closed guard but he's struggling to control his opponent.
Cheeseburger is active off his back here, looking for submissions.
Cheeseburger is working an open guard here, looking to improve his position. No doubt that will leave him open to counters but at least he's being more offensive.
Durrant wants to control from the top but Cheeseburger keeps moving.
Cheeseburger utilising some decent striking defenses from the guard, preventing the ground and pound.
Durrant trying to control but Cheeseburger is working from the bottom.
Durrant postures up.
And thats the end of the round the fighters go back to their corners.
That was a close round but I would say that Jimmy Cheeseburger will probably get the nod.
Well, the break between rounds is over. Let's get back to the scrappin!
Cheeseburger throws a head kick that misses.
Cheeseburger shoots in for a takedown. "I don't think so" says Durrant as he avoids it easily.
Durrant takes a big uppercut there. He seems a bit wobbly but no, he's OK.
Durrant takes a jab right on the nose. That must have hurt but he shrugs his shoulders and looks to return the favor.
Cheeseburger lands a two punch combo.
Cheeseburger jabs away that one connects to the head of his opponent.
David Durrant is looking to throw some combinations by the looks of things.
Durrant fakes an overhand right and shoots for a takedown. Cheeseburger sprawls well initially but Durrant persists and gets the takedown into half guard.
Durrant uses his free foot to push down on Cheeseburger's thigh. Eventually he works his other foot free and he's advanced to mount - this is trouble for Cheeseburger.
Cheeseburger is working to get back to half guard.
The fighters are tangled up in the ropes here. We might need a restart if the fighters can't break free themselves.
Durrant is working to isolate an arm here. It's a telegraphed submission attempt but he's gone for it anyway - and he's got it! Durrant extends the arm and Cheeseburger is forced to tap!
Ladies and gentlemen, after 1:03 of round 2, we have a winner by way of Submission (Armbar). David Durrant!
David Durrant is the new welterweight champion!
|
|
|
|
|
|
|
|
|
|
|
|
|
|
|
|
|
|
|
|
|
|
|
| S |
C
A |
G |
S |
C
B |
G |
|
S |
C |
G |
|
energy
A | B |
|
hype
A | B |
|
pop
A | B |
|
mgr
A | B |
|
FIGHT
RATING
76% |
|
|
|
|
|
|
|
|
|
|
