|
Play
by Play - Fighter's Fight Commentary
|
Event:
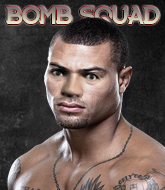
RSE : Just Some Fights 11
Date: Nov 01, 2023 |
#R1#
Stevens scores with a jab to the jaw.#CUT#It looks like Shac Carwin has been cut.
Carwin dives in for a single leg takedown but Stevens sprawls and the fighters end up clinched against the cage.
Carwin shoots in for a takedown but doesn't get it.
Carwin keeping his hands up high there, blocking the jab from Stevens.
Carwin with the counter takedown but Stevens avoids it easily.
Stevens takes a swing at Carwin's ribcage but misses.
Carwin keeping at a good range here, avoiding a leg kick.
Carwin with the counter takedown but Stevens avoids it easily.
Carwin is trying hard to land a takedown here. Stevens sprawls well and keeps this one on the feet.
Austin Stevens has stuffed three takedown attempts in the round now. That's going to take a lot out of Shac Carwin.#TD2#
Carwin dives in and scores a takedown into Stevens's guard.
We've had a slow start to the round here - hopefully the action picks up.
Carwin won't allow Stevens to sweep him here.
Carwin throws a strike but Stevens rolls with it and manages to sweep. Now he's in guard on top. #REVR##SUB2#
Carwin has his foot on Stevens's thigh. He's trying to push off and get in position for a triangle, I think. Stevens works his way back into a safe position though.
Carwin has the superior BJJ but he's also working some ground strikes into his gameplan.#SUB2#
Carwin isolates an arm and boxes in a triangle. Stevens stacks Carwin on his neck as he steps over and passes to the side. He's now in a much more dominant position where he can look to do some serious damage. Nice move by Stevens!#T1#
Carwin tries to bench press Stevens off him but Stevens keeps the position.
Carwin trying his best to control but Stevens has mounted him.
Carwin wants to hold on but Stevens pushes him away.
Carwin can't escape the position.
Stevens sitting in mount, just looking to control for the moment.
Carwin manages to regain half guard. Good work. #SUB2#
Carwin is looking to sinch up a guillotine here but Stevens pulls his head out easily. #SUB2#
Carwin is looking to sinch up a guillotine here but Stevens pulls his head out easily.
The fighters are pressed up against the cage, both looking to find a bit of space to work.#T2##SUB2#
Carwin looking for submissions off his back.#SUB2#
Carwin actively working from the bottom here.
Stevens has freed up his trapped foot and advances to mount.
Stevens controlling the pace for now.
Carwin manages to regain half guard. Good work. #SUB2#
Carwin actively working from the bottom here.#T3#
Stevens seems content to maintain position for now, rather than mounting any offense.
Carwin is looking for a sweep. Stevens is wise to his cunning plan and keeps the top position.
Stevens is figuring out what he wants to do next.
We've been informed that Carwin has been working hard on his conditioning in the buildup to the fight.#SUB2#
Carwin looking for submissions from an awkward position here.#SUB2#
Carwin is looking to sinch up a guillotine here but Stevens pulls his head out easily. #SUB2#
Carwin is looking to sinch up a guillotine here but Stevens pulls his head out easily. #SUB2#
Carwin looking to work for a kimura from the bottom.#T4#
The crowd are getting on the fighters' backs, as the pace has dropped off in the last minute or so.
Stevens wants to lay and pray for a moment but Carwin keeps working.
Stevens prevents Carwin from improving his position.#SUB2#
Carwin looking for submissions from an awkward position here.
The ref warns both fighters not to hold the cage as they work up against the meshing.#SUB2#
Carwin looking for submissions from an awkward position here.
Stevens performing his best blanket impression for a moment.
The crowd thankful this round is nearly over.
Stevens prevents Carwin from improving his position.
Stevens knows he needs to get back to his feet asap. He's simply no match for Carwin on the ground.#SUB2#
Carwin is looking to sinch up a guillotine here but Stevens pulls his head out easily.
And that is the end of the round. The fighters go back to their corners.
Austin Stevens dominated that round.
The cut man is working on Shac Carwin's cut.
The fighters' corners scream their final instructions, as the referee calls time. Here we go, back to the action!#R2#
Carwin takes a shot right to the liver - Bas would have been proud of that punch.
Carwin has his takedown stuffed
and Stevens counters with a straight punch to the midsection.
Carwin with a lazy takedown attempt
and Stevens counters with a quick right hand to the jaw.
A big left from Stevens misses.
Carwin slips a jab from Stevens.
We've had a slow start to the round here - hopefully the action picks up.
Stevens looks to land a right hand but Carwin moved out of range.#TD2#
Carwin closes the distance and clinches up, looking for a takedown. He shifts his weight and gets a nice trip into half guard.

Stevens manages to create a bit of space in order to work his way back to his feet. Carwin keeps hold of his opponent and drives him back against the cage. #T1##BC2#
Carwin breaks the clinch and we're back to striking at distance.
Carwin shoots and misses
and Stevens cracks him with a counter punch right on the button.
Austin Stevens has stuffed three takedown attempts in the round now. That's going to take a lot out of Shac Carwin.
Carwin on the wrong end of a decent looking cross there.
Carwin fails with a takedown attempt.
Stevens misses with a head kick.
Stevens misses with a two punch combination.
Stevens tries to bum rush Carwin with a series of wild strikes but Carwin uses good footwork to avoid the assault.#TD2#
Excellent takedown into side control there by Carwin.
Stevens throws Carwin to one side and escapes!#T2#
The crowd cheering loudly, showing their appreciation for the quality fight we're seeing here.
Carwin goes for a double leg but Stevens avoids the attempt and the two fighters end up clinched against the cage as Stevens continues to drive forward.
Stevens seem to be loading up, looking for a big counter.
Carwin shoots in for a double leg but Stevens sprawls well. That's going to sap some energy.
Carwin misses with a takedown
and Stevens counters with a straight right hand.
Stevens is really dominating this fight. Is there anything that Carwin can do to turn this around?#TD2#
Carwin feints and as Stevens raises his hands in defense, Carwin changes levels and drives through with a takedown into guard.
Stevens pushes Carwin off and gets back to his feet.
Austin Stevens is looking to keep the fight on the feet at all costs.
Carwin shoots in for a takedown - he's clinched up with Stevens but Stevens pushes him off and we're back to square one.#T3#
Carwin misses with a takedown attempt. He shot from a bit too far out.
Stevens connects with a right hand. Carwin shakes it off.
Stevens goes to the watering hole and comes back with a big thumbs up from the judges as he scores a three punch combo.
Stevens finds nothing but air with that leg kick attempt.
Carwin with the counter takedown but Stevens avoids it easily.
Stevens cracks Carwin with a nice right hand that draws applause from the crowd.
Stevens throws a right hand that misses
#TD2#
and Carwin counters with a shoot takedown into half guard.
Stevens manages to create a bit of space in order to work his way back to his feet. Carwin keeps hold of his opponent and drives him back against the cage. #T4#
The fans in attendance giving it up for the two fighters, who have really let it all hang out in the last minute or so!#TD2#
Carwin has moved round to his opponent's back and is looking for a suplex! Oh snap! He's tossed Stevens clear over his head and slammed him to the mat!
Stevens manages to escape to his feet. #TD2#
Carwin drops down and drives through with a powerful takedown into guard.
Stevens pulls Carwin in close to his closed guard and prevents Carwin from doing any damage or advancing position.
Carwin trying to control the position from guard on top but Stevens is wriggling around, looking for whatever he can.
The crowd applaud the fighters' efforts here as the round comes to an end.
There's a bit of a scramble here and now Stevens is on top in guard.
#REVR#
And that is the end of the round. The fighters go back to their corners.
Austin Stevens dominated that second round.
The cut man is working on Shac Carwin's cut.
That's time! Stevens's corner gives him a slap on the ass as he gets ready to fight. This is the final round!#R3#
Stevens leaves Carwin with his face pressed against the mat as he sprawls beautifully, defending against a solid takedown attempt.
Stevens stuffs a takedown. It's all about dictating where the fight takes place and Stevens wants it to stay on the feet.
Stevens throws a hook but Carwin avoids it easily.
Carwin is trying hard to land a takedown here. Stevens sprawls well and keeps this one on the feet.
Austin Stevens has stuffed three takedown attempts in the round now. That's going to take a lot out of Shac Carwin.
Stevens goes to the watering hole and comes back with a big thumbs up from the judges as he scores a three punch combo.
Austin Stevens is winning the standup battle so far.
We've had a slow start to the round here - hopefully the action picks up.
Stevens leaves Carwin with his face pressed against the mat as he sprawls beautifully, defending against a solid takedown attempt.
Shac Carwin seems to be the more aggressive standup fighter in this bout.
Stevens scores with a jab.#T1#
Carwin defending well as Stevens loads up on a big left hand.
Carwin with the counter takedown but Stevens avoids it easily.
Carwin misses with a takedown attempt
letting Stevens counter with a right hand.
Carwin will have to do better than that with his takedown attempts.
Stevens is looking to counter punch.
Carwin shoots in for a takedown but Stevens shows good takedown defense.
Stevens throws a big counter combination but Carwin scrambles out of danger and avoids any damage.
Sloppy strikes from Stevens. Those never looked like landing.
Carwin drops down looking to force a counter takedown but Stevens defends it well.
Stevens throws a series of punches but Carwin avoids them all with ease.
And Carwin tries to counter it with a takedown but Stevens pushes his down on his head and steps out.
Carwin fails to land the takedown.#T2#
The fighters circling - Stevens throws out the jab but it was never going to land.
Stevens swings wildly with a hook that is half blocked by Carwin.
Carwin is trying hard to land a takedown here. Stevens sprawls well and keeps this one on the feet.
Stevens throws a push kick but Carwin slaps the foot to one side.
Stevens cracks a nice hook into Carwin's ribs.
Stevens lands a jab to the nose.
Carwin misses with a takedown attempt
and Stevens counters with a left to the body.
Carwin takes a big intake of breath there - he's definitely tired.
The fans in attendance giving it up for the two fighters, who have really let it all hang out in the last minute or so!
Carwin tries for a takedown but Stevens sees it coming a mile off and avoids it easily.#T3#
A nice combination there by Stevens.
Carwin tries for a takedown but Stevens sees it coming a mile off and avoids it easily.
Stevens was looking to counter that move with a punch but didn't quite pull the trigger.
Carwin closes the distance and clinches up with Stevens, looking for a takedown. Carwin pushes Stevens against the cage but Stevens circles to the side and manages to break the clinch.
Stevens is looking for a counter combo.
Stevens dances in quickly and lands a nice inside leg kick on Carwin. That did some damage!
Stevens tests Carwin's chin there with a solid looking shot.#CUT#That has opened up Shac Carwin's cut even more.
Stevens misses with a body shot. Nice footwork from Carwin.
Carwin takes a jab on the nose. He smiles like he loves it and keeps coming.#ROC#Carwin is rocked!
Stevens is looking to score with low kicks.
Stevens thuds his right hand into Carwin's forehead from close range. That could be painful for both fighters.
Shac Carwin has stepped it up - he knows he needs a finish here!
Carwin is still on wobbly legs! Can Stevens finish him?#T4#
Stevens misses with a series of wild punches.
Carwin wants to clinch but Stevens slips to the side
and Stevens counters with a huge left! Carwin is in big trouble! He's backing up but Stevens isn't giving him chance to recover. Under a barage of punches the ref has to step in to save Carwin from any more damage. A dominating finish by Stevens!
Ladies and gentlemen, after 4:20 of round 3, we have a winner by way of TKO (Strikes). Austin Stevens!
An out of breath and clearly excited Austin Stevens thanked Silverguard Outfitters 🛡 for their help and support (and free stuff they sent him). |
|
|
|
Event:
RSE : Just Some Fights 7
Date: Sep 06, 2023 |
#R1##TD#
Carwin drives through with a takedown into guard.
We get told so often about how wrestlers don't like to be on their backs. Let's see if Volarus can do anything to dispel that myth.
Carwin is stalling in the full guard.
Carwin wants to control from the top but Volarus keeps moving.
Carwin looking to pass the guard.
Volarus is working an open guard here, looking to improve his position. No doubt that will leave him open to counters but at least he's being more offensive.
Volarus looking to control.
We've had a slow start to the round here - hopefully the action picks up.
Carwin stands up and looks to throw the legs aside to pass to side control. Volarus swivels though and keeps the full guard. #SUB#
Carwin thinks about going for a leg but decides against it, in order to maintain the position.
Volarus avoiding any damage from the ground and pound. #T1##SUB#
Carwin thinks about going for a leg but decides against it, in order to maintain the position.
Volarus can't keep his opponent in guard - Carwin advances to half guard, no doubt looking to mount.
Carwin throwing shots but Volarus is blocking nicely.
The ref warns both fighters not to hold the cage as they work up against the meshing.
Volarus won't allow Carwin to pass to mount.
Carwin trying to control from half guard but Volarus is working away.
Volarus really doesn't want to stay on the ground with Carwin. If he can't get it back to his feet, it's only a matter of time before he'll be tapping out.#SUB#
Carwin wants to work for an arm triangle but Volarus is really keeping half guard well and defending the submission attempt.
#SUB#
Carwin seems to be working for a kimura but Volarus defends the submission attempt.
Volarus wants to improve his position but Carwin is controlling well.
#T2#
The two fighters exchange a few words. I couldn't hear what they were saying but maybe it's more fun if you make it up yourself. Carwin connects with a nice short shot to Volarus's temple.
Carwin wants to control but Volarus is keeping him busy.
Carwin thows a wild elbow that connects with the canvas. #SUB#
Carwin is thinking about going for an arm triangle but he can't free his leg.
#SUB#
Carwin is looking for a kimura. It's going to be difficult to finish that from half guard though and Volarus defends it well.
Carwin wants to take a breather but Volarus is having none of it. #SUB#
Carwin looking for a submission but Volarus manages to get full guard, putting an end to that submission attempt.
#T3#
Carwin wants to control from the top but Volarus keeps moving. #SUB#
Carwin drops back looking for a heel hook - he quickly realises he's not going to get it but Volarus manages to dive on top of him before he can escape and now Carwin has Volarus in his guard.#REVB##SUB#
Carwin looking for submissions from the bottom here. Moving his hips around, possibly looking for an armbar.
#SUB#
Carwin has his foot on Volarus's thigh. He's trying to push off and get in position for a triangle, I think. Volarus works his way back into a safe position though.
Hammerfist, elbow! yells Volarus's corner. There ya go! There ya go! #SUB#
Volarus is sitting in close to Carwin's body. Carwin has gone for a guillotine from the bottom. Oh damn, that looks pretty tight! Volarus is panicking - it looks like this one could be all over! Yes, Volarus is tapping! That was a very nice submission by Carwin.
Ladies and gentlemen, after 4:59 of round 1, we have a winner by way of Submission (Guillotine). Shac Carwin!
A less than humble Shac Carwin misjudged his post fight interview somewhat and came across a little too arrogant whilst trying to hype up his own abilities. |
|
|
|
Event:
RSE 4: Conquer All
Date: Jul 08, 2023 |
#R1#
Henriksen rushes in with a sloppy looking punch
#TD2#
and Carwin decides to take the opportunity to score a takedown. He's landed in Henriksen's guard.
Henriksen is looking to stand back up... there's a bit of a scramble and Carwin dives into side control.
#REVR#
Henriksen is positioning himself to get back to half guard. #SUB2#
Carwin has hold of Henriksen's arm. He's looking for a kimura. Henriksen seems comfortable defending it but Carwin has shifted his position slighty and is cranking on the arm! Henriksen is real pain and he's forced to tap out! Henriksen is disgusted with himself for not defending it better but Carwin couldn't care less - he's delighted!
Ladies and gentlemen, after 0:19 of round 1, we have a winner by way of Submission (Kimura). Shac Carwin!
Shac Carwin decided to hype himself up post fight. It was going well but he went on about it a bit too long and the crowd turned on him a little. |
|
|
|
Event:
MMAHKI 46
Date: May 05, 2023 |
#R1##TD#
Carwin shoots in for a takedown from distance. He catches Jones napping and manages to drive through into side control!
Jones wants to control but Carwin postures up.
Jones is positioning himself to get back to half guard.
Jones is trying to escape the position but Carwin is controlling the position.
Jones is looking for a sweep.
Jones is trying to control Carwin's posture but Carwin avoids it.
Carwin has improved his flexibility recently so we will have to see if he can use that to his advantage.
Carwin tries to advance to mount but Jones denies him. #SUB#
Carwin is looking for a kimura. He might have it! No, Jones has escaped the position, nice work there.
Jones taking a bit of punishment here - Carwin scoring with strikes.
The ref warns both fighters not to hold the cage as they work up against the meshing.
We've had a slow start to the round here - hopefully the action picks up.#SUB#
Carwin tries for a kimura. Not really close to a finish though.
Jones is not content to let Carwin control the position. #T1#
Jones can't do much from the bottom here.
Jones is looking for a sweep.
Jones looks more muscular than last time we saw him. He must have been on the weights.
Jones is holding Carwin down, trying to stall.
Jones tries to buck Carwin off but Carwin is having none of it.
Jones manages to get back to half guard.
Jones keeping hold of Carwin's head, controlling as best he can.
Jones avoiding damage under a succession of punches from Carwin. #SUB#
Jones is defending against the submission attempts here by Carwin.
#T2##SUB#
Carwin wants to work for an arm triangle but Jones is really keeping half guard well and defending the submission attempt.
Jones keeping hold of Carwin's head, controlling as best he can.
Jones gets back to full guard.
Carwin missing there with some ground and pound from the guard. #SUB2#
Jones is working actively off his back, looking to secure an arm or perhaps work for a triangle.
Carwin throwing strikes from guard but Jones blocks nicely.
Jones is trying to control the position from the bottom.
Carwin chips away with some ground and pound.#T3#
Carwin throwing strikes but missing.
Carwin missing there with some ground and pound from the guard.
Carwin trying to pass the guard but can't manage it just yet.
Carwin with a flurry of punches that miss.
Carwin is looking to work some ground and pound but Jones has wrist control.
Carwin keeps in close for a moment and lands a decent shot to the side of Jones's head.
Jones controlling the position.#SUB#
Carwin thinks about going for a leg but decides against it, in order to maintain the position.
There's a bit of a scramble here and now Jones is on top in guard.
#REVB##SUB#
Carwin escapes his hips to the side and looks to be working for an armbar. Jones gives him a little smile and shakes his head. No chance.
Jones wants to control from the top but Carwin keeps moving. #T4##SUB#
Jones got a little sloppy there for a moment and Carwin has worked his way into a loose triangle - can he finish it?! No, Jones has managed to get both his arms back between Carwin's legs - danger averted.#SUB#
Carwin is throwing his legs up, looking for submissions. Jones is aware though and is defending well.
Carwin keeping moving, preventing Jones from controlling successfully.
Carwin keeping full guard, as Jones tries to pass.
Jones advances to half guard.
Jones tries to pass to full mount but Carwin defends it. #SUB2#
Jones is thinking about going for an arm triangle but he can't free his leg.
The crowd thankful this round is nearly over.#SUB#
Carwin looking for submissions from an awkward position here.
Jones is taking a breather. Carwin says something to him but it's hard to make out. Perhaps he's telling him to get on with it and actually do something.
And that is the end of the round. The fighters go back to their corners.
Shac Carwin dominated that round.
Well, the break between rounds is over. Let's get back to the scrappin!#R2##TD#
Carwin shoots in for a takedown from distance. He catches Jones napping and manages to drive through into side control!#SUB#
Carwin tries for a kimura. Not really close to a finish though.
Jones is looking for a sweep.
Carwin working away.
We've had a slow start to the round here - hopefully the action picks up.#SUB#
Carwin wants to work for a kimura but he's foiled early by Jones, who protects the arm well. #SUB#
Carwin working hard here to secure a kimura but he's not really in the right position for it.
Jones tries to improve position but can't. #T1##SUB#
Carwin goes for an armbar here - this could be all over! But no, Jones has escaped beautifully and is now on top in side control! Oh, that's unlucky for Carwin but great work by Jones.#SUB2#
Jones looking for an arm triangle but it's way too loose to do anything.
Carwin wants to escape from the position here - easier said than done!#SUB2#
Jones tries for an arm triangle. That looks pretty tight to me. Is this one over!?! Possibly, maybe, no Jones has let go of the choke. Obviously it wasn't as tight as we thought!
The fighters are pressed up against the cage, both looking to find a bit of space to work.
Jones lands a nice forearm strike.
Carwin is trying to get back to half guard.
Carwin sneaks a leg under to get back to half guard.#T2#
Carwin is trying to control but can't.
#SUB2#
Carwin is trying to control Jones's posture. Jones takes advantage of the lull and advances to side control. He also appears to have an arm triangle here! Uh oh, big trouble for Carwin! Jones is rotating here... this could be the end... Carwin is out! Jones has ended this one emphatically! Great submission!
Ladies and gentlemen, after 2:24 of round 2, we have a winner by way of Submission (Arm Triangle). Jack Jones!
Jack Jones bigged himself up after the win. The crowd seemed to love it. |
|
|
|
Event:
Quick Fight Championship
Date: Mar 04, 2023 |
#R1##TD2#
Carwin gets caught on his heels momentarily as he allows Adams to score an easy takedown into full guard.#SUB#
Carwin has managed to work for a loose triangle. I think Adams should be able to defend this one pretty easily though. Oh, Carwin has tightened it up now! Adams should have reacted faster there - he's in big trouble and yes, he's tapped out! This one is all over!
Ladies and gentlemen, after 0:18 of round 1, we have a winner by way of Submission (Triangle). Shac Carwin!
Shac Carwin was full of energy after the big win and talked about how he thinks he can do big things in this sport. The crowd were appreciative of his determination to succeed. |
|
|
|
Event:
SSG Thanksgiving
Date: Nov 27, 2022 |
This TWGC bout is 1 fifteen minute round in the super heavyweight division. Introducing today's competitors. In the red corner, competing out of Las Vegas, with a TWGC record of 0 wins and 0 losses; Shac Carwin! And in the blue corner, fighting out of Montreal, with a TWGC record of 0 wins and 0 losses; Miles Levesque!
The judges for this bout are Frank Antenori, Jack Bonds and Timothy Bukovac.
The official calls the fighters to the middle and the contest is under way.
We've got one fighter who appears to only be looking to counter and the other not looking particularly aggressive either, so we could be in for a dull fight.
Carwin fails miserably with a takedown attempt.#TD#
Levesque gets caught flat footed, as Carwin shoots in with a quick takedown into guard. Score +2 for takedown into guard / half guard: Carwin (2) vs (0) Levesque
We've had a slow start to the round here - hopefully the action picks up.
Carwin tries to free his leg and advance position but Levesque is retaining full guard. #SUB2#
Levesque had isolated an arm as going for a kimura. Carwin defends it easily.
Carwin tries to free his leg and advance position but Levesque is retaining full guard. #T1#
Carwin trying to control but Levesque is working from the bottom. #SUB2#
Levesque has his foot on Carwin's thigh. He's trying to push off and get in position for a triangle, I think. Carwin works his way back into a safe position though.#SUB2#
Levesque is active off his back here, looking for submissions.
Carwin trying to control but Levesque is working from the bottom. #SUB2#
Levesque throws his legs up looking for a submission but Carwin uses it to pass to side control.
Score +3 for passing guard: Carwin (5) vs (0) Levesque#SUB#
Carwin tries for an arm triangle. That looks pretty tight to me. Is this one over!?! Possibly, maybe, no Carwin has let go of the choke. Obviously it wasn't as tight as we thought!
Levesque is trying to get back to half guard. He's pushing on Carwin's leg. He's managed it. Nice work.#SUB2#
Levesque is looking to sinch up a guillotine here but Carwin pulls his head out easily.
The fighters are pressed up against the cage, both looking to find a bit of space to work.#SUB2#
Levesque looking for submissions from an awkward position here.
Levesque tries to get to full guard but Carwin has control of the leg. #T2##SUB2#
Levesque is looking to sinch up a guillotine here but Carwin pulls his head out easily.
Levesque is looking to control Carwin's leg but it's slowly edging free. Can Levesque avoid being mounted?#SUB#
Carwin is trying to work for a kimura. This could be trouble! No, Levesque has managed to free his arm - good work. #SUB#
Carwin seems to be looking for submissions.
Levesque is staying active underneath Carwin, who seems content to just control the action from this position. #SUB2#
Levesque looking for submissions from an awkward position here.
Carwin passes the guard and advances to mount! Score +3 for passing guard: Carwin (8) vs (0) Levesque#SUB#
Carwin looks like he's working for a submission but he's not found anything just yet.#T3#
Levesque regains half guard.#SUB2#
Levesque is looking to sinch up a guillotine here but Carwin pulls his head out easily. #SUB2#
Levesque looking to work for a kimura from the bottom.#SUB2#
Levesque looking to work for a kimura from the bottom.
Levesque is looking to improve his position.
Carwin trying to control the action but Levesque is working from the bottom. #T4##SUB2#
Levesque looking for submissions off his back.#SUB#
Carwin is working for a kimura but Levesque is defending it quite comfortably.
Carwin is keen to just control but Levesque is a slippery customer.
Levesque trying to control from the bottom.
Carwin prevents Levesque from improving his position.#SUB2#
Levesque looking to work for a kimura from the bottom.
The ref warns both fighters not to hold the cage as they work up against the meshing.#SUB2#
Levesque looking for submissions off his back.#T5##SUB2#
Levesque actively working from the bottom here.#SUB#
Carwin is working for submissions here but there's nothing on.
#SUB2#
Levesque looking for subs from the bottom but Carwin mounts him! Score +3 for passing guard: Carwin (11) vs (0) Levesque
Levesque wants to control but Carwin is having none of it.
Levesque is working to get back to half guard.
#SUB#
Carwin is in full mount, looking to secure a guillotine but Levesque is surviving well by controlling Carwin's body position as best he can.
Carwin tries to control but Levesque wriggling away. #T6##SUB#
Carwin looking for an armbar but decides to keep the dominant position instead.
Levesque working to try and regain half guard.
#SUB#
Carwin looks like he's working for a submission but he's not found anything just yet.
Levesque reaches up to try and control the position but Carwin seems to have an arm triangle now! Uh oh! Levesque rolls and tries to escape and now Carwin has his back!
Score +3 for taking back: Carwin (14) vs (0) Levesque
Carwin doesn't have the hooks in and Levesque manages to turn into his guard.
Score +2 for sweep to guard / half guard: Carwin (14) vs (2) Levesque#SUB2#
Levesque thinks about going for a leg but decides against it, in order to maintain the position.
Levesque preventing the sweep. #T7#
Carwin keeping full guard, as Levesque tries to pass.
Levesque wants to control from the top but Carwin keeps moving. #SUB#
Carwin is active off his back here, looking for submissions.
Carwin is breathing heavily.
Levesque wants to control from the top but Carwin keeps moving. #SUB#
Levesque avoids a guillotine attempt easily.
Levesque trying to pass the guard but can't manage it just yet.
Levesque trying to control but Carwin is working from the bottom.
Levesque advances to half guard. #SUB2#
Levesque is working for a submission here. He's got hold of the far side arm and he's looking for a kimura. He's cranking on the arm and he's got it! Carwin is tapping out! Ouch, that looked like it hurt!
Ladies and gentlemen, after 8:55 of round 1, we have a winner by way of Submission (Kimura). Miles Levesque! |
|
|
|
|
|
|