|
Play
by Play - Fighter's Fight Commentary
|
Event:
WFCG 3: Fujiwara vs Grizzly
Date: Sep 07, 2022 |
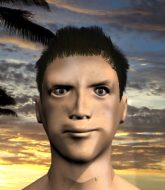
This TWGC bout is 1 fifteen minute round in the super heavyweight division. Introducing today's competitors. In the red corner, competing out of London, with a TWGC record of 1 wins and 1 losses; Ryan Jack! And in the blue corner, fighting out of New York, with a TWGC record of 6 wins and 2 losses; Josie Saltzman!
The judges for this bout are Frank Dennis, Stewart Dunkirk and Tiny Johnson.
The official calls the fighters to the middle and the contest is under way.
Jack fails to land the takedown.#TD2#
Saltzman decides to change it up a bit and drives through with a nice takedown into half guard. Score +2 for takedown into guard / half guard: Jack (0) vs (2) Saltzman
Jack tries to roll over but Saltzman keeps him under control.#SUB#
Jack looking to work for a kimura from the bottom.#SUB2#
Saltzman has hold of the far side arm. He's working for the Kimura, can Jack defend it? Saltzman steps over the head and cranks it - Jack is tapping out! That was textbook stuff right there - nice submission victory for Saltzman!
Ladies and gentlemen, after 0:28 of round 1, we have a winner by way of Submission (Kimura). Josie Saltzman!
Josie Saltzman decided to go for the less than humble approach in his post fight interview, telling everyone how he is going to conquer the world. The crowd seemed to like it when really that sort of approach could have gone either way. |
|
|
|
Event:
WFCG 2: Babel vs Fujiwara
Date: Aug 24, 2022 |
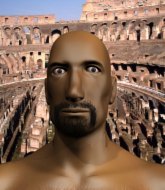
This TWGC bout is 1 fifteen minute round in the super heavyweight division. Introducing today's competitors. In the red corner, competing out of St Petersburg, with a TWGC record of 2 wins and 0 losses; Magomed Khasbulaev! And in the blue corner, fighting out of London, with a TWGC record of 1 wins and 0 losses; Ryan Jack!
The judges for this bout are Bruno Lombardi, Reed Andrews and Russell Pearce.
Let's get this grappling contest under way! Who will be victorious?
Jack shoots in looking for a takedown but Khasbulaev manages to keep the fight standing, pushing Jack's face into the canvas for good measure before circling away.
Khasbulaev defends well against a solid takedown attempt from Jack.
Khasbulaev is trying to close the distance and clinch up, after that failed offence from Jack.
Khasbulaev wants to clinch up but Jack keeps it at a distance.
Khasbulaev tries to clinch there but Jack circles away.
#TD#
Khasbulaev darts in and lands a nice takedown into half guard. Score +2 for takedown into guard / half guard: Khasbulaev (2) vs (0) Jack
Khasbulaev wants to control but Jack is keeping him busy.
Khasbulaev is thwarting Jack's attempts to control the position.
Khasbulaev controlling the action here.
Jack is looking to control Khasbulaev's leg but it's slowly edging free. Can Jack avoid being mounted?
We've had a slow start to the round here - hopefully the action picks up.
Khasbulaev content to control rather than advance. #SUB#
Khasbulaev looking for a kimura but he'll have to free his other leg if he wants to finish that. Perhaps he's just using it as a distraction technique.
#T1##SUB#
Khasbulaev is trying a forearm choke
I don't think that's going to do much at this level of the game.
Khasbulaev is trying to control. Jack wants to improve his position but can't escape this time.
Khasbulaev is looking to advance position but Jack won't allow it.
Khasbulaev controlling the action here.#T2#
Khasbulaev is looking to take a break and control but Jack is keeping him honest, looking to work from the bottom.
Jack wants to get back to full guard.
Jack has no desire to be mounted, so is trying to control. Khasbulaev is working away from the top position though.
The fighters are pressed up against the cage, both looking to find a bit of space to work.
Khasbulaev wants to take a breather but Jack is having none of it. #SUB#
Khasbulaev is working for a kimura but Jack is defending it quite comfortably.
Jack is looking to improve his position.
#T3#
Khasbulaev is just sitting in half guard, waiting for something to happen.#SUB2#
Jack is looking to sinch up a guillotine here but Khasbulaev pulls his head out easily.
Jack is trying to control but can't.
We've been informed that Jack has been working hard on his conditioning in the buildup to the fight.#SUB#
Khasbulaev is looking for a kimura but he's never going to get it from there.
Khasbulaev seems content to maintain position for now, rather than mounting any offense.
Khasbulaev is looking to take a break and control but Jack is keeping him honest, looking to work from the bottom. #T4#
Khasbulaev is really struggling to control Jack but he's trying to hold on to the position.
Jack trying to control but Khasbulaev postures up.
Khasbulaev content to sit in half guard and control for a moment. #SUB#
Khasbulaev is sneakily working for an arm triangle but Jack sees it coming and defends easily.#SUB2#
Jack looking to work for a kimura from the bottom.
Jack is trying to maintain the position but Khasbulaev is very close to passing his half guard.#T5#
Jack is looking to improve his position.
Khasbulaev is thwarting Jack's attempts to control the position.
Khasbulaev performing his best blanket impression for a moment.
Khasbulaev is trying to control the action in half guard but Jack is working away on the bottom, looking perhaps to get back to full guard.
Khasbulaev perhaps working for something from half guard, or maybe not. It looks like he's just sitting there.
Khasbulaev is trying to control the action in half guard but Jack is working away on the bottom, looking perhaps to get back to full guard. #SUB#
Khasbulaev seems to be working for a kimura but Jack defends the submission attempt.
Khasbulaev controlling the action here.#T6#
Jack is looking to improve his position.
Neither fighter is being very active at the moment, with Khasbulaev in particular looking to stall.
Khasbulaev trying to control the action but Jack is working from the bottom.
Jack tries to roll over but Khasbulaev keeps him under control.#SUB#
Khasbulaev is thinking about going for an arm triangle but he can't free his leg.
Jack is looking for a sweep. Khasbulaev is wise to his cunning plan and keeps the top position.#T7#
Jack is in trouble now - Khasbulaev has advanced to mount! Score +3 for passing guard: Khasbulaev (5) vs (0) Jack
Khasbulaev can't quite control the action as he would like just now, as Jack is looking to escape.
Jack is trying to escape the mount.
Jack is persisting with the attempt to improve his position.#SUB#
Khasbulaev goes for an armbar but Jack turns quickly into his guard - lovely anticipation from Jack. Score +2 for sweep to guard / half guard: Khasbulaev (5) vs (2) Jack
Jack wants to control from the top but Khasbulaev keeps moving. #T8#
Jack tries to free his leg and advance position but Khasbulaev is retaining full guard.
Khasbulaev trying to control the position.
Khasbulaev looking for a sweep. Not yet Khasbulaev, not yet.
Khasbulaev might be looking to lock onto one of his opponent's long limbs for a submission, whilst we're on the ground.
Jack sneaks a leg through and gets to half guard. That was like a knife through butter how easily he passed Khasbulaev's guard. #SUB2#
Jack is thinking about going for an arm triangle but he can't free his leg.
Jack is trying to control the action in half guard but Khasbulaev is working away on the bottom, looking perhaps to get back to full guard. #SUB#
Khasbulaev is looking to sinch up a guillotine here but Jack pulls his head out easily. #T9#
Jack is trying to control. Khasbulaev wants to improve his position but can't escape this time.
Khasbulaev trying to control but Jack postures up.
Khasbulaev is trying to get back to full guard.
Jack tries to pass to full mount but Khasbulaev defends it.
Khasbulaev trying to control here.
#SUB#
Khasbulaev looking for submissions from an awkward position here.
Khasbulaev is trying to get back to full guard.#T10#
Jack uses his free foot to push down on Khasbulaev's thigh. Eventually he works his other foot free and he's advanced to mount - this is trouble for Khasbulaev. Score +3 for passing guard: Khasbulaev (5) vs (5) Jack
Khasbulaev bucks up and manages to get a nice reversal! He's in guard on the top - nicely done! Score +2 for sweep to guard / half guard: Khasbulaev (7) vs (5) Jack
Khasbulaev trying to control the position from guard on top but Jack is wriggling around, looking for whatever he can.
Jack looking to hit a scissor sweep but Khasbulaev is one step ahead there.
Khasbulaev trying to control but Jack is working from the bottom. #T11#
Khasbulaev controlling from the guard. I say controlling but really, he's stalling.
Khasbulaev passes easily into side control. Nice work. Score +3 for passing guard: Khasbulaev (10) vs (5) Jack
Khasbulaev is looking to take a break and control but Jack is keeping him honest, looking to work from the bottom.
Khasbulaev laying and praying for a moment but Jack takes advantage and regains half guard.
Khasbulaev trying to control from half guard but Jack is working away. #T12#
Khasbulaev content to sit in half guard and control for a moment.
Jack tries to roll over but Khasbulaev keeps him under control.#SUB#
Khasbulaev is sneakily working for an arm triangle but Jack sees it coming and defends easily.
Jack is the more experienced fighter here and he's going to need to draw on some of that experience if he's going to pull this one out the bag.#SUB#
Khasbulaev is looking for a kimura but he's never going to get it from there.
Khasbulaev wants to lay and pray for a moment but Jack keeps working. #T13#
Khasbulaev not doing much here.
#SUB2#
Jack looking to work for a kimura from the bottom.#SUB2#
Jack looking for submissions from an awkward position here.
Khasbulaev is figuring out what he wants to do next.#T14#
Khasbulaev wants to control but Jack is keeping him busy.
Jack is trying to get back to full guard.#SUB#
Khasbulaev is trying to work for a kimura. This could be trouble! No, Jack has managed to free his arm - good work. #SUB#
Khasbulaev is trying a forearm choke
I don't think that's going to do much at this level of the game.
Boooooooooooooooooooo!!! God, this has been a terrible round. Come on you two, sort yourselves out!#SUB#
Khasbulaev is looking for an arm triangle, whilst trying to pass to side control. Jack doesn't seem that keen to cooperate though. No luck this time Khasbulaev.
And that's the end of the fight!
Khasbulaev takes the fight on points by 10 to 5. |
|
|
|
Event:
WFCG 1 : Babel vs McTavish
Date: Aug 17, 2022 |
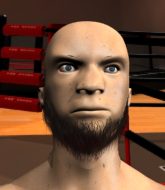
This TWGC bout is 1 fifteen minute round in the super heavyweight division. Introducing today's competitors. In the red corner, competing out of London, with a TWGC record of 0 wins and 0 losses; Ryan Jack! And in the blue corner, fighting out of Helsinki, with a TWGC record of 0 wins and 0 losses; Yuvaraj Hallstro!
The judges for this bout are Frank Dennis, Wesley Smith and Chris Downing.
Let's get this grappling contest under way! Who will be victorious?#TD#
Jack feints and then dives in with a takedown. That was a long way out but the feint bought him enough time to close the distance and complete the takedown. Now we'll play guard for a bit and see who can get the better of that position. Score +2 for takedown into guard / half guard: Jack (2) vs (0) Hallstro
Jack is frustrating his opponent with some stalling tactics from top position.
Jack trying to control the position from guard on top but Hallstro is wriggling around, looking for whatever he can. #SUB2#
Hallstro is active off his back here, looking for submissions.
Hallstro is working an open guard here, looking to improve his position. No doubt that will leave him open to counters but at least he's being more offensive.
The fighters are pressed up against the cage, both looking to find a bit of space to work.#SUB2#
Hallstro is throwing his legs up, looking for submissions. Jack is aware though and is defending well.
We've had a slow start to the round here - hopefully the action picks up.#SUB2#
Hallstro is looking for a guillotine. You can't force these things though and Jack defends well.#SUB2#
Hallstro is looking for a guillotine. You can't force these things though and Jack defends well.#SUB2#
Hallstro looking for subs off his back but Jack has passed one foot through into half guard.
#T1#
Hallstro trying to control here.
Jack is trying to control the action in half guard but Hallstro is working away on the bottom, looking perhaps to get back to full guard.
Jack wants to pass to mount but Hallstro is defending the position. #SUB#
Jack is trying to work for a kimura but Hallstro is defending well.
Hallstro regains full guard. Nicely done.
Hallstro wants to sweep here but Jack controlling him for the moment.
Jack looks to be in better condition than last time we saw him fight. Obviously he's been working hard on his cardio.#T2#
Jack wants to pass the guard but Hallstro is keeping the position.
The fighters are going at a pretty good pace and they're both starting to sweat now.
Jack trying to control the position from guard on top but Hallstro is wriggling around, looking for whatever he can.
Hallstro working a defensive guard but Jack passes into half guard.
#SUB#
Jack looking for a kimura but he'll have to free his other leg if he wants to finish that. Perhaps he's just using it as a distraction technique.
Hallstro wants to control but Jack is keeping busy and won't allow it. #SUB2#
Hallstro is looking to sinch up a guillotine here but Jack pulls his head out easily.
Hallstro is doing well to avoid being mounted. He's controlling the position at the moment.#T3#
Hallstro regains full guard. Nicely done.
The ref warns both fighters not to hold the cage as they work up against the meshing.
Jack postures up.
#SUB2#
Hallstro working from the bottom, still in full guard. He's managed to get a loose triangle. Jack doesn't seem to be doing much to defend here, obviously he feels comfortable in the position. Jack manages to throw the legs off his shoulder and he's back into guard - no problem. #SUB2#
Hallstro looking for submissions off his back, moving his hips, looking for an opening.
#SUB2#
Hallstro has an active guard here but Jack has managed to pass into half guard.
Hallstro tries to get to full guard but Jack has control of the leg.
Jack trying to control from half guard but Hallstro is working away.
Jack wants to free his trapped foot but Hallstro is holding on for dear life with his legs. #T4#
Hallstro slips a foot under and gets full guard. Nice work.
Hallstro looking to sweep here. No luck so far. #SUB#
Jack has gone for a leg lock! Hallstro slips out almost immediately though and dives into Jack's guard. Score +2 for sweep to guard / half guard: Jack (2) vs (2) Hallstro
Hallstro sitting in guard, not really doing much.
Hallstro stopping the sweep attempt from Jack.#T5#
Hallstro wants to pass the guard but Jack is keeping the position.
Hallstro is just sitting in guard, looking to avoid any submissions. #SUB2#
Hallstro drops back, looking for a kneebar! Jack looks panicked! The fighters roll across the mat, one looking to finish, one looking to escape. Jack looks to have wriggled free... Yes, he's got his leg free and he's dived into side control! Good work there from Jack! Score +4 for clean sweep to past guard: Jack (6) vs (2) Hallstro
Hallstro is trying to get back to half guard.
Hallstro is moving his hips around well on the bottom and has managed to get back to half guard.
Hallstro tries to get to full guard but Jack has control of the leg.
Jack passes to side control. Score +3 for passing guard: Jack (9) vs (2) Hallstro
Hallstro is trying to control Jack's posture but Jack avoids it.
We've been informed that Hallstro has been working hard on his conditioning in the buildup to the fight.#T6##SUB#
Jack is trying to get an arm triangle but Hallstro is defending well.
Hallstro can't do much from the bottom here.
Hallstro sneaks a leg under to get back to half guard.#SUB2#
Hallstro looking for a kimura from the bottom but Jack passes into side control! Score +3 for passing guard: Jack (12) vs (2) Hallstro
Hallstro seems a little lost for a moment, as Jack dominates the positioning.
Hallstro struggling a bit here.
Hallstro is looking to reverse the position.
Jack passes to full mount! That's big trouble for Hallstro! Score +2 for reaching mount: Jack (14) vs (2) Hallstro#T7#
Jack looking to control but Hallstro is working nicely, looking to advance position himself.
Hallstro can't escape the position.
#SUB#
Jack with some aggressive grappling here. He's looking for submissions here, rather than waiting for the opportunity to counter.
Hallstro is in all sorts of trouble here.
#SUB#
Jack goes for an armbar but Hallstro turns quickly into his guard - lovely anticipation from Hallstro. Score +2 for sweep to guard / half guard: Jack (14) vs (4) Hallstro#SUB2#
Hallstro is trying to work a guillotine from the top, or something like that? Don't know how he thinks he's going to get a finish from there. #SUB#
Jack is looking for a triangle but Hallstro pushes his legs off easily.
Jack is breathing heavily.
Hallstro trying to control the position from guard on top but Jack is wriggling around, looking for whatever he can. #T8#
Hallstro works a leg free and moves into half guard.
Hallstro is trying to control the action in half guard but Jack is working away on the bottom, looking perhaps to get back to full guard.
Hallstro not doing much here.
#SUB2#
Hallstro is trying to work for a kimura. This could be trouble! No, Jack has managed to free his arm - good work.
Jack is looking for a sweep. Hallstro is wise to his cunning plan and keeps the top position.#SUB2#
Hallstro is working for submissions here but there's nothing on.
#SUB2#
Hallstro is trying to work for a kimura. This could be trouble! No, Jack has managed to free his arm - good work. #T9#
Jack is looking to improve his position.
Jack is trying to maintain the position but Hallstro is very close to passing his half guard.
Hallstro works his foot free and advances to mount. Score +3 for passing guard: Jack (14) vs (7) Hallstro#SUB2#
Hallstro looks like he's working for a submission but he's not found anything just yet.#SUB2#
Hallstro has hold of Jack's left arm, perhaps looking for a submission. The two fighters tussle over control of the isolated limb and Jack manages to get his arm back to his side and away from danger.
Jack tries to get back to half guard but can't. #T10#
Hallstro takes a little breather and maintains the position. The referee will be looking for him to stay active from such a dominant position though.#SUB2#
Hallstro is looking to secure an arm. He's managed it! He's pivoting for an armbar - that looks tight! But Jack has managed to get out of it and now he's in a dominant position. Nice work from Jack! Score +2 for sweep to guard / half guard: Jack (16) vs (7) Hallstro
Hallstro looking for a sweep. Not yet Hallstro, not yet. #SUB2#
Hallstro escapes his hips to the side and looks to be working for an armbar. Jack gives him a little smile and shakes his head. No chance.
Jack wants to pass the guard but Hallstro is keeping the position.#T11#
Hallstro controlling the position.#SUB2#
Hallstro looking for submissions from the bottom but instead Jack passes into half guard.
Hallstro is trying to get back to full guard.
Hallstro wants to control but Jack passes into side.
Score +3 for passing guard: Jack (19) vs (7) Hallstro
Hallstro looking for a sweep but Jack has passed into full mount! Oh no! Score +2 for reaching mount: Jack (21) vs (7) Hallstro
Hallstro tries to hold on but Jack postures up.
Hallstro is controlling an arm, preventing Jack from taking his back. Although keeping him in mount is no better to be honest.
#T12#
Hallstro is working to get back to half guard.
Hallstro looking to escape from mount but he's given up his back! Score +3 for taking back: Jack (24) vs (7) Hallstro
Jack controlling well, preventing Hallstro from escaping the position.
#SUB#
Jack looking for the RNC. #SUB#
Hallstro defends a rear naked choke attempt by controlling one of Jack's arms. #SUB#
Jack looking for the choke from the back.
Jack avoiding Hallstro 's attempts to control his hands.
Hallstro tries to escape the position - he's now mounted. Is that better or worse? Hard to tell! #T13#
Hallstro regains half guard.
Hallstro wants to get back to full guard.
Hallstro works his way to full guard. Good work.#SUB2#
Hallstro has a loose triangle. He'll be looking to tighten that up but Jack can see exactly what he's planning and manages to posture up and free himself.
Hallstro bucks up whilst keeping hold of a body lock, managing to reverse the position. Now he's in top in Jack's guard. Score +2 for sweep to guard / half guard: Jack (24) vs (9) Hallstro
Hallstro sneaks a leg through and gets to half guard. That was like a knife through butter how easily he passed Jack's guard. #SUB2#
Hallstro seems to be working for a kimura but Jack defends the submission attempt.
Hallstro tries to pass the half guard into mount. Jack knows what he's doing though and prevents the attempt. #T14##SUB2#
Hallstro is looking for an arm triangle, whilst trying to pass to side control. Jack doesn't seem that keen to cooperate though. No luck this time Hallstro. #SUB2#
Hallstro is looking for a kimura but Jack is holding onto that half guard position, so it's hard for Hallstro to get the leverage.
Jack manages to get to full guard.
Jack keeping full guard, as Hallstro tries to pass.
Boooooooooooooooooooo!!! God, this has been a terrible round. Come on you two, sort yourselves out!
Hallstro trying to control the position from guard on top but Jack is wriggling around, looking for whatever he can.
And that's the end of the fight!
Jack takes the fight on points by 24 to 9. |
|
|
|
Event:
Quick Fight Championship
Date: Aug 09, 2022 |
#R1#
Roman scores with a nice right hand.
#CUT2#It looks like Ryan Jack has been cut.
Roman throws a head kick that misses #TD#
and Jack counters with a single leg into guard. Roman didn't expect that.
Jack throwing strikes from guard but Roman blocks nicely.
Jack is just sitting in guard, looking to avoid any submissions.
Jack's ground tactics aren't going to win him many fans. Let's hope he's got fireworks for us if he gets back to his feet because he's not doing much on the ground.
We've had a slow start to the round here - hopefully the action picks up.
Jack scores with a decent looking elbow strike.
Jack looking to control the position here, rather than advance. #T1#
Roman trying to punch from his back but it's not doing any damage. #SUB#
Jack drops back for a leg! It's a sloppy attempt though and Jack jumps back into guard quickly, to retain the dominant position.
Roman can't keep his opponent in guard - Jack advances to half guard, no doubt looking to mount.
Jack scores with a couple of good hammerfists.
Roman is trying to control but can't.
Jack trying to control the pace. #SUB#
Jack looking for a submission but Roman manages to get full guard, putting an end to that submission attempt.
Roman can't keep his opponent in guard - Jack advances to half guard, no doubt looking to mount.
Neither fighter is being very active at the moment, with Jack in particular looking to stall.#T2##SUB#
Jack has hold of the far side arm. He's working for the Kimura, can Roman defend it? Jack steps over the head and cranks it - Roman is tapping out! That was textbook stuff right there - nice submission victory for Jack!
Ladies and gentlemen, after 2:12 of round 1, we have a winner by way of Submission (Kimura). Ryan Jack! |
|
|
|
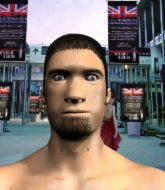
Event:
Quick Fight Championship
Date: Aug 01, 2022 |
#R1#
George swings for the body but Jack moves out of range.
Jack tries to score a power double leg takedown but George sees that one coming and sprawls well. That will dishearten Jack somewhat.
Jack walks straight into an uppercut. Luckily it didn't land flush.#CUT2#It looks like Ryan Jack has been cut.
Jack fails with a takedown attempt from distance.#KD2#
George feints and then winds up with a huge right hand that connects perfectly and sends Jack sprawling to the canvas! Jack rolls over backwards and springs off the cage and manages to regain his footing - how acrobatic! Oh, he's still wobbly - can George finish him?!
#ROC2#Jack is rocked!
The crowd are loving this. Great action here.#CL2#
Jack gets tackled into the cage by George. George maintains the clinch.
Oh Jack is still all over the place! His legs are completely gone! Will he be able to recover?!!
George misses with some punches.
George swings wildly with an uppercut but Jack uses good head movement to avoid it.
George has a couple of punches blocked by Jack.
Jack being controlled against the cage.
George throws a big uppercut that drops Jack! More strikes from George and the referee jumps in to stop the fight! Jack lies dazed against the cage as George celebrates with his cornermen!
Ladies and gentlemen, after 0:44 of round 1, we have a winner by way of TKO (Strikes). George George! |
|
|
|
|
|
|