|
Play
by Play - Fighter's Fight Commentary
|
Event:
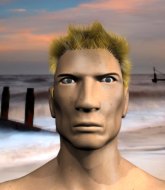
IHOF 7: High Treason
Date: Apr 20, 2018 |
#R1#
Morris lands a slapping body shot.
Morris throws a body punch but Sight moves out of range.
Sight moves into range and throws a lovely three punch combination.
Sight cracks Morris with an open hand slap.
Sight tries to close the distance and clinch but Morris swats him to one side with an open hand palm strike and circles away.
Morris seem to be loading up, looking for a big counter.
A jab from Sight finds it's way through Morris's defenses. #CL#
Morris closes the distance and clinches.
Morris throws a punch but it's blocked by Sight.
Morris pushes Sight back against the cage and lands a hook to the side of the head.
Sight prevents a body shot from Morris.
Sight is trying to break the clinch but Morris has him pressed against the cage.
Morris throws a knee to the head but misses.
We've seen a great period of action over the last minute or so - credit to both fighters for going all out!
Sight tries to break the clinch but Morris is controlling the position.
Morris gets through Sight's defenses to land a nice punch to the side of the head.
Morris taking a breather.
Morris misses the knee to the body. Nice hip positioning from Sight.
Knees to the body from Morris.
A short right hand to the side of the head by Morris.#T1##BC2#
Sight breaks the clinch.
Sight rushes forward with a series of wild hooks but Morris moves out of range and avoids them all easily.
Sight throws a head kick that misses.
Sloppy strikes from Sight. Those never looked like landing.
Morris pushing out the jab but it's not landing.
A combination from Sight does no damage.
A combination from Sight does no damage.
Sight scores with a shot to the body.
Sight scores with a nice head shot.
Morris misses with a right hand
and Sight counters with a left and a right that stings Morris.
Sight lands a nice hook to Morris's body. Morris takes it in his stride and looks to land his own strikes.
The crowd are loving this. Great action here.
Morris misses with a double jab
enabling Sight to counter with a crisp jab.
Morris throws the left hand but Sight avoids the punch easily.
Sight throws a body kick that misses. #T2#
Sight misses with a combination
and Morris counters with a nice jab to the body that keeps Sight thinking.
Sight lands a jab-cross combination.
Morris fails to land with a series of punches.
Sight stuns Morris with a nice body shot, before stepping back out of range.
Morris looks to land a left hand but Sight moved out of range nicely.#KD2#
Sight drops Morris with a beautiful combination! Morris stares up at his opponent, who ushers him back to his feet - Sight is looking for the KO!#ROC2#
Morris is rocked!
Morris misses with a wild combination.
Oh Morris is still all over the place! His legs are completely gone! Will he be able to recover?!!
A combination from Morris does no damage.
Morris seems to have got his legs back now.
Sight swings away but doesn't land with a series of punches.
Morris ducks right into an uppercut from Sight.
Morris throws a sloppy head kick
and Sight counters with a nice uppercut.
Sight drops Morris with a naaaaasty hook - Morris is in real trouble here! Sight dives in to side control and pounds out his opponent for a TKO victory! The crowd goes nuts!
Ladies and gentlemen, after 2:57 of round 1, we have a winner by way of TKO (Strikes). Paul Sight!
|
|
|
|
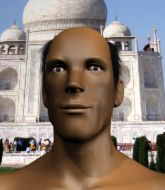
Event:
TWGC 21 (205lbs, D4): St Petersburg Qualifier - Round 1
Date: Apr 14, 2018 |
Coming up we have a light heavyweight Tycoon World Grappling Championship rules bout between Buck Morris (ranked 5926 p4p, 0 weight class) and Lando Nallo (ranked 6709 p4p, 0 weight class). Morris comes to the cage accompanied by Radioactive - Imagine Dragons feat. Kendrick Lamar. Nallo has chosen Fort Battle - Trevor Jones as his entrance music. This should be a great matchup!
This TWGC bout is 1 fifteen minute round in the light heavyweight division. Introducing today's competitors. In the red corner, competing out of Helsinki, with a TWGC record of 1 wins and 1 losses; Buck Morris! And in the blue corner, fighting out of Las Vegas, with a TWGC record of 0 wins and 0 losses; Lando Nallo!
The judges for this bout are Konstantin Menshow, Vladimir Khabensky and Aleksei Zolotukhin.
The fighters connect hands in the middle of the mat and we are under way.

Nallo looks for a takedown. He's got it. We're now in half guard. Score +2 for takedown into guard / half guard: Morris (0) vs (2) Nallo
Morris tries to get to full guard but Nallo has control of the leg.
Morris is working hard here to advance position.
The fighters are pressed up against the cage, both looking to find a bit of space to work.
Morris is trying to maintain the position but Nallo is very close to passing his half guard.

Nallo is looking for a kimura but he's never going to get it from there.
We've had a slow start to the round here - hopefully the action picks up.
Nallo wants to control but Morris is keeping him busy.
Nallo is working for an americana but Morris has been sneaky and has managed to get back to half guard, whilst Nallo was thinking about the submission.
Nallo looking to pass the guard.

That's one minute gone in the round.
Morris is avoiding any damage by keeping wrist control.
Morris working a defensive guard here.
Nallo trying to control the position from guard on top but Morris is wriggling around, looking for whatever he can.
Morris not looking particularly offensive just at the moment.
Morris looking to sweep here. No luck so far.

Morris is throwing his legs up, looking for submissions. Nallo is aware though and is defending well.

That's two minutes gone in the round.
Nallo stands up and looks to throw the legs aside to pass to side control. Morris swivels though and keeps the full guard.
Morris is working from a closed guard but he's struggling to control his opponent.
Nallo tries to free his leg and advance position but Morris is retaining full guard.
Morris is working from a closed guard but he's struggling to control his opponent.
Morris is really struggling to control Nallo but he's trying to hold on to the position.
Nallo really doesn't want to stay on the ground with Morris. If he can't get it back to his feet, it's only a matter of time before he'll be tapping out.
Morris is working actively off his back, looking to secure an arm or perhaps work for a triangle.
Nallo is taking a break and basically stalling. The referee will not allow him to do that for long.

That's three minutes gone in the round.
Nallo wants to control from the top but Morris keeps moving.
Nallo advances position into side control! Score +3 for passing guard: Morris (0) vs (5) Nallo
Nallo wants to control but Morris is keeping him busy.
Nallo tries for a kimura. Not really close to a finish though.
Nallo trying to control the action but Morris is working from the bottom.
Morris tries to get back to half guard but can't.

That's four minutes gone in the round.
Nallo tries for a kimura but Morris is defending well.
Morris tries to work a leg under to get back to half guard but Nallo wriggles his own leg back out and remains in side control.
Morris can't do much from the bottom here.
Nallo tries for an arm triangle. That looks pretty tight to me. Is this one over!?! Possibly, maybe, no Nallo has let go of the choke. Obviously it wasn't as tight as we thought!
The ref warns both fighters not to hold the cage as they work up against the meshing.
Nallo thinks about going for a far side armbar but bails out and retains the dominant position instead.

That's five minutes gone in the round.
Morris manages to get one leg in to regain half guard.
Morris is trying to control but can't.
Morris moves his hips nicely and gets into full guard.
Nallo forces his way into half guard.
Morris gets full guard.
Nallo trying to control but Morris is working from the bottom.
Morris has a loose triangle. He'll be looking to tighten that up but Nallo can see exactly what he's planning and manages to posture up and free himself.
Morris throwing his legs up looking for a triangle.

That's six minutes gone in the round.
Nallo trying to control the position from guard on top but Morris is wriggling around, looking for whatever he can.
Nallo drops back, looking for a kneebar! Morris looks panicked! The fighters roll across the mat, one looking to finish, one looking to escape. Morris looks to have wriggled free... Yes, he's got his leg free and he's dived into side control! Good work there from Morris! Score +4 for clean sweep to past guard: Morris (4) vs (5) Nallo
Nallo is trying to control Morris's posture but Morris avoids it.
Morris is looking for a kimura. He might have it! No, Nallo has escaped the position, nice work there.

That's seven minutes gone in the round.
Nallo is not content to let Morris control the position.
Morris tries for an arm triangle. That looks pretty tight to me. Is this one over!?! Possibly, maybe, no Morris has let go of the choke. Obviously it wasn't as tight as we thought!
Nallo is looking for a sweep.
Nallo manages to land a sweep and he's now on top! Lovely Jiu Jitsu! Score +2 for sweep to guard / half guard: Morris (4) vs (7) Nallo
Morris is looking to improve his position.

That's eight minutes gone in the round.
Nallo performing his best blanket impression for a moment.
Morris is trying to control but can't.
Morris looking for submissions from an awkward position here.
Nallo is looking for an arm triangle, whilst trying to pass to side control. Morris doesn't seem that keen to cooperate though. No luck this time Nallo.
Nallo is looking for a kimura here.

That's nine minutes gone in the round.
Morris is looking to control Nallo's leg but it's slowly edging free. Can Morris avoid being mounted?
Nallo is trying a forearm choke
I don't think that's going to do much at this level of the game.
Morris is working for an escape here. He's hooked one of Nallo's legs and he's managed to sneak out and take Nallo's back! Score +4 for clean sweep to past guard: Morris (8) vs (7) Nallo

That's ten minutes gone in the round.
Morris is remaining active here, looking for the choke. The more discerning members of the crowd will appreciate his efforts.
Morris is persistently looking for the submission but Nallo is defending it well.
Morris tries to get the hooks in deep but Nallo pushed the leg off.
Nallo is in bad spot here.
Morris is persistently looking for the submission but Nallo is defending it well.
Nallo tries to escape but Morris has the hooks in and won't let him break free.
Morris has his hand under the chin of his opponent looking for the choke. He's nearly got it! This one could be all over! But no, Nallo has freed his hand and lives to survive another
well, another couple of seconds at least!

That's eleven minutes gone in the round.
Morris is working hard for the rear naked choke here.
Morris trying to control.
Nallo trying to control the action but Morris just sinks the hooks in.
Morris has got his arm under Nallo's chin working for the choke
has he got it? It looks pretty tight! Oh! Nallo has spun round into Morris's guard beautifully! Well done that man!
Score +2 for sweep to guard / half guard: Morris (8) vs (9) Nallo
Morris working from the bottom, still in full guard. He's managed to get a loose triangle. Nallo doesn't seem to be doing much to defend here, obviously he feels comfortable in the position. Nallo manages to throw the legs off his shoulder and he's back into guard - no problem.

That's twelve minutes gone in the round.
Nallo looking to pass the guard.
Morris is looking for a guillotine. You can't force these things though and Nallo defends well.
Nallo tries to free his leg and advance position but Morris is retaining full guard.
Nallo trying to control the position from guard on top but Morris is wriggling around, looking for whatever he can.
Morris can't keep his opponent in guard - Nallo advances to half guard, no doubt looking to mount.
Morris is trying to get back to full guard.

That's thirteen minutes gone in the round.
Morris is working for an escape here. He's hooked one of Nallo's legs and he's managed to sneak out and take Nallo's back! Score +4 for clean sweep to past guard: Morris (12) vs (9) Nallo
Nallo is in bad spot here.
Morris looking for the RNC.
Morris is breathing heavily.
Nallo is really stuck here.
Nallo trying to control the position but Morris manages to sink in the hooks.
Morris doesn't have the hooks in and Nallo manages to turn into his guard.
Score +2 for sweep to guard / half guard: Morris (12) vs (11) Nallo
Nallo trying to move into half guard but instead Morris has managed to sweep! Score +2 for sweep to guard / half guard: Morris (14) vs (11) Nallo
Nallo is looking to cinch up a triangle. Morris throws the leg off to one side though and gets in tight to Nallo's body to avoid the submission. Nallo has instead reached around Morris's neck and now has a guillotine! Oh, this is biiiig trouble! Nallo arches his back and squeezes and forces the tap from his hapless opponent.
Ladies and gentlemen, after 14:57 of round 1, we have a winner by way of Submission (Guillotine). Lando Nallo!
An out of breath and clearly excited Lando Nallo thanked Pit Bull Development for their help and support (and free stuff they sent him). |
|
|
|
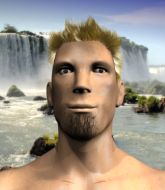
Event:
IHOF IV: The Ides of March
Date: Mar 10, 2018 |
#R1#
A jab from Morris misses.
Byrd uses good footwork to avoid the strikes from Morris.#CL#
Morris forces Byrd back against the cage and clinches.
Morris wants to push off and get back to the center of the mat but Byrd has him pressed against the cage.
Morris scores with an uppercut up the middle.
With the fighters clinched against the cage, Morris creates a bit of distance for himself and scores with a nice uppercut.
Byrd goes for a takedown attempt but Morris pushes him away and we're back to fighting at a distance.
Morris dips to his left and cracks Byrd with an uppercut!
We've had a slow start to the round here - hopefully the action picks up.
Morris lands with an overhand left.
Morris throws a head kick that misses #CL2#
and Byrd counters by moving into the clinch. Good anticipation by Byrd. #TD#
Morris drags the fight down to the ground.
Morris has momentary wrist control but Byrd slips an elbow through the middle.#T1#
Morris has control of Byrd's left arm, preventing Byrd from doing any damage.
Morris lands a beautiful sweep and he's now moved into his opponent's guard.#REVR#
Morris lands a couple of elbows.
Byrd has Morris pulled in close to control his posture.
Morris tries to free his leg and advance position but Byrd is retaining full guard.
Morris controlling from the top position.
Byrd avoiding any damage from the ground and pound. #T2#
Morris trying to pass the guard but can't manage it just yet.
Byrd trying to control the position here.
Morris throws a big elbow that misses.
Byrd keeping full guard, as Morris tries to pass.
A big thud reverberates around the arena there as Morris accidentally thumps the mat. Hopefully he's not broken his hand.
Morris preventing the sweep.
Byrd working a defensive guard here.
Byrd wants to control but Morris passes easily into half guard.
Morris definitely looks more muscular than last time we saw him fight.#T3#
Byrd is positioning himself well to prevent Morris advancing to mount.
Morris trying to control the pace.
Morris working to pass to mount. He's got his hand pressing down on Byrd's thigh. Byrd counters though and makes it back to full guard.
Morris might be looking to lock onto one of his opponent's long limbs for a submission, whilst we're on the ground.#SUB2#
Byrd has an omoplata and is looking to use it perhaps as a submission or perhaps to transition. Morris is in a bit of discomfort here, but he's managed to free himself and has dived into side control! That didn't work out too well for Byrd.#T4#
A few boos can be heard. I'm sure they will multiply if the fighters don't pick up the pace.
Byrd parries the strikes from Morris easily there. Morris is wary of posturing up too much because it might enable Byrd to escape.
Morris wants to lay and pray for a moment but Byrd keeps working.
Byrd tries to improve position but can't.
Byrd is not in a great position here, taking some shots.
Morris moving around in side mount but really he's just happy to control for now.
Byrd struggling a bit here.
Boooooooooooooooooooo!!! God, this has been a terrible round. Come on you two, sort yourselves out!
Byrd is trying to improve his position.
And thats the end of the round the fighters go back to their corners.
Buck Morris dominated that round.
That's time! Morris's corner gives him a slap on the ass as he gets ready to fight.
#R2#
Morris throws a sloppy head kick and Byrd moves out of range easily.
Morris is looking to clinch.
Morris misses with a body shot.
Byrd takes a shot to the nose. Hopefully that hasn't broken it.
Byrd on the wrong end of a kick to the body.
Byrd throws a nice inside leg kick.
Morris throws a right and a left that Byrd avoids nicely.
Byrd steps in looking to clinch after the strikes miss from Morris.
Byrd throws a low kick but it's checked well by Morris.
Morris takes a step back and watches a body kick go sailing past his mid section.
We've had a slow start to the round here - hopefully the action picks up.
Byrd looks to throw the jab but Morris is out of range.
Morris takes a step towards his opponent and connects with a left hand, before circling away.
Morris connects with a lovely jab that went straight through the gap between Byrd's hands.
Byrd uses some good footwork to avoid the body shot by Morris.
#T1#
Horrible takedown attempt by Byrd or perhaps it was just good defense by Morris, which made it look bad.
Byrd tries for a takedown but Morris sees it coming a mile off and avoids it easily.
Morris is really dominating this fight. Is there anything that Byrd can do to turn this around?
Morris avoids a punch combination nicely.
Byrd misses with an attempted mid kick.
Morris throws a nice hook to the body that draws an oooh from the crowd.
Morris fakes a jab and scores with a low kick.
Buck Morris is looking to throw some combinations by the looks of things.
Morris lands a right hook to the body.
Morris tries to clinch but is not successful on this occasion.
Morris connects with a high kick.
Buck Morris seems to be the more aggressive standup fighter in this bout.#T2#
Morris throws a head kick but Byrd moves out of range.
Byrd checks a low kick from Morris.#TD2#
Byrd throws the overhand right but ducks down into a quick takedown attempt. Morris was covering up waiting for the punch and Byrd finishes the takedown easily into guard. #ES#
Morris has scooted to the edge of the canvas and used the cage to get back to his feet. Byrd has stuck on his opponent and is forcing him back against the cage.
The crowd are loving this. Great action here.
Byrd prevents a body shot from Morris.
Byrd avoids the elbow strike from Morris, against the cage.
Byrd blocks a couple of punches on the inside.
Morris tries to circle away but Byrd has him pinned against the cage.
Byrd fails to pull the fight into his guard.
Buck Morris has stuffed three takedown attempts in the round now. That's going to take a lot out of Del Byrd.
Morris taking a breather.#T3##BC#
Morris breaks the clinch and we're back to striking at distance.
Byrd darts in looking for a takedown but Morris gets double underhooks and turns Byrd into the cage.
Byrd lands a nice shot that snaps Morris's head back.
Morris lands a jab.
The fighters circling - Byrd throws out the jab but it was never going to land.
Morris throws a jab, cross combination which is slipped
and Byrd counters nicely by changing levels and landing a hook to the body.
A big right from Morris misses.
Morris looks for the body kick but Byrd saw that one coming.
Byrd is definitely looking for the counter takedowns here.
Morris tries a head kick but it misses.
Byrd misses the jab.#T4#
Byrd shoots in for a takedown. He's persisting with it as Morris sprawls well. Morris wins this battle and keeps the fight standing. Byrd gets slowly back to his feet.
Morris throws a combination but it was largely blocked by Byrd.
Morris misses with a looping left.
Morris bobbing and weaving, closes the distance and lands a hook to the side of Byrd's head.
Buck Morris is winning the standup battle so far.
Byrd avoids a kick to the body.
Byrd thuds a mid kick into his opponent's body. That will wear on Morris if he has to take too many more of those.
The fans in attendance giving it up for the two fighters, who have really let it all hang out in the last minute or so!
Morris slips in close and lands a nice hook before moving back out of range.
Morris pivots as if he's going to throw a leg kick but stops half way.
Morris throws out a loose jab but Byrd uses good head movement to avoid it.
Morris closes the distance looking to clinch #TD2#
and Byrd counters with a shoot takedown into half guard.
And thats the end of the round the fighters go back to their corners.
Buck Morris dominated that second round.
That's the end of the round. The referee orders the cornermen out of the cage so we can get back down to business. This is the final round!
#R3#
Byrd throws a front kick that sends Morris stumbling back into the cage.#TD2#
Byrd decides to change it up a bit and drives through with a nice takedown into half guard.
Byrd scoring with strikes to the body and head. #SUB#
Morris looking to work for a kimura from the bottom.
Ground and pound from Byrd.
Byrd thows a huge punch but Morris dodges it nicely.
We've had a slow start to the round here - hopefully the action picks up.
The fighters are battling for position here. Morris manages to regain full guard. Nice work.
Byrd looking to sit in guard and control but Morris gets the butterfly guard and sweeps. He's now in the guard on the top. #REVR#
Morris is fighting to break Byrd's control of his arms but Byrd is doing a good job of controlling the position at the moment.#T1#
Morris trying to control but Byrd is working from the bottom.
Byrd wants to sweep here but Morris controlling him for the moment.
Morris wants to control from the top but Byrd keeps moving.
Morris wants to pass the guard but Byrd is keeping the position.
Morris with a flurry of punches that miss. #T2#
The crowd are starting to boo a lack of action.
Morris wants to control from the top but Byrd keeps moving.
Byrd is doing well to control the posture of his opponent and prevent any damage.
Let's hope that Byrd has the urge to step up the pace any second now because for the last 15 or 20 seconds he's just been holding on tight.
We may be looking at a referee standup if the pace doesn't pick up soon.
Morris stopping the sweep attempt from Byrd.#REF3#
The referee has motioned to the fighters to stand back up. He just wasn't happy with the level of activity.
Morris fails to land with the punch combination there - jab, cross, hook, miss, miss, miss.
Byrd throws a head kick that misses
and Byrd takes a counter punch right on the button for his troubles.
Byrd is the more experienced fighter here and he's going to need to draw on some of that experience if he's going to pull this one out the bag.
Morris chopped to the floor by a nice leg kick but he springs right back up before Byrd can pounce on him.
Morris misses the shot to the body. #T3#
Morris takes a swing at Byrd's ribcage but misses.
Morris looks to score with a combo but nothing lands.
Byrd tries to counter by closing the distance.
Byrd dodges the punch combination from Morris.
And Byrd tries to counter it with a takedown but Morris pushes his down on his head and steps out.
Byrd throws a right and a left that Morris avoids nicely.
Morris appears to be looking for a counter takedown.
Morris looks to score with a combo but nothing lands.
Byrd tries to clinch up.
Morris fakes a head shot and lands one to the body.
Byrd keeping a good distance there, avoiding the body shot.
Byrd drops down looking to force a counter takedown but Morris defends it well.
Morris misses with a head kick.
Morris throws a leg kick that is checked#TD2#
and Byrd counters with a nice double leg into side control. Morris won't be happy with that. #T4#
Byrd controls the position.
A control attempt from Morris but he's now mounted!
Both fighters are breathing heavily.
This has been an exciting period of action!
Byrd landing strikes, looking to finish!
Morris takes a big shot to the head but keeps on trying to improve his position.
Byrd scoring with strikes but Morris is staying in there.
Byrd wants to control the pace but Morris is squirming around nicely.
Del Byrd has stepped it up - he knows he needs a finish here!
Buck Morris is fighting for a decision here - he's started to take the cautious approach.
Byrd punishing his opponent with strikes.
Morris in a bad spot here, taking shots to the head.
Byrd lands a couple of nice shots there from mount.
And that's the end of the fight!
I would just about give that final round to Del Byrd.
Well Morris has outscored his opponent in every aspect of the fight today. Only a scarily incompetent judge or two will keep him from a well deserved win... Over to the ring announcer for the scorecards.
Ladies and gentlemen, after 3 rounds of action, we go to the scorecards for a decision.
Judge Reed Andrews scores the fight for Buck Morris!
Judge Anthony Taglia scores the fight for Buck Morris!
Judge John Kavanagh scores the fight for Buck Morris!
Buck Morris wins by unanimous decision!
During a confident post fight interview, Buck Morris thanked all his fans. He seemed very genuine when describing how motivated his fans keep him.
|
|
|
|
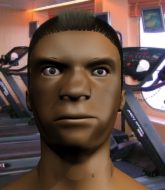
Event:
IHOF 2.0: New Years Revolution
Date: Dec 30, 2017 |
#R1#
A punch lands to the side of Morris 's head but he takes it in his stride.
The fight stays on the outside here - Morris looks like he's thinking about clinching though.
Gorbachenko connects with a body shot that sends Morris's belly button to the back.
Gorbachenko just misses with a punch to the body.
Gorbachenko looks to score with a jab to the body but Morris is just out of range.
The fight stays on the outside here - Morris looks like he's thinking about clinching though.
Gorbachenko is moving around nicely and scores here with a single head shot.
Gorbachenko looks to score with a jab to the body but Morris is just out of range.
Gorbachenko avoids the clinch attempt nicely.
Morris wants to clinch.
We've had a slow start to the round here - hopefully the action picks up.
Gorbachenko lands with a shot to the body.
A head kick misses from Morris.
Morris swings for the body but Gorbachenko moves out of range.
#T1##CL#
Morris moves into the clinch successfully.
Morris tries to land a knee to the head but misses.
Morris with an attempt at a knee that misses.
A right handed body shot lands from Gorbachenko.
Morris throws an elbow but it misses.
Gorbachenko scores with a shot to the side of Morris's head.
Gorbachenko lands with a good tight uppercut to the head.
A body shot lands from Gorbachenko.
Morris is breathing heavily.
Morris takes a shot to the head.
Gorbachenko lands a nice looking hook to the body, against the cage.
Morris's head jolts backwards as he takes an uppercut right on the button!
Gorbachenko scores with a shot to the side of Morris's head.
Gorbachenko throws a blind hook that connects with the side of Morriss head.
Fantastic stuff here - a very entertaining period of action, which has drawn cheers from the crowd.
Gorbachenko lands a nice uppercut.
A nice right hand lands inside from Gorbachenko.
Gorbachenko dips a shoulder and cracks Morris with a mighty uppercut! Morris falls back against the cage and Gorbachenko unloads with a barrage of strikes! Morris is completely out with his eyes open, only supported by the cage! Save him ref! Eventually the ref decides to do his job and jumps in - Gorbachenko screams abuse at the incompetent official before going over to celebrate with his corner. Brutal stuff!
Ladies and gentlemen, after 1:52 of round 1, we have a winner by way of TKO (Strikes). Anatoly Gorbachenko! Anatoly Gorbachenko retains his light heavyweight title!
Anatoly Gorbachenko decided to go for the less than humble approach in his post fight interview, telling everyone how he is going to conquer the world. The crowd seemed to like it when really that sort of approach could have gone either way.
|
|
|
|
Event:
TWGC 19 (265+lbs, D4): Helsinki Qualifier - Round 2
Date: Nov 25, 2017 |
Coming up we have a super heavyweight Tycoon World Grappling Championship rules bout between Mortimer Locust (ranked 22319 p4p, 0 weight class) and Buck Morris (ranked 8629 p4p, 716 weight class). This should be a great matchup!
This TWGC bout is 1 fifteen minute round in the super heavyweight division. Introducing today's competitors. In the red corner, competing out of New York, with a TWGC record of 1 wins and 1 losses; Mortimer Locust! And in the blue corner, fighting out of Helsinki, with a TWGC record of 1 wins and 0 losses; Buck Morris!
The judges for this bout are Ben Zyskovitsi, Marco Blurström and Arvi Lind.
Let's get this grappling contest under way! Who will be victorious?

Locust rushes Morris and presses him up against the cage.

Locust gets double underhooks and manages to take the fight to the ground. Score +2 for takedown into guard / half guard: Locust (2) vs (0) Morris
Morris escapes his hips to the side and looks to be working for an armbar. Locust gives him a little smile and shakes his head. No chance.
Morris looking for a guillotine here but Locust defends easily.
Locust is frustrating his opponent with some stalling tactics from top position.
Locust wants to pass the guard but Morris is keeping the position.
We've had a slow start to the round here - hopefully the action picks up.
Locust slips effortlessly into side control - very nice. Score +3 for passing guard: Locust (5) vs (0) Morris
That's one minute gone in the round.
Morris is trying to escape the position but Locust is controlling the position.
Locust working hard here to secure a kimura but he's not really in the right position for it.
The ref warns both fighters not to hold the cage as they work up against the meshing.
Morris struggling a bit here.
Locust wants to work for a kimura but he's foiled early by Morris, who protects the arm well.
Locust tries for a kimura. Not really close to a finish though.
Morris tries to buck Locust off but Locust is having none of it.
That's two minutes gone in the round.
Locust is trying to get an arm triangle but Morris is defending well.
Morris is looking to regain half guard here but Locust keeps moving and retains side control.
Locust wants to control for a moment but Morris uses the opportunity to move back to half guard.
Morris is trying to get back to full guard.
Locust is trying for a guillotine from the top but the pressure isn't in the right place so Morris is just riding it out for now. Locust eventually gives up the hold.
That's three minutes gone in the round.
Locust is working for a submission of some sort.
Morris is looking for a sweep. Locust is wise to his cunning plan and keeps the top position.
Locust seems very keen to just sit and control from half guard but Morris does not like that idea so much and is remaining active off his back.
Locust is looking for a kimura. It's going to be difficult to finish that from half guard though and Morris defends it well.
Locust is looking for a kimura but Morris is holding onto that half guard position, so it's hard for Locust to get the leverage.
That's four minutes gone in the round.
Morris is not content to let Locust control the position.
Locust seems to be looking for submissions.
Locust is trying a forearm choke
I don't think that's going to do much at this level of the game.
Locust is looking for a kimura but he's never going to get it from there.
Locust is trying to work for a kimura. This could be trouble! No, Morris has managed to free his arm - good work.
Locust is trying to work for a kimura but Morris is defending well.
That's five minutes gone in the round.
Locust is keen to just control but Morris is a slippery customer.
Locust is trying to work for a kimura. This could be trouble! No, Morris has managed to free his arm - good work.
Locust wants to work for an arm triangle but Morris is really keeping half guard well and defending the submission attempt.
The fighters are pressed up against the cage, both looking to find a bit of space to work.
Locust is keen to just control but Morris is a slippery customer.
That's six minutes gone in the round.
Locust is trying to work for a kimura but Morris is defending well.
Locust is just sitting in half guard, waiting for something to happen.
Locust is trying to control. Morris wants to improve his position but can't escape this time.
Locust seems to be trying to get a kimura but instead Morris has recovered full guard.
Morris can't keep his opponent in guard - Locust advances to half guard, no doubt looking to mount.
Morris is trying to maintain the position but Locust is very close to passing his half guard.
That's seven minutes gone in the round.
Locust is working for submissions here but there's nothing on.
Locust seems to be working for a kimura but Morris defends the submission attempt.
Locust is sneakily working for an arm triangle but Morris sees it coming and defends easily.
Locust seems to be looking for submissions.
Locust is trying a forearm choke
I don't think that's going to do much at this level of the game.
Locust is trying to control. Morris wants to improve his position but can't escape this time.
That's eight minutes gone in the round.
Locust content to control rather than advance.
Locust is thinking about going for an arm triangle but he can't free his leg.
Locust works his way into full mount! Score +3 for passing guard: Locust (8) vs (0) Morris
Locust is working on an americana here. Ooh, that looks pretty nasty! Nope, Morris has managed to escape the submission attempt.
That's nine minutes gone in the round.
Locust goes for an armbar but he's not got it
Morris turns into him and now he's in Locust's guard.
Score +2 for sweep to guard / half guard: Locust (8) vs (2) Morris
Locust pulls Morris in close to his closed guard and prevents Morris from doing any damage or advancing position.
Morris trying to pass the guard but can't manage it just yet.
That's ten minutes gone in the round.
Locust is controlling Morris's posture.
Locust bucks up whilst keeping hold of a body lock, managing to reverse the position. Now he's in top in Morris's guard. Score +2 for sweep to guard / half guard: Locust (10) vs (2) Morris
Locust stands up and looks to throw the legs aside to pass to side control. Morris swivels though and keeps the full guard.
Locust is pushing down on Morris's leg trying to pass to half guard. Morris is fighting to maintain full guard but Locust has managed to sneak the leg through.
Locust is looking to advance position but Morris won't allow it.
Locust is trying to control. Morris wants to improve his position but can't escape this time.
Morris is defending against the submission attempts here by Locust.
Locust is actively looking for submissions here but good counter grappling here from Morris as he works his way to full guard.
That's eleven minutes gone in the round.
Locust sitting in guard here, content to control.
Locust slips nicely into half guard.
Locust is trying to work for a kimura but Morris is defending well.
Locust seems like he's working for an arm triangle here. He's freed his trapped foot and he's rotating nicely. Morris is in big trouble! He's tapping out! This one is aaaaaaaaaaaall over!
Ladies and gentlemen, after 12:55 of round 1, we have a winner by way of Submission (Arm Triangle). Mortimer Locust!
Mortimer Locust was full of energy after the big win and talked about how he thinks he can do big things in this sport. The crowd were appreciative of his determination to succeed. |
|
|
|
Event:
TWGC 19 (265+lbs, D4): Helsinki Qualifier - Round 1
Date: Nov 24, 2017 |
Coming up we have a super heavyweight Tycoon World Grappling Championship rules bout between Buck Morris (ranked 8630 p4p, 715 weight class) and Duane Carman (ranked 4887 p4p, 552 weight class). Buck Morris had a look across the cage there at his opponent. He definitely means business
This TWGC bout is 1 fifteen minute round in the super heavyweight division. Introducing today's competitors. In the red corner, competing out of Helsinki, with a TWGC record of 0 wins and 0 losses; Buck Morris! And in the blue corner, fighting out of Rio de Janeiro, with a TWGC record of 0 wins and 1 losses; Duane Carman!
The judges for this bout are Anni Minnemäki, Johanna Lukiainen and Matti Vanhoillinen.
The official calls the fighters to the middle and the contest is under way.
Morris closes the distance and clinches.
Morris gets double underhooks to prevent a takedown attempt from Carman.
Morris is trying to drag Carman to the mat but Carman just about manages to keep his footing. He used the cage to his advantage there.
Morris is trying to pull guard but being pressed up against the cage enables Carman to keep the fight standing.
Carman is trying to work for a single leg takedown but Morris pulls him back up using the underhooks.
Morris is working for a takedown up against the cage. He can't get it on this occasion though.
That's three failed takedown attempts in the round for Buck Morris. That's going to take a lot out of him.
Carman jumps guard but Morris turns him against the cage and keeps the fight standing.
We've had a slow start to the round here - hopefully the action picks up.
Morris pulls guard successfully.
Carman postures up.
Carman content to stall in guard here.
The ref warns both fighters not to hold the cage as they work up against the meshing.
Carman stands up and looks to throw the legs aside to pass to side control. Morris swivels though and keeps the full guard.
That's one minute gone in the round.
Morris is looking for a triangle but Carman pushes his legs off easily.
Morris is active off his back here, looking for submissions.
Carman seems content to control from guard here. He's going to have to remain active though if he doesn't want to get stood back up.
Morris looking for a sweep. Not yet Morris, not yet.
That's two minutes gone in the round.
Morris looking to control.
Morris is active off his back here, looking for submissions.
Carman stands up and looks to throw the legs aside to pass to side control. Morris swivels though and keeps the full guard.
Morris looking for submissions from the bottom here. Moving his hips around, possibly looking for an armbar.
Morris escapes his hips to the side and looks to be working for an armbar. Carman gives him a little smile and shakes his head. No chance.
Carman pressing down on his opponent's thigh, looking to pass guard. Morris is keeping the position for now.
That's three minutes gone in the round.
Carman is frustrating his opponent with some stalling tactics from top position.
Carman is pushing down on Morris's leg trying to pass to half guard. Morris is fighting to maintain full guard but Carman has managed to sneak the leg through.
Morris keeping hold of Carman's head, controlling as best he can.
Morris is looking for a sweep. Carman is wise to his cunning plan and keeps the top position.
Carman is looking to advance position but Morris won't allow it.
The fighters are pressed up against the cage, both looking to find a bit of space to work.
That's four minutes gone in the round.
Morris gets back to full guard.
Carman wants to pass the guard but Morris is keeping the position.
Morris is working actively off his back, looking to secure an arm or perhaps work for a triangle.
Morris working a defensive guard here.
Carman looking to pass the guard.
That's five minutes gone in the round.
Morris controlling Carman's posture.
Carman tries to free his leg and advance position but Morris is retaining full guard.
Morris lands a beautiful sweep and he's now moved into his opponent's guard. Score +2 for sweep to guard / half guard: Morris (2) vs (0) Carman
Carman looking for submissions from the bottom here. Moving his hips around, possibly looking for an armbar.
Carman is looking for a triangle but Morris pushes his legs off easily.
That's six minutes gone in the round.
Morris wants to control from the top but Carman keeps moving.
Carman has a loose triangle. He'll be looking to tighten that up but Morris can see exactly what he's planning and manages to posture up and free himself.
Morris is just sitting in guard, looking to avoid any submissions.
Morris drops back looking for a leg! Carman is in trouble here! The fighters roll with the hold and Carman manages to kick Morris off! Morris jumps back into Carman's guard.
Carman tries to land a sweep but no joy.
That's seven minutes gone in the round.
Morris controls the pace of the fight for a moment.
Carman is pulling down on Morris's head. It's preventing any offense from Morris, at least for the moment.
Carman keeping moving, preventing Morris from controlling successfully.
Carman has a loose triangle. He'll be looking to tighten that up but Morris can see exactly what he's planning and manages to posture up and free himself.
Morris got a little sloppy there for a moment and Carman has worked his way into a loose triangle - can he finish it?! No, Morris has managed to get both his arms back between Carman's legs - danger averted.
That's eight minutes gone in the round.
Morris wants to control from the top but Carman keeps moving.
Morris pressing down on his opponent's thigh, looking to pass guard. Carman is keeping the position for now.
Carman is trying to control the position from the bottom.
That's nine minutes gone in the round.
Morris trying to control the position from guard on top but Carman is wriggling around, looking for whatever he can.
Morris stands up and looks to throw the legs aside to pass to side control. Carman swivels though and keeps the full guard.
Morris is pushing down on Carman's leg trying to pass to half guard. Carman is fighting to maintain full guard but Morris has managed to sneak the leg through.
Morris works his foot free and advances to mount. Score +3 for passing guard: Morris (5) vs (0) Carman
Morris trying to control but he's not successful this time.
That's ten minutes gone in the round.
Morris is going oldschool here, as he tries to force Carman to tap using a forearm choke. This isn't 1993 though, so Carman shrugs it off.
Morris wants to control the pace but Carman is squirming around nicely.
Morris has hold of Carman's left arm, perhaps looking for a submission. The two fighters tussle over control of the isolated limb and Carman manages to get his arm back to his side and away from danger.
Morris prevents Carman from getting the reversal.
That's eleven minutes gone in the round.
Carman regains half guard.
Morris is trying a forearm choke
I don't think that's going to do much at this level of the game.
Carman wants to control but Morris is keeping busy and won't allow it.
Carman is controlling Morris's position as best he can from this difficult position.
That's twelve minutes gone in the round.
Morris perhaps working for something from half guard, or maybe not. It looks like he's just sitting there.
Morris stalling away here and it's allowed Carman to slip out his trapped foot and regain full guard.
Morris trying to control the position from guard on top but Carman is wriggling around, looking for whatever he can.
Carman pulls Morris in close to prevent any damage.
Carman keeping moving, preventing Morris from controlling successfully.
That's thirteen minutes gone in the round.
Carman is doing well to control the posture of his opponent and prevent any damage.
Morris drops back for a leg but he's not going to get it - he lets go and Carman dives on top into guard. Score +2 for sweep to guard / half guard: Morris (5) vs (2) Carman
Carman showing good wrestling skills to control the position.
Morris looking for a guillotine here but Carman defends easily.
Carman looking to pass the guard.

That's fourteen minutes gone in the round.
Carman is still trying to improve position.
Morris is throwing his legs up, looking for submissions. Carman is aware though and is defending well.
Morris trying to keep a closed guard but Carman is proving a slippery customer.
Morris has a loose triangle. He'll be looking to tighten that up but Carman can see exactly what he's planning and manages to posture up and free himself.
Boooooooooooooooooooo!!! God, this has been a terrible round. Come on you two, sort yourselves out!
Carman pressing down on his opponent's thigh, looking to pass guard. Morris is keeping the position for now.
And that's the end of the fight!
Morris takes the fight on points by 5 to 2. |
|
|
|
|
|
|