|
|
PBP Commentary |
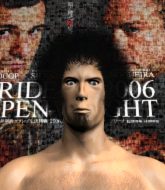
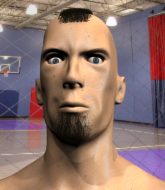
Coming up we have a heavyweight MMA rules bout between Cain Marko II (ranked 0 p4p, 0 weight class) and Mirko Filapovich (ranked 0 p4p, 0 weight class). Filapovich comes into a darkened arena with his song building. Metallica - enter sandman kicks in, the lights come on and the crowd goes wild! What a showman! Over to our ring announcer for the fighter introductions!
 |
|
 |
| 210 cm
22
270 lbs
1 - 1 - 0 |
|
188 cm
19
225 lbs
1 - 2 - 0 |
BJJ Blue Belt
Solid boxing
Granite chin |
|
BJJ White Belt
Good kicks
Tends to cut |
|
| |
|
Ladies and gentlemen. This fight is 3 rounds, in the heavyweight division.
Introducing the fighter to my left, fighting out of the red corner.
With a record of
1 - 1 - 0, fighting out of New York, Cain Marko II!
And introducing the fighter to my right, fighting out of the blue corner.
With a record of
1 - 2 - 0, fighting out of New York, Mirko Filapovich!
The judges for this bout are Russell Pearce, Columbo Gatti and David Schapiro.

The bell rings for round one and we are underway!
Filapovich throws a half hearted mid kick.
A head kick misses from Filapovich.
A big left from Filapovich misses.

Marko II bobs and weaves into range and then changes levels and scores with a nice takedown into side control.
Marko II sitting in side control, looking to soften his opponent up with elbows and hammerfists but Filapovich is avoiding damage well and looking to escape the position.
Marko II creates some space and throws a big elbow, but Filapovich sees it coming and moves his head just enough to avoid the strike.
Filapovich is pushing Marko II's head away, looking to escape. Marko II manages to hold on to the position though.
Marko II lands a decent elbow from side control.
Marko II has been looking to land a fair amount of strikes on the ground. He might be looking to soften his opponent up in order to work for a submission.
Marko II wants to control but Filapovich is keeping him busy.
Filapovich is working hard to escape and get back to his feet. After a battle for position, Marko II asserts his dominance and retains side control.
Marko II will need to keep those long limbs tucked in whilst he's on the ground, to prevent any submissions.

Marko II looking for an arm triangle but it's way too loose to do anything.
Filapovich is looking to get back to his feet here but Marko II is keeping cool and he's managed to take Filapovich's back.

That's one minute gone in the round.
Filapovich is trying to get back to his feet but Marko II has full control of the position and if anything, Filapovich has just worked his way into a worse spot.
Marko II somehow managing to miss with a strike from the back.
Marko II connects with a big shot to the side of Filapovich's head.
Filapovich covering up well and avoiding damage.
Marko II lands a shot to the head.
Filapovich looking to stop the rear naked choke attempt by controlling the hands.
Marko II tightening his grip on Filapovich, looking for the choke.
Marko II is breathing heavily.
Filapovich holding both Marko II 's hands and preventing any damage.

That's two minutes gone in the round.
Filapovich covering up well under a barage of strikes.
Filapovich trying to get back to his feet but Marko II is in full control for now.
The ref warns both fighters not to hold the cage as they work up against the meshing.
The referee is taking a good look at Filapovich as he is on the wrong end of some big shots from Marko II!
Marko II scores with punches from the back.
Filapovich is trying to get back to his feet but Marko II has full control of the position and if anything, Filapovich has just worked his way into a worse spot.

That's three minutes gone in the round.
Marko II lands shots from the back.
Filapovich holding both Marko II 's hands and preventing any damage.
Marko II is working the ground and pound. Can Filapovich escape?
Marko II throwing wild punches that miss their target.
Filapovich has the hand control, trying to stop the rear naked choke.
Marko II scores with punches to the body.
Marko II throwing sloppy strikes.
Marko II is landing with strikes from the back.
Filapovich wants to get back to his feet.

That's four minutes gone in the round.
Marko II is working the ground and pound. Can Filapovich escape?
Marko II looking for the choke but no joy.
Filapovich is trying to stand back up.
Marko II has his opponent trapped and is landing shots. Not a good position for Filapovich.
And thats the end of the round the fighters go back to their corners.
Cain Marko II dominated that round.
The corners get their ten second warning. Both fighters stand from their stools and stare eachother down, ready to get back to the action.

Marko II fails with a takedown attempt from distance.
A nice leg kick lands there from Filapovich.
A head kick misses from Filapovich.
Filapovich scores with a hook to the body. Marko II takes a step back and tries to catch his breath.
Filapovich throws a body punch but Marko II moves out of range.
Marko II takes a kick to the side of the head.
This is a great period of action - very entertaining stuff!
Marko II takes a kick to the side of the head.
Marko II blocks a head kick by Filapovich.
Filapovich throws a head kick but Marko II moves out of range.
Filapovich scores with a head kick.
Mirko Filapovich seems to be the more aggressive standup fighter in this bout.
Filapovich cracks Marko II with a good shot that sees him stumbling back into the cage.
Marko II staying out of range there.
Filapovich lands a high kick!
Cain Marko II is looking to throw some combinations by the looks of things.
Filapovich throws a right and a left that Marko II avoids nicely.
Filapovich throws a head kick that half lands.
Marko II shoots in for a takedown - he's clinched up with Filapovich but Filapovich pushes him off and we're back to square one.
Filapovich lands three nice shots there - that looked like it hurt!
Marko II takes a head kick and shrugs it off.
Both fighters are absolutely exhausted here.
That's one minute gone in the round.
Filapovich fakes high and swings low for a body shot but Marko II manages to avoid it.
Marko II fails with a rather predictable takedown attempt.
That's three failed takedown attempts in the round for Cain Marko II. That's going to take a lot out of him.
Decent striking displayed by Filapovich there.
The step up in weight doesn't seem to be a problem for Filapovich. He's performing admirably here against the bigger man.
Filapovich digs a good hook to Marko II's body.
Marko II misses with a takedown attempt - Filapovich sprawls well and throws a nice strike on the way out which just misses.
Filapovich pulls out of a head kick attempt.
Like a baseball bat into the meat of his leg there - nice leg kick by Filapovich.
Good leg kick by Filapovich there. It's the ones that make that thud noise that hurt and that was an almighty thud.
Marko II closes the distance and lands a one-two.
Filapovich throws a head kick that misses.
Marko II avoids the head kick by Filapovich.
Filapovich throws a big shot that misses.
Filapovich keeps the fight standing with a nice sprawl.
Mirko Filapovich is looking to keep the fight on the feet at all costs.
Filapovich dances in quickly and lands a nice inside leg kick on Marko II. That did some damage!
That's two minutes gone in the round.
Filapovich pulls out of a head kick attempt.
Marko II misses with a wild combination.
Marko II shoots in for a takedown but doesn't get it.
Marko II blocks a head kick by Filapovich.
Marko II tries to check the leg kick but that clearly hurt him.
Marko II scores with a nice looking left hook and follows it up with an uppercut!
Marko II keeping his hands up high there, blocking the jab from Filapovich.
Marko II tries to clinch there but Filapovich circles away.
Filapovich throws a jab but it's blocked by Marko II.
Filapovich misses with a body shot.
Filapovich takes a punch to the jaw and another one to the bread basket.
Marko II changes levels and looks for a double leg takedown. Filapovich tries to avoid it but Marko II manages to keep hold of a leg and drag Filapovich to the ground. Filapovich escapes though and pops straight back up to his feet.
Filapovich throws a head kick that misses and slips in the process. He scrambles back to his feet and the fighters circle.
Filapovich fakes a head shot and lands one to the body.
Marko II shoots in for a takedown but doesn't get it.
Filapovich throws a head kick but Marko II moves out of range.
Filapovich throws a hook but Marko II blocks it.
That's three minutes gone in the round.
Marko II avoids the head kick by Filapovich.
Marko II shoots in but no luck this time.
Mirko Filapovich seems to be getting the better of the standup.
Marko II avoids the head kick by Filapovich.
Marko II lands with an overhand left.
Marko II steps to the side to avoid the strikes from Filapovich.
Filapovich moving in and out of range nicely, whilst landing the scoring shot.
Filapovich swings wildly with a couple of big hooks
and Marko II decides to take the opportunity to score a takedown. He's landed in Filapovich's guard.
Filapovich wants to stand but Marko II is controlling the position.
Marko II trying to land body shots but he keeps hitting the mat.
Filapovich wants to stand up but Marko II is controlling him.
Marko II missing there with some ground and pound from the guard.
Filapovich wants to stand and escape but Marko II is having none of it.
That's four minutes gone in the round.
Marko II keeps in close for a moment and lands a decent shot to the side of Filapovich's head.
Marko II postures up in Filapovich's guard and throws a big left but Filapovich blocks it.
Filapovich wants to stand but Marko II is controlling the position.

The referee has ruled that neither fighter is active enough on the ground and has stood them back up.
Marko II closes the distance, clinches up and gets a nice trip takedown into side control. Very smooth.
The fighters are pressed up against the cage, both looking to find a bit of space to work.
Filapovich avoids any damage from the ground and pound of Marko II.

Filapovich throws his opponent off and manages to get back to his feet! Nicely done!
Horrible takedown by Marko II or perhaps it was just good defense by Filapovich which made him look bad.
Filapovich dips down and scores with a jab to the body.
The crowd are going absolutely nuts as the round comes to an end - what a fantastic round of action!
Filapovich throws a head kick but Marko II moves out of range.
Marko II closes this distance looking for a takedown but Filapovich circles away.
The crowd cheering loudly, showing their appreciation for the quality fight we're seeing here.
Marko II changes levels and looks for a double leg takedown. Filapovich tries to avoid it but Marko II manages to keep hold of a leg and drag Filapovich to the ground. Filapovich escapes though and pops straight back up to his feet.
And thats the end of the round the fighters go back to their corners.
Mirko Filapovich showed his class in that round. I'd imagine he'll take it on all the scorecards.
That's time! Back to the action! So, we enter the final round. Let's see if either fighter can bring us a finish, or whether we're going to the judges scorecards.

Filapovich tries a switch kick but it misses it's target.
Filapovich scores with a nice one two combo and darts back out of range to avoid anything coming in the opposite direction.
Some wild striking there from Filapovich.
Marko II shoots in for a takedown but Filapovich shows good takedown defense.
Filapovich lands a powerful looking uppercut that connected with his opponent's jaw.
Filapovich's corner calls for a 1-2. Filapovich obliges with the 1 part as he scores the single shot and moves back out of range.
Filapovich keeps his opponent at a distance with a nice jab.
A head kick misses from Filapovich.
Filapovich moves out of range of the body kick from Marko II.
Filapovich throws a sloppy head kick and Marko II moves out of range easily.
Filapovich stuffs the takedown attempt from Marko II. Marko II gets slowly back to his feet.
Marko II blocks a head kick by Filapovich.
Marko II fails with the takedown.
That's three failed takedown attempts in the round for Cain Marko II. That's going to take a lot out of him.
Filapovich looks to score with a jab to the body but Marko II is just out of range.
Both fighters are breathing heavily.
Filapovich throws a combination that misses
and Marko II counters with a straight right hand.
That's one minute gone in the round.
Filapovich misses with a head kick.
Filapovich throws a head kick that misses and slips in the process. He scrambles back to his feet and the fighters circle.
Marko II fails miserably with a takedown attempt.

Marko II has Filapovich up against the cage in a clinch.

Filapovich escapes the clinch and we're back to striking.
Marko II fails with a takedown attempt.
Nice shot by Filapovich.
Marko II takes a head kick and shrugs it off.
Filapovich lands with a kick to the temple. Marko II shrugs as if to say "is that all you've got?"
Marko II will have to do better than that with his takedown attempts.
Marko II tries to shoot in for a takedown. He's got hold of a leg but Filapovich swivels and escapes.
Filapovich throws a right high kick that is partially blocked by Marko II.
Marko II will have to do better than that with his takedown attempts.
Filapovich throws a head kick that misses and slips in the process. He scrambles back to his feet and the fighters circle.
That's two minutes gone in the round.
Marko II gets cracked there but stands up to it.
Marko II throws a head kick but Filapovich moves out of range.
Filapovich misses the shot to the body.
Marko II lets the fists fly and connects with a left straight followed by a right hook.
Marko II shoots in and drives through. Filapovich sprawls well.
Filapovich throws a head kick that Marko II semi-blocks.
An inside leg kick lands from Filapovich.
Filapovich misses with the combination.
Marko II closes the distance and clinches up with Filapovich, looking for a takedown. Marko II pushes Filapovich against the cage but Filapovich circles to the side and manages to break the clinch.
Filapovich pulls out of a head kick attempt.
Marko II blocks a head kick by Filapovich.
Marko II shoots in for a double leg but Filapovich sprawls well. That's going to sap some energy.
Marko II clobbers Filapovich with an overhand right that has the crowd gasping. That made a horrendous noise.
Filapovich misses with a head kick.
Marko II throws a sloppy head kick and Filapovich moves out of range easily.
Marko II takes a shot to the eye socket. That's gotta hurt.
That's three minutes gone in the round.
Marko II misses with a takedown attempt. He shot from a bit too far out.
Marko II looks for a takedown but Filapovich sprawls well.
Filapovich stuffs the takedown attempt from Marko II. Marko II gets slowly back to his feet.
Filapovich tries a switch kick but it misses it's target.
A punch combination from Filapovich misses.
Marko II fails with a rather predictable takedown attempt.
Marko II shoots in for a takedown - he's clinched up with Filapovich but Filapovich pushes him off and we're back to square one.
Filapovich throws a head kick but Marko II moves out of range.
Filapovich throws a head kick but Marko II moves out of range.
Marko II shoots in for a double leg but Filapovich sprawls well. That's going to sap some energy.
Marko II fails with an attempt to clinch.
Filapovich goes for a high kick. It partially lands.
An inside leg kick lands from Filapovich.
That's four minutes gone in the round.
Filapovich misses with a head kick.
Filapovich gets caught flat footed, as Marko II shoots in with a quick takedown into guard.
Filapovich wants to stand but Marko II is controlling the position.
Marko II throwing shots from guard but he's hitting more mat than opponent.
Filapovich really doesn't want to stay on the ground with Marko II. If he can't get it back to his feet, it's only a matter of time before he'll be tapping out.
Marko II pushes down on Filapovich's leg and manages to get into half guard.
Marko II is looking for a kimura but Filapovich is holding onto that half guard position, so it's hard for Marko II to get the leverage.
Filapovich manages to escape and get back to his feet!
Marko II drives through with a really nice takedown into side control.
The crowd applaud the fighters efforts here as the round comes to an end.
Marko II prevents Filapovich from escaping the position.
And that's the end of the fight!
Mirko Filapovich comfortably won the final round on my scorecard.
I think Filapovich has won this one but let's see whether the judges agree with me. Over to the ring announcer for the scorecards.
Ladies and gentlemen, after 3 rounds of action, we go to the scorecards for a decision.
Judge Russell Pearce scores the fight 28:28
Judge Columbo Gatti scores the fight 28:29
Judge David Schapiro scores the fight 28:28
The fight is ruled a majority draw!
|
|
|
|
|
|
|
|
|
|
|
|
|
|
|
|
|
|
|
|
|
|
|
| S |
C
A |
G |
S |
C
B |
G |
|
S |
C |
G |
|
energy
A | B |
|
hype
A | B |
|
pop
A | B |
|
mgr
A | B |
|
FIGHT
RATING
89% |
|
|
|
|
|
|
