|
|
PBP Commentary |
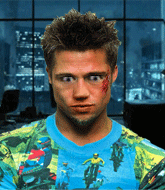
Coming up we have a featherweight MMA rules bout between Tyler Durden (ranked 537 p4p, 61 weight class) and Kotetsu Yamamoto (ranked 1469 p4p, 157 weight class). Durden comes to the cage accompanied by Where Is My Mind. Both fighters look fresh as a daisy as they make their way towards the cage.
 |
|
 |
| 180 cm
34
157 lbs
22 - 11 - 0 |
|
168 cm
33
149 lbs
25 - 13 - 3 |
Abu Dhabi Champ
World class boxer
Insanely flexible |
|
Excellent grappler
World class MT
Good gas tank |
|
| |
|
Ladies and gentlemen. This fight is 3 rounds, in the featherweight division.
Introducing the fighter to my left, fighting out of the red corner.
With a record of
22 - 11 - 0, fighting out of Las Vegas, Tyler Durden!
And introducing the fighter to my right, fighting out of the blue corner.
With a record of
25 - 13 - 3, fighting out of New York, Kotetsu Yamamoto!
The judges for this bout are Timothy Bukovac, Frank Antenori and Jack Bonds.

The bell rings for round one and we are underway!
Yamamoto checks the leg kick nicely there.
Yamamoto stalks Durden and leaps in with a furious combination of punches. Uppercuts and crosses smash into Durden's face. Durden staggers backwards, shaken.
Nice body punch from Durden.
Durden misses with a wild body shot.
Yamamoto avoids a low kick by using good footwork.
Yamamoto connects with a crisp jab.
Nice takedown defense from Durden. No joy for Yamamoto on that attempt.
Yamamoto misses with a few strikes there.
Yamamoto bobs and weaves and unloads with a good uppercut.
Yamamoto scores with a jab to the jaw.
That's a knee to de groin and it's over and out! Yamamoto crumples to the ground after an illegal strike from Durden - the referee stops the clock and Yamamoto gets 5 minutes to recover from that one. "I'm sorry" says Durden. Yamamoto manages to get back to his feet and the fight resumes.
Wooooo! Give it up for these two warriors! They are putting on a show!
Yamamoto misses with a looping right.
We've been informed that Yamamoto has been sparring a lot of Muay Thai in the buildup to this fight so let's see if that has an impact on the result.
Yamamoto moves out of range of the strikes.
Yamamoto misses with a body punch
and Durden counters with a leg kick.
Yamamoto ducks down and throws a hook to the body but Durden moves away.
Yamamoto's hands are dropping dangerously low here and Durden connects clean with a right hook that sends him down to one knee! Yamamoto scrambles back to his feet.
Yamamoto misses with a wild combination.
Yamamoto paws at his opponent with the jab and then lunges in with a straight, right on the button.

That's one minute gone in the round.
Durden fakes a jab and scores with a low kick.
Durden tries to land with a swinging hook to the body but Yamamoto was well out of range. Poor timing from Durden.
Tyler Durden is looking to keep the fight on the feet at all costs.
Durden fakes high and swings low for a body shot but Yamamoto manages to avoid it.
Durden with a hook.
Yamamoto lands with a nice combination. Durden backs away looking to recover.
A shot to the body from Yamamoto misses
and Durden counters with a straight right hand.
Durden fakes high and swings low for a body shot but Yamamoto manages to avoid it.
Yamamoto thows a left - swing and a miss!
Durden uses good footwork to avoid the strikes from Yamamoto.
Yamamoto shoots for a takedown but Durden saw that one coming a mile off and avoided it easily.
Durden looking to land some kicks to the body here.
Yamamoto is pinned up against the cage taking some big shots here. The referee is looking closely deciding whether he should stop the fight.
Yamamoto throws a combination but it was largely blocked by Durden.
The fans in attendance giving it up for the two fighters, who have really let it all hang out in the last minute or so!
Yamamoto walks straight into an uppercut. Luckily it didn't land flush.
Durden avoids a punch combination nicely.
Yamamoto connects with a body shot that sends Durden's belly button to the back.

That's two minutes gone in the round.
Durden looks to score with a jab to the body but Yamamoto is just out of range.

Yamamoto gets a takedown into half guard.
The ref warns both fighters not to hold the cage as they work up against the meshing.
Durden trying to control here.
Durden is looking to regain full guard. Not this time though.
Yamamoto trying to control from half guard but Durden is working away.
Durden is trying to maintain the position but Yamamoto is very close to passing his half guard.
Durden is looking for a sweep. Yamamoto is wise to his cunning plan and keeps the top position.

That's three minutes gone in the round.
Durden wants to control but Yamamoto is keeping busy.
Durden moves into full guard.
Durden looking to sweep using the butterfly guard but Yamamoto puts pay to that idea as he passes nicely into half guard.
Durden is looking to improve his position.
Yamamoto thumps the canvas. Not on purpose obviously - he just missed Durden's head.
Durden is looking for a sweep. Yamamoto is wise to his cunning plan and keeps the top position.
Durden moves his hips nicely and gets into full guard.
Durden trying to keep a closed guard but Yamamoto is proving a slippery customer.

That's four minutes gone in the round.
Durden seems keen to control rather than go for a submission, at least for now.
Durden preventing the ground and pound from doing any damage.
Yamamoto lands a couple of elbows.
Durden has control of Yamamoto's left arm, preventing Yamamoto from doing any damage.
Durden is trying to control the position from the bottom.
Durden looking for a sweep. Not yet Durden, not yet.
Durden is controlling Yamamoto's posture.

The referee has stepped in and called for a break in the action. We'll restart on the feet.
Yamamoto missing with a left hand there. Durden was out of range so wasted energy throwing that one.
And thats the end of the round the fighters go back to their corners.
Kotetsu Yamamoto dominated that round.
The fighters' corners scream their final instructions, as the referee calls time. Here we go, back to the action!

Good standup being displayed there by Yamamoto as he connects with a hook.
Durden scores with a leg kick.
Yamamoto throws a hook to the body but it doesn't connect.
Nice defenses there by Yamamoto.
Kotetsu Yamamoto seems to be the more aggressive standup fighter in this bout.
Yamamoto throws out a token jab with nothing on it.
Yamamoto fakes high and shoots in for a takedown but Durden avoids it really well and circles away.
Yamamoto tests Durden's chin there with a solid looking shot.
Durden bobs and weaves well there to avoid the strikes.
Durden appears to be looking for a big counter.
Yamamoto feints and then dives in with a takedown. That was a long way out but the feint bought him enough time to close the distance and complete the takedown. Now we'll play guard for a bit and see who can get the better of that position.
We've had a slow start to the round here - hopefully the action picks up.
Yamamoto makes a bit of distance and scores with some ground and pound, still in guard.
Yamamoto is working the ground and pound from guard. He might want to try advancing position though to get more of an impact.
Durden controlling the position.
Durden has controlled the position for a good 20 seconds, which will no doubt be starting to frustrate his opponent.
That's one minute gone in the round.
Durden not looking particularly offensive just at the moment.
Yamamoto trying to control the position from guard on top but Durden is wriggling around, looking for whatever he can.
Durden wants to control here, rather than go for any submissions from the bottom. At least for now.
Yamamoto postures up.
Yamamoto trying to control the position from guard on top but Durden is wriggling around, looking for whatever he can.
The ref stands the fighters back up due to a lack of activity.
The fighters circling - Yamamoto throws out the jab but it was never going to land.
Durden looking to throw a kick but he's pulled out of it.
Yamamoto dives in and grabs Durden's left leg, looking for a takedown. Durden pushes down on Yamamoto's head and hops out.
That's two minutes gone in the round.
Neither fighter has done anything of merit for a good minute or two here and the crowd are not happy about it.
Good standup being displayed there by Yamamoto as he connects with a hook.
Durden moves out of range as Yamamoto strikes.
Durden connects with a good right hand that stumbles Yamamoto. Yamamoto circles away out of range and recomposes himself.
Kotetsu Yamamoto seems to be getting the better of the standup.
A swing and a miss from Durden.
Yamamoto misses with a looping left.
Yamamoto checks the leg kick nicely there.
Yamamoto looks like he wants to counter punch here.
Yamamoto takes a punch right to his stomach. That took the wind out of him momentarily.
Durden connects with a lovely right hand, straight down the pipe.
Yamamoto lands with a cross.
Yamamoto looks to score with a jab to the body but Durden is just out of range.
Durden lands a body shot.
Yamamoto takes one to the side of the head.
Durden is using his height advantage well here, landing a good percentage of his punches.
Durden scores with a nice strike.
Durden uses some good footwork to avoid the body shot by Yamamoto.
Durden moves out of range as Yamamoto strikes.
Durden jinks towards his opponent looking like he wants to counter with a mid kick but doesn't commit.
Durden scores with a nice head shot.
Yamamoto tries a switch kick but it misses it's target.
That's three minutes gone in the round.
Nice uppercut there from Durden.
Nice takedown defense from Durden. No joy for Yamamoto on that attempt.
Durden is looking to counter with a body kick.
Tyler Durden has stuffed three takedown attempts in the round now. That's going to take a lot out of Kotetsu Yamamoto.
Durden throws a jab but it's blocked by Yamamoto.
Durden blocks a jab.
Durden is looking to counter punch.
Durden connects with a body shot that sends Yamamoto's belly button to the back.
A punch combination from Yamamoto misses.
Durden misses with a low kick as Yamamoto jumps back.
It looks like Durden has been trying to sharpen up his punching technique, as it looks crisper than last time we saw him.
Durden throws a body punch but Yamamoto moves out of range.
Durden scores with a straight right hand, right through his opponent's guard.
Durden lands an overhand left. A wild punch that just about connected.
Yamamoto on the wrong end of a vicious looking body shot.
Durden scores with a jab to the body.
Yamamoto tries to drive through with a takedown attempt but Durden defends well and Yamamoto ends up having to push Durden into the cage where they will battle it out in the clinch.
Yamamoto misses with a left hand
and Durden counters with a crisp hook to the side of the head.
The crowd are loving this. Great action here.
Durden misses with a straight left.
A swing and a miss from Durden.
Yamamoto lands with a cross.
That's four minutes gone in the round.
Durden defending well as Yamamoto loads up on a big left hand.
Durden jabs Yamamoto right on the nose. Yamamoto blinks but takes it well.
The fighters circle momentarily. Durden darts into range and connects with a nice straight punch.

Yamamoto is rocked!
Durden lands with a thumping leg kick.
Yamamoto is still on wobbly legs! Can Durden finish him?
Yamamoto lands a nice hook to Durden's body. Durden takes it in his stride and looks to land his own strikes.
Yamamoto seems to have recovered his senses.
Yamamoto darts in and lands a nice takedown into half guard.
Durden manages to get to full guard.
Yamamoto postures up to throw the ground and pound strikes but they don't connect.
Yamamoto trying to pass the guard but can't manage it just yet.
And thats the end of the round the fighters go back to their corners.
Tyler Durden dominated that second round.
The fighters' corners scream their final instructions, as the referee calls time. Here we go, back to the action! This is the final round!

Yamamoto throws out a loose jab but Durden uses good head movement to avoid it.
Nice defenses there by Durden.
Yamamoto throws a looping overhand right but Durden ducks down to avoid it.
Durden with a jab.
Durden motions for Yamamoto to come forward. Durden throws a leg kick but it misses it's target.
Yamamoto misses with a low kick as Durden jumps back.
Yamamoto throws a shot from downtown. Durden moves away and avoids it.
Durden ducks down and throws a hook to the body but Yamamoto moves away.
Yamamoto misses with a looping right.
Yamamoto swings wildly with a right hand that was never going to find it's target.
Durden lands a body shot.
Yamamoto tests Durden's chin there with a solid looking shot.
We've had a slow start to the round here - hopefully the action picks up.
Durden throws a hook to the body but it doesn't connect.
Yamamoto throws a hook but Durden avoids it easily.
Yamamoto lands a body shot.
Durden looks to land a left hand but Yamamoto moved out of range nicely.
A jab from Yamamoto misses.
A solid body kick from Durden.
That's one minute gone in the round.
Yamamoto misses with a telegraphed body shot
and Durden counters with a slapping leg kick.
Durden misses with a straight left.
Yamamoto slips a jab from Durden.
Yamamoto cracks Durden with an open hand slap.
Yamamoto lands a leg kick that knocks Durden off balance momentarily.
Oooooooooooh, not good. A low kick from Durden lands where it shouldn't have, right in the... well, you know what he did? He kicked him in the penis. He's injured, injured bad. The referee sends both fighters to their corners and Yamamoto has 5 minutes to recover. He's OK now though... a thumbs up from Yamamoto and we're back underway with a touch of gloves.
A shot to the liver by Durden. Beautiful body shot.
Durden lands the left hand.
Durden ducks down and throws a hook to the body but Yamamoto moves away.
Durden walks forward and throws out a flicking leg kick. Yamamoto checks it nicely though, as he moves to the side.
Yamamoto staying out of range there.
Durden takes one on the chin but seems OK.
Yamamoto just misses with a punch to the body.
Yamamoto shoots in for a takedown and gets it. Let's see what he's got on the mat.
We've seen a great period of action over the last minute or so - credit to both fighters for going all out!
Durden is pulling down on Yamamoto's head. It's preventing any offense from Yamamoto, at least for the moment.
Durden looking to control.
That's two minutes gone in the round.
Yamamoto tries to free his leg and advance position but Durden is retaining full guard.
Yamamoto trying to control the position from guard on top but Durden is wriggling around, looking for whatever he can.
A real slowdown in the pace of the fight for a moment, as Durden holds on and takes a little breather.
Hammerfist, elbow! yells Yamamoto's corner. There ya go! There ya go!
Yamamoto loading up with the ground and pound but he's missing more than he's landing in this flurry.
Durden looking to hit a scissor sweep but Yamamoto is one step ahead there.
Durden will need to keep those long limbs tucked in whilst he's on the ground, to prevent any submissions.
Durden trying to keep a closed guard but Yamamoto is proving a slippery customer.
That's three minutes gone in the round.
Yamamoto looking to sit in guard and control but Durden gets the butterfly guard and sweeps. He's now in the guard on the top.


Yamamoto working from the bottom, still in full guard. He's managed to get a loose triangle. Durden doesn't seem to be doing much to defend here, obviously he feels comfortable in the position. Durden manages to throw the legs off his shoulder and he's back into guard - no problem.
Durden seems content to control from guard here. He's going to have to remain active though if he doesn't want to get stood back up.
Durden's ground tactics aren't going to win him many fans. Let's hope he's got fireworks for us if he gets back to his feet because he's not doing much on the ground.
That's four minutes gone in the round.
A few boos can be heard. I'm sure they will multiply if the fighters don't pick up the pace.
Further stalling from Durden.
Durden stopping the sweep attempt from Yamamoto.
Kotetsu Yamamoto has got the better of the ground game so far.
Durden avoids a guillotine attempt easily.
Durden engaging in some classic timewasting tactics.
The crowd thankful this round is nearly over.
Durden trying to control but Yamamoto is working from the bottom.
The referee has stepped in and called for a break in the action. We'll restart on the feet.
And that's the end of the fight!
I would just about give that final round to Kotetsu Yamamoto.
I think Yamamoto has won this one but let's see whether the judges agree with me. Over to the ring announcer for the scorecards.
Ladies and gentlemen, after 3 rounds of action, we go to the scorecards for a decision.
Judge Timothy Bukovac scores the fight 28:29
Judge Frank Antenori scores the fight 28:29
Judge Jack Bonds scores the fight 29:28
In favor of your winner, by split decision... Kotetsu Yamamoto!
An out of breath Kotetsu Yamamoto thanked his loyal fans in his post fight interview, giving them credit for his success over the course of his career.
|
|
|
|
|
|
|
|
|
|
|
|
|
|
|
|
|
|
|
|
|
|
|
| S |
C
A |
G |
S |
C
B |
G |
|
S |
C |
G |
|
energy
A | B |
|
hype
A | B |
|
pop
A | B |
|
mgr
A | B |
|
FIGHT
RATING
53% |
|
|
|
|
|
|
