|
|
PBP Commentary |
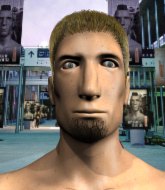
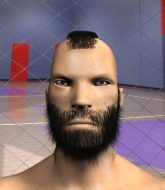
Coming up we have a welterweight MMA rules bout between Ryan Monet (ranked 0 p4p, 0 weight class) and JB Black (ranked 0 p4p, 0 weight class). Monet comes to the cage accompanied by Blow Me Away. Black has chosen Walk as his entrance music. We have two fighters making their debuts here, so let's see who comes out of this one with their first professional victory.
 |
|
 |
| 190 cm
18
169 lbs
0 - 0 - 0 |
|
175 cm
18
170 lbs
0 - 0 - 0 |
BJJ Blue Belt
Basic striking
Cuts easily |
|
BJJ White Belt
Brawler
Prefers standup |
|
| |
|
Ladies and gentlemen. This fight is 3 rounds, in the welterweight division.
Introducing the fighter to my left, fighting out of the red corner.
With a record of
0 - 0 - 0, fighting out of Amsterdam, Ryan Monet!
And introducing the fighter to my right, fighting out of the blue corner.
With a record of
0 - 0 - 0, fighting out of Amsterdam, JB Black!
The judges for this bout are , and .

The bell rings for round one and we are underway!
A shot to de liver by Black. Beautiful body shot.
Monet fails in his attempt to clinch.

Monet closes the distance and gets a double leg, slamming Black to the mat! Black manages to get full guard.
Monet trying to pass the guard but can't manage it just yet.
Monet wants to control from the top but Black keeps moving.
Monet stops Black from standing up.
The fighters are pressed up against the cage, both looking to find a bit of space to work.

Black has butterfly guard. He's looking to stand up here. He pushes Monet off him and springs to his feet nicely. The crowd applauds.

Monet gets to the clinch - let's see what his plan is here.
Monet has a body lock and is looking for a takedown. Black is bouncing around trying to prevent the takedown and somehow he has indeed managed to stay on his feet.
Black can't break the clinch.
Monet keeps control of Black as he tries to wriggle out of the double underhooks.
Monet wants to stall.
Black on the defensive, avoiding the knees to the body.
Monet is trying to drag Black to the mat but Black just about manages to keep his footing. He used the cage to his advantage there.
Monet gets double underhooks and manages to take the fight to the ground.
Monet is breathing heavily.
The crowd are loving this. Great action here.
Black is looking to stand up but Monet isn't so interested in that idea.
Black wants to get back to his feet but he's too absorbed in his own little project and Monet manages to pass to side control.

That's one minute gone in the round.
Black has hold of Monet's hands but Monet slips his arm to the side and lands an elbow.

Monet is working for a kimura but Black is defending it quite comfortably.
Monet stops Black from getting back to his feet.
The ref warns both fighters not to hold the cage as they work up against the meshing.

Neither fighter is doing enough for the referee's liking and he's decided to stand them back up.
Black looks to score with a jab to the body but Monet is just out of range.
Black stuffs the takedown.
That's three failed takedown attempts in the round for Ryan Monet. That's going to take a lot out of him.
Black thows a body shot but no joy.
Monet fails with the takedown.
Black tries to bum rush Monet with a series of wild strikes but Monet uses good footwork to avoid the assault.

That's two minutes gone in the round.
A few boos can be heard. I'm sure they will multiply if the fighters don't pick up the pace.
Black stalks Monet and leaps in with a furious combination of punches. Uppercuts and crosses smash into Monet's face. Monet staggers backwards, shaken.

It looks like Ryan Monet has been cut.
Monet ducks right into an uppercut from Black.
JB Black is looking to keep the fight on the feet at all costs.
Black throws a nice outside leg kick.
Monet tries for a takedown but Black sees it coming a mile off and avoids it easily.
Black lands a nice looking body shot.
Monet takes one on the chin but seems OK.
Black throws a combination but comes up with nothing but fresh air.
Monet keeping a good distance there, avoiding the body shot.
Monet closes the distance and clinches up, looking for a takedown. He shifts his weight and gets a nice trip into half guard.
Monet is looking for a kimura. It's going to be difficult to finish that from half guard though and Black defends it well.
Monet is trying to work for a kimura. He's got his hands clasped together - this could be trouble! No, Black has managed to free his arm - good work.
Monet is looking to take a break and control but Black is keeping him honest, looking to work from the bottom.
Monet will need to keep those long limbs tucked in whilst he's on the ground, to prevent any submissions.

That's three minutes gone in the round.
Monet is working for a kimura but Black is defending it quite comfortably.
Monet really does look like a pencil wearing a pair of gloves. Let's hope he has a gameplan to suit that ridiculous body shape.
Monet is working for a submission of some sort.
Monet prevents Black from standing back up.
It looks like we're going to have a standup here. Neither fighter is doing enough on the ground.
Monet tries to clinch up but Black circles away and keeps his distance.
Nice takedown defense from Black. No joy for Monet on that attempt.

That's four minutes gone in the round.
The crowd are showing their displeasure at the lack of action as loud boos ring out around the arena.
Black scores with a punch to the gut of his opponent.
Black misses with a jab, cross combination.
Monet throws a head kick that misses and slips in the process. He scrambles back to his feet and the fighters circle.
Black swats away the attempt to clinch by Monet.
Black throws a combination but it was largely blocked by Monet.
Black keeps the fight on the outside.
Black is throwing a lot of body shots here, looking to wear down Monet rather than just go for the knockout.
The crowd cheers as Black lands an impressive looking overhand right. Monet doesn't seem phased though.
Monet showing good head movement there, avoiding the strikes from Black.
Monet misses with a takedown attempt - Black sprawls well and throws a nice strike on the way out which just misses.
Monet tries to clinch up.
The crowd applaud the fighters efforts here as the round comes to an end.
Monet fails miserably with a takedown attempt.
Black lands a jab to Monet's midsection.
And thats the end of the round the fighters go back to their corners.
JB Black dominated that round.
The cut man is working on Ryan Monet's cut.
That's the end of the interval. I'm sure that seemed a lot quicker than a minute for our two fighters! Back to the action.

Black looks to throw the jab but Monet is out of range.
Ryan Monet seems to be the more aggressive standup fighter in this bout.
Monet darts in and lands a nice takedown into half guard.
Monet is trying for a guillotine from the top but the pressure isn't in the right place so Black is just riding it out for now. Monet eventually gives up the hold.
Black manages to escape and get back to his feet!
Black fakes high and swings low for a body shot but Monet manages to avoid it.
Monet with poor footwork there. He got himself in a bit of a tangle, enabling Black to score with a decent uppercut.
Black throws a hook to the side of Monet's head but Monet sees it coming and ducks under it beautifully.
Monet tries to move into range but Black moves to the side and lands with a nice right hand.
Both fighters are absolutely exhausted here.
Monet avoids the head kick by Black.
Monet clinches with his opponent.
Monet is trying to work for a single leg takedown but Black pulls him back up using the underhooks.
That's one minute gone in the round.
Black wants to strike at distance but he can't break free of the clinch.
Black has had enough of the clinch but Monet keeps him there for the moment.
Black wants to break free. God knows he wants to breaaaak freeee.
Monet has a body lock and is looking for a takedown. Black is bouncing around trying to prevent the takedown and somehow he has indeed managed to stay on his feet.
Black has had enough of the clinch but Monet keeps him there for the moment.
Black wants to get back to striking at distance but Monet won't allow it.
Black tries to break the clinch but Monet is controlling the position.
Monet has double underhooks and is working for a body lock takedown. He's got it. The fighters land in half guard but Black regains guard immediately.
Monet scores with a decent looking elbow strike.
Black is trying to stand up but he's not managed so far.
Monet drops back for a leg! It's a sloppy attempt though and Monet jumps back into guard quickly, to retain the dominant position.
Monet is trying to work a guillotine from the top, or something like that? Don't know how he thinks he's going to get a finish from there.
Black keeping moving, preventing Monet from controlling successfully.
That's two minutes gone in the round.
Monet drops back looking for a heel hook - he quickly realises he's not going to get it but Black manages to dive on top of him before he can escape and now Monet has Black in his guard.
Black decides to stand up and beckons his opponent to follow.
Black jabs Monet right on the nose. Monet blinks but takes it well.
Monet gets a takedown into half guard.
Black is trying to stand back up but Monet is controlling him
Monet working Black over with strikes.
Monet is looking for a kimura but Black is holding onto that half guard position, so it's hard for Monet to get the leverage.
Black makes his way to full guard, as Monet worked for a kimura.
That's three minutes gone in the round.
Black wants to stand and escape but Monet is having none of it.
Monet trying to pass the guard but can't manage it just yet.
Black uses the cage to get back to his feet.
Black has used his reach advantage pretty well so far tonight.
Black fails to land with the punch combination there - jab, cross, hook, miss, miss, miss.
Monet clinches with his opponent.
Monet is trying to drag Black to the mat but Black just about manages to keep his footing. He used the cage to his advantage there.
That's three failed takedown attempts in the round for Ryan Monet. That's going to take a lot out of him.
Black wants to break free but Monet has control.
Monet tries for a takedown. No joy.
Black wants to break free but Monet has control.
Black wants to break the clinch but can't.
Monet is trying to work for a single leg takedown but Black pulls him back up using the underhooks.
Monet has dropped down and is working for a takedown. Black is trying to keep an underhook but Monet manages to get the takedown into half guard.
Monet is working for submissions here but there's nothing on.
That's four minutes gone in the round.
Monet tries to stand but can't do so whilst Black controls his leg.
Monet is looking for a kimura. It's going to be difficult to finish that from half guard though and Black defends it well.
Ryan Monet overall seems to be getting the better of the ground position in the fight so far.
Monet prevents Black from standing back up.
Monet slips a nice elbow through Black's hands, connecting with Black's forehead.
Black is trying to stand back up but Monet is controlling him
Monet is working for a submission here. He's got hold of the far side arm and he's looking for a kimura. He's cranking on the arm and he's got it! Black is tapping out! Ouch, that looked like it hurt!
Ladies and gentlemen, after 4:56 of round 2, we have a winner by way of Submission (Kimura). Ryan Monet!
|
|
|
|
|
|
|
|
|
|
|
|
|
|
|
|
|
|
|
|
|
|
|
| S |
C
A |
G |
S |
C
B |
G |
|
S |
C |
G |
|
energy
A | B |
|
hype
A | B |
|
pop
A | B |
|
mgr
A | B |
|
FIGHT
RATING
50% |
|
|
|
|
|
|
