|
|
PBP Commentary |
Coming up we have a middleweight MMA rules bout between Walter Never Faulter (ranked 0 p4p, 0 weight class) and Jamal Nelson (ranked 0 p4p, 0 weight class). Man, I cannot wait for this one!
 |
|
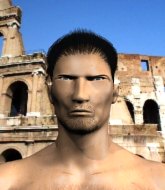 |
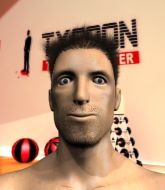
| 186 cm
22
193 lbs
2 - 0 - 0 |
|
186 cm
18
184 lbs
1 - 0 - 0 |
BJJ Purple Belt
Counter striker
Good chin |
|
BJJ Blue Belt
Basic striking
Very confident |
|
| |
|
Ladies and gentlemen. This fight is 3 rounds, in the middleweight division.
Introducing the fighter to my left, fighting out of the red corner.
With a record of
2 - 0 - 0, fighting out of Los Angeles, Walter Never Faulter!
And introducing the fighter to my right, fighting out of the blue corner.
With a record of
1 - 0 - 0, fighting out of Los Angeles, Jamal Nelson!
The judges for this bout are , and .

The bell rings for round one and we are underway!
Ouch! a nice leg kick from Nelson, right into the meat.
Never Faulter showing good head movement there, avoiding the strikes from Nelson.

Never Faulter scores a trip takedown into side control. Nice.
Never Faulter tries to move to mount but Nelson blocks the move with his legs.
Never Faulter wants to control but Nelson is keeping him busy.
Nelson is looking for a sweep.
Nelson is persisting with the attempt to improve his position.
Nelson wants to escape from the position here - easier said than done!
Never Faulter tries to advance to mount but Nelson denies him.

Neither fighter is doing enough for the referee's liking and he's decided to stand them back up.
Nelson misses with a head kick.
Nelson scores with a three punch combo!
Nelson tries to bum rush Never Faulter with a series of wild strikes but Never Faulter uses good footwork to avoid the assault.
Never Faulter shoots in for a takedown but Nelson shows good takedown defense.
Never Faulter dodges the punch combination from Nelson.
Nelson tries to score with a low kick but Never Faulter moves his leg out of the way.

That's one minute gone in the round.
Nelson fails with an attempt to clinch.
Nelson misses with the combination.

The fight moves into the clinch position.
Nelson can't break the clinch.
Never Faulter has Nelson pressed up against the cage and is working for takedown. Nelson manages to improve position though and keeps the fight standing.
Never Faulter fails to pull the fight into his guard.
That's three failed takedown attempts in the round for Walter Never Faulter. That's going to take a lot out of him.
Nice body punch from Nelson - that landed with a thud.
Never Faulter blocks an uppercut.
Never Faulter prevents Nelson from breaking the clinch.
Nelson has had enough of the clinch but Never Faulter keeps him there for the moment.
Nelson on the defensive, avoiding the knees to the body.
Nelson using the Thai plumb to throw knees but Never Faulter has his back arched nicely, preventing the strike.
Never Faulter keeps control of Nelson as he tries to wriggle out of the double underhooks.

Never Faulter manages to break the clinch.
Jamal Nelson seems to be the more aggressive standup fighter in this bout.
A punch combination from Nelson misses.
A punch combination from Nelson misses.
A punch combination from Nelson misses.
Nelson fails to land with a series of punches.
Nelson tries to bum rush Never Faulter with a series of wild strikes but Never Faulter uses good footwork to avoid the assault.

That's two minutes gone in the round.
Neither fighter has done anything of merit for a good minute or two here and the crowd are not happy about it.
Never Faulter tries to shoot in for a takedown. He's got hold of a leg but Nelson swivels and escapes.
Nelson tries to clinch but Never Faulter moves away
and Never Faulter counters by moving into the clinch. Good anticipation by Never Faulter.
Never Faulter jumps into guard, dragging Nelson to the mat.
Never Faulter working the defensive guard well to avoid strikes from Nelson.
Both fighters really going for it on the ground here!
Nelson has decided he wants to stand but the closed guard of Never Faulter is proving hard to escape from.
Nelson looks gassed!
Never Faulter controls Nelson momentarily but Nelson frees himself.
The fighters are pressed up against the cage, both looking to find a bit of space to work.

Nelson gets to his feet - Never Faulter follows without any prompting.
Never Faulter shoots in for a takedown but doesn't get it.
Nelson tries to clinch but Never Faulter moves out of range.
Never Faulter will have to do better than that with his takedown attempts.
Nelson throws a combination that misses
and Never Faulter decides to take the opportunity to score a takedown. He's landed in Nelson's guard.

Nelson looking for submissions off his back, moving his hips, looking for an opening.
Nelson keeping full guard, as Never Faulter tries to pass.
Nelson trying to control the position.
Nelson wants to sweep but no luck.
Nelson kicks Never Faulter off and gets to his feet.

That's three minutes gone in the round.
Never Faulter shoots in for a takedown. "I don't think so" says Nelson as he avoids it easily.
Nelson falls off balance throwing a combination
and Never Faulter counters with a nice double leg into guard.
Never Faulter with a nice head shot there.
Never Faulter drops back for a leg! It's a sloppy attempt though and Never Faulter jumps back into guard quickly, to retain the dominant position.
Never Faulter trying to control but Nelson is working from the bottom.
Nelson working for a triangle but Never Faulter defends it easily.
Never Faulter wants to pass the guard but Nelson is keeping the position.
Nelson working from the bottom, still in full guard. He's managed to get a loose triangle. Never Faulter doesn't seem to be doing much to defend here, obviously he feels comfortable in the position. Never Faulter manages to throw the legs off his shoulder and he's back into guard - no problem.
Nelson had isolated an arm as going for an omaplata. Never Faulter is defending the submission well but is in a very vulnerable position. Nelson Is leaning forward trying to finish the omaplata but decides to abandon it, and take Never Faulter's back instead.
Never Faulter trying to control the hands but Nelson breaks the grip.

That's four minutes gone in the round.
Never Faulter rolls and manages to get back to half guard. Nicely done.
Never Faulter looking for submissions from an awkward position here.
Never Faulter is trying is best to control the position here.
Nelson is trying to control the action in half guard but Never Faulter is working away on the bottom, looking perhaps to get back to full guard.
Nelson is looking for a kimura but Never Faulter is holding onto that half guard position, so it's hard for Nelson to get the leverage.
Nelson throwing punches and elbows but they're not doing any damage.
Neither fighter is doing enough for the referee's liking and he's decided to stand them back up.
Never Faulter slips a jab and a cross from Nelson.
Never Faulter decides to change it up a bit and drives through with a nice takedown into half guard.
Fantastic stuff here - a very entertaining period of action, which has drawn cheers from the crowd.
Never Faulter passes to side control.
Never Faulter connects with a decent looking elbow from side control that caused Nelson some visible discomfort.
Nelson is trying to improve his position.
The crowd applaud the fighters efforts here as the round comes to an end.
Nelson manages to get one leg in to regain half guard.
The ref warns both fighters not to hold the cage as they work up against the meshing.
Nelson wants to get back to his feet.
Nelson is looking to sinch up a gullotine here but Never Faulter pulls his head out easily.
And thats the end of the round the fighters go back to their corners.
Walter Never Faulter dominated that round.
OK. That's time! The bell goes and we're back to the action.

A head kick misses from Nelson.
Nelson wants to land a leg kick but Never Faulter is out of range.
Nelson moves into the clinch successfully.
Nelson wants to push off and get back to the center of the mat but Never Faulter has him pressed against the cage.
Never Faulter keeps control of Nelson as he tries to wriggle out of the double underhooks.
Never Faulter is trying to slow down the pace of the fight but Nelson is keeping busy.
Nelson wants to get back to striking at distance but Never Faulter won't allow it.
Nelson misses with some punches.
Nelson can't break the clinch.
A short uppercut from Nelson.
Nelson wants to push off and get back to the center of the mat but Never Faulter has him pressed against the cage.
Never Faulter managing to block the knees to the body from Nelson.
Nelson using the Thai clinch to land knees to the body.
Nelson throws an elbow that misses.
We've had a slow start to the round here - hopefully the action picks up.
Nelson wants to strike at distance but he can't break free of the clinch.
Nelson breaks the clinch.
Never Faulter checks a leg kick.
Nelson gets taken down but at least he's managed to land in guard.
Nelson working for a triangle but Never Faulter defends it easily.
Both fighters are absolutely exhausted here.
Nelson is looking for a triangle but Never Faulter pushes his legs off easily.
That's one minute gone in the round.
Never Faulter trying to control but Nelson is working from the bottom.
Nelson looking to hit a scissor sweep but Never Faulter is one step ahead there.
Nelson working from the bottom, still in full guard. He's managed to get a loose triangle. Never Faulter doesn't seem to be doing much to defend here, obviously he feels comfortable in the position. Never Faulter manages to throw the legs off his shoulder and he's back into guard - no problem.
Nelson wants to get back to his feet but Never Faulter is in a dominant position and won't allow it.
Nelson is working actively off his back, looking to secure an arm or perhaps work for a triangle.
Never Faulter stops Nelson from standing up.
Nelson tries to land a sweep but no joy.
Nelson had isolated an arm as going for an omaplata. Never Faulter is defending the submission well but is in a very vulnerable position. Nelson Is leaning forward trying to finish the omaplata but decides to abandon it, and take Never Faulter's back instead.
Nelson working for a choke but Never Faulter reverses nicely into Nelson 's guard.
That's two minutes gone in the round.
Nelson working for a triangle but Never Faulter defends it easily.
Nelson pushes Never Faulter off and gets back to his feet.
Nelson misses with a series of wild punches.
Nelson throws a hard body shot but it just misses.
Never Faulter avoids the head kick by Nelson.
Never Faulter on the receiving end of a decent leg kick there by Nelson. Nelson obviously looking to wear him down.
Never Faulter showing good head movement there, avoiding the strikes from Nelson.
Nelson tries to clinch up but Never Faulter circles away and keeps his distance.
Never Faulter fails in his attempt to clinch.
Never Faulter looks for a takedown. He's got it. We're now in half guard.
That's three minutes gone in the round.
Nelson moves his hips nicely and gets into full guard.
Never Faulter avoids a guillotine attempt easily.
Never Faulter avoids a guillotine attempt easily.
Never Faulter works over Nelson with some ground and pound from guard.
Nelson had isolated an arm as going for an omaplata. Never Faulter is defending the submission well but is in a very vulnerable position. Nelson Is leaning forward trying to finish the omaplata but decides to abandon it, and take Never Faulter's back instead.
Nelson working for a RNC but it's not happening just yet.
Never Faulter is defending well here and trying to improve his position.
Nelson has his hand under the chin of his opponent looking for the choke. He's nearly got it! This one could be all over! But no, Never Faulter has freed his hand and lives to survive another
well, another couple of seconds at least!
Nelson looking for the RNC.
Nelson lands with a nice looking elbow that stuns Never Faulter.
That's four minutes gone in the round.
Nelson working for a RNC but it's not happening just yet.
Nelson trying to control.
Never Faulter fending off the submission attempt from Nelson.
The fans in attendance giving it up for the two fighters, who have really let it all hang out in the last minute or so!
Nelson is remaining active here, looking for the choke. The more discerning members of the crowd will appreciate his efforts.
Never Faulter preventing the rear naked choke attempt from Nelson.
Never Faulter is really stuck here.
The crowd applaud the fighters efforts here as the round comes to an end.
Nelson lands with a couple of good shots - one to the side of the head and one questionable shot that could be viewed as to the back of the head but the referee lets it go.
Never Faulter breaks Nelson's hooks off and manages to turn into his guard.
Nelson is trying to control the position but Never Faulter postures up.
And thats the end of the round the fighters go back to their corners.
Jamal Nelson showed his class in that round. I'd imagine he'll take it on all the scorecards.
The minute break is over - no more time for sponges and pep talks - back to the action! Let's hear some noise people - this is the final round!

Nelson throws a hook to the body but it doesn't connect.
Never Faulter shoots in for a takedown! He's got it and he's managed to land in full mount! That's better than Never Faulter was expecting from the takedown attempt, I'm sure!
Never Faulter looking to secure an arm triangle but Nelson defends it well.
Nelson working to try and regain half guard.
Never Faulter looking to secure an arm triangle but Nelson defends it well.
Never Faulter working for a guillotine from mount but Nelson is in no mood to give up.
Never Faulter working Nelson over with strikes here.
Never Faulter is in full mount, looking to secure a guillotine but Nelson is surviving well by controlling Never Faulter's body position as best he can.
Nelson is in all sorts of trouble here.
Nelson sneaks a leg under to get to half guard.
Never Faulter trying to pass the guard but Nelson defending well.
Both fighters are breathing heavily.
That's one minute gone in the round.
Never Faulter is working for a submission here. He's got hold of the far side arm and he's looking for a kimura. He's cranking on the arm and he's got it! Nelson is tapping out! Ouch, that looked like it hurt!
Ladies and gentlemen, after 1:24 of round 3, we have a winner by way of Submission (Kimura). Walter Never Faulter!
|
|
|
|
|
|
|
|
|
|
|
|
|
|
|
|
|
|
|
|
|
|
|
| S |
C
A |
G |
S |
C
B |
G |
|
S |
C |
G |
|
energy
A | B |
|
hype
A | B |
|
pop
A | B |
|
mgr
A | B |
|
FIGHT
RATING
100% |
|
|
|
|
|
|
