|
|
PBP Commentary |
Coming up we have a light heavyweight MMA rules bout between Brendan Burgess (ranked 0 p4p, 0 weight class) and Balla Boy (ranked 0 p4p, 0 weight class). The fight MMA fans around the world have waited their entire lives for!
 |
|
 |
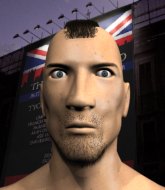
| 185 cm
22
215 lbs
1 - 2 - 0 |
|
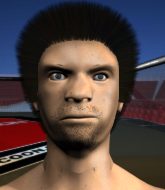
190 cm
21
206 lbs
0 - 0 - 0 |
BJJ Blue Belt
Counter fighter
Cuts easily |
|
BJJ Blue Belt
Brawler
Solid chin |
|
| |
|
Ladies and gentlemen. This fight is 3 rounds, in the light heavyweight division.
Introducing the fighter to my left, fighting out of the red corner.
With a record of
1 - 2 - 0, fighting out of Tokyo, Brendan Burgess!
And introducing the fighter to my right, fighting out of the blue corner.
With a record of
0 - 0 - 0, fighting out of Tokyo, Balla Boy!
The judges for this bout are Shigeki Fujiwara, Taro Takaoka and Shigeki Sano.

The bell rings for round one and we are underway!

Boy is looking for a takedown here. He's shot in and has managed to get it, finishing up in Burgess's half guard.
Boy looks towards his corner to check for any instructions. The corner give him nothing to work with, so he cracks Burgess with a short hammerfist. I guess that's as good as any advice he could get in this position.
Burgess tries to roll over but Boy keeps him under control.

Boy looking for a kimura but he'll have to free his other leg if he wants to finish that. Perhaps he's just using it as a distraction technique.
The fighters are pressed up against the cage, both looking to find a bit of space to work.
Boy is looking for a kimura here.
Burgess works his way to full guard. Good work.
We've had a slow start to the round here - hopefully the action picks up.
Boy tries to free his leg and advance position but Burgess is retaining full guard.
The ref warns both fighters not to hold the cage as they work up against the meshing.
Boy trying to control the position from guard on top but Burgess is wriggling around, looking for whatever he can.
Burgess is avoiding any damage by keeping wrist control.

That's one minute gone in the round.
Boy trying to control but Burgess is working from the bottom.
Burgess wants to sweep here but Boy controlling him for the moment.
Burgess keeping full guard, as Boy tries to pass.
Burgess looking for a sweep. Not yet Burgess, not yet.
Boy prevents Burgess from getting back to his feet.
Burgess working a defensive guard here.
Boy is sitting in guard, working some ground and pound.
Boy drops back looking for a heel hook - he quickly realises he's not going to get it but Burgess manages to dive on top of him before he can escape and now Boy has Burgess in his guard.

Burgess postures up.

That's two minutes gone in the round.
Boy is looking for a triangle here but Burgess uses the submission attempt to pass into side control.
Boy manages to work his way to half guard, despite Burgess's best efforts.
Boy wants to improve his position but Burgess is controlling well.

Burgess is trying a forearm choke
I don't think that's going to do much at this level of the game.

That's three minutes gone in the round.
Burgess wants to stand up but Boy has a hold of him and won't allow it.
Boy gets full guard.

Boy is working an open guard so Burgess takes the opportunity to get back to his feet.
Burgess gets caught napping as Boy dives in and scores a takedown. Burgess manages to retain guard.
The fighters are going at a pretty good pace and they're both starting to sweat now.
Burgess keeping moving, preventing Boy from controlling successfully.
Burgess wants to sweep here but Boy controlling him for the moment.

That's four minutes gone in the round.
Boy trying to control the position from guard on top but Burgess is wriggling around, looking for whatever he can.
Boy is in close to Burgess's body, working some short punches and elbows.
Burgess is trying to control the position from the bottom.
Boy stopping the sweep attempt from Burgess.
Boy trying to control but Burgess is working from the bottom.
Burgess keeping full guard, as Boy tries to pass.
Boy loading up with the ground and pound but he's missing more than he's landing in this flurry.
Boooooooooooooooooooo!!! God, this has been a terrible round. Come on you two, sort yourselves out!
Boy working from the guard for now, landing some ground and pound.
Boy trying to control the position from guard on top but Burgess is wriggling around, looking for whatever he can.
Boy with a couple of shots to the head there. Not particularly brutal.
And thats the end of the round the fighters go back to their corners.
Balla Boy dominated that round.
The referee calls time. The cornermen exit stage left and we're back to business.

Burgess gets caught flat footed, as Boy shoots in with a quick takedown into guard.

Burgess has managed to wall walk up one of the corner posts to get back to his feet. Boy is pushing him up against the cage, looking to control the position.
Boy has dropped down and is working for a takedown. Burgess is trying to keep an underhook but Boy manages to get the takedown into half guard.
Burgess manages to create a bit of space in order to work his way back to his feet. Boy keeps hold of his opponent and drives him back against the cage.
Wooooo! Give it up for these two warriors! They are putting on a show!
Boy gets the body lock takedown. After a quick scramble, Burgess regains guard.
Burgess has his feet on Boy's hips. He pushes off and gets to his feet. Nice work.
Balla Boy seems to be the more aggressive standup fighter in this bout.
A momentary lapse in concentration from Burgess enables Boy to shoot in and score with a neat double leg. Burgess manages to secure a closed guard as the fighters hit the mat.
Boy throws a big elbow that misses.
Boy wants to control from the top but Burgess keeps moving.
Burgess wants to stand but Boy is controlling the position.
Boy landing with the ground and pound.
Burgess is trying to keep Boy in close.
That's one minute gone in the round.
Boy drops back, looking for a kneebar! Burgess looks panicked! The fighters roll across the mat, one looking to finish, one looking to escape. Burgess looks to have wriggled free... Yes, he's got his leg free and he's dived into side control! Good work there from Burgess!
Burgess tries to stand but Boy is controlling his head.
Brendan Burgess overall seems to be getting the better of the ground position in the fight so far.
Boy regains half guard.
That's two minutes gone in the round.
Boy is looking to get full guard. It looks like he might be successful but at the last minute Burgess jumps into side control!
Boy tries to work a leg under to get back to half guard but Burgess wriggles his own leg back out and remains in side control.
Burgess is looking to finish here, going for an Americana. Boy knows the correct defense though, so he's OK.
Burgess tries to get to his feet but he's trapped momentarily.
That's three minutes gone in the round.
Boy regains half guard.
Burgess looks towards his corner to check for any instructions. The corner give him nothing to work with, so he cracks Boy with a short hammerfist. I guess that's as good as any advice he could get in this position.
Burgess takes advantage of the dominant position to land a couple of big hammer fists.
Burgess is trying to work for a kimura but Boy is defending well.
Burgess is trying to get back to his feet now but his leg is trapped.
That's four minutes gone in the round.
Well. There's a bit of a lull in the action here and the crowd are starting to get restless.
Burgess stands up and beckons Boy to join him on the feet.
Boy shoots in and gets a takedown into half guard. Boy showed some decent athleticism there.
Burgess is defending against the submission attempts here by Boy.
Burgess is looking to improve his position.
Boy missing with some ground and pound from the half guard.
Boy landing with strikes to the body and head, softening up his opponent.
Boy wants to free his trapped foot but Burgess is holding on for dear life with his legs.
Burgess is trying to stand back up but Boy is controlling him
And thats the end of the round the fighters go back to their corners.
Brendan Burgess dominated that second round.
Well, the break between rounds is over. Let's get back to the scrappin! Let's get this one finished - here comes the final round!

Boy closes the distance and scores a nice trip takedown into half guard. Burgess did well to prevent Boy getting side control.
Burgess is positioning himself well to prevent Boy advancing to mount.
Burgess keeping his head moving to avoid the ground and pound.
Burgess is not content to let Boy control the position.
Boy lands a big shot. The thud that echoes around the arena is like music to the fans' ears.
Burgess looking to work for a kimura from the bottom.
Burgess wants to get back to his feet.
We've had a slow start to the round here - hopefully the action picks up.
Boy not throwing his punches with enough precision this time.
Boy is working for a kimura but Burgess is defending it quite comfortably.
Boy is controlling the pace.
That's one minute gone in the round.
Boy wants to control but Burgess is keeping him busy.
Burgess wants to control but Boy is keeping busy and won't allow it.
Boy throwing shots but Burgess is blocking nicely.
Boy throwing punches and elbows but they're not doing any damage.
Burgess is trying to get back to full guard.
Boy is taking a breather. Burgess says something to him but it's hard to make out. Perhaps he's telling him to get on with it and actually do something.
Boy seems to be looking for submissions.
Burgess is doing well to control the position and prevent Boy from advancing to side control.
Burgess is trying to get back to full guard.
That's two minutes gone in the round.
A few boos can be heard. I'm sure they will multiply if the fighters don't pick up the pace.
Burgess manages to get to full guard.
Burgess keeping moving, preventing Boy from controlling successfully.
Boy scoring with some ground and pound.
Boy wants to control from the top but Burgess keeps moving.
Boy stands up over Burgess, holding his feet. He dives back in and lands a decent shot to the head.
Boy trying to control but Burgess is working from the bottom.
Burgess is working an open guard here, looking to improve his position. No doubt that will leave him open to counters but at least he's being more offensive.
That's three minutes gone in the round.
Boy postures up and lands a big shot to Burgess's brow.
Boy looking to pass the guard.
Burgess preventing the ground and pound from doing any damage.
Boy trying to control but Burgess is working from the bottom.

The referee has decided to stand the fighters back up, so we'll restart on the feet.
Boy is looking for a takedown here. He's shot in and has managed to get it, finishing up in Burgess's half guard.
Burgess tries to kick Boy off in order to stand up. Boy Avoids the leg push though and dives into side control.
Burgess avoids any damage from the ground and pound of Boy.
Boy looking for an arm triangle but it's way too loose to do anything.
Boy looking for an arm triangle but it's way too loose to do anything.
Boy takes a big intake of breath there - he's definitely tired.
That's four minutes gone in the round.
Burgess tries to work a leg under to get back to half guard but Boy wriggles his own leg back out and remains in side control.
Boy throwing shots but missing, from side control.
Boy is looking to take a break and control but Burgess is keeping him honest, looking to work from the bottom.
You can see the frustration on Burgess's face, being in this tough position on the bottom.
Burgess is trying to improve his position.
Boy wants to lay and pray for a moment but Burgess keeps working.
Boooooooooooooooooooo!!! God, this has been a terrible round. Come on you two, sort yourselves out!
Boy thinks about going for a far side armbar but bails out and retains the dominant position instead.
Boy is looking to take a break and control but Burgess is keeping him honest, looking to work from the bottom.
And that's the end of the fight!
Balla Boy comfortably won the final round on my scorecard.
Well Boy has outworked and out performed his opponent in all aspects of the game today. He was simply too good and the decision should be no more than a formality. Over to the ring announcer for the scorecards.
Ladies and gentlemen, after 3 rounds of action, we go to the scorecards for a decision.
Judge Shigeki Fujiwara scores the fight 28:29
Judge Taro Takaoka scores the fight 28:29
Judge Shigeki Sano scores the fight 28:29
In favor of your winner, by unanimous decision... Balla Boy!
A victorious Balla Boy thanked his army of followers in his post fight interview, telling people to make sure they follow him on Twitter.
|
|
|
|
|
|
|
|
|
|
|
|
|
|
|
|
|
|
|
|
|
|
|
| S |
C
A |
G |
S |
C
B |
G |
|
S |
C |
G |
|
energy
A | B |
|
hype
A | B |
|
pop
A | B |
|
mgr
A | B |
|
FIGHT
RATING
33% |
|
|
|
|
|
|

