|
|
PBP Commentary |
Coming up we have a welterweight MMA rules bout between Yamato Take (ranked 0 p4p, 0 weight class) and Tyrone Biggums (ranked 0 p4p, 0 weight class). Tyrone Biggums is the more experienced fighter, so let's see if that makes a difference tonight.
 |
|
 |
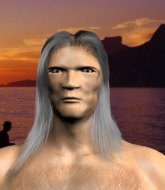
| 179 cm
28
182 lbs
4 - 0 - 0 |
|
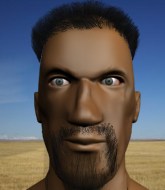
178 cm
32
185 lbs
16 - 13 - 0 |
Great wrestler
World class boxer
Insanely flexible |
|
Excellent grappler
World class MT
Good gas tank |
|
| |
|
Ladies and gentlemen. This fight is 3 rounds, in the welterweight division.
Introducing the fighter to my left, fighting out of the red corner.
With a record of
4 - 0 - 0, fighting out of Las Vegas, Yamato Take!
And introducing the fighter to my right, fighting out of the blue corner.
With a record of
16 - 13 - 0, fighting out of London, Tyrone Biggums!
The judges for this bout are George Francis, Gwen Towbar and Alan Glass.

The bell rings for round one and we are underway!
Biggums pulls out of a head kick attempt.
Well, he's not going to score with shots like that. A lazy body kick attempt from Biggums.
Biggums tries to check a leg kick but that clearly hurt him.
An inside leg kick from Biggums misses.
Take looks to have improved his striking defense since last time we saw him fight.
Take throws a hard body shot but it just misses.
Take connects with a solid leg kick.
Take misses with a looping right.
Biggums counters with a body kick.
Biggums looks to land a combination but Take avoids it well.
Take throws a front kick aimed at Biggums's knee but Biggums avoids it well.
We've been informed that Biggums has been sparring a lot of Muay Thai in the buildup to this fight so let's see if that has an impact on the result.
Biggums throws a jab to the body, straight down the pipe. Boom. That sent Take stumbling backwards but he manages to regain his composure quickly.
Take misses with a hook.
Take swings for the body but Biggums moves out of range.
Biggums throws a nice outside leg kick.
Biggums on the receiving end of a decent leg kick there by Take. Take obviously looking to wear him down.
Good leg kick by Biggums there. It's the ones that make that thud noise that hurt and that was an almighty thud.
Take scoring well with a low kick there.
This is a great period of action - very entertaining stuff!
Take misses the shot to the body.
Take lands a jab to Biggums's midsection.
Tyrone Biggums seems to be the more aggressive standup fighter in this bout.
Biggums throws a wild body kick that Take sees coming a mile off.
Biggums lands a right hook to the body.
Take feints and then cracks Biggums's leading leg with a nice low kick. He's obviously looking to slow Biggums down.

That's one minute gone in the round.
Take connects with a solid leg kick.
Biggums misses with a right hand
and Take counters with a straight right hand.
Well, he's not going to score with shots like that. A lazy body kick attempt from Biggums.
Biggums swings and misses with a hook to the body.
Take keeping his hands up high there, blocking the jab from Biggums.
Biggums throws a wild combination but nothing lands.
An inside leg kick lands from Biggums.
Biggums uses some good footwork to avoid the body shot by Take.
Biggums throws a jab when Take was well out of range.
Biggums is the aggressor but that punch slipped nicely by Take.
Biggums throws a hook but Take avoids it easily.
Biggums takes a jab right on the nose. That must have hurt but he shrugs his shoulders and looks to return the favor.

It looks like Tyrone Biggums has been cut.
A good leg kick by Biggums.
Biggums throws out a loose jab but Take uses good head movement to avoid it.
Biggums connects with a lovely right hand, straight down the pipe.
Biggums scores with a leg kick.
Wooooo! Give it up for these two warriors! They are putting on a show!
Take lands an overhand left. A wild punch that just about connected.
Take fakes a couple of low kicks, before throwing one on the third attempt. It connects and Biggums has to reset his feet before getting ready to engage.
Take blocks a head kick by Biggums.
Jab, cross, leg kick. Nice combination by Biggums!

That's two minutes gone in the round.
Biggums scores with a jab. Take acknowledges it with a nod of the head.
Biggums looks to land a body kick but Take moved away.
Take misses with an uppercut.
Take avoids the body shot from Biggums.
Biggums moves his head to the side to avoid a jab but walks straight into a cross.

Biggums is rocked!
Biggums stooping low to avoid any incoming strikes and then lunges in with an uppercut come cross that lands flush.
Biggums is still on wobbly legs! Can Take finish him?
Biggums walks forward and throws out a flicking leg kick. Take checks it nicely though, as he moves to the side.
Biggums seems to have recovered his senses.
Wow, both these guys are really going for it!
Take lands a nice looking body shot.
Take tests Biggums's chin there with a solid looking shot.
Good standup being displayed there by Biggums as he connects with a hook.
Biggums works his jab well there, keeping his opponent at a distance.
Biggums throws a body shot but no joy.
Take looking to land some kicks to the body here.
Take throws a hook to the body but it doesn't connect.
Take with a nice looking leg kick. You could hear that one land in a back row.
Biggums throws a couple of head shots and lands with the final one - a decent hook, which struck Take on the side of the head.
The crowd cheers as Take lands an impressive looking overhand right. Biggums doesn't seem phased though.
Biggums connects with a leg kick. Take looked like he was expecting something else and didn't defend it.
Biggums cracks Take with a good jab.

That's three minutes gone in the round.
Take pivots, looking for a leg kick but Biggums is out of range and Take settles back down.
Biggums throws a low kick but his opponent is out of range.
Biggums takes a shot right to the liver - Bas would have been proud of that punch.
Take misses with a straight left.
Biggums bobs and weaves and throws out a fast jab that snaps Take's head backwards.
Good work by Take as he checks the leg kick.
Biggums darts in and out, connecting with a jab.
Take throws a series of punches but Biggums avoids them all with ease.
Biggums scores with a nice body kick.
Biggums moves out of range as Take throws a body kick.
A looping hook to the body misses from Biggums. Take does a little dance to reset his feet.
A decent looking cross lands there for Take.
Take is looking to land body kicks.
Take scores with a shot to the body.
Take blocks a low kick nicely.
Biggums throws a hard body shot but it just misses.
Wooooo! Give it up for these two warriors! They are putting on a show!
Take misses with a low kick.
And an attempted straight right on the counter from Biggums! But no joy.
Take throws a half hearted mid kick.
Take takes a nice looking leg kick right on the meat of his thigh there.

That's four minutes gone in the round.
Biggums lands a nice hook to Take's body. Take takes it in his stride and looks to land his own strikes.
Take throws a hard body shot but it just misses.
Biggums throws a leg kick but Take moved away.
Take takes a big uppercut there. He seems a bit wobbly but no, he's OK.
A slow jab from Take misses its intended target.
Biggums avoids the head kick by Take.
Take lands with a shot to the body.
Biggums throws a quick inside leg kick.
Take throws a front kick aimed at Biggums's knee but Biggums avoids it well.
Take cracks the inside of Biggums's front leg.
Biggums scores with a hook to the body. Take takes a step back and tries to catch his breath.
Biggums's leg has a nasty welt from taking a succession of leg kicks. That must be slowing him down.
Take motions for Biggums to come forward. Take throws a leg kick but it misses it's target.
Take tries to land with a swinging hook to the body but Biggums was well out of range. Poor timing from Take.
A solid leg kick lands there for Biggums.
As the round comes to an end the crowd are showing their appreciation for a great round of action.
Biggums throws a body shot but no joy.
Biggums tries a head kick but it misses.
Take misses with a jab, cross combination.
Biggums ducks low and lands a nice hook to the body of his opponent.
Biggums throws a lazy body kick
and Take counters with a thumping low kick.
And thats the end of the round the fighters go back to their corners.
A close round but Tyrone Biggums will probably get the nod.
The cut man is working on Tyrone Biggums's cut.
The fighters' corners scream their final instructions, as the referee calls time. Here we go, back to the action!

A looping hook to the body misses from Biggums. Take does a little dance to reset his feet.
Take half committed to a counter leg kick.
Biggums scores with a jab. Take acknowledges it with a nod of the head.
Take throws a body kick but he wasn't in range.
Biggums scores with a slapping inside leg kick.
Good leg kick by Take there. It's the ones that make that thud noise that hurt and that was an almighty thud.
Biggums misses with a body shot.
Take misses with a leg kick.
Take lands with a cross to side of his opponent's head.
Tyrone Biggums seems to be getting the better of the standup.
Take throws a low kick but it's checked well by Biggums.
Take throws a couple of head shots and lands with the final one - a decent hook, which struck Biggums on the side of the head.
Take waving his hands out in front of him, looking to distract Biggums.
Biggums scores with a body shot.
Take ducks down and throws a hook to the body but Biggums moves away.
Take lands a powerful looking uppercut that connected with his opponent's jaw.
Take ducks down and throws a hook to the body.
We've seen a great period of action over the last minute or so - credit to both fighters for going all out!
Biggums connects with the punch.
Take throws a hook to the body but it doesn't connect.
Take throws the kick towards the body but Biggums avoids it.
Biggums thows a leg kick but Take checks it
and Take counters with a crisp hook to the side of the head.
That's one minute gone in the round.
Take scores with the left hand. Biggums knows he should have avoided that one.
Nice defenses there by Biggums.
Take takes a swing at Biggums's ribcage but misses.
Biggums ducks down and throws a hook to the body but Take moves away.
A slow jab from Biggums misses its intended target.
Take half committed to a counter leg kick.
Biggums buckles his opponent's knee momentarily with a nice leg kick.
Take keeping at a good range here, avoiding a leg kick.
Biggums checks a low kick from Take.
Take scores with a hook.
Take jabs at Biggums's body.
An inside leg kick from Biggums misses.
Take appeared to be looking to counter that last move with a leg kick.
Take throws a sloppy head kick and Biggums moves out of range easily.
Take wants to clinch up but Biggums keeps it at a distance.
Take misses with a straight left.
Take defending well as Biggums loads up on a big left hand.
Biggums checks a leg kick nicely.
Take ducks under a wild hook from Biggums.
Take throws a head kick but Biggums moves out of range.
Biggums slips under a jab from Take.
That's two minutes gone in the round.
This fight brought to you by 5M nutrition - it's mmmmm tasty. Nice jab by Take.
The crowd cheering loudly, showing their appreciation for the quality fight we're seeing here.
Take missing with a left hand there. Biggums was out of range so wasted energy throwing that one.
Take throws a low kick but it's checked well by Biggums.
Biggums throws a low kick but Take avoids it.
Take scores with a leg kick.
Take throws a nice outside leg kick.
Take connects with a good right hand that stumbles Biggums. Biggums circles away out of range and recomposes himself.
Biggums ducks right into an uppercut from Take.
Biggums misses with a telegraphed body shot
and Take counters with a nice body kick.
Biggums defending well as Take loads up on a big left hand.
Biggums throws a combination but comes up with nothing but fresh air.
Take is looking to counter punch.
Biggums lands an overhand left. A wild punch that just about connected.
Biggums connects with a looping right hand.
Biggums rushes forward with a series of wild hooks but Take moves out of range and avoids them all easily.
It looked like Take wanted to counter with a hook but didn't fully commit.
Biggums uses decent footwork to sidestep a right hand from Take.
Take keeping his hands up high there, blocking the jab from Biggums.
Biggums staying out of range there.
Biggums scores with a spinning back kick!
That's three minutes gone in the round.
Take throws a leg kick but Biggums sees it coming and checks it nicely.
Biggums misses with a body shot.
Biggums checks a low kick from Take.
Biggums walks straight into a jab right on the nose. That one stung - he's blinking and trying to clear his head.
Take cracks Biggums on the jaw with a powerful right hand and Biggums falls backwards against the cage. Take follows up with more strikes that drop Biggums to his knees. Take keeps the pressure on and the referee jumps in to save Biggums! This one is all over!
Ladies and gentlemen, after 3:20 of round 2, we have a winner by way of TKO (Strikes). Yamato Take!
|
|
|
|
|
|
|
|
|
|
|
|
|
|
|
|
|
|
|
|
|
|
|
| S |
C
A |
G |
S |
C
B |
G |
|
S |
C |
G |
|
energy
A | B |
|
hype
A | B |
|
pop
A | B |
|
mgr
A | B |
|
FIGHT
RATING
85% |
|
|
|
|
|
|

