|
|
PBP Commentary |
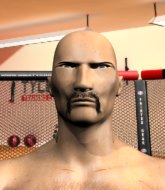
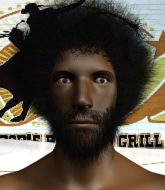
Coming up we have a featherweight MMA rules bout between Takeshi Hashimoto (ranked 0 p4p, 0 weight class) and Tyrone The Crack Head (ranked 0 p4p, 0 weight class). Hashimoto comes into the arena with Tomoki Hasegawa - Lemon Song blaring out of the sound system. The Crack Head has chosen Mr. Flamboyant as his entrance music. Over to our ring announcer for the fighter introductions!
 |
|
 |
| 158 cm
21
142 lbs
2 - 2 - 0 |
|
150 cm
22
140 lbs
9 - 4 - 0 |
Good wrestling
Solid boxing
KO power |
|
Good wrestler
Dangerous knees
Good gas tank |
|
| |
|
Ladies and gentlemen. This fight is 3 rounds, in the featherweight division.
Introducing the fighter to my left, fighting out of the red corner.
With a record of
2 - 2 - 0, fighting out of London, Takeshi Hashimoto!
And introducing the fighter to my right, fighting out of the blue corner.
With a record of
9 - 4 - 0, fighting out of Los Angeles, Tyrone The Crack Head!
The judges for this bout are William Gold, Richard Clark and Steven Brown.

The bell rings for round one and we are underway!
The Crack Head throws a front kick aimed at Hashimoto's knee but Hashimoto avoids it well.
Hashimoto feinted with a counter takedown.
The Crack Head tries to score with an inside leg kick but telegraphs it and Hashimoto is able to avoid easily.
The Crack Head throws a sloppy head kick and Hashimoto moves out of range easily.
Hashimoto half commits to a counter takedown before pushing away, out of range.
The Crack Head thows a leg kick but Hashimoto checks it

and Hashimoto counters with a nice shoot takedown that brings the fighters to the ground.
The Crack Head keeping moving, preventing Hashimoto from controlling successfully.
Hashimoto throws a big right hand that misses.
We've had a slow start to the round here - hopefully the action picks up.
The Crack Head wants to stand but Hashimoto is controlling the position.
Hashimoto working some ground and pound from guard but it's not doing any damage.
Hashimoto with a flurry of punches that miss.

That's one minute gone in the round.
Hashimoto stopping the sweep attempt from The Crack Head.
The fighters are pressed up against the cage, both looking to find a bit of space to work.
Hashimoto throws a big right hand that misses.
Hashimoto trying to land body shots but he keeps hitting the mat.
Hashimoto trying to control but The Crack Head is working from the bottom.
The Crack Head is pulling down on Hashimoto's head to control his posture.
The Crack Head utilising some decent striking defenses from the guard, preventing the ground and pound.
The Crack Head is working an open guard here, looking to improve his position. No doubt that will leave him open to counters but at least he's being more offensive.
The Crack Head keeping moving, preventing Hashimoto from controlling successfully.

The referee has decided to stand the fighters back up, so we'll restart on the feet.
The Crack Head throws a body kick that misses
and Hashimoto decides to take the opportunity to score a takedown. He's landed in The Crack Head's guard.
Hashimoto throws a big right hand that misses.

That's two minutes gone in the round.
Hashimoto stands up over The Crack Head, holding his feet. He dives back in and lands a decent shot to the head.
The ref warns both fighters not to hold the cage as they work up against the meshing.
Hashimoto throwing strikes from guard but The Crack Head blocks nicely.
Hashimoto throwing elbows and punches but not connecting, as The Crack Head works some decent striking defense from the bottom.
Hashimoto is frustrating his opponent with some stalling tactics from top position.
Hashimoto is looking to work some ground and pound but The Crack Head has wrist control.
The Crack Head is working an open guard here, looking to improve his position. No doubt that will leave him open to counters but at least he's being more offensive.
Hashimoto postures up in The Crack Head's guard and throws a big left but The Crack Head blocks it.
The Crack Head is working from a closed guard but he's struggling to control his opponent.
The Crack Head tries to land a sweep but no joy.

That's three minutes gone in the round.
Hashimoto working in close now, lands a nice elbow to the side of The Crack Head's head.
Hashimoto connects with a couple of short punches.
Hashimoto working some ground and pound from guard but it's not doing any damage.
Hashimoto lands a nice shot whilst sitting in his opponent's guard.
The Crack Head is doing well to control the posture of his opponent and prevent any damage.
Hashimoto with a flurry of punches that miss.
The Crack Head has control of Hashimoto's left arm, preventing Hashimoto from doing any damage.
The fighters are starting to get a bit slippery now, which will make submissions a bit more difficult.
Hashimoto throwing elbows and punches but not connecting, as The Crack Head works some decent striking defense from the bottom.
The Crack Head pulls Hashimoto in close to his closed guard and prevents Hashimoto from doing any damage or advancing position.
Hashimoto postures up to throw the ground and pound strikes but they don't connect.

That's four minutes gone in the round.
Hashimoto with a flurry of punches that miss.
The Crack Head preventing the ground and pound from doing any damage.
Hashimoto preventing the sweep.
Hashimoto seems content to control from guard here. He's going to have to remain active though if he doesn't want to get stood back up.
The ref stands the fighters back up due to a lack of activity.
The Crack Head throws a head kick that misses
and Hashimoto counters with a nice double leg into guard.
Hashimoto throwing shots from guard but he's hitting more mat than opponent.
The Crack Head keeping moving, preventing Hashimoto from controlling successfully.
The crowd thankful this round is nearly over.
Hashimoto throwing elbows and punches but not connecting, as The Crack Head works some decent striking defense from the bottom.
Hashimoto lands a couple of elbows.
And thats the end of the round the fighters go back to their corners.
Takeshi Hashimoto dominated that round.
That's time! Back to the action!

The Crack Head tries a head kick but it misses.
Hashimoto attempts a counter takedown but The Crack Head avoids it well and moves away.
The Crack Head throws a sloppy head kick and Hashimoto moves out of range easily.
Hashimoto avoids the head kick by The Crack Head.
Hashimoto appears to be looking for a counter takedown.
Hashimoto shoots in from a long way out. He's driving through with the takedown attempt and he eventually gets it, landing in The Crack Head's guard.
The Crack Head is wriggling around but Hashimoto manages to pass to half guard.

Hashimoto looking to pass the half guard. Not this time.
Hashimoto wants to control but The Crack Head is keeping him busy.
Hashimoto has been looking to land a fair amount of strikes on the ground. He might be looking to soften his opponent up in order to work for a submission.
We've had a slow start to the round here - hopefully the action picks up.
Hashimoto throwing shots but they're hitting the canvas more than the man.
The Crack Head is refusing to be controlled, as Hashimoto sits in half guard.
The Crack Head is trying to stand.
That's one minute gone in the round.
Hashimoto missing with the ground and pound from half guard.
Hashimoto sitting in half guard, looking to land shots. The Crack Head defending well though.
Hashimoto thumps the canvas. Not on purpose obviously - he just missed The Crack Head's head.
Hashimoto prevents The Crack Head from improving his position.
Hashimoto throwing shots but The Crack Head is blocking nicely.
Hashimoto missing with some ground and pound from the half guard.
Hashimoto lands with a punch from half guard.
Hashimoto thumps the canvas. Not on purpose obviously - he just missed The Crack Head's head.
Hashimoto sitting in half guard, looking to land shots. The Crack Head defending well though.
Hashimoto is thwarting The Crack Head's attempts to control the position.
The Crack Head blocking the ground and pound attempt from Hashimoto.
That's two minutes gone in the round.
Hashimoto scores with a couple of good hammerfists.
The Crack Head is trying to stand.
Hashimoto throws a strike but The Crack Head avoids it easily and moves to full guard.
Hashimoto is sitting in guard, working some ground and pound.
The Crack Head keeping moving, preventing Hashimoto from controlling successfully.
Hashimoto with a flurry of punches that miss.
Hashimoto postures up in The Crack Head's guard and throws a big left but The Crack Head blocks it.
Hashimoto won't allow The Crack Head to sweep him here.
The Crack Head is looking to stand up but Hashimoto isn't so interested in that idea.
Hashimoto trying to move into half guard but instead The Crack Head has managed to sweep!
That's three minutes gone in the round.
Hashimoto is doing well to control the posture of his opponent and prevent any damage.
The Crack Head is looking to stand up but Hashimoto won't let him.
My spies in Bruize Brothaz inform me that The Crack Head has been getting involved in the gym's BJJ sparring sessions. Let's see whether that pays dividends!
Hashimoto is really dominating this fight. Is there anything that The Crack Head can do to turn this around?
Hashimoto tries to land a sweep but no joy.
The referee has stepped in and called for a break in the action. We'll restart on the feet.
The Crack Head throws a leg kick but Hashimoto sees it coming and checks it nicely.
The Crack Head throws a leg kick that is checked
and Hashimoto decides to take the opportunity to score a takedown. He's landed in The Crack Head's guard.
That's four minutes gone in the round.
Hashimoto pushing down on The Crack Head's thigh, trying to pass to half guard. He's managed it... Nice work.
Hashimoto is trying to control. The Crack Head wants to improve his position but can't escape this time.
Hashimoto sitting in half guard, looking to land shots. The Crack Head defending well though.
Hashimoto not landing any meaningful shots this time.
Hashimoto not landing any meaningful shots this time.
Takeshi Hashimoto overall seems to be getting the better of the ground position in the fight so far.
Hashimoto not throwing his punches with enough precision this time.
Hashimoto not throwing his punches with enough precision this time.
The Crack Head is looking for a sweep. Hashimoto is wise to his cunning plan and keeps the top position.
The crowd thankful this round is nearly over.
Hashimoto trying to control from half guard but The Crack Head is working away.
The Crack Head tries to get to full guard but Hashimoto has control of the leg.
And thats the end of the round the fighters go back to their corners.
Takeshi Hashimoto dominated that second round.
Well, the break between rounds is over. Let's get back to the scrappin! This is the final round!

A head kick by The Crack Head misses
and Hashimoto counters with a driving takedown into guard. Nice work there by Hashimoto.
Hashimoto trying to pass the guard but can't manage it just yet.
Hashimoto wants to control from the top but The Crack Head keeps moving.
Hashimoto postures up to throw the ground and pound strikes but they don't connect.
A big thud reverberates around the arena there as Hashimoto accidentally thumps the mat. Hopefully he's not broken his hand.
The Crack Head avoiding any damage from the ground and pound.
The Crack Head is pulling down on Hashimoto's head to control his posture.
We've had a slow start to the round here - hopefully the action picks up.
Hashimoto connects with a couple of short punches.
Hashimoto wants to control from the top but The Crack Head keeps moving.
The Crack Head utilising some decent striking defenses from the guard, preventing the ground and pound.
That's one minute gone in the round.
Hashimoto postures up in The Crack Head's guard and throws a big left but The Crack Head blocks it.
Hashimoto scores with a decent looking elbow strike.
Hashimoto throwing elbows and punches but not connecting, as The Crack Head works some decent striking defense from the bottom.
The Crack Head wants to control here, rather than go for any submissions from the bottom. At least for now.
Hashimoto loading up with the ground and pound but he's missing more than he's landing in this flurry.
Hashimoto working some ground and pound from guard but it's not doing any damage.
The Crack Head wants to sweep but no luck.
Hashimoto in full guard, throwing the ground and pound. No damage this time.
The Crack Head utilising some decent striking defenses from the guard, preventing the ground and pound.
The referee has stepped in and called for a break in the action. We'll restart on the feet.
Tyrone The Crack Head is looking to throw some combinations by the looks of things.
The Crack Head pivots, looking for a leg kick but Hashimoto is out of range and The Crack Head settles back down.
The Crack Head tries a head kick but it misses.
That's two minutes gone in the round.
The Crack Head throws a sloppy head kick
and Hashimoto counters with a nice shoot takedown that brings the fighters to the ground.
Hashimoto throwing shots from guard but he's hitting more mat than opponent.
Hashimoto throws a big elbow that misses.
The Crack Head utilising some decent striking defenses from the guard, preventing the ground and pound.
Hashimoto in full guard, throwing the ground and pound. No damage this time.
Hashimoto looking to sit in guard and control but The Crack Head gets the butterfly guard and sweeps. He's now in the guard on the top.
Hashimoto seems keen to control rather than go for a submission, at least for now.
That's three minutes gone in the round.
Hashimoto looking to hit a scissor sweep but The Crack Head is one step ahead there.
The Crack Head wants to get up but he can't break Hashimoto's closed guard. He needs to be careful trying to break the legs open, as he's open to submissions here.
That's four minutes gone in the round.
Neither fighter has done anything of merit for a good minute or two here and the crowd are not happy about it.
Hashimoto is working an open guard here, looking to improve his position. No doubt that will leave him open to counters but at least he's being more offensive.
Hashimoto is working hard here to advance position.
Tyrone The Crack Head has stepped it up - he knows he needs a finish here!
The Crack Head throwing elbows and punches but not connecting, as Hashimoto works some decent striking defense from the bottom.
The referee has decided to stand the fighters back up, so we'll restart on the feet.
Boooooooooooooooooooo!!! God, this has been a terrible round. Come on you two, sort yourselves out!
The Crack Head wants to slow Hashimoto down by chopping away at his legs.
Hashimoto feinted with a counter takedown.
Hashimoto closes this distance looking for a takedown but The Crack Head circles away.
And that's the end of the fight!
Takeshi Hashimoto showed his dominance in that final round.
Well I reckon that's a shut out for Hashimoto, winning every round. Will the judges agree? They are the ones who matter, even if they are often depressingly incompetent. Over to the ring announcer for the scorecards.
Ladies and gentlemen, after 3 rounds of action, we go to the scorecards for a decision.
Judge William Gold scores the fight 30:27
Judge Richard Clark scores the fight 30:27
Judge Steven Brown scores the fight 30:27
In favor of your winner, by unanimous decision... Takeshi Hashimoto!
The defeated Tyrone The Crack Head had this to say: 'F the UFC anyways!!!'.
|
|
|
|
|
|
|
|
|
|
|
|
|
|
|
|
|
|
|
|
|
|
|
| S |
C
A |
G |
S |
C
B |
G |
|
S |
C |
G |
|
energy
A | B |
|
hype
A | B |
|
pop
A | B |
|
mgr
A | B |
|
FIGHT
RATING
29% |
|
|
|
|
|
|

