|
|
PBP Commentary |
Coming up we have a middleweight MMA rules bout between James Brice (ranked 0 p4p, 0 weight class) and Lenny Bang (ranked 0 p4p, 0 weight class). Over to our ring announcer for the fighter introductions!
 |
|
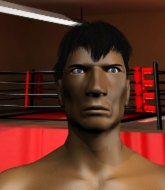 |
| 185 cm
21
190 lbs
0 - 0 - 0 |
|
188 cm
21
185 lbs
4 - 6 - 0 |
BJJ White Belt
Brawler
Cuts easily |
|
BJJ White Belt
Decent boxing
Determined |
|
| |
|
Ladies and gentlemen. This fight is 3 rounds, in the middleweight division.
Introducing the fighter to my left, fighting out of the red corner.
With a record of
0 - 0 - 0, fighting out of Helsinki, James Brice!
And introducing the fighter to my right, fighting out of the blue corner.
With a record of
4 - 6 - 0, fighting out of Helsinki, Lenny Bang!
The judges for this bout are Johanna Lukiainen, Marco Blurström and Matti Vanhoillinen.

The bell rings for round one and we are underway!
A combination from Brice does no damage.
Brice dodges the punch combination from Bang.

Brice fakes an overhand right and shoots for a takedown. Bang sprawls well initially but Brice persists and gets the takedown into half guard.
Bang looks more muscular than last time we saw him. He must have been on the weights.
Brice looks over to his corner - he wants some instructions but his corner are not responding.
Brice seems to be taking a bit of a break to think of his next move. He lands a short punch in the meantime.
Brice is just sitting in half guard, waiting for something to happen.

Brice is working for a kimura but Bang is defending it quite comfortably.
We've had a slow start to the round here - hopefully the action picks up.
Bang looks like he's trying to stand up.

That's one minute gone in the round.
Brice lands with an elbow from half guard - that looked like it hurt.
Bang has hold of Brice's hands but Brice slips his arm to the side and lands an elbow.
Brice trying to control the action but Bang is working from the bottom.
Brice stops Bang from getting back to his feet.
Brice throwing shots but they're hitting the canvas more than the man.
Brice stops Bang from getting back to his feet.
Brice is trying to control. Bang wants to improve his position but can't escape this time.
Brice scoring with strikes to the body and head.
Brice slows the pace down in half guard.

That's two minutes gone in the round.
Brice tries to pass to full mount but Bang defends it.
Bang is not content to let Brice control the position.
Bang is trying to defend against the ground and pound but Brice scores with a couple of nice shots.
Brice working some ground and pound from close in. He's looking to maintain this position and strike for a while by the looks of things... although he'll probably advance to full mount in a minute now I've said that.
Brice not throwing his punches with enough precision this time.
The fighters are starting to perspire pretty heavily.
Brice content to sit in half guard and control for a moment.
Brice stops Bang from getting back to his feet.
Brice has been looking to land a fair amount of strikes on the ground. He might be looking to soften his opponent up in order to work for a submission.

That's three minutes gone in the round.
Brice works his way into side control.
Check out the look on Brice's face as he threw that strike - that's one determined fighter!
The fighters are pressed up against the cage, both looking to find a bit of space to work.
Brice advances nicely into full mount.
Brice connects with a couple of good shots from mount.
Bang takes a big shot to the head but keeps on trying to improve his position.
Bang looks winded!
Brice fakes a shot to the body and cracks his opponent in the head. Nice ground and pound there!
Brice lands with some vicious ground and pound - can Bang hang on?
Bang is in a horrible position here. Brice smacks him with another shot as he tries to escape the position.
Brice is still in mount, landing shots to his trapped opponent. Bang can't stay in a position like this for much longer.
Brice lands a couple of nice shots there from mount.
Brice with a couple of short strikes.
This has been an exciting period of action!
Bang takes a big shot to the head but keeps on trying to improve his position.

That's four minutes gone in the round.
Brice connects with a couple of good shots from mount.
Bang is bucking up trying to escape but Brice cracks him with another couple of good strikes.
Bang is really trying hard to get back to his feet.
The ref warns both fighters not to hold the cage as they work up against the meshing.
Brice is still in mount, landing shots to his trapped opponent. Bang can't stay in a position like this for much longer.
Brice is still in mount, landing shots to his trapped opponent. Bang can't stay in a position like this for much longer.
Brice scoring with strikes but Bang is staying in there.
Bang is not a happy chappy
he wants out of there.
Brice scoring with strikes but Bang is staying in there.
Bang is trying to get to the cage to help him get back to his feet.
BOOM! Brice connects with a massive shot to the dome!
Brice tucks in and makes sure he doesn't lose the dominant position.
Bang's corner are shouting for him to stand up but that's bad cornering - how is he meant to stand up when he's mounted? He should be looking to improve his position on the ground before trying to stand back up.
And thats the end of the round the fighters go back to their corners.
James Brice dominated that round.
OK. That's time! The bell goes and we're back to the action.

Brice changes levels and drives through with a really nice takedown into side control. Bang looks really pissed at himself for not defending that better.
Brice is looking for a kimura. He might have it! No, Bang has escaped the position, nice work there.
Bang is not content to let Brice control the position.
Brice lands a knee to the body and a forearm to the face.

Brice decides to stand back up.
We've had a slow start to the round here - hopefully the action picks up.
Bang fails to land with a series of punches.

Brice closes the distance and clinches.
Brice is pushing Bang up against the cage, for a bit of lean and pray action. Action being used the in the loosest possible sense of the word.
Bang is breathing heavily.
Brice lands a right hand.
That's one minute gone in the round.
Bang tries to break the clinch but Brice is controlling the position.
Bang wants to break free. God knows he wants to breaaaak freeee.

Brice breaks the clinch and we're back to striking at distance.
Bang throws a head kick that misses.
Brice rushes Bang and pushes him back against the cage in a clinch.
Brice wants a takedown.
Brice keeps the fight in the clinch, despite Bang's efforts to push away.
Brice jumps guard and drags Bang to the mat. He's obviously going to be looking for submissions off his back.
James Brice overall seems to be getting the better of the ground position in the fight so far.

Bang drops back, looking for a kneebar! Brice looks panicked! The fighters roll across the mat, one looking to finish, one looking to escape. Brice looks to have wriggled free... Yes, he's got his leg free and he's dived into side control! Good work there from Brice!

Bang is not content to let Brice control the position.
Bang is working hard to escape and get back to his feet. After a battle for position, Brice asserts his dominance and retains side control.
That's two minutes gone in the round.
Brice stands up and we're back to a striking position.
Brice cracks Bang with a hook to the jaw. Both fighters smile at eachother and high-five before getting back down to business.
Lenny Bang seems to be the more aggressive standup fighter in this bout.
Brice forces Bang back against the cage and clinches.
Brice jumps guard but Bang stands there with Brice around his waist. Brice gives up and drops back to his feet. We remain in the clinch.
Some stalling of biblical proportions here from Brice.
Brice breaks the clinch and we return to the middle of the mat.
Brice shoots in but Bang avoids the takedown attempt easily.
That's three failed takedown attempts in the round for James Brice. That's going to take a lot out of him.
That's three minutes gone in the round.
Brice clinches.
Bang looks like he'd prefer to be striking at range right now.
Bang blocks an elbow strike.
Brice escapes the clinch and we're back to striking.
Brice tries to clinch but is not successful on this occasion.
Brice is trying hard to land a takedown here. Bang sprawls well and keeps this one on the feet.
Brice swings wildly with a couple of big hooks
and Bang makes him pay by landing a nice hook to the body before moving out of range.
Bang will need to tighten up his combinations if he doesn't want to gas himself out, swinging at thin air.
Brice throws a big counter combination but Bang scrambles out of danger and avoids any damage.
A telegraphed takedown attempt from Brice is defended easily by Bang.
Brice gets cracked there but stands up to it.
That's four minutes gone in the round.
No joy there for Brice, who threw a few shots but didn't land.
Bang avoids the clinch attempt nicely.
Bang closes the distance and lands a one-two.
Brice fakes high and swings low for a body shot but Bang manages to avoid it.
Brice has his head slapped from side to side by a 3 punch combination. That must have hurt him.
This is a great period of action - very entertaining stuff!
Bang throws a head kick that misses and slips in the process. He scrambles back to his feet and the fighters circle.
Brice throws a combination but comes up with nothing but fresh air.
As Brice backs off Bang throws a huge counter combo but Brice manages to avoid it all.
James Brice is looking to throw some combinations by the looks of things.
Bang catches Brice with a nice straight right. He seems pissed - ooooh, it's on now! On like donkey kong!
Bang throws a body kick but he wasn't in range.
Brice moves out of range as Bang throws a body kick.
Bang stuffs the takedown attempt from Brice. Brice gets slowly back to his feet.
And thats the end of the round the fighters go back to their corners.
That was a close second round but I would say that James Brice will probably get the nod.
The fighters get back to their feet, the hooter sounds and we're back to the action! This is the final round!

Bang looks to land a combination but Brice avoids it well.
Brice changes levels and looks for a double leg takedown. Bang tries to avoid it but Brice manages to keep hold of a leg and drag Bang to the ground. Bang escapes though and pops straight back up to his feet.
Brice looks to land a combination but Bang avoids it well.
Brice moves into the clinch successfully.
Brice escapes the clinch and we're back to striking.
Sloppy strikes from Brice. Those never looked like landing.
Brice drops his hands and takes a jab to the jaw for his troubles.
Bang gets caught napping as Brice dives in and scores a takedown. Bang manages to retain guard.
Brice passes into half guard.
Brice wants to take a breather but Bang is having none of it.
Both fighters are breathing heavily.
Bang is trying to stand back up but Brice is controlling him
Brice is nestled in close to Bang, controlling him well. He's worked in a nice elbow to the side of the head as well, for good measure.
That's one minute gone in the round.
Brice is keen to just control but Bang is a slippery customer.
Bang wants to stand back up but Brice manages to pass into side control.
Brice working the ground and pound.
Brice in side control lands a decent elbow.
Bang taking punishment in the form of punches.
Bang wants to get back to his feet but Brice drags him back down.
Brice wants to lay and pray for a moment but Bang keeps working.
Brice lands some shots froms side control.
That's two minutes gone in the round.
Brice tries to advance to mount but Bang denies him.
Brice is putting a hurting on Bang here, landing some big shots from side control.
Bang wants to get back to his feet.
Brice controlling from side mount.
Brice decides to take the fight back to the feet.
Bang misses with a series of wild punches.
That's three minutes gone in the round.
Brice tries for a takedown but Bang sees it coming a mile off and avoids it easily.
Bang looks shocked there as he takes a right hand to the temple.
Bang throws a wild combination but nothing lands.
Brice looks for a takedown here. Will he get it? Bang is fending him off so far but Brice persists. Nope, Bang circles away and we're back to standing.
That's three failed takedown attempts in the round for James Brice. That's going to take a lot out of him.
Bang lands a nice looking body shot.
Brice misses with a takedown attempt
and Bang counters with a crisp hook to the side of the head.
Brice pivots, looking for a leg kick but Bang is out of range and Brice settles back down.
Brice tries for a takedown but Bang sees it coming a mile off and avoids it easily.
Brice swings wildly with a couple of big hooks
and Bang connects with a straight left hand counter down the middle.
Brice tries to clinch up against the cage, rushing in to close the distance. Bang manages to break the clinch and circles back to the middle of the mat.
A nice combination there by Bang.
Lenny Bang seems to be getting the better of the standup.
Bang misses with the combination.
That's four minutes gone in the round.
Brice will need to tighten up his combinations if he doesn't want to gas himself out, swinging at thin air.
Fantastic stuff here - a very entertaining period of action, which has drawn cheers from the crowd.
A combination from Bang does no damage.
Brice rushes Bang and presses him up against the cage.
Brice lands a right hand that snaps the head of Bang backwards.
Brice has managed to pull guard. Let's see whether he can work an aggressive guard. It will also be interesting to see what tactics Bang uses from the top position.
Bang won't allow Brice to sweep him here.
Bang scoring with some ground and pound.

Bang decides to stand up and beckons his opponent to follow.
Lenny Bang has stepped it up - he knows he needs a finish here!
Bang lands with a two punch combination before moving back out of range.
James Brice is fighting for a decision here - he's started to take the cautious approach.
Brice shoots in for a takedown and gets it.
Bang wants to stand back up but Brice manages to pass into side control.
And that's the end of the fight!
Lenny Bang comfortably won the final round on my scorecard.
I think Brice has won this one but let's see what the judges have to say. Over to the ring announcer for the scorecards.
Ladies and gentlemen, after 3 rounds of action, we go to the scorecards for a decision.
Judge Johanna Lukiainen scores the fight 29:27
Judge Marco Blurström scores the fight 28:29
Judge Matti Vanhoillinen scores the fight 29:27
In favor of your winner, by split decision... James Brice!
|
|
|
|
|
|
|
|
|
|
|
|
|
|
|
|
|
|
|
|
|
|
|
| S |
C
A |
G |
S |
C
B |
G |
|
S |
C |
G |
|
energy
A | B |
|
hype
A | B |
|
pop
A | B |
|
mgr
A | B |
|
FIGHT
RATING
51% |
|
|
|
|
|
|
