|
|
PBP Commentary |
Coming up we have a super heavyweight MMA rules bout between Tyler Durden (ranked 0 p4p, 0 weight class) and Roc Moss (ranked 0 p4p, 0 weight class). Both these guys have really solid chins. Will we see a standup war or will they both decide that a knockout is unlikely and try to win the fight elsewhere?
 |
|
 |
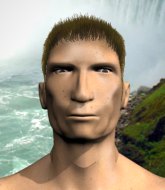
| 200 cm
18
270 lbs
2 - 2 - 0 |
|
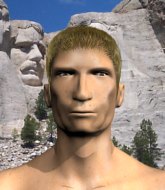
194 cm
19
275 lbs
0 - 4 - 0 |
BJJ Purple Belt
Basic striking
Good chin |
|
BJJ Blue Belt
Counter striker
Granite chin |
|
| |
|
Ladies and gentlemen. This fight is 5 rounds, for the super heavyweight championship of the world!
Introducing the champion to my left, fighting out of the red corner.
With a record of
2 - 2 - 0, fighting out of Las Vegas, Tyler Durden!
And introducing the challenger to my right, fighting out of the blue corner.
With a record of
0 - 4 - 0, fighting out of Las Vegas, Roc Moss!
The judges for this bout are Robert Twigg, Chris Downing and Cecil Peabody.

The bell rings for round one and we are underway!
Durden is on the wrong end of a nice combination from Moss.
Moss moves away from the strike by Durden.
Durden shoots in for a takedown. "I don't think so" says Moss as he avoids it easily.
Moss stuffs the takedown attempt from Durden. Durden gets slowly back to his feet.
Moss punishes Durden's body with a nice straight punch.
Durden tries to close the distance and clinch up against the cage but Moss paws at him with a jab and circles away.
Durden is looking to take this fight into the clinch.

The fight moves into the clinch position.
Moss wants a takedown.
Durden's corner are urging him to control the action in the clinch for a moment, rather than mount any serious offense. I'm sure the crowd appreciate those instructions... not.

Moss pushes off and circles away, back to the middle of the mat.
Moss lands three nice shots there - that looked like it hurt!
Moss lands an overhand left. A wild punch that just about connected.
Nice takedown defense from Moss. No joy for Durden on that attempt.
That's three failed takedown attempts in the round for Tyler Durden. That's going to take a lot out of him.

Durden closes the distance, clinches up and gets a nice trip takedown into side control. Very smooth.
Wooooo! Give it up for these two warriors! They are putting on a show!
Moss sneaks back into half guard.

That's one minute gone in the round.
Moss tries to strike from the bottom but it doesn't land.
Moss has no desire to be mounted, so is trying to control. Durden is working away from the top position though.
Moss wants to get back to full guard.
Moss wants to get back to his feet.

Durden is trying to work for a kimura. He's got his hands clasped together - this could be trouble! No, Moss has managed to free his arm - good work.
The fighters are pressed up against the cage, both looking to find a bit of space to work.
Durden seems very keen to just sit and control from half guard but Moss does not like that idea so much and is remaining active off his back.
The fighters are battling for position here. Moss manages to regain full guard. Nice work.
Durden looking to pass the guard.
Durden is breathing heavily.

That's two minutes gone in the round.
Neither fighter has done anything of merit for a good minute or two here and the crowd are not happy about it.

Neither fighter is doing enough for the referee's liking and he's decided to stand them back up.
Moss comes forward and lands a shot to the body, then darts back out of range.
Moss connects with a looping left hand that seems like it dazed Durden momentarily.
Durden takes a shot right to the liver - Bas would have been proud of that punch.
Durden tries to clinch but Moss moves away
and Moss counters by clinching up.
Moss breaks the clinch and we're back to striking at distance.
Durden misses with a takedown attempt
enabling Moss to counter with a crisp jab.
Moss fakes low and throws an overhand right that catches Durden on the side of the head.
A nice combination there by Moss.
Moss misses with the combination.
Moss tries to bum rush Durden with a series of wild strikes but Durden uses good footwork to avoid the assault.
Moss wings a very wild body shot but it does the job and lands to the midsection.
Moss connects with a lovely right hand, straight down the pipe.
Moss works Durden's body with a nice hook.
Moss throws a right hand that Durden ducks under and follows up with a left that Durden also avoids with ease.

That's three minutes gone in the round.
Durden takes a shot to the body in his stride.
Durden avoids a punch combination nicely.
Durden takes a body punch that cleary hurt but he's trying not to show any weakness.
Moss gets a clinch.
Moss breaks from the clinch.
Moss lands with a nice combination. Durden backs away looking to recover.
Moss scores with a jab to the jaw of his opponent.
Moss fakes with an overhand right and moves in to clinch with Durden, pushing him back against the cage.
Moss lands a body shot in the clinch.
Moss escapes the clinch and we're back to striking.
Moss tries to bum rush Durden with a series of wild strikes but Durden uses good footwork to avoid the assault.
Durden on the wrong end of a decent looking cross there.
Moss swings away but doesn't land with a series of punches.
Moss lands a lovely overhand right.
The crowd are loving this. Great action here.
Moss lands with a two punch combination before moving back out of range.

That's four minutes gone in the round.
Durden takes a punch right to his stomach. That took the wind out of him momentarily.
Danga de danga de dang - Moss scores with a four punch combination!
Moss clinches.
Moss breaks the clinch and we're back to striking at distance.
Moss takes the fight into the clinch.
Moss breaks from the clinch.
Durden with a poor takedown
and Moss counters with a nice uppercut.
Moss gets in close and instigates a clinch.
Moss manages to break the clinch.
Tyler Durden seems to be the more aggressive standup fighter in this bout.
Durden takes a shot to the body in his stride.
Moss lands a pitter patter jab to the forehead of his opponent.
The crowd are going absolutely nuts as the round comes to an end - what a fantastic round of action!
Moss gets a clinch.
Moss breaks from the clinch.
Moss looks to land a combination but Durden avoids it well.
And thats the end of the round the fighters go back to their corners.
Roc Moss dominated that round.
That's the end of the round. The referee orders the cornermen out of the cage so we can get back down to business.

Moss tries to bum rush Durden with a series of wild strikes but Durden uses good footwork to avoid the assault.
Durden wants to clinch
and Moss counters by moving into the clinch. Good anticipation by Moss.
Moss breaks the clinch and we're back to striking at distance.
Durden with a poor takedown
and Moss counters with a nice body shot.
Durden with a lazy takedown attempt
and Moss counters with a crisp hook to the side of the head.
Moss pushes Durden up against the cage in a clinch.
Moss breaks the clinch and we're back to striking at distance.
Durden with a poor takedown
and Moss makes him pay by landing a nice hook to the body before moving out of range.
That's three failed takedown attempts in the round for Tyler Durden. That's going to take a lot out of him.
Moss throws a nice looking combination but Durden bobs and weaves to avoid any damage.
Moss feints and as Durden raises his hands in defense, Moss changes levels and drives through with a takedown into guard.
Both fighters are absolutely exhausted here.

Moss decides to stand up and beckons his opponent to follow.
Moss clinches.
Moss breaks the clinch and we return to the middle of the mat.
Roc Moss seems to be getting the better of the standup.
Moss gets a takedown into half guard.
That's one minute gone in the round.
Durden is pressing down on Moss's left leg trying to get back to full guard. He's managed it.
Moss has been the more effective fighter overall so far.
Moss wants to get up but he can't break Durden's closed guard. He needs to be careful trying to break the legs open, as he's open to submissions here.
Durden throws a couple of weedy looking strikes off his back.
Moss decides he's had enough of playing guard and decides to stand. Come on Durden, up you get!
Moss gets to the clinch - let's see what his plan is here.
Moss wants to break free. God knows he wants to breaaaak freeee.
Durden pushes off and circles away, back to the middle of the mat.
Durden misses with a takedown
and Moss counters by clinching up.
Moss manages to break the clinch.
Durden avoids a punch combination nicely.
That's two minutes gone in the round.
Durden misses with a takedown
and Moss counters with a three punch combination, finished off with a leg kick. Nice work.
Durden has his takedown stuffed
letting Moss counter with a right hand.
Moss throws a right and a left that both miss.
Durden dodges the punch combination from Moss.
Durden shoots and misses
letting Moss counter with a right hand.
Durden doesn't succeed with the takedown
and Moss counters into the clinch. Nicely done.
Moss blocks a knee to the body. He'll have a nicely bruised forearm in the morning.
Moss wants to get back to striking at distance but Durden won't allow it.
Moss breaks the clinch and we return to the middle of the mat.
Durden closes the distance and looks for a trip takedown... aaaand he's got it - Durden lands in his opponent's guard.
Moss wants to stand up but Durden is controlling him.
That's three minutes gone in the round.
Durden won't allow Moss to sweep him here.
Durden passes Moss's left leg - he's now in half guard.
Durden seems very keen to just sit and control from half guard but Moss does not like that idea so much and is remaining active off his back.
Durden is really struggling to control Moss but he's trying to hold on to the position.
Moss is trying to get back to full guard.
Moss is staying active underneath Durden, who seems content to just control the action from this position.
That's four minutes gone in the round.
Well. There's a bit of a lull in the action here and the crowd are starting to get restless.
Durden throwing punches and elbows but they're not doing any damage.
The ref warns both fighters not to hold the cage as they work up against the meshing.
Neither fighter is doing enough for the referee's liking and he's decided to stand them back up.
Moss looks to score with a combo but nothing lands.
Durden wants to clinch
and Moss counters with a one-two to the body.
Durden doesn't succeed with the takedown
and Durden takes a counter punch right on the button for his troubles.
Moss moves into the clinch successfully.
Durden wants a takedown but no success here.
Durden tries to jump guard but he falls flat on his backside. Moss smiles and moves away.
Moss cracks Durden with a nice right hand that draws applause from the crowd.
Nice shot by Moss.
And thats the end of the round the fighters go back to their corners.
Roc Moss showed his class in that round. I'd imagine he'll take it on all the scorecards.
That's time! Back to the action!

Durden doesn't succeed with the takedown
and Moss counters with a right hand to the body.
Moss lands a glancing blow to the side of Durden's head.
Durden looks like he's developed a pretty tasty lump over his left eye. He'll need to avoid taking much more damage to that.
Moss throws a series of punches but Durden avoids them all with ease.
Moss lands with a right hand.
A left and a right from Moss both land. Nice combination.
Moss lands a straight punch to the body, keeping Durden at a distance.
Durden fails with the takedown
and Moss counters with a straight punch to the midsection.
Moss showing good head movement there, avoiding the strikes from Durden.
Moss paws at his opponent with the jab and then lunges in with a straight, right on the button.
Tyler Durden is looking to throw some combinations by the looks of things.
Moss misses with a jab and misses with a cross straight after too.
Durden tries for a takedown but Moss circles away easily
and Moss counters with a straight punch to the midsection.
That's three failed takedown attempts in the round for Tyler Durden. That's going to take a lot out of him.
Both fighters are breathing heavily.
That's one minute gone in the round.
Moss forces Durden back against the cage and clinches.
Moss breaks the clinch and we return to the middle of the mat.
Moss throws a combination but comes up with nothing but fresh air.
Durden is on the wrong end of a nice combination from Moss.
Durden fails with the takedown
and Moss decides to take the opportunity to score a takedown. He's landed in Durden's guard.
Moss landing with the ground and pound.
Moss cracks Durden with a solid left hand.
Moss has decided he wants to stand but the closed guard of Durden is proving hard to escape from.
Durden isolates an arm and boxes in a triangle. Moss stacks Durden on his neck as he steps over and passes to the side. He's now in a much more dominant position where he can look to do some serious damage. Nice move by Moss!
Moss is working Durden over with some ground and pound from side control.
That's two minutes gone in the round.
Moss decides to stand up, so the ref orders Durden to his feet.
Durden has his head slapped from side to side by a 3 punch combination. That must have hurt him.
Durden tries to clinch
and Moss counters with a lovely shot to the body.
Moss throws a nice looking combination but Durden bobs and weaves to avoid any damage.
Durden tries for a takedown but Moss circles away easily
and Moss counters with a nice double leg into half guard.
The crowd cheering loudly, showing their appreciation for the quality fight we're seeing here.
Durden wants to control but Moss is keeping busy.
Durden tries to get to full guard but Moss has control of the leg.
That's three minutes gone in the round.
Durden is looking to control Moss's leg but it's slowly edging free. Can Durden avoid being mounted?
Durden looking to work for a kimura from the bottom.
Durden tries to roll over but Moss keeps him under control.
Moss wants to free his trapped foot but Durden is holding on for dear life with his legs.
Moss works his foot free and advances to mount.
That's four minutes gone in the round.
The crowd are showing their displeasure at the lack of action as loud boos ring out around the arena.
Durden sneaks a leg back under and regains half guard and is working straight away to try and get back to guard. He hasn't managed just yet though.
Moss really doesn't want to stay on the ground with Durden. If he can't get it back to his feet, it's only a matter of time before he'll be tapping out.
Moss tries to stand but can't do so whilst Durden controls his leg.
Durden is looking to control Moss's leg but it's slowly edging free. Can Durden avoid being mounted?
Durden slips a foot under and gets full guard. Nice work.
Moss won't allow Durden to sweep him here.
Moss postures up.
And thats the end of the round the fighters go back to their corners.
Roc Moss really dominated that round.
That's the end of the round. The referee orders the cornermen out of the cage so we can get back down to business.

Left hook, right uppercut from Moss.
Moss throws a right and a left that both miss.
Moss misses with the combination.
Durden with a poor takedown
and Moss counters with a straight punch to the midsection.
Moss fakes a head punch and goes low to the body. Nicely done.
Moss throws a right and a left that both miss.
Durden tries to clinch but Moss is having none of it.
Durden tries for a takedown but Moss circles away easily
and Moss counters with a nice body shot.
A left and a right from Moss both land. Nice combination.
Moss ducks down and throws a hook to the body.
Moss fakes a head punch and goes low to the body. Nicely done.
Moss closes the distance and presses his opponent up against the cage.
It's got to the stage where if one of these guys blows hard enough, the other might fall over.
Moss escapes the clinch and we're back to striking.
Moss lands a body shot.
That's one minute gone in the round.
Moss lands a nice looking body shot.
Moss throws a wild combination but nothing lands.
Moss is throwing a lot of body shots here, looking to wear down Durden rather than just go for the knockout.
Moss stalks Durden and leaps in with a furious combination of punches. Uppercuts and crosses smash into Durden's face. Durden staggers backwards, shaken.
Durden takes a shot right to the bread basket.
Durden takes a shot right to the liver - Bas would have been proud of that punch.
Moss displaying good standup as he scores with a three punch combination.
Moss pushes Durden up against the cage in a clinch.
Moss breaks the clinch and we're back to striking at distance.
Moss digs a good body shot into Durden's ribs.
Durden misses with a takedown attempt
and Moss counters with a right hand to the body.
That's three failed takedown attempts in the round for Tyler Durden. That's going to take a lot out of him.
Durden shoots in but doesn't get the takedown
enabling Moss to counter with a crisp jab.
Moss lands a jab-cross combination.
Durden takes one on the chin but keeps coming.
That's two minutes gone in the round.
Moss swinging wilding here.
A nice combination there by Moss.
Moss throws a jab to the body, straight down the pipe. Boom. That sent Durden stumbling backwards but he manages to regain his composure quickly.
Moss scores with a nice looking left hook and follows it up with an uppercut!
Nice shot lands for Moss.
Durden shoots in but doesn't get the takedown
and Moss counters by moving into the clinch.
Durden takes a shot to the head.
Moss breaks from the clinch.
Moss scores with a nice head shot.
Moss instigates a clinch.
Moss will no doubt start fighting again in a minute but for now he's just having a little rest, leaning Durden up against the cage.
Durden tries to pull guard but Moss won't allow it.
That's three minutes gone in the round.
Moss breaks the clinch and we return to the middle of the mat.
Durden closes the distance and gets a double leg, slamming Moss to the mat! Moss manages to get full guard.
Moss is trying to stand up but he's not managed so far.
Durden stands up and looks to throw the legs aside to pass to side control. Moss swivels though and keeps the full guard.
Durden stands up from Moss's guard - Durden perhaps looking for a knockout.
Durden with a poor takedown
and Moss decides to take the opportunity to score a takedown. He's landed in Durden's guard.
Durden looking for submissions from the bottom here. Moving his hips around, possibly looking for an armbar.
Durden bucks up whilst keeping hold of a body lock, managing to reverse the position. Now he's in top in Moss's guard.
Roc Moss has got the better of the ground game so far.
That's four minutes gone in the round.
Moss tries to land a sweep but no joy.
Durden advances to half guard.
Durden is thinking about going for an arm triangle but he can't free his leg.
Durden is looking for a kimura but he's never going to get it from there.
Durden is looking for a kimura here.
The crowd applaud the fighters efforts here as the round comes to an end.
Moss is working for an escape here. He's hooked one of Durden's legs and he's managed to sneak out and take Durden's back!
And thats the end of the round the fighters go back to their corners.
Roc Moss dominated that fourth round.
The fighters get back to their feet, the hooter sounds and we're back to the action! Let's hear some noise people - this is the final round!

Durden tries to clinch but Moss moves away
and Moss counters into the clinch. Nicely done.
Durden tries to jump guard but he falls flat on his backside. Moss smiles and moves away.
Durden tries for a takedown but Moss circles away easily
and Moss counters with a nice double leg into half guard.
Moss wants to lay and pray for a moment but Durden keeps working.
Moss slips a nice elbow through Durden's hands, connecting with Durden's forehead.
Moss is trying to get back to his feet now but his leg is trapped.
Durden looking to work for a kimura from the bottom.
Durden on the receiving end of some nice ground and pound.
Moss is trying for a guillotine from the top but the pressure isn't in the right place so Durden is just riding it out for now. Moss eventually gives up the hold.
Both of our modern day gladiators look out of it here - an gruelling 5 rounds of action taking it's toll on them, no doubt.
That's one minute gone in the round.
Moss decides to return to a standing position.
Durden misses with a takedown attempt
and Moss counters with a shoot takedown into half guard.
That's three failed takedown attempts in the round for Tyler Durden. That's going to take a lot out of him.
Durden is looking to regain full guard. Not this time though.
Durden is looking to sinch up a gullotine here but Moss pulls his head out easily.
Durden tries to strike from the bottom but it doesn't land.
That's two minutes gone in the round.
Moss prevents Durden from improving his position.
Durden looking for submissions from an awkward position here.
Durden wants to get back to full guard.
Durden wants to sweep but Moss has passed to side control!
Durden is positioning himself to get back to half guard.
Neither fighter is doing enough for the referee's liking and he's decided to stand them back up.
Moss misses with a double jab.
That's three minutes gone in the round.
Moss throws a one two combo.
Moss clinches with his opponent.
Good anti-grappling being displayed by Moss as Durden tries to tie him up.
Durden looking for a takedown.
Moss manages to break the clinch.
Durden with a lazy takedown attempt
and Moss counters with a shoot takedown. Durden fights it but they end up in guard.
Moss landing with the ground and pound.
Durden is trying to control the position from the bottom.
Moss stands up and waves to Durden to follow him.
That's four minutes gone in the round.
Durden lands a leg kick. The shin dug right into the meat of the thigh.
Moss moves in looking to clinch but Durden pushes him off.
Durden drives through with a takedown into guard.
Durden loading up with the ground and pound but he's missing more than he's landing in this flurry.
Durden trying to control the position from guard on top but Moss is wriggling around, looking for whatever he can.
Tyler Durden has stepped it up - he knows he needs a finish here!
Moss is working an open guard so Durden takes the opportunity to get back to his feet.
The crowd applaud the fighters efforts here as the round comes to an end.
Moss avoids a punch combination nicely.
Durden misses with a leg kick
and Moss counters with a series of strikes. Durden will be more careful next time no doubt.
Roc Moss is fighting for a decision here - he's started to take the cautious approach.
Durden throws a left and a right that both miss
and Moss counters with a nice single leg takedown and he's in Durden's guard now.
And that's the end of the fight!
Roc Moss comfortably won the final round on my scorecard.
Well Moss has outworked and out performed his opponent in all aspects of the game today. He was simply too good and the decision should be no more than a formality. Over to the ring announcer for the scorecards.
Ladies and gentlemen, after 5 rounds of action, we go to the scorecards for a decision.
Judge Robert Twigg scores the fight 45:50
Judge Chris Downing scores the fight 44:50
Judge Cecil Peabody scores the fight 44:50
In favor of your winner, by unanimous decision... Roc Moss!
Roc Moss is the new super heavyweight champion!
|
|
|
|
|
|
|
|
|
|
|
|
|
|
|
|
|
|
|
|
|
|
|
| S |
C
A |
G |
S |
C
B |
G |
|
S |
C |
G |
|
energy
A | B |
|
hype
A | B |
|
pop
A | B |
|
mgr
A | B |
|
FIGHT
RATING
100% |
|
|
|
|
|
|
