|
|
PBP Commentary |
Coming up we have a welterweight MMA rules bout between Marc Melton (ranked 0 p4p, 0 weight class) and Ryan Kondo (ranked 0 p4p, 0 weight class). Both fighters will be looking to make this an exciting fight for the fans, I'm sure!
 |
|
 |
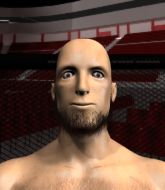
| 162 cm
19
177 lbs
2 - 3 - 0 |
|
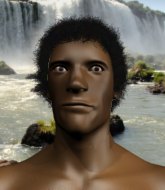
175 cm
24
170 lbs
0 - 0 - 0 |
BJJ Blue Belt
Counter fighter
Cuts easily |
|
BJJ Blue Belt
Solid Muay Thai
Inexperienced |
|
| |
|
Ladies and gentlemen. This fight is 3 rounds, in the welterweight division.
Introducing the fighter to my left, fighting out of the red corner.
With a record of
2 - 3 - 0, fighting out of Tokyo, Marc Melton!
And introducing the fighter to my right, fighting out of the blue corner.
With a record of
0 - 0 - 0, fighting out of Tokyo, Ryan Kondo!
The judges for this bout are Yasuomi Hirokawa, Yukihiro Yamamoto and Tatsuya Matsuyama.

The bell rings for round one and we are underway!
Kondo fakes a couple of low kicks, before throwing one on the third attempt. It connects and Melton has to reset his feet before getting ready to engage.

Kondo feints and then dives in with a takedown. That was a long way out but the feint bought him enough time to close the distance and complete the takedown. Now we'll play guard for a bit and see who can get the better of that position.

Melton is active off his back here, looking for submissions.
Kondo sitting in guard, not really doing much.
Melton looking for submissions from the bottom but instead Kondo passes into side control.
Melton really is a fat lump.
Melton tries to work a leg under to get back to half guard but Kondo wriggles his own leg back out and remains in side control.
We've had a slow start to the round here - hopefully the action picks up.
Kondo misses with a strike but at least he's keeping busy, looking to cause some damage - that will still help him when it comes to the judges scorecards.

That's one minute gone in the round.
Kondo misses with a strike but at least he's keeping busy, looking to cause some damage - that will still help him when it comes to the judges scorecards.
Kondo tries to cartwheel into mount but he doesn't manage it.
Melton is trying to get back to half guard.
Kondo is maintaining the dominant position - no doubt Melton will start to get frustrated soon if he's not already.
Melton tries to buck Kondo off but Kondo is having none of it.
The ref warns both fighters not to hold the cage as they work up against the meshing.
Kondo is looking to take a break and control but Melton is keeping him honest, looking to work from the bottom.
Kondo advances nicely into full mount.

That's two minutes gone in the round.
A lull in the action here being met with boos from the crowd.
Kondo throwing strikes here but Melton is writhing around nicely and avoiding any serious damage.
Kondo controlling from mount.
Kondo wants to control the pace but Melton is squirming around nicely.
Kondo throwing shots from mount but they're not landing.
The fighters are pressed up against the cage, both looking to find a bit of space to work.
Kondo takes a little breather and maintains the position. The referee will be looking for him to stay active from such a dominant position though.
Kondo thowing strikes but they're hitting the gloves, not doing any damage.

That's three minutes gone in the round.

Kondo is in full mount, looking to secure a guillotine but Melton is surviving well by controlling Kondo's body position as best he can.
Melton avoids a series of strikes thrown by Kondo.
Melton might be looking to lock onto one of his opponent's long limbs for a submission, whilst we're on the ground.
Kondo wants to control the pace but Melton is squirming around nicely.
Kondo controlling from the full mount.

That's four minutes gone in the round.
The crowd are showing their displeasure at the lack of action as loud boos ring out around the arena.

Kondo gets to his feet and calls his opponent to stand. Here come the fireworks!
Ryan Kondo seems to be the more aggressive standup fighter in this bout.
Kondo closes the distance and scores a nice trip takedown into half guard. Melton did well to prevent Kondo getting side control.
Kondo seems very keen to just sit and control from half guard but Melton does not like that idea so much and is remaining active off his back.
Kondo keeping composed on the top, looking to control the action.
Melton is not content to let Kondo control the position.
Boooooooooooooooooooo!!! God, this has been a terrible round. Come on you two, sort yourselves out!
Kondo controlling the action here.
Kondo is working for a kimura but Melton is defending it quite comfortably.
The referee claps his hands together and tells the fighters to work.
And thats the end of the round the fighters go back to their corners.
Ryan Kondo dominated that round.
The corners get their ten second warning. Both fighters stand from their stools and stare eachother down, ready to get back to the action.

Melton misses with a head kick.

The fight moves into the clinch position.
Melton is fighting off a takedown attempt but Kondo is just too persistent for him and manages to trip Melton to the mat. Melton regains guard as soon as the fighters hit the mat.
Melton has an omoplata and is looking to use it perhaps as a submission or perhaps to transition. Kondo is in a bit of discomfort here, but he's managed to free himself and has dived into side control! That didn't work out too well for Melton.
Kondo advances nicely into full mount.
We've had a slow start to the round here - hopefully the action picks up.
Kondo throwing sloppy strikes, which aren't doing any damage.
Kondo misses with some ground and pound and Melton recovers position to half guard.
Melton actively working from the bottom here.
That's one minute gone in the round.
Kondo with a momentary lay and pray from half guard.
Kondo is trying for a guillotine from the top but the pressure isn't in the right place so Melton is just riding it out for now. Kondo eventually gives up the hold.
Kondo seems content to maintain position for now, rather than mounting any offense.
That's two minutes gone in the round.
The crowd are getting on the fighters' backs, as the pace has dropped off in the last minute or so.
Kondo is working for a kimura but Melton is defending it quite comfortably.
Melton is staying active underneath Kondo, who seems content to just control the action from this position.
Ryan Kondo has got the better of the ground game so far.
That's three minutes gone in the round.
Kondo seems to be looking for submissions.
Kondo is trying to work for a kimura but Melton is defending well.
Kondo throwing shots but Melton is blocking nicely.
Melton is not content to let Kondo control the position.

The referee has decided to stand the fighters back up, so we'll restart on the feet.
Melton tries to clinch up.
Melton circles away from the clinch attempt

and Melton counters with a takedown into side control.
That's four minutes gone in the round.
Kondo is trying to get back to half guard. He's pushing on Melton's leg. He's managed it. Nice work.
Kondo actively working from the bottom here.
Kondo is looking to regain full guard. Not this time though.
Boooooooooooooooooooo!!! God, this has been a terrible round. Come on you two, sort yourselves out!
Kondo trying to control from the bottom.
And thats the end of the round the fighters go back to their corners.
Ryan Kondo showed his class in that round. I'd imagine he'll take it on all the scorecards.
The minute break is over - no more time for sponges and pep talks - back to the action! Let's get this one finished - here comes the final round!

Melton lands a jab-cross combination.
The fight stays on the outside here - Kondo looks like he's thinking about clinching though.
Melton tries to counter with a takedown but Kondo is quick to defend against it.
Kondo avoids the clinch attempt nicely.
Kondo shoots in for a takedown! He's got it and he's managed to land in side control! That's better than Kondo was expecting from the takedown attempt, I'm sure!

Melton throws his opponent off and manages to get back to his feet! Nicely done!
We've had a slow start to the round here - hopefully the action picks up.
Kondo scores with a takedown into Melton's guard.
The crowd cheering loudly, showing their appreciation for the quality fight we're seeing here.
Melton is looking for a triangle but Kondo pushes his legs off easily.
That's one minute gone in the round.
Kondo throws a sloppy strike and Melton has hooked up an armbar on the loose arm! He's turned and extended fully! Kondo is forced to tap! Great BJJ from Melton!
Ladies and gentlemen, after 1:25 of round 3, we have a winner by way of Submission (Armbar). Marc Melton!
|
|
|
|
|
|
|
|
|
|
|
|
|
|
|
|
|
|
|
|
|
|
|
| S |
C
A |
G |
S |
C
B |
G |
|
S |
C |
G |
|
energy
A | B |
|
hype
A | B |
|
pop
A | B |
|
mgr
A | B |
|
FIGHT
RATING
36% |
|
|
|
|
|
|

