|
|
PBP Commentary |
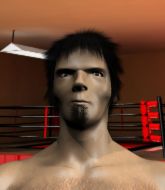
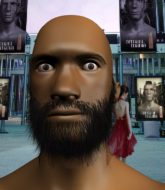
Coming up we have a welterweight MMA rules bout between Georges Hughes (ranked 0 p4p, 0 weight class) and Laaka Mato (ranked 0 p4p, 0 weight class). Both fighters look fresh as a daisy as they make their way towards the cage.
 |
|
 |
| 174 cm
26
170 lbs
7 - 8 - 0 |
|
174 cm
19
170 lbs
7 - 3 - 0 |
BJJ Purple Belt
Basic striking
Granite chin |
|
BJJ Blue Belt
Basic striking
Good gas tank |
|
| |
|
Ladies and gentlemen. This fight is 3 rounds, in the welterweight division.
Introducing the fighter to my left, fighting out of the red corner.
With a record of
7 - 8 - 0, fighting out of The Island, Georges Hughes!
And introducing the fighter to my right, fighting out of the blue corner.
With a record of
7 - 3 - 0, fighting out of The Island, Laaka Mato!
The judges for this bout are David Hoff, Michael Johnstone and Winston Alpacca.

The bell rings for round one and we are underway!
Hughes on the wrong end of a vicious looking body shot.
A big right from Mato misses.
Hughes has his hands up protecting his head but a hook from Mato finds it's way round the side to connect with Hughes's head.
Mato misses the shot to the body.
Hughes misses with a series of wild punches.
Mato scores with a jab to the body.
Mato misses with a hook. Hughes ducked under it nicely.
Hughes throwing a counter right hand but Mato manages to avoid it.
Mato looks to throw the jab but Hughes is out of range.
Hughes definitely looks more muscular than last time we saw him fight.
Mato avoids the body shot from Hughes.
Hughes ducks under a wild hook from Mato.
Mato missing with a left hand there. Hughes was out of range so wasted energy throwing that one.
Mato throws a wild combination but nothing lands.
Hughes swung with a counter right hand that didn't connect.
Mato works Hughes's body with a nice hook.

Hughes gets in close and instigates a clinch.
This is a great period of action - very entertaining stuff!
Hughes throws a vicious knee straight up the middle but Mato blocks it with crossed arms.
Hughes misses with a shot to the kidneys.
Mato is trying to stall.
Mato is trying to break the clinch but Hughes has him pressed against the cage.

That's one minute gone in the round.
Hughes creates a bit of distance and throws an elbow that only just misses.
Mato blocks the elbow strike.
Hughes misses with a shot to the kidneys.
Hughes struggles to land a body shot inside as Mato controls his hands.
Hughes with an attempt at a knee that misses.
Mato tries to stall but Hughes uses the opportunity to gain a better position.

Mato breaks from the clinch.
Hughes slips under a jab from Mato.
A looping hook to the body misses from Mato. Hughes does a little dance to reset his feet.
Hughes gets to the clinch - let's see what his plan is here.
Mato can't break the clinch.
Mato trying to stall but Hughes improves his position.
Hughes is trying to work for a single leg takedown but Mato pulls him back up using the underhooks.
Hughes doesn't land with the attempted body shot.
Hughes with the Thai clinch. He's looking to land a big knee but he's not managed it this time.
Hughes tries to land a knee to the body but he is off balance and Mato avoids it.
Mato tries to circle away but Hughes has him pinned against the cage.
Mato avoiding damage as Hughes throws knees to the body.
Mato breaks the clinch and we return to the middle of the mat.
Hughes displays some good footwork, moving neatly out of range as Mato throws out the jab.

That's two minutes gone in the round.
Mato connects with a jab.
Mato throws a lazy right hand but Hughes sees it coming a mile off and sidesteps it easily.
Mato thuds a left hand into Hughes's body.
Hughes takes one on the button.
We've seen a great period of action over the last minute or so - credit to both fighters for going all out!
Mato fakes a head punch and goes low to the body. Nicely done.
Mato misses with an uppercut. Hughes saw that one coming.
Hughes swings and misses with a hook to the body.
Hughes fakes high and swings low for a body shot but Mato manages to avoid it.
Mato dips to his left and cracks Hughes with an uppercut!
Hughes jabbing away but nothing is landing.
Mato digs a good body shot into Hughes's ribs.
Hughes throws a body shot but no joy.
Hughes on the wrong end of a nice hook.
The fighters circling - Mato throws out the jab but it was never going to land.
Hughes throws a big counter combination but Mato scrambles out of danger and avoids any damage.
Laaka Mato is looking to keep the fight on the feet at all costs.
Mato digs a good body shot into Hughes's ribs.
Hughes fakes high and swings low for a body shot but Mato manages to avoid it.
The fighters circling - Mato throws out the jab but it was never going to land.
Mato cracks a nice hook into Hughes's ribs.
Hughes gets to the clinch - let's see what his plan is here.

That's three minutes gone in the round.
Hughes missing with knees to the body.
Hughes throws a vicious knee straight up the middle but Mato blocks it with crossed arms.
Hughes is breathing heavily.
Hughes missing with knees to the body.
Hughes tries a body shot but Mato blocks it.
Mato tries to stall but Hughes uses the opportunity to gain a better position.
Mato is trying to stall.
Mato's corner calls for him to break the clinch, which he does.
Mato misses with a body shot.
Hughes fails with a takedown attempt from distance.
Mato scores with a sloppy punch to the body. Not much technique there but it did the business.
A telegraphed right hand from Mato misses the target.
Mato pushing out the jab but it's not landing.
It looked like Hughes was looking amped, ready to throw a big counter but didn't commit.
Mato throws a big shot that misses.
Mato connects with a single shot there.
Hughes rushes forward with a series of wild hooks but Mato moves out of range and avoids them all easily.
Hughes closes the distance and clinches.
Mato gets underhooks to prevent Hughes's takedown attempt.
That's three failed takedown attempts in the round for Georges Hughes. That's going to take a lot out of him.
Hughes with the Thai clinch. He's looking to land a big knee but he's not managed it this time.

That's four minutes gone in the round.
Hughes can't get the takedown.
Hughes misses with a body punch.
Mato blocks a couple of punches on the inside.
Mato tries to stall but Hughes uses the opportunity to gain a better position.
Mato trying to stall but Hughes improves his position.
Hughes keeps control of Mato as he tries to wriggle out of the double underhooks.
An uppercut on the inside fails to land for Hughes.
Mato looks like he'd prefer to be striking at range right now.
Mato stalling against the cage.
Mato lands a right hand that snaps the head of Hughes backwards.
We've seen a great period of action over the last minute or so - credit to both fighters for going all out!
Mato stalling.
Mato looks like he'd prefer to be striking at range right now.
Hughes tries a knee to the head but he's missed.
Mato is trying to slow down the pace of the fight but Hughes is keeping busy.
Hughes with the Thai clinch. He's looking to land a big knee but he's not managed it this time.
Mato managing to block the knees to the body from Hughes.
And thats the end of the round the fighters go back to their corners.
Laaka Mato dominated that round.
Well, the break between rounds is over. Let's get back to the scrappin!

Hughes gets cracked with a nice right hand there by Mato.
Mato misses with a looping left.
Mato fakes a head punch and goes low to the body. Nicely done.
Mato misses with a straight right.
Mato misses with a looping left.
Hughes throws a series of punches but Mato moves out of range.
Mato dips down and scores with a jab to the body.
Hughes on the wrong end of a nice jab.
Mato scores with a nice head shot.
Wow, both these guys are really going for it!
Mato moves into range and connects with a jab.
Mato jabs. That one connects to the head of his opponent.

Hughes is rocked!
The crowd cheering loudly, showing their appreciation for the quality fight we're seeing here.
A looping hook to the body misses from Hughes. Mato does a little dance to reset his feet.
Oh Hughes is still all over the place! His legs are completely gone! Will he be able to recover?!!
and Mato counters with a massive uppercut that badly hurts Hughes! He's just covering up as Mato starts to tee off till the referee steps in and stops the fight!
Ladies and gentlemen, after 0:42 of round 2, we have a winner by way of TKO (Strikes). Laaka Mato!
Laaka Mato seemed lost for words in his post fight interview but he remembered to thank his fans and directed everyone to his website.
|
|
|
|
|
|
|
|
|
|
|
|
|
|
|
|
|
|
|
|
|
|
|
| S |
C
A |
G |
S |
C
B |
G |
|
S |
C |
G |
|
energy
A | B |
|
hype
A | B |
|
pop
A | B |
|
mgr
A | B |
|
FIGHT
RATING
58% |
|
|
|
|
|
|

