|
|
PBP Commentary |
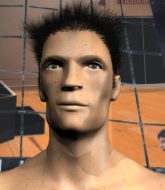
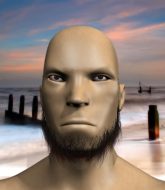
Coming up we have a middleweight MMA rules bout between Jimmy Caldwell (ranked 0 p4p, 0 weight class) and Anthony Abaddon (ranked 0 p4p, 0 weight class). Abaddon has chosen Limp Bizkit - Break Stuff as his entrance music. Both fighters look fresh as a daisy as they make their way towards the cage.
 |
|
 |
| 186 cm
42
200 lbs
27 - 30 - 0 |
|
182 cm
42
190 lbs
35 - 25 - 0 |
Good wrestling
World class boxer
Very quick |
|
Good wrestler
Lethal high kicks
Heavy handed |
|
| |
|
Ladies and gentlemen. This fight is 3 rounds, in the middleweight division.
Introducing the fighter to my left, fighting out of the red corner.
With a record of
27 - 30 - 0, fighting out of London, Jimmy Caldwell!
And introducing the fighter to my right, fighting out of the blue corner.
With a record of
35 - 25 - 0, fighting out of New York, Anthony Abaddon!
The judges for this bout are Paul Tew, William Gold and Donald Grub.

The bell rings for round one and we are underway!
Abaddon throws a jab to the body, straight down the pipe. Boom. That sent Caldwell stumbling backwards but he manages to regain his composure quickly.

Caldwell looking to score a takedown here. Abaddon is defending well but Caldwell drives through and ends up in Abaddon's guard.

Abaddon is edging up against the cage. He's using the cage to get back to his feet. Nice work there - the fighters are clinched.
Abaddon throws a blind hook that connects with the side of Caldwells head.
Caldwell is looking to break free of the clinch but Abaddon has double underhooks.
Caldwell is trying to work out of this bad position, with his back against the cage.
Caldwell misses with the head strike.
Caldwell is trying to break free.
Caldwell's head jolts backwards as he takes an uppercut right on the button!
We've seen a great period of action over the last minute or so - credit to both fighters for going all out!
Caldwell is trying to force a seperation but Abaddon has the dominant position.
Abaddon changes levels and goes for a takedown here. Caldwell fights it off and pushes away nicely.
Ooooh, nice body kick lands from Abaddon. Caldwell shrugs it off though.
Caldwell shoots in but no luck this time.
Caldwell walks straight into an uppercut. Luckily it didn't land flush.
Abaddon throws a nice outside leg kick.

That's one minute gone in the round.
Abaddon throws a sloppy head kick and Caldwell moves out of range easily.
Caldwell looking to score a takedown here. Abaddon is defending well but Caldwell drives through and ends up in Abaddon's guard.
Abaddon trying to control the position.
Abaddon pushes Caldwell off for just long enough to get back to his feet. Very athletic spring there.
Oooooooooooh, not good. A low kick from Abaddon lands where it shouldn't have, right in the... well, you know what he did? He kicked him in the penis. He's injured, injured bad. The referee sends both fighters to their corners and Caldwell has 5 minutes to recover. He's OK now though... a thumbs up from Caldwell and we're back underway with a touch of gloves.
Caldwell keeping his hands up high there, blocking the jab from Abaddon.
Caldwell has been talking about how he's improved his wrestling in the run up to the fight so let's see if that's enough to sway the balance.
Caldwell dodges the punch combination from Abaddon.
Caldwell throws a low kick but Abaddon avoids it.

Caldwell has managed to clinch.
A short left from Abaddon.
Caldwell trying to stall but Abaddon improves his position.
With the fighters clinched against the cage, Abaddon creates a bit of distance for himself and scores with a nice uppercut.
This has been an exciting period of action!
Caldwell tried to land a shot to the body but connects with Abaddon's elbow.

That's two minutes gone in the round.
Abaddon working Caldwell over with knees to the body.
A head punch on the inside from Caldwell fails to land.

Abaddon breaks the clinch and we're back to striking at distance.
Caldwell tries to shoot in for a takedown. He's got hold of a leg but Abaddon swivels and escapes.
Abaddon throws a head kick that misses
and Caldwell counters with a nice double leg into guard.
Abaddon manages to wriggle out and sneak his way back up to his feet, so the fighters are now clinched up against the cage.
Abaddon prevents Caldwell from breaking the clinch.
Caldwell gets double underhooks to prevent a takedown attempt from Abaddon.
Abaddon lands with a short punch from the clinch.
Caldwell wants to break free. God knows he wants to breaaaak freeee.
Caldwell throws a head punch that misses.
Caldwell tries to break free but Abaddon pushes him back against the cage.
Caldwell stalling in the clinch but Abaddon improves position.
An uppercut on the inside fails to land for Caldwell.
Caldwell takes a knee to the side of the body.

That's three minutes gone in the round.
Abaddon lands a knee to the head there! That was nasty!

It looks like Jimmy Caldwell has been cut.
Abaddon lands a shoulder strike that jolts his opponent's head backwards.
Abaddon is working for takedown but Caldwell is calmly controlling the position for now.
Jimmy Caldwell has stuffed three takedown attempts in the round now. That's going to take a lot out of Anthony Abaddon.

Abaddon decides to pull guard.
Abaddon trying to keep a closed guard but Caldwell is proving a slippery customer.
Caldwell trying to control but Abaddon is working from the bottom.

Caldwell got a little sloppy there for a moment and Abaddon has worked his way into a loose triangle - can he finish it?! No, Caldwell has managed to get both his arms back between Abaddon's legs - danger averted.
Caldwell pressing down on his opponent's thigh, looking to pass guard. Abaddon is keeping the position for now.
The ref warns both fighters not to hold the cage as they work up against the meshing.
Caldwell controlling from the guard. I say controlling but really, he's stalling.

That's four minutes gone in the round.
Caldwell trying to move into half guard but instead Abaddon has managed to sweep!

Abaddon pressing down on his opponent's thigh, looking to pass guard. Caldwell is keeping the position for now.
Abaddon is taking a break and basically stalling. The referee will not allow him to do that for long.
Caldwell is working from a closed guard but he's struggling to control his opponent.
Abaddon working some strikes from top position.
Caldwell working a defensive guard here.
And thats the end of the round the fighters go back to their corners.
Anthony Abaddon dominated that round.
The cut man is working on Jimmy Caldwell's cut.
The corners get their ten second warning. Both fighters stand from their stools and stare eachother down, ready to get back to the action.

Abaddon lands with a nice body punch.
Caldwell closes the distance and presses his opponent up against the cage.
Caldwell swings wildly with an uppercut but Abaddon uses good head movement to avoid it.
Abaddon lands a hook that snaps the head of Caldwell backwards.
Caldwell misses with the head strike.
Abaddon throws a blind hook that connects with the side of Caldwells head.
Caldwell misses with a hook from the clinch.
Caldwell lands a shoulder strike.
Caldwell misses with the head strike.
Abaddon is working for a takedown up against the cage. He can't get it on this occasion though.
We've had a slow start to the round here - hopefully the action picks up.
Abaddon keeps the fight in the clinch, despite Caldwell's efforts to push away.
A frustrated look appears on Caldwell's face as he tries to break the clinch.
Caldwell swings wildly with an uppercut but Abaddon uses good head movement to avoid it.
With the fighters clinched against the cage, Abaddon creates a bit of distance for himself and scores with a nice uppercut.
That's one minute gone in the round.
Caldwell gets underhooks to prevent Abaddon's takedown attempt.
Caldwell is trying to push Abaddon away but Abaddon has him pressed against the cage, so he's going nowhere.
Caldwell working hard to break the clinch.
Abaddon keeps the fight in the clinch, despite Caldwell's efforts to push away.
Caldwell wants to stall.
Abaddon prevents Caldwell from breaking the clinch.
Abaddon struggles to land a body shot inside as Caldwell controls his hands.
Abaddon lands an elbow just above Caldwell 's eye.
Caldwell is trying to force a seperation but Abaddon has the dominant position.
Abaddon tried to land a shot to the body but connects with Caldwell's elbow.
Abaddon blocks a punch to the side of the head.
Abaddon misses with a hook to the ribs.
Abaddon lands a right hand that snaps the head of Caldwell backwards.
A head punch on the inside from Caldwell fails to land.
Caldwell trying to control the position but instead, Abaddon has worked for underhooks and has pushed Caldwell into the cage.
Caldwell misses with a short punch on the inside.
That's two minutes gone in the round.
Abaddon holding his opponent close, against the cage.
Caldwell has had enough of the clinch and is looking to separate.
Caldwell misses with a hook from the clinch.
Caldwell tries to break free but Abaddon pushes him back against the cage.

Caldwell's corner calls for him to break the clinch, which he does.
Ouch! a nice leg kick from Abaddon, right into the meat.
Caldwell has closed the distance and engaged Abaddon in a clinch.
A real battle for position is taking place between these two warriors.
Abaddon displaying some good clinch control by pressing Caldwell up against the cage.
With the fighters clinched against the cage, Abaddon creates a bit of distance for himself and scores with a nice uppercut.
Caldwell takes an elbow to the temple.
Abaddon works for underhooks and lands a body shot in the process.
Caldwell misses with some punches.
The crowd are loving this. Great action here.
Abaddon lands on the inside with an uppercut.
That's three minutes gone in the round.
Abaddon lands with a short punch from the clinch.
Caldwell's corner calls for him to break the clinch, which he does.
Abaddon throws out a loose jab but Caldwell uses good head movement to avoid it.

Abaddon closes the distance and clinches.
Caldwell misses with the head strike.
Caldwell has a couple of punches blocked by Abaddon.
Abaddon works for underhooks and lands a body shot in the process.
Abaddon lands a knee to the head.
Abaddon works on Caldwell's body with a couple of short punches.
Both fighters are absolutely exhausted here.
Abaddon is clearly stalling here... Pick up the pace son.
Abaddon crunches a lovely knee into Caldwell's ribcage.
Abaddon softening up his opponent with strikes, against the cage.
Abaddon lands a nice elbow from the clinch.

Caldwell is rocked!
Abaddon lands a right hand that snaps the head of Caldwell backwards.
Oh Caldwell is still all over the place! His legs are completely gone! Will he be able to recover?!!
The crowd cheering loudly, showing their appreciation for the quality fight we're seeing here.
Abaddon working the clinch nicely. Caldwell is working for position but Abaddon cracks him with a big knee to the head! Caldwell crumples up against the cage and Abaddon lands two more shots before the ref can save Caldwell! This one is all over!
Ladies and gentlemen, after 4:56 of round 2, we have a winner by way of TKO (Knee & Punches). Anthony Abaddon!
Anthony Abaddon tried to hype himself up post fight but didn't word it too well and it ended up with him sounding like a bit of a tool.
|
|
|
|
|
|
|
|
|
|
|
|
|
|
|
|
|
|
|
|
|
|
|
| S |
C
A |
G |
S |
C
B |
G |
|
S |
C |
G |
|
energy
A | B |
|
hype
A | B |
|
pop
A | B |
|
mgr
A | B |
|
FIGHT
RATING
58% |
|
|
|
|
|
|
