|
|
PBP Commentary |
Coming up we have a lightweight MMA rules bout between Dpk Bht (ranked 0 p4p, 0 weight class) and Jack Badger (ranked 0 p4p, 0 weight class). These two fighters really are very evenly matched on the feet - it will be fascinating to see who can assert themselves in that aspect of the fight.
 |
|
 |
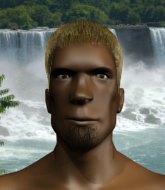
| 190 cm
25
160 lbs
0 - 0 - 0 |
|
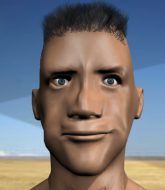
180 cm
23
162 lbs
4 - 7 - 0 |
BJJ Blue Belt
Solid Muay Thai
Cuts easily |
|
BJJ White Belt
Decent boxing
Granite chin |
|
| |
|
Ladies and gentlemen. This fight is 3 rounds, in the lightweight division.
Introducing the fighter to my left, fighting out of the red corner.
With a record of
0 - 0 - 0, fighting out of London, Dpk Bht!
And introducing the fighter to my right, fighting out of the blue corner.
With a record of
4 - 7 - 0, fighting out of London, Jack Badger!
The judges for this bout are Richard Clark, Daniel Bishop and Colin Fotheringham.

The bell rings for round one and we are underway!
Bht has his head slapped from side to side by a 3 punch combination. That must have hurt him.
Badger will need to tighten up his combinations if he doesn't want to gas himself out, swinging at thin air.

Badger changes levels and drives through with a really nice takedown into side control. Bht looks really pissed at himself for not defending that better.
Bht is trying to control Badger's posture but Badger avoids it.
Badger is trying to ground and pound but Bht uses the momentary lack of control by Badger to regain half guard.
Bht really does look like a pencil wearing a pair of gloves. Let's hope he has a gameplan to suit that ridiculous body shape.
Bht keeping his head moving to avoid the ground and pound.
Badger really doesn't want to stay on the ground with Bht. If he can't get it back to his feet, it's only a matter of time before he'll be tapping out.
Bht is positioning himself well to prevent Badger advancing to mount.
We've had a slow start to the round here - hopefully the action picks up.
Badger sitting in half guard, looking to land shots. Bht defending well though.
Bht is trying to control but can't.
The referee looks like he's ready to step in and stand the fighters back up.
Badger thows a wild elbow that connects with the canvas.

The ref stands the fighters back up due to a lack of activity.

That's one minute gone in the round.
Badger throws a combination but it was largely blocked by Bht.
Bht displays good takedown defense there as he swats away a double leg from Badger.
Badger throws a loose over hand right and dives in with a double leg takedown. Bht tries to sprawl but it's too late and the fighters hit the mat. Badger is in Bht's guard.
Badger working some ground and pound from guard but it's not doing any damage.

Bht is edging up against the cage. He's using the cage to get back to his feet. Nice work there - the fighters are clinched.

Bht drags the fight down to the ground.
Bht tries to land a sweep but no joy.
Bht is doing well to control the posture of his opponent and prevent any damage.
Badger in full guard, throwing the ground and pound. No damage this time.
There's a bit of a scramble here and now Bht is on top in guard.

That's two minutes gone in the round.
Badger trying to control the position.
Bht trying to control but Badger is working from the bottom.
Bht slows down the pace of the fight for a moment. He'll need to remain active if he doesn't want to see the fight stood back up.
The referee decides to stand the fighters back up.
Bht shoots for a double leg takedown but Badger sprawls well. He's pushed Bht's face into the mat and manages to get back to his feet relatively easily.
Badger's coach down at Quick Fingers BEST BANG FOR BUCK Gym was telling us pre-fight that they have been working on Badger's balance. Obviously they view that as a key factor in the outcome of this fight.
Bht gets his takedown attempt stuffed easily
and Badger counters with a left and a right that stings Bht.
The crowd are loving this. Great action here.

Badger moves into the clinch.
Badger gets control of Bht's arms and successfully pulls guard. Badger will no doubt be looking for submissions off his back.

That's three minutes gone in the round.
Badger wants to control but instead he gets his guard passed and Bht is now in half guard.

Bht stands up and beckons Badger to join him on the feet.
Bht attempts a leg kick but it's missed by a good margin.
Badger shoots in from a long way out. He's driving through with the takedown attempt and he eventually gets it, landing in Bht's guard.
The fighters are working up against the cage. Bht manages to wriggle his way back to his feet, so the fighters are now clinched against the cage.
Badger gets double underhooks and manages to take the fight to the ground.
Bht has butterfly guard. He's looking to stand up here. He pushes Badger off him and springs to his feet nicely. The crowd applauds.
Badger displays good takedown defense there as he swats away a double leg from Bht.
That's three failed takedown attempts in the round for Dpk Bht. That's going to take a lot out of him.
Badger wants to clinch up but Bht keeps it at a distance.
Badger darts in and clinches Bht up against the cage.

That's four minutes gone in the round.
This has been an exciting period of action!
Badger has managed to pull guard. Let's see whether he can work an aggressive guard. It will also be interesting to see what tactics Bht uses from the top position.
Bht throwing strikes but missing.
Badger preventing the ground and pound from doing any damage.
Bht postures up to throw the ground and pound strikes but they don't connect.
Bht controls the pace of the fight for a moment.
Badger keeping full guard, as Bht tries to pass.
Badger can't do much from the bottom at the moment, as Bht controls the pace.
The referee wants the fighters to be more active or he's going to reset them on the feet.
And thats the end of the round the fighters go back to their corners.
Jack Badger dominated that round.
The minute break is over - no more time for sponges and pep talks - back to the action!

Badger has Bht up against the cage in a clinch.
Badger has dropped down and is looking to force the takedown but it's defended by Bht after a bit of a struggle.
Bht jumps guard but Badger stands there with Bht around his waist. Bht gives up and drops back to his feet. We remain in the clinch.

Bht escapes the clinch and we're back to striking.
Bht avoids the clinch attempt nicely.
We've had a slow start to the round here - hopefully the action picks up.
Badger throws a wild body kick that Bht sees coming a mile off.
Bht throws a quick inside leg kick.
Bht moves in looking to clinch but Badger pushes him off.
Badger throws a counter combo.
Badger keeps the fight on the outside.
Bht gets his takedown attempt stuffed easily
and Badger cracks him with a counter punch right on the button.
That's one minute gone in the round.
Badger misses with a jab and misses with a cross straight after too.
Badger changes levels and drives through with a really nice takedown into side control. Bht looks really pissed at himself for not defending that better.
Bht struggling a bit here.
The ref warns both fighters not to hold the cage as they work up against the meshing.
Bht is moving his hips around well on the bottom and has managed to get back to half guard.
Bht kicks off Badger and gets to his feet.
Badger jabs. That one connects to the head of his opponent.
Bht tries to keep at a distance but Badger has taken the fight into the clinch.
Badger is trying to break the clinch but Bht is controlling him.
Badger is defending well against a takedown attempt.
That's three failed takedown attempts in the round for Dpk Bht. That's going to take a lot out of him.
That's two minutes gone in the round.
Badger tries for a takedown. No joy.
Badger has been the more effective fighter overall so far.
Bht trying to land knees to the body.
Bht is trying to drag Badger to the mat but Badger just about manages to keep his footing. He used the cage to his advantage there.
Badger blocks a knee to the body. He'll have a nicely bruised forearm in the morning.
Bht is trying to pull guard but Badger turns him against the cage and we stay in the clinch.
Badger pulls guard successfully.
The crowd are loving this. Great action here.

Badger has his feet on Bht's hips. He pushes off and gets to his feet. Nice work.
Nice sprawl there from Badger as Bht shoots in.
That's three minutes gone in the round.
Badger throws a right and a left that both miss.
Bht tries to counter with a takedown but Badger is quick to defend against it.
Badger throws a lazy body kick
and Bht makes him pay by landing a nice hook to the body before moving out of range.
Both fighters are absolutely exhausted here.
Badger throws a combination but comes up with nothing but fresh air.
Badger takes the fight into the clinch.
Badger drops down looking for an ankle pick but Bht pulls his leg out and moves away.
Badger darts in and clinches Bht up against the cage.
Bht misses with a punch on the inside.
Badger wants to break free. God knows he wants to breaaaak freeee.
A battle for position here, against the cage.
That's four minutes gone in the round.
Bht slowing the pace effectively.
Bht breaks the clinch and we return to the middle of the mat.
Bht tries to sprawl but Badger drives through with a takedown into half guard.
Bht manages to create a bit of space in order to work his way back to his feet. Badger keeps hold of his opponent and drives him back against the cage.
The crowd are loving this. Great action here.
Badger wants to take the fight to the mat but Bht manages to get underhooks and keep the fight in the clinch.
Bht pulls guard successfully.
Bht keeping full guard, as Badger tries to pass.
Badger postures up in Bht's guard and throws a big left but Bht blocks it.
Bht has his hands on Badger's head, controlling the position.
And thats the end of the round the fighters go back to their corners.
Jack Badger showed his class in that round. I'd imagine he'll take it on all the scorecards.
The fighters' corners scream their final instructions, as the referee calls time. Here we go, back to the action! The crowd applaud as we get ready to start the final round!

Bht moves out of range of the body kick.
Badger moves into the clinch successfully.
Bht tries to pull guard but Badger holds him up against the cage and eventually Bht drops back down to his feet.
Badger is working for takedown but Bht is calmly controlling the position for now.
Badger gets double underhooks and manages to take the fight to the ground.
Bht is edging up against the cage. He's using the cage to get back to his feet. Nice work there - the fighters are clinched.
Bht tries for a takedown but Badger manages to get underhooks.
We've had a slow start to the round here - hopefully the action picks up.
Badger stops a takedown attempt from Bht.
That's three failed takedown attempts in the round for Dpk Bht. That's going to take a lot out of him.
Bht goes for a body shot but it's blocked.
That's one minute gone in the round.
Badger stops a takedown attempt from Bht.
Badger jumps guard but his hands slip and he falls flat on his back. Well, he's made himself look a right mug there, as Bht walks away with a smile on his face. Badger gets slowly back to his feet and shakes his head.
Badger has taken the fight to the clinch.
Bht breaks the clinch and we're back to striking at distance.
Badger forces Bht back against the cage and clinches.
Badger working hard to break the clinch.
Badger is trying to break free.
Badger is working on a leg, looking for a takedown but Bht is defending well.
Bht misses with a body punch.
Bht tries to throw a body punch but Badger avoids it by throwing Bht back against the cage.
Bht ties up his opponent against the cage and manages to drag the fight down to the ground. Bht no doubt will be looking to work submissions from his guard.
That's two minutes gone in the round.

Bht working from the bottom, still in full guard. He's managed to get a loose triangle. Badger doesn't seem to be doing much to defend here, obviously he feels comfortable in the position. Badger manages to throw the legs off his shoulder and he's back into guard - no problem.
Badger with a nice head shot there.
Both fighters are breathing heavily.
Bht bucks up whilst keeping hold of a body lock, managing to reverse the position. Now he's in top in Badger's guard.
Bht controls from within his opponent's guard.
Bht throws a strike but Badger rolls with it and manages to sweep. Now he's in guard on top.
Jack Badger has got the better of the ground game so far.
Bht keeping moving, preventing Badger from controlling successfully.
Bht trying to strike from the bottom but really, it's not the best position to be doing that from!
That's three minutes gone in the round.
Bht wants to improve his position but instead Badger has moved into half guard.
The ref stands the fighters back up due to a lack of activity.
Jack Badger seems to be getting the better of the standup.
Bht shoots in for a takedown but Badger shows good takedown defense.
Bht fails miserably with a takedown attempt.
Bht has his takedown stuffed
and Badger cracks him with a counter punch right on the button.
Badger throws the overhand right but ducks down into a quick takedown attempt. Bht was covering up waiting for the punch and Badger finishes the takedown easily into guard.
Badger scoring with some ground and pound.
Badger landing with the ground and pound.
Badger throws a big right hand that misses.
That's four minutes gone in the round.
Bht looking to sweep here. No luck so far.
Badger keeps in close for a moment and lands a decent shot to the side of Bht's head.
Bht preventing the ground and pound from doing any damage.
Badger working from the guard for now, landing some ground and pound.
Badger prevents Bht from getting back to his feet.
Badger working some strikes from top position.
Badger working from the guard for now, landing some ground and pound.
The fighters are pressed up against the cage, both looking to find a bit of space to work.
Badger stands up and looks to throw the legs aside to pass to side control. Bht swivels though and keeps the full guard.
Badger cracks Bht with a solid left hand.
The crowd thankful this round is nearly over.
Badger lands a couple of elbows.
Dpk Bht has stepped it up - he knows he needs a finish here!
Jack Badger is fighting for a decision - hopefully he's judged it right and he's actually winning the fight.
Badger trying to control but Bht is working from the bottom.
And that's the end of the fight!
Jack Badger comfortably won the final round on my scorecard.
Well Badger has outworked and out performed his opponent in all aspects of the game today. He was simply too good and the decision should be no more than a formality. Over to the ring announcer for the scorecards.
Ladies and gentlemen, after 3 rounds of action, we go to the scorecards for a decision.
Judge Richard Clark scores the fight 27:30
Judge Daniel Bishop scores the fight 27:30
Judge Colin Fotheringham scores the fight 27:30
In favor of your winner, by unanimous decision... Jack Badger!
|
|
|
|
|
|
|
|
|
|
|
|
|
|
|
|
|
|
|
|
|
|
|
| S |
C
A |
G |
S |
C
B |
G |
|
S |
C |
G |
|
energy
A | B |
|
hype
A | B |
|
pop
A | B |
|
mgr
A | B |
|
FIGHT
RATING
40% |
|
|
|
|
|
|
