|
|
PBP Commentary |
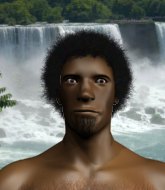
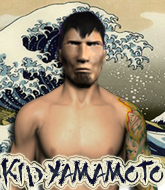
Coming up we have a bantamweight MMA rules bout between Jack Clark (ranked 0 p4p, 0 weight class) and Kenshin Yamamoto (ranked 0 p4p, 0 weight class). Clark's entrance music is Rent a Wreck. A fine choice. Kenshin Yamamoto is staring across the cage at his opponent, tweaking his nipples.
 |
|
 |
| 168 cm
36
148 lbs
35 - 23 - 1 |
|
169 cm
36
147 lbs
22 - 6 - 1 |
Good wrestling
World class boxer
Insanely flexible |
|
Olympic wrestler
Excellent boxer
Good gas tank |
|
| |
|
Ladies and gentlemen. This fight is 5 rounds, for the bantamweight championship of the world!
Introducing the champion to my left, fighting out of the red corner.
With a record of
35 - 23 - 1, fighting out of New York, Jack Clark!
And introducing the challenger to my right, fighting out of the blue corner.
With a record of
22 - 6 - 1, fighting out of Los Angeles, Kenshin Yamamoto!
The judges for this bout are Yuuki Gou, Yukihiro Shimada and Taro Takaoka.

The bell rings for round one and we are underway!
Yamamoto lands the left hand.
Yamamoto walks straight into a jab right on the nose. That one stung - he's blinking and trying to clear his head.
Clark stooping low to avoid any incoming strikes and then lunges in with an uppercut come cross that lands flush.
Clark clobbers Yamamoto with an overhand right that has the crowd gasping. That made a horrendous noise.
Clark throws a jab but it's blocked by Yamamoto.
Clark on the wrong end of a nice hook.
Clark paws at his opponent with the jab and then lunges in with a straight, right on the button.
Yamamoto throws a right hand that misses
and Clark counters with a stiff right hand.
Jack Clark seems to be the more aggressive standup fighter in this bout.
Yamamoto cracks Clark with an open hand slap.
This is a great period of action - very entertaining stuff!
A left lands for Yamamoto.
Clark connects with a good right hand that stumbles Yamamoto. Yamamoto circles away out of range and recomposes himself.
A slow jab from Clark misses its intended target.
And Yamamoto tries to counter it with a takedown but Clark pushes his down on his head and steps out.
A big right from Clark misses.
And Yamamoto tries to counter it with a takedown but Clark pushes his down on his head and steps out.
Clark bobs and weaves well there to avoid the strikes.
An attempted straight right counter from Clark misses the target.
Yamamoto throws a lazy uppercut
and Clark counters with a nice uppercut.
Yamamoto cracks Clark with a good jab.

That's one minute gone in the round.
No joy there for Clark, who threw a few shots but didn't land.
Yamamoto changes levels for a counter takedown but doesn't follow through with his attempt.
Clark throws a hook to the side of Yamamoto's head but Yamamoto sees it coming and ducks under it beautifully.
Yamamoto defending well as Clark loads up on a big left hand.
Yamamoto feints the counter takedown.
Yamamoto throws an uppercut from half a mile away. Clark sees it coming and avoids it easily.
Clark is really head hunting here, hardly looking to strike to the body at all.
Clark lands with a two punch combination before moving back out of range.
Yamamoto misses with a takedown
and Clark counters with a crisp hook to the side of the head.

Yamamoto shoots in for a takedown from distance. He catches Clark napping and manages to drive through into side control!

Yamamoto tries for an arm triangle. That looks pretty tight to me. Is this one over!?! Possibly, maybe, no Yamamoto has let go of the choke. Obviously it wasn't as tight as we thought!
The fighters are pressed up against the cage, both looking to find a bit of space to work.
This is a great period of action - very entertaining stuff!
Yamamoto tries to advance to mount but Clark denies him.
Yamamoto tries for a kimura. Not really close to a finish though.

That's two minutes gone in the round.
Yamamoto is trying to get an arm triangle but Clark is defending well.
The ref warns both fighters not to hold the cage as they work up against the meshing.
Clark regains half guard.
Clark wants to improve his position but Yamamoto is controlling well.
Yamamoto wants to pass to mount but Clark is defending the position.

That's three minutes gone in the round.
Yamamoto is working for a kimura but Clark is defending it quite comfortably.
Yamamoto is keen to just control but Clark is a slippery customer.
Yamamoto prevents Clark from improving his position.

That's four minutes gone in the round.
The crowd are hurling abuse towards the fighters... You can hardly blame them though because there isn't a lot going on in the fight.
Clark is trying to maintain the position but Yamamoto is very close to passing his half guard.
Clark wants to get back to full guard.
The referee claps his hands together and tells the fighters to work.
Clark moves his hips nicely and gets into full guard.
Yamamoto works a leg free and moves into half guard.
Clark is trying to maintain the position but Yamamoto is very close to passing his half guard.
Yamamoto is looking to pass the guard... He's managed it - he's now in full mount!
And thats the end of the round the fighters go back to their corners.
That was a close round but I would say that Jack Clark will probably get the nod.
That's time! Clark's corner gives him a slap on the ass as he gets ready to fight.

Yamamoto looks to score with a jab to the body but Clark is just out of range.
Clark slips under a jab.
Clark swung with a counter right hand that didn't connect.
Yamamoto misses with a double jab
and Clark cracks him with a counter punch right on the button.
Yamamoto showing good head movement there, avoiding the strikes from Clark.
Clark uses good head movement to avoid the hook from Yamamoto.
A head kick by Yamamoto misses
and Clark counters with a crisp hook to the side of the head.
Clark with poor footwork there. He got himself in a bit of a tangle, enabling Yamamoto to score with a decent uppercut.
Clark misses with a body shot.
We've had a slow start to the round here - hopefully the action picks up.
Clark misses with a straight right.
Clark moves out of range of the strikes.
Yamamoto keeping a good distance there, avoiding the body shot.
Yamamoto feints and then dives in with a takedown. That was a long way out but the feint bought him enough time to close the distance and complete the takedown. Now we'll play guard for a bit and see who can get the better of that position.
That's one minute gone in the round.
Clark tries to land a sweep but no joy.
Yamamoto works a leg free and moves into half guard.
Clark tries to roll over but Yamamoto keeps him under control.
Clark trying to control from the bottom.
Yamamoto trying to control from half guard but Clark is working away.
Yamamoto is trying to work for a kimura but Clark is defending well.
Clark tries to roll over but Yamamoto keeps him under control.
That's two minutes gone in the round.
Well. There's a bit of a lull in the action here and the crowd are starting to get restless.
Clark trying to control but Yamamoto postures up.
Yamamoto stalling.
Clark wants to improve his position but Yamamoto is controlling well.
That's three minutes gone in the round.
Yamamoto passes the half guard and he's now in mount! Big trouble for Clark!
Yamamoto content just to control the position here.
Yamamoto trying to control but he's not successful this time.
Yamamoto looking to secure an arm triangle but Clark defends it well.
Clark is trying to escape the mount.
That's four minutes gone in the round.
Clark is working hard here to advance position.
Yamamoto is going oldschool here, as he tries to force Clark to tap using a forearm choke. This isn't 1993 though, so Clark shrugs it off.
Boooooooooooooooooooo!!! God, this has been a terrible round. Come on you two, sort yourselves out!
Yamamoto trying to control but he's not successful this time.
And thats the end of the round the fighters go back to their corners.
Kenshin Yamamoto showed his class in that round. I'd imagine he'll take it on all the scorecards.
Well, the break between rounds is over. Let's get back to the scrappin!

Clark shuffles to his left behind two crisp jabs. Yamamoto eats them both and turns towards Clark to reposition himself and eats a stinging right hand-left hook combo.
A left lands for Yamamoto.
Clark scores with a sloppy right hand. Yamamoto should have avoided that one.
Clark thows a left - swing and a miss!
Clark lands with a cross.
Yamamoto staying out of range there.
Yamamoto is looking to take this fight into the clinch.
Clark bobs and weaves and throws out a fast jab that snaps Yamamoto's head backwards.
Clark moves forwards but Yamamoto connects with a nice, crisp jab.
Yamamoto moves away from the strike by Clark.
A big left from Clark misses.
Yamamoto is definitely looking for the counter takedowns here.
That's one minute gone in the round.
Clark misses the shot to the body.
Yamamoto keeping a good distance there, avoiding the body shot.
Yamamoto connects with a right hand. Clark shakes it off.
Clark throws a big shot that misses.
And Yamamoto tries to counter it with a takedown but Clark pushes his down on his head and steps out.
Yamamoto misses with an uppercut
and Clark counters with a nice uppercut.
Yamamoto shoots in for a takedown and gets it. Let's see what he's got on the mat.
Kenshin Yamamoto has got the better of the ground game so far.
Yamamoto throws a big right hand that misses.
Yamamoto trying to control but Clark is working from the bottom.
Clark lands a beautiful sweep and he's now moved into his opponent's guard.

Yamamoto tries to land a sweep but no joy.
That's two minutes gone in the round.
Yamamoto looking for submissions off his back, moving his hips, looking for an opening.
Yamamoto has his foot on Clark's thigh. He's trying to push off and get in position for a triangle, I think. Clark works his way back into a safe position though.
Yamamoto is trying to keep Clark in close.
Clark stands up and looks to throw the legs aside to pass to side control. Yamamoto swivels though and keeps the full guard.
Clark content to stall in guard here.
Yamamoto looking to hit a scissor sweep but Clark is one step ahead there.
That's three minutes gone in the round.
Yamamoto throws his legs up looking for a submission but Clark uses it to pass to side control.
Yamamoto is trying to get back to half guard.
Yamamoto is trying to control Clark's posture but Clark avoids it.
Clark is maintaining the dominant position - no doubt Yamamoto will start to get frustrated soon if he's not already.
That's four minutes gone in the round.
There's not a lot going on here and the crowd are letting the fighters know they're not willing to tolerate a lack of action.
Yamamoto tries to get back to half guard but can't.
Clark takes a little break here. Yamamoto wants to take advantage but he is being controlled well.
Yamamoto is looking to regain half guard here but Clark keeps moving and retains side control.

The referee has stepped in and called for a break in the action. We'll restart on the feet.
The crowd thankful this round is nearly over.
Yamamoto changes levels and looks for a double leg takedown. Clark tries to avoid it but Yamamoto manages to keep hold of a leg and drag Clark to the ground. Clark escapes though and pops straight back up to his feet.
And thats the end of the round the fighters go back to their corners.
Jack Clark clearly takes that round.
The corners get their ten second warning. Both fighters stand from their stools and stare eachother down, ready to get back to the action.

Yamamoto throws a body punch but Clark moves out of range.
Yamamoto showing good head movement there, avoiding the strikes from Clark.
Clark connects with a jab.
Clark drops his hands and takes a jab to the jaw for his troubles.
Clark stuffs a takedown. It's all about dictating where the fight takes place and Clark wants it to stay on the feet.
Clark connects with a looping left hand that seems like it dazed Yamamoto momentarily.
Jack Clark is winning the standup battle so far.
Clark misses with a straight left.
We've had a slow start to the round here - hopefully the action picks up.
Clark stooping low to avoid any incoming strikes and then lunges in with an uppercut come cross that lands flush.
Clark throws a jab when Yamamoto was well out of range.
Yamamoto fakes a head punch and goes low to the body. Nicely done.
Yamamoto swings away but doesn't land with a series of punches.
Clark swung with a counter right hand that didn't connect.
Clark blocks a jab.
That's one minute gone in the round.
Clark swings for the body but Yamamoto moves out of range.
The fighters circle momentarily. Clark darts into range and connects with a nice straight punch.
Clark takes a shot right to the bread basket.
Yamamoto ducks right into an uppercut from Clark.
Clark throws out a token jab with nothing on it.
A nice combination there by Clark.
Clark throws a series of punches but Yamamoto moves out of range.
Clark misses with a hook.

Yamamoto closes the distance and clinches.
Good anti-grappling being displayed by Yamamoto as Clark tries to tie him up.
Clark wants to break free but Yamamoto has control.
Clark has a couple of punches blocked by Yamamoto.
That's two minutes gone in the round.
The referee is keeping an eye on Yamamoto - much more stalling and he will separate the fighters.
Clark is looking to break free of the clinch but Yamamoto has double underhooks.
Yamamoto lands with a short head shot on the inside.
Fantastic stuff here - a very entertaining period of action, which has drawn cheers from the crowd.
Yamamoto slows down the pace here.

Clark breaks the clinch and we're back to striking at distance.
Yamamoto throws a looping left and ducks down for a takedown. He's got his arms around Clark's waist but Clark gets an underhook and avoids the takedown by throwing Yamamoto off to one side.
Clark looks to throw the jab but Yamamoto is out of range.
Clark lands a nice shot that snaps Yamamoto's head back.
Clark throws out a loose jab but Yamamoto uses good head movement to avoid it.
And Yamamoto tries to counter it with a takedown but Clark pushes his down on his head and steps out.
Yamamoto ducks under a wild hook from Clark.
Clark scores with the left hand. Yamamoto knows he should have avoided that one.
That's three minutes gone in the round.
Clark slips under a jab.
Clark swung with a counter right hand that didn't connect.
Yamamoto tries to move into range but Clark moves to the side and lands with a nice right hand.
Yamamoto scores with a shot to the body.
Yamamoto lands with a cross to side of his opponent's head.
Clark lands a vicious shot with the stealth of a sniper and the strength of a viper. Are vipers that strong? I can think of lots of things that are stronger than a viper - not many rhyme with sniper though.
Clark walks straight into a jab right on the nose. That one stung - he's blinking and trying to clear his head.
Clark swings wildly with a right hand that was never going to find it's target.
Yamamoto walks straight into an uppercut. Luckily it didn't land flush.
Jack Clark is looking to keep the fight on the feet at all costs.
A swing and a miss from Yamamoto.
Yamamoto has a pretty nasty looking mouse under his right eye.
Clark looks to score with a combo but nothing lands.
Clark throws a jab but it's blocked by Yamamoto.
Yamamoto fails with a rather predictable takedown attempt.
Jack Clark has stuffed three takedown attempts in the round now. That's going to take a lot out of Kenshin Yamamoto.
That's four minutes gone in the round.
Clark waving his hands out in front of him, looking to distract Yamamoto.
Yamamoto changes levels for a counter takedown but doesn't follow through with his attempt.
Yamamoto keeping a good distance there, avoiding the body shot.
We've seen a great period of action over the last minute or so - credit to both fighters for going all out!
Clark connects with a body shot that sends Yamamoto's belly button to the back.
Clark misses with the combination.
Clark cracks Yamamoto with a hook to the jaw. Both fighters smile at eachother and high-five before getting back down to business.
Yamamoto gets to the clinch - let's see what his plan is here.
Yamamoto tried to land a shot to the body but connects with Clark's elbow.
Yamamoto throws a punch but it's blocked by Clark.
Yamamoto lands with a good tight uppercut to the head.
Yamamoto lands a body punch in the clinch.
Yamamoto misses with a punch on the inside.
And thats the end of the round the fighters go back to their corners.
Jack Clark had his way with Kenshin Yamamoto in that round.
That's the end of the round. The referee orders the cornermen out of the cage so we can get back down to business. This is the final round!

Yamamoto with a poor takedown
and Clark counters with a crisp hook to the side of the head.
Nice body punch from Clark.
Yamamoto dives in for a single leg takedown but Clark sprawls and the fighters end up clinched against the cage.
Yamamoto blocks a jab.
Yamamoto changes levels for a counter takedown but doesn't follow through with his attempt.
Yamamoto takes a big uppercut there. He seems a bit wobbly but no, he's OK.
Clark throws a right and a left that both miss.
Clark misses with a wild combination.
Yamamoto's jab looks to have found its range, popping Clark under the eye.
We've had a slow start to the round here - hopefully the action picks up.
Yamamoto takes a solid shot to the body. That one hurt him but he's trying not to show it.
Yamamoto will have to do better than that with his takedown attempts.
Jack Clark has stuffed three takedown attempts in the round now. That's going to take a lot out of Kenshin Yamamoto.
Clark thuds his right hand into Yamamoto's forehead from close range. That could be painful for both fighters.
That's one minute gone in the round.
Clark throws a left and a right that both miss
and Yamamoto counters with a nice shoot takedown that brings the fighters to the ground.

Clark is scooting his butt against the cage and has managed to get back to his feet. Yamamoto presses him back against the cage, presumably looking to take the fight back to the mat.
Yamamoto misses with a punch to the body.
Yamamoto has Clark pressed against the cage.
Clark stalling against the cage.
Yamamoto scores with a shoulder strike.
Clark's corner calls for him to break the clinch, which he does.
Clark throws a body shot but no joy.
The fight stays on the outside here - Yamamoto looks like he's thinking about clinching though.
Clark looks to score with a jab to the body but Yamamoto is just out of range.
And Yamamoto tries to counter it with a takedown but Clark pushes his down on his head and steps out.
That's two minutes gone in the round.
Yamamoto keeping his hands up high there, blocking the jab from Clark.
Clark is really dominating this fight. Is there anything that Yamamoto can do to turn this around?
Clark jabs Yamamoto right on the nose. Yamamoto blinks but takes it well.
This has been an exciting period of action!
Clark tries to land with a swinging hook to the body but Yamamoto was well out of range. Poor timing from Clark.
Clark throws a body punch but Yamamoto moves out of range.
Clark gets cracked there but stands up to it.
Yamamoto displays some good footwork, moving neatly out of range as Clark throws out the jab.
Yamamoto misses with a straight right.
A little feinted left hand from Clark on the counter but he doesn't commit to it.
The fight moves into the clinch position.
Clark has had enough of the clinch but Yamamoto keeps him there for the moment.
Yamamoto misses with a punch on the inside.
Yamamoto lands a hook to the body. It's hard to tell if that hurt Clark or not.
Clark looking to stall.
That's three minutes gone in the round.
Yamamoto slows down the pace here.
Clark softening up his opponent with strikes, against the cage.
Jack Clark is fighting for a decision here - he's started to take the cautious approach.
Yamamoto stays in close to his opponent and throws a right hand to the body.
Clark blocks an uppercut.
Yamamoto slows down the pace here.
Yamamoto tries to work over Clark's body with a swooping hook but it only glances the target.
Clark is trying to force a seperation but Yamamoto has the dominant position.
That's four minutes gone in the round.
Yamamoto is trying to drag Clark to the mat but Clark just about manages to keep his footing. He used the cage to his advantage there.
The referee calls for Yamamoto to work.
A head punch on the inside from Yamamoto fails to land.
A right hook to the body lands for Yamamoto.
Yamamoto tries to throw a body punch but Clark avoids it by throwing Yamamoto back against the cage.
Clark blocks a body shot from Yamamoto.
Yamamoto misses with a body punch.
Kenshin Yamamoto has stepped it up - he knows he needs a finish here!
A short right from Yamamoto.
And that's the end of the fight!
Jack Clark showed his dominance in that final round.
I think Clark has won this one but let's see what the judges have to say. Over to the ring announcer for the scorecards.
Ladies and gentlemen, after 5 rounds of action, we go to the scorecards for a decision.
Judge Yuuki Gou scores the fight 49:46
Judge Yukihiro Shimada scores the fight 49:46
Judge Taro Takaoka scores the fight 49:47
In favor of your winner, by unanimous decision... Jack Clark!
Jack Clark retains his bantamweight title!
A very excited looking Jack Clark made sure he remembered to thank all the fans both in the arena and on the internet. He said all the coolest people spend all day on MMA websites, which got a big reaction.
|
|
|
|
|
|
|
|
|
|
|
|
|
|
|
|
|
|
|
|
|
|
|
| S |
C
A |
G |
S |
C
B |
G |
|
S |
C |
G |
|
energy
A | B |
|
hype
A | B |
|
pop
A | B |
|
mgr
A | B |
|
FIGHT
RATING
46% |
|
|
|
|
|
|

