|
|
PBP Commentary |
Coming up we have a bantamweight MMA rules bout between Joanna Piechocka (ranked 0 p4p, 0 weight class) and Hideo Sato (ranked 0 p4p, 0 weight class). Chooooooooon! I think Piechocka might be my favorite fighter, now he's come out to Kill YOU !!!. Sato has chosen Kodo Drums as his entrance music. Joanna Piechocka has a significant reach advantage - let's see if he can make it count.
 |
|
 |
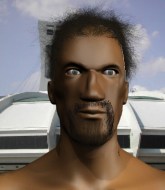
| 174 cm
30
133 lbs
10 - 9 - 0 |
|
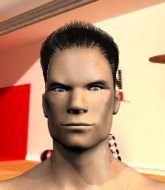
154 cm
20
135 lbs
3 - 2 - 0 |
BJJ Purple Belt
Counter fighter
Very strong |
|
BJJ Purple Belt
Basic striking
Solid chin |
|
| |
|
Ladies and gentlemen. This fight is 5 rounds, for the bantamweight championship of the world!
Introducing the champion to my left, fighting out of the red corner.
With a record of
10 - 9 - 0, fighting out of Rio de Janeiro, Joanna Piechocka!
And introducing the challenger to my right, fighting out of the blue corner.
With a record of
3 - 2 - 0, fighting out of Rio de Janeiro, Hideo Sato!
The judges for this bout are Seu Braga, Luis Engracia and Felipe Paraventi.

The bell rings for round one and we are underway!
Sato tries to close the distance and clinch up against the ropes but Piechocka paws at him with a jab and circles away.
Piechocka uses good footwork to avoid the strikes from Sato.
Piechocka looks to score with a jab to the body but Sato is just out of range.
Jab, cross, leg kick. Nice combination by Piechocka!
Piechocka lands a vicious shot with the stealth of a sniper and the strength of a viper. Are vipers that strong? I can think of lots of things that are stronger than a viper - not many rhyme with sniper though.
Sato dives in for a single leg takedown but Piechocka sprawls and the fighters end up clinched against the ropes.
As Sato looks to move away, Piechocka throws a big counter combo bu Sato just gets out of the way.
Piechocka defends well against a solid takedown attempt from Sato.

Sato darts in and clinches Piechocka up against the ropes.

Piechocka breaks the clinch.
We've had a slow start to the round here - hopefully the action picks up.

Sato throws a loose over hand right and dives in with a double leg takedown. Piechocka tries to sprawl but it's too late and the fighters hit the mat. Sato is in Piechocka's guard.
The crowd cheering loudly, showing their appreciation for the quality fight we're seeing here.
Piechocka avoiding any damage from the ground and pound.
Sato stopping the sweep attempt from Piechocka.

Sato is holding a leg here, probably looking for an ankle lock - he drops back and goes for it! Piechocka is in trouble! Is it all over??? No! Piechocka has escaped and now he's on top!

Piechocka has to be careful here, sitting in the guard of a superior BJJ player.

That's one minute gone in the round.
Sato is working from a closed guard but he's struggling to control his opponent.
Piechocka stopping the sweep attempt from Sato.
Sato wants to control the position but Piechocka says "no thanks buddy" and passes to half guard.
Sato has no desire to be mounted, so is trying to control. Piechocka is working away from the top position though.
Sato is looking for a sweep. Piechocka is wise to his cunning plan and keeps the top position.

That's two minutes gone in the round.
A lull in the action here being met with boos from the crowd.
Sato is persisting with the attempt to improve his position.
Piechocka tries to stand and escape but Sato is controlling the position.
Piechocka looks to be in better condition than last time we saw him fight. Obviously he's been working hard on his cardio.
The fighters are trapped in the ropes so we're going to have a reposition here. The ref calls for a break and repositions the fighters in the center of the ring.
Sato gets full guard.
Sato is trying to control the position but Piechocka postures up.
Sato is working an open guard here, looking to improve his position. No doubt that will leave him open to counters but at least he's being more offensive.
Sato working for submissions but it's allowed Piechocka to get to half guard.
Sato trying to control from the bottom.
Sato moves into full guard.

That's three minutes gone in the round.
Sato has a butterfly guard looking to sweep but Piechocka has passed into side control.
The fighters are tangled up in the ropes here. We might need a restart if the fighters can't break free themselves.

Piechocka has had enough of the ground for now and decides to stand.
Joanna Piechocka is looking to keep the fight on the feet at all costs.
Piechocka drops his hands momentarily and Sato takes advantage with a crisp shot to the head.
Piechocka really does look like a pencil wearing a pair of gloves. Let's hope he has a gameplan to suit that ridiculous body shape.
Sato shoots in with a takedown attempt and he has Piechocka pinned against the ropes. Piechocka gets the underhooks and manages to circle away.
Piechocka throws a big counter combination but Sato scrambles out of danger and avoids any damage.
Joanna Piechocka has stuffed three takedown attempts in the round now. That's going to take a lot out of Hideo Sato.
Piechocka swings for the body but Sato moves out of range.
Sato changes levels for a counter takedown but doesn't follow through with his attempt.
Piechocka slaps away a takedown attempt from Sato, before circling back to the center of the mat.

That's four minutes gone in the round.
Sato is looking to take this fight into the clinch.
Piechocka looked to counter with a high kick but didn't commit.
Sato tries to clinch up but Piechocka circles away and keeps his distance.
Piechocka tries to bum rush Sato with a series of wild strikes but Sato uses good footwork to avoid the assault.
Sato drives through and clinches with Piechocka against the ropes.
Sato tries to jump guard but he falls flat on his backside. Piechocka smiles and moves away.
Piechocka scores with a jab to the body.
The crowd thankful this round is nearly over.
Sato fails with the takedown
and Piechocka counters with a three punch combination, finished off with a leg kick. Nice work.
Sato has managed to clinch.
And thats the end of the round the fighters go back to their corners.
Joanna Piechocka dominated that round.
That's the end of the round. The referee orders the cornermen out of the ring so we can get back down to business.

Piechocka bobs and weaves and unloads with a good uppercut.
Sato closes the distance and clinches.
Piechocka breaks the clinch and we return to the middle of the mat.
A really sloppy takedown attempt there from Sato.
Piechocka throws a couple of head shots and lands with the final one - a decent hook, which struck Sato on the side of the head.
Piechocka takes a punch to the jaw and another one to the bread basket.
Sato tries to drive through with a takedown attempt but Piechocka defends well and Sato ends up having to push Piechocka into the ropes where they will battle it out in the clinch.
We've had a slow start to the round here - hopefully the action picks up.
Sato throws the left hand but Piechocka avoids the punch easily.
Sato tries to clinch but Piechocka moves out of range.
Sato looks to clinch
and Piechocka counters with a crisp hook to the side of the head.
Sato with a lazy takedown attempt
and Piechocka counters with a three punch combo that has Sato backing up. Sato nods at Piechocka to acknowledge the strikes.
Joanna Piechocka has stuffed three takedown attempts in the round now. That's going to take a lot out of Hideo Sato.
That's one minute gone in the round.
Piechocka stuffs a takedown. It's all about dictating where the fight takes place and Piechocka wants it to stay on the feet.
Sato misses with a takedown attempt
and Piechocka counters with a nice uppercut.
Sato misses with a takedown attempt
and Piechocka counters with a series of strikes. Sato will be more careful next time no doubt.
Sato is breathing heavily.
Sato tries for a takedown but Piechocka sees it coming a mile off and avoids it easily.
Piechocka appears to be looking for a big counter.
Sato shoots in for a double leg but Piechocka sprawls well. That's going to sap some energy.
Sato jabbing away but nothing is landing.
Piechocka misses with a jab, cross combination.
A nice leg kick lands there from Piechocka.
Piechocka cracks Sato with an open hand slap.
Sato gets a clinch.
Piechocka escapes the clinch and we're back to striking.
Hideo Sato seems to be the more aggressive standup fighter in this bout.
Sato misses with a jab and misses with a cross straight after too.
Piechocka throws a big counter combination but Sato scrambles out of danger and avoids any damage.
That's two minutes gone in the round.
Fantastic stuff here - a very entertaining period of action, which has drawn cheers from the crowd.
Sato misses with a left hand
and Piechocka counters with a three punch combination, finished off with a leg kick. Nice work.
Sato with a lazy takedown attempt
and Piechocka cracks him with a counter punch right on the button.
Piechocka lands with a shot to the body.
Sato fails with the takedown
and Piechocka counters with a stiff right hand.
Sato dives in for a single leg takedown but Piechocka sprawls and the fighters end up clinched against the ropes.
Piechocka looks to score with a jab to the body but Sato is just out of range.
Sato shoots and misses
and Piechocka counters with a two punch combo.
Sato shoots and misses
and Piechocka connects with a straight left hand counter down the middle.
Piechocka is really dominating this fight. Is there anything that Sato can do to turn this around?
Sato sees a low kick coming and goes to check it, but it's actually a body kick and it thuds into his unprotected ribs.
Sato walks into a jab.
Sloppy strikes from Piechocka. Those never looked like landing.
Sato tries a counter takedown but it's more of a dummy move, and he uses it to push himself away.
That's three minutes gone in the round.
Piechocka fakes high and swings low for a body shot but Sato manages to avoid it.
Sato tries to counter by closing the distance.
Sato has his takedown stuffed
and Piechocka counters nicely by changing levels and landing a hook to the body.
Sato misses with a takedown attempt
and Piechocka counters with a one-two to the body.
Piechocka lands a jab followed by a nice looking cross.
Piechocka is using his height advantage well here, landing a good percentage of his punches.
Piechocka fails to land with the punch combination there - jab, cross, hook, miss, miss, miss.
Sato tries to score a power double leg takedown but Piechocka sees that one coming and sprawls well. That will dishearten Sato somewhat.
A combination from Piechocka does no damage.
Sato wants to counter with a clinch but Piechocka pushes him away.
Piechocka stuffs a takedown. It's all about dictating where the fight takes place and Piechocka wants it to stay on the feet.
That's four minutes gone in the round.
Sato fails with a takedown attempt.
Piechocka misses with a half-hearted attempt at a head kick.
Sato shoots and misses
and Piechocka counters with a lovely straight right hand!
Wooooo! Give it up for these two warriors! They are putting on a show!
Sato tries to clinch
and Piechocka counters with a left and a right that stings Sato.
Piechocka looks to land a combination but Sato avoids it well.
Sato avoids the head kick by Piechocka.
Sato fakes an overhand right and shoots for a takedown. Piechocka sprawls well initially but Sato persists and gets the takedown into half guard.
The crowd applaud the fighters' efforts here as the round comes to an end.
Sato is looking for a kimura. It's going to be difficult to finish that from half guard though and Piechocka defends it well.
Piechocka regains full guard. Nicely done.
And thats the end of the round the fighters go back to their corners.
Joanna Piechocka dominated that second round.
That's time! Back to the action!

Sato shoots in looking for a takedown but Piechocka manages to keep the fight standing, pushing Sato's face into the canvas for good measure before circling away.
It looked like Piechocka was looking amped, ready to throw a big counter but didn't commit.
Piechocka throws a lazy head kick
and Sato counters with a single leg into guard. Piechocka didn't expect that.
Sato looking to pass the guard.
Sato trying to move into half guard but instead Piechocka has managed to sweep!
Sato has an omoplata and is looking to use it perhaps as a submission or perhaps to transition. Piechocka is in a bit of discomfort here, but he's managed to free himself and has dived into side control! That didn't work out too well for Sato.
Sato tries to bench press Piechocka off him but Piechocka keeps the position.
We've had a slow start to the round here - hopefully the action picks up.
Piechocka trying to control the action but Sato is working from the bottom.
Sato takes a big intake of breath there - he's definitely tired.
That's one minute gone in the round.
Sato is positioning himself to get back to half guard.
Sato gets back to half guard.
Piechocka is taking a breather. Sato says something to him but it's hard to make out. Perhaps he's telling him to get on with it and actually do something.
Sato with the active half guard here but Piechocka passes nicely into side control.
Sato tries to get back to half guard but can't.
That's two minutes gone in the round.
There's not a lot going on here and the crowd are letting the fighters know they're not willing to tolerate a lack of action.
Piechocka tries to stand but Sato is controlling his head.
Piechocka wants to control but Sato is keeping him busy.
Piechocka is really struggling to control Sato but he's trying to hold on to the position.
Sato is positioning himself to get back to half guard.
Sato tries to control but Piechocka manages to take his back.
That's three minutes gone in the round.
A lull in the action here.
Sato tries to break free.
Sato looking very determined here, making life difficult for Piechocka.
Sato rolls, trying to escape but Piechocka keeps control of the position.
Will Piechocka go for the finish here or will he try and keep control of the position?
That's four minutes gone in the round.
Sato rolls, trying to escape but Piechocka keeps control of the position.
Sato rolls and manages to get back to half guard. Nicely done.
Sato is staying active underneath Piechocka, who seems content to just control the action from this position.
Sato wants to get back to full guard.
Sato trying to hold on to Piechocka's head to control him but Piechocka postures up.
Sato tries to kick Piechocka off but Piechocka keeps his base steady and stays in half guard.
Boooooooooooooooooooo!!! God, this has been a terrible round. Come on you two, sort yourselves out!
Piechocka looks over to his corner - he wants some instructions but his corner are not responding.
Sato is trying to control but can't.
It looks like the ref is thinking about a standup.
And thats the end of the round the fighters go back to their corners.
Joanna Piechocka clearly takes that round.
The fighters get back to their feet, the hooter sounds and we're back to the action!

Sato wants to clinch up but Piechocka keeps it at a distance.
A really sloppy takedown attempt there from Sato.
Piechocka connects with a body shot that sends Sato's belly button to the back.
Sato shoots for a double leg takedown but Piechocka sprawls well. He's pushed Sato's face into the mat and manages to get back to his feet relatively easily.
Sato shoots for a takedown but Piechocka saw that one coming a mile off and avoided it easily.
Piechocka throws a big counter combination but Sato scrambles out of danger and avoids any damage.
Joanna Piechocka has stuffed three takedown attempts in the round now. That's going to take a lot out of Hideo Sato.
Sato looks to clinch
and Piechocka counters with a straight punch to the midsection.
We've had a slow start to the round here - hopefully the action picks up.
Sato is looking to clinch.
Piechocka seem to be loading up, looking for a big counter.
Ooooh, nice body kick lands from Piechocka. Sato shrugs it off though.
Sato gets his takedown attempt stuffed easily
and Sato takes a counter punch right on the button for his troubles.
Sato is absolutely dripping with sweat - he looks exhausted.
That's one minute gone in the round.
Piechocka misses with the combination.
Sato tries to grapple but his opponent circles
and Piechocka counters with a lovely shot to the body.
A telegraphed takedown attempt from Sato is defended easily by Piechocka.
Piechocka appears to be looking for a big counter.
Sato misses with a takedown
and Piechocka counters with a one-two to the body.
Sato showing good head movement there, avoiding the strikes from Piechocka.
That's two minutes gone in the round.
Sato has his takedown stuffed
and Piechocka counters with a nice uppercut.
Piechocka cracks Sato with an open hand slap.
Piechocka swings and misses with a hook to the body.
Sato fails in his attempt to clinch.
Piechocka throws a big counter combination but Sato scrambles out of danger and avoids any damage.
Sato doesn't manage to clinch there - Piechocka circles away.
It looked like Piechocka was looking amped, ready to throw a big counter but didn't commit.
Joanna Piechocka is winning the standup battle so far.
Sato misses the body punch
and Piechocka counters with a quick right hand to the jaw.
Sato tries to close the distance and clinch up against the ropes but Piechocka paws at him with a jab and circles away.
As Sato looks to move away, Piechocka throws a big counter combo bu Sato just gets out of the way.
Nice jab there from Piechocka.
The crowd are loving this. Great action here.
No joy there for Piechocka, who threw a few shots but didn't land.
That's three minutes gone in the round.
Sato misses with a takedown attempt
letting Piechocka counter with a right hand.
Sato misses with a takedown attempt
and Piechocka counters with a nice jab to the body that keeps Sato thinking.
Piechocka feints a jab promting Sato to slip. Piechocka then demonstrates his capabilities by jabbing again. Sato slips again and ducks right into an uppercut.
Joanna Piechocka is looking to throw some combinations by the looks of things.
Sato doesn't succeed with the takedown
and Piechocka counters with a quick right hand to the jaw.
Sato tries to close the distance and clinch up but Piechocka swats him away and circles back towards the center.
Sato tries for a takedown but Piechocka sees it coming a mile off and avoids it easily.
Piechocka throws a body shot but no joy.
Sato closes the distance and clinches.
Piechocka breaks from the clinch.
Piechocka is using his reach advantage well here, landing the more effective single shots from range.
Piechocka throws a combination but it was largely blocked by Sato.
That's four minutes gone in the round.
Piechocka displays good takedown defense there as he swats away a double leg from Sato.
Piechocka throws a big counter combination but Sato scrambles out of danger and avoids any damage.
Piechocka throws a body punch but Sato moves out of range.
And Sato tries to counter it with a takedown but Piechocka pushes his down on his head and steps out.
Sato is looking to clinch but Piechocka is avoiding it.
Piechocka throws a series of punches but Sato moves out of range.
Wooooo! Give it up for these two warriors! They are putting on a show!
Sato is the aggressor but that punch slipped nicely by Piechocka.
Piechocka throws a big counter combination but Sato scrambles out of danger and avoids any damage.
Sato is looking to clinch.
It looked like Piechocka was trying to counter with a body shot coming off that last attack from Sato.
Sato throws a hard body shot but it just misses.
Jab, jab by Piechocka - just one landing.
Sato is really struggling to land any decent head shots against his taller opponent.
Sato misses with a takedown
and Piechocka counters with a series of strikes. Sato will be more careful next time no doubt.
And thats the end of the round the fighters go back to their corners.
Joanna Piechocka had his way with Hideo Sato in that round.
Well, the break between rounds is over. Let's get back to the scrappin! This is the final round!

Sato tries to clinch there but Piechocka circles away.
Piechocka throws a big counter combination but Sato scrambles out of danger and avoids any damage.
Sato ducks down and throws a hook to the body but Piechocka moves away.
Piechocka looks to land a combination. Sato sees it coming but can only parry a couple of the shots.
Piechocka defends well against a solid takedown attempt from Sato.
Sato shoots in for a takedown - he's clinched up with Piechocka but Piechocka pushes him off and we're back to square one.
A counter left hand to the body from Piechocka misses its target.
Sato slips a jab and a cross from Piechocka.
Sato has a pretty nasty looking mouse under his right eye.
Sato shoots and misses
and Piechocka connects with a straight left hand counter down the middle.
Joanna Piechocka has stuffed three takedown attempts in the round now. That's going to take a lot out of Hideo Sato.
We've had a slow start to the round here - hopefully the action picks up.
Sato with a poor takedown
and Piechocka counters with a lovely straight right hand!
Piechocka keeps the fight standing with a nice sprawl.
Sato is wobbling all over the place through exhaustion. Will he make it to the final bell?
That's one minute gone in the round.
Sato tries to shoot in for a takedown. He's got hold of a leg but Piechocka swivels and escapes.
Sato throws an ugly left hook that misses
and Piechocka counters with a two punch combo.
Piechocka slaps away a takedown attempt from Sato, before circling back to the center of the mat.
Piechocka lands a jab.
Piechocka fakes and then throws a beautiful body shot. Sato looks a bit winded and takes a step backwards to take a breath.
Sato shoots in but Piechocka avoids the takedown attempt easily.
A low kick from Sato misses
and Piechocka counters with a series of strikes. Sato will be more careful next time no doubt.
That's two minutes gone in the round.
Sato tries to clinch
and Sato takes a counter punch right on the button for his troubles.
Sato shoots in but Piechocka avoids the takedown attempt easily.
Piechocka is looking for a counter combo.
Sato fails with the takedown
and Piechocka counters with a nice body shot.
The fans in attendance giving it up for the two fighters, who have really let it all hang out in the last minute or so!
Sato on the wrong end of a decent looking cross there.
Sato shoots in looking for a double leg takedown. Piechocka defends it nicely.
Piechocka appears to be looking for a big counter.
Sato fails with the takedown
and Piechocka counters with a right hand to the body.
That's three minutes gone in the round.
Danga de danga de dang - Piechocka scores with a four punch combination!
Sato chopped to the floor by a nice leg kick but he springs right back up before Piechocka can pounce on him.
Sato shoots and misses
and Piechocka counters with a kick to the head that grazes his opponent. Sato is lucky that one didn't land flush.
Sato has his takedown stuffed
and Piechocka counters with a three punch combination, finished off with a leg kick. Nice work.
Sato takes a shot right to the bread basket.
Sato on the wrong end of a kick to the body.
Sato shoots in and drives through. Piechocka sprawls well.
Sato has his takedown stuffed
and Piechocka counters with a good right hand that lands right on the jaw.
Joanna Piechocka is fighting for a decision here - he's started to take the cautious approach.
That's four minutes gone in the round.
The fans in attendance giving it up for the two fighters, who have really let it all hang out in the last minute or so!
Sato takes a kick to the side of the head.
Sloppy strikes from Piechocka. Those never looked like landing.
Sato fails with the takedown
and Sato takes a counter punch right on the button for his troubles.
Piechocka stuffs the takedown attempt from Sato. Sato gets slowly back to his feet.
Piechocka throws a jab to the body, straight down the pipe. Boom. That sent Sato stumbling backwards but he manages to regain his composure quickly.
Hideo Sato has stepped it up - he knows he needs a finish here!
Sato throws a series of punches but Piechocka moves out of range.
Sato closes the distance looking to clinch
and Piechocka counters with a lovely shot to the body.
And that's the end of the fight!
Joanna Piechocka showed his dominance in that final round.
Well I reckon that's a shut out for Piechocka, winning every round. Will the judges agree? They are the ones who matter, even if they are often depressingly incompetent. Over to the ring announcer for the scorecards.
Ladies and gentlemen, after 5 rounds of action, we go to the scorecards for a decision.
Judge Seu Braga scores the fight 50:43
Judge Luis Engracia scores the fight 50:43
Judge Felipe Paraventi scores the fight 50:43
In favor of your winner, by unanimous decision... Joanna Piechocka!
Joanna Piechocka retains his bantamweight title!
After winning the bout, Joanna Piechocka thanked all his fans and promised he'd do even better in his next fight. The crowd seemed to love his humility.
Hideo Sato spoke after the fight, saying 'I apologize to my family and fans for letting you down this evening. But like a true warrior I look at this loss as a way to get better and drive forwards..... to victory!'.
|
|
|
|
|
|
|
|
|
|
|
|
|
|
|
|
|
|
|
|
|
|
|
| S |
C
A |
G |
S |
C
B |
G |
|
S |
C |
G |
|
energy
A | B |
|
hype
A | B |
|
pop
A | B |
|
mgr
A | B |
|
FIGHT
RATING
53% |
|
|
|
|
|
|

