|
|
PBP Commentary |
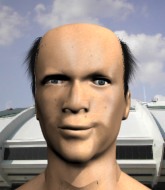
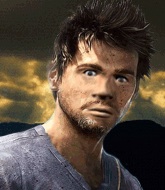
Coming up we have a welterweight MMA rules bout between Bjoen Lott (ranked 0 p4p, 0 weight class) and Lyle Humphreys (ranked 0 p4p, 0 weight class). We have two fighters making their debuts here, so let's see who comes out of this one with their first professional victory.
 |
|
 |
| 172 cm
18
177 lbs
0 - 0 - 0 |
|
182 cm
16
173 lbs
0 - 0 - 0 |
Decent wrestler
Brawler
Cardio machine |
|
Good wrestler
Brawler
Determined |
|
| |
|
Ladies and gentlemen. This fight is 3 rounds, in the welterweight division.
Introducing the fighter to my left, fighting out of the red corner.
With a record of
0 - 0 - 0, fighting out of Amsterdam, Bjoen Lott!
And introducing the fighter to my right, fighting out of the blue corner.
With a record of
0 - 0 - 0, fighting out of Amsterdam, Lyle Humphreys!
The judges for this bout are Saam Ante, Patrick Alders and Daniel Blasius.

The bell rings for round one and we are underway!
Lott shoots in for a double leg but Humphreys sprawls well. That's going to sap some energy.

Humphreys gets in close and instigates a clinch.
Lott tries to break free but Humphreys pushes him back against the cage.
Humphreys goes for a body shot but it's blocked.
Humphreys tries a shoulder strike but it doesn't do any damage.
Lott is trying to maintain a safe position but Humphreys gets an underhook and turns Lott into the cage.
Lott throws a punch but it's blocked by Humphreys.
Humphreys with an attempt at a knee that misses.
Lott misses with a knee strike.
Humphreys tries to work over Lott's body with a swooping hook but it only glances the target.
Humphreys swings wildly with an uppercut but Lott uses good head movement to avoid it.
Lott has hold of a leg and is looking for a trip takedown. Humphreys avoids it nicely though and we remain in the clinch.
We've had a slow start to the round here - hopefully the action picks up.
Humphreys throws a knee to the head but misses.
Humphreys tries a knee to the head but Lott blocks it.
Lott could do with losing a few pounds - he looks very soft around the mid section, to put it politely.
Humphreys missing with knees to the body.
A head punch blocked on the inside by Lott.

Humphreys has moved round to his opponent's back and is looking for a suplex! Oh snap! He's tossed Lott clear over his head and slammed him to the mat!

That's one minute gone in the round.
Lott can't escape the position.
Lott is trying to get back to his feet but Humphreys has full control of the position and if anything, Lott has just worked his way into a worse spot.
Humphreys throwing wild punches that miss their target.
Lott trying to control the hands but Humphreys won't let him.
Humphreys loading up with punches from the back mount - how long can Lott hold on?
Humphreys doesn't have the hooks in and Lott manages to turn into his guard.
Lott trying to stand up but can't free himself from Humphreys's guard.
Lott is frustrating his opponent with some stalling tactics from top position.

That's two minutes gone in the round.

That's three minutes gone in the round.

Lott thinks about going for a leg but decides against it, in order to maintain the position.
Humphreys is trying to control the position from the bottom.
Lott wants to control from the top but Humphreys keeps moving.
Lott showing good wrestling skills to control the position.
The ref warns both fighters not to hold the cage as they work up against the meshing.

That's four minutes gone in the round.
Well. There's a bit of a lull in the action here and the crowd are starting to get restless.
Humphreys wants to sweep but no luck.
It looks like the ref is thinking about a standup.
Lott is just sitting in guard, looking to avoid any submissions.

The ref stands the fighters back up due to a lack of activity.
Lott fails to land with a series of punches.
A bone on bone clash there as Lott blocks the leg kick.
Humphreys misses with a leg kick
and Lott counters with a quick right hand to the jaw.
Lott misses with a takedown attempt - Humphreys sprawls well and throws a nice strike on the way out which just misses.
That's three failed takedown attempts in the round for Bjoen Lott. That's going to take a lot out of him.
The crowd thankful this round is nearly over.
Humphreys will have to do better than that with his takedown attempts.
Humphreys tries to clinch but is not successful on this occasion.
Lott avoids the body shot from Humphreys.
And thats the end of the round the fighters go back to their corners.
Lyle Humphreys dominated that round.
The minute break is over - no more time for sponges and pep talks - back to the action!


Lott shoots in for a takedown and gets it. Let's see what he's got on the mat.
Humphreys avoiding any damage from the ground and pound.
Lott forces his way into half guard.

Lott stands up from half guard... He's had enough of that ground malarky for the time being.
Humphreys fakes high and swings low for a body shot but Lott manages to avoid it.
Lott closes the distance and gets a double leg, slamming Humphreys to the mat! Humphreys manages to get full guard.
Lott preventing the sweep.
We've had a slow start to the round here - hopefully the action picks up.
Lott keeps in close for a moment and lands a decent shot to the side of Humphreys's head.
Lott scores with a decent looking elbow strike.
Lott lands a couple of digs.
Lott controls from within his opponent's guard.
That's one minute gone in the round.
Lott advances position into side control!
Humphreys is looking to reverse the position.
We get told so often about how wrestlers don't like to be on their backs. Let's see if Humphreys can do anything to dispel that myth.
Lott is moving around in side control but his primary objective seems to be to maintain the position.
Lott tries to advance to mount but can't.
Lott stands up and we're back to a striking position.
That's two minutes gone in the round.
The crowd are getting on the fighters' backs, as the pace has dropped off in the last minute or so.
Humphreys avoids the head kick by Lott.
Horrible takedown attempt by Lott or perhaps it was just good defense by Humphreys, which made it look bad.
Humphreys throws an off balance right hand
and Lott cracks him with a counter punch right on the button.
Lott drives through with a really nice takedown into side control.
Lott stands up and beckons Humphreys to his feet.
Lott fails with a takedown attempt.
Humphreys displays good takedown defense there as he swats away a double leg from Lott.
That's three failed takedown attempts in the round for Bjoen Lott. That's going to take a lot out of him.
Lott looking to shoot here. He's gone for it and he's landed a takedown into side control! Oh, that's bad for Humphreys!
Lott is really dominating this fight. Is there anything that Humphreys can do to turn this around?
That's three minutes gone in the round.
Check out the look on Lott's face as he threw that strike - that's one determined fighter!
Lott working away.
Humphreys really doesn't want to stay on the ground with Lott. If he can't get it back to his feet, it's only a matter of time before he'll be tapping out.
Lott controls the position.
Humphreys takes a big shot right to the temple there but he's taken it well.
Lott tries for a kimura but Humphreys is defending well.
Lott is looking for a kimura. He might have it! No, Humphreys has escaped the position, nice work there.
That's four minutes gone in the round.
Humphreys is looking for a sweep.
Lott advances nicely into full mount.
Lott scoring with strikes but Humphreys is staying in there.
Lott tucks in and makes sure he doesn't lose the dominant position.
Lott looking to secure an arm triangle but Humphreys defends it well.
The fighters are pressed up against the cage, both looking to find a bit of space to work.
We've seen a great period of action over the last minute or so - credit to both fighters for going all out!
Lott is going oldschool here, as he tries to force Humphreys to tap using a forearm choke. This isn't 1993 though, so Humphreys shrugs it off.
And thats the end of the round the fighters go back to their corners.
Bjoen Lott dominated that second round.
The corners get their ten second warning. Both fighters stand from their stools and stare eachother down, ready to get back to the action. This is the final round!

Lott closes the distance and clinches up, looking for a takedown. He shifts his weight and gets a nice trip into half guard.
Humphreys is trying to get back to full guard.
Lott scores with a couple of good hammerfists.
Lott looks to score some points with some ground and pound.
Humphreys trying to control here.
Lott tries to pass to full mount but Humphreys defends it.
We've had a slow start to the round here - hopefully the action picks up.
Lott passes the guard and advances to mount!
That's one minute gone in the round.
Humphreys is looking to get to half guard.
Lott is in full mount, looking to secure a guillotine but Humphreys is surviving well by controlling Lott's body position as best he can.
Lott postures up and cracks his opponent a couple of times before moving back into close ground control. Humphreys looks a forlorn figure.
Lott stands up from the dominant position. He obviously fancies his chances standing.
Lott darts in and lands a nice takedown into half guard.
Lott seems like he's working for an arm triangle here. He's freed his trapped foot and he's rotating nicely. Humphreys is in big trouble! He's tapping out! This one is aaaaaaaaaaaall over!
Ladies and gentlemen, after 2:59 of round 3, we have a winner by way of Submission (Arm Triangle). Bjoen Lott!
|
|
|
|
|
|
|
|
|
|
|
|
|
|
|
|
|
|
|
|
|
|
|
| S |
C
A |
G |
S |
C
B |
G |
|
S |
C |
G |
|
energy
A | B |
|
hype
A | B |
|
pop
A | B |
|
mgr
A | B |
|
FIGHT
RATING
48% |
|
|
|
|
|
|

