|
|
PBP Commentary |
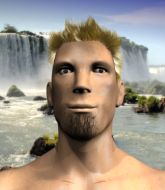
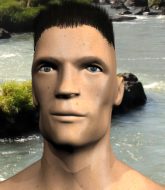
Coming up we have a welterweight MMA rules bout between Connor McGuinness (ranked 0 p4p, 0 weight class) and Sterling Archer (ranked 0 p4p, 0 weight class). McGuinness comes to the cage accompanied by Foggy Dew / Hypnotize Remix . These two fighters really are very evenly matched on the feet - it will be fascinating to see who can assert themselves in that aspect of the fight.
 |
|
 |
| 183 cm
26
185 lbs
12 - 6 - 0 |
|
185 cm
36
181 lbs
10 - 4 - 0 |
Good wrestling
World class boxer
Granite chin |
|
Good wrestler
Great elbows
Good gas tank |
|
| |
|
Ladies and gentlemen. This fight is 3 rounds, in the welterweight division.
Introducing the fighter to my left, fighting out of the red corner.
With a record of
12 - 6 - 0, fighting out of Los Angeles, Connor McGuinness!
And introducing the fighter to my right, fighting out of the blue corner.
With a record of
10 - 4 - 0, fighting out of Los Angeles, Sterling Archer!
The judges for this bout are Jack Bonds, Don Winkell and .

The bell rings for round one and we are underway!

Archer shoots in and scores a nice double leg takedown into half guard.
McGuinness trying to control here.

McGuinness looking for submissions off his back.
McGuinness is refusing to be controlled, as Archer sits in half guard.
Archer wants to pass the guard but McGuinness is defending well.
We've had a slow start to the round here - hopefully the action picks up.
McGuinness is looking to sinch up a guillotine here but Archer pulls his head out easily.

Archer is working for submissions here but there's nothing on.

That's one minute gone in the round.
Archer sitting and controlling from the half guard.
Archer is pressing down on McGuinness's thigh, looking to free his foot. McGuinness is holding on for now.
McGuinness wants to improve his position but Archer is controlling well.
McGuinness is looking to sinch up a guillotine here but Archer pulls his head out easily.
McGuinness trying to hold on to Archer's head to control him but Archer postures up.
Archer scores with a couple of good hammerfists.

That's two minutes gone in the round.
There's not a lot going on here and the crowd are letting the fighters know they're not willing to tolerate a lack of action.
Archer works his way into side control.
Archer lands a knee to the body and follows it up with some ground and pound to the head. That will wear McGuinness down.
McGuinness is looking for a sweep.
McGuinness can't do much from the bottom here.
McGuinness tries to bench press Archer off him but Archer keeps the position.
The fighters are pressed up against the cage, both looking to find a bit of space to work.
McGuinness struggling a bit here.
Archer lands some shots froms side control.
Archer working away.
McGuinness is looking to regain half guard here but Archer keeps moving and retains side control.
Archer cracks McGuinness with a big elbow.
Archer has the superior BJJ but he's also working some ground strikes into his gameplan.

That's three minutes gone in the round.
Archer wants to work for a kimura but he's foiled early by McGuinness, who protects the arm well.
McGuinness tries to get back to half guard but can't.
McGuinness is trying to control Archer's posture but Archer avoids it.
Archer is chipping away with strikes.
McGuinness is positioning himself to get back to half guard.
You can see the frustration on McGuinness's face, being in this tough position on the bottom.

That's four minutes gone in the round.
The crowd are getting on the fighters' backs, as the pace has dropped off in the last minute or so.
McGuinness tries to bench press Archer off him but Archer keeps the position.
Archer is trying to land an Americana. He has the arm isolated but McGuinness is keeping cool and he's avoided the danger for now.
Archer thinks about going for a far side armbar but bails out and retains the dominant position instead.
Archer landing with strikes to the head and body from side control.
Boooooooooooooooooooo!!! God, this has been a terrible round. Come on you two, sort yourselves out!
McGuinness is trying to control Archer's posture but Archer avoids it.
McGuinness is positioning himself to get back to half guard.
And thats the end of the round the fighters go back to their corners.
Sterling Archer dominated that round.
That's the end of the interval. I'm sure that seemed a lot quicker than a minute for our two fighters! Back to the action.

Archer misses with a body shot. Nice footwork from McGuinness.
Archer throws a jab but it's blocked by McGuinness.
A combination from McGuinness does no damage.
Archer tries to land with a swinging hook to the body but McGuinness was well out of range. Poor timing from Archer.
Archer shoots in looking for a takedown but McGuinness manages to keep the fight standing, pushing Archer's face into the canvas for good measure before circling away.
Archer slips a straight right by McGuinness.
McGuinness missing with a left hand there. Archer was out of range so wasted energy throwing that one.
This fight brought to you by 5M nutrition - it's mmmmm tasty. Nice jab by McGuinness.

It looks like Sterling Archer has been cut.
Archer shoots in for a takedown from distance. He catches McGuinness napping and manages to drive through into side control!
McGuinness can't do much from the bottom here.
McGuinness manages to get one leg in to regain half guard.
Archer landing with strikes to the body and head, softening up his opponent.
McGuinness blocking the ground and pound attempt from Archer.
McGuinness looking for submissions off his back.
The crowd are loving this. Great action here.
McGuinness trying to control from the bottom.
Sterling Archer has got the better of the ground game so far.
That's one minute gone in the round.
McGuinness looks like he's trying to stand up.
Ground and pound from Archer.
Archer is thinking about going for an arm triangle but he can't free his leg.
Archer looking to pass the half guard. Not this time.
Archer lands a big shot. The thud that echoes around the arena is like music to the fans' ears.
McGuinness moves his hips nicely and gets into full guard.
That's two minutes gone in the round.
Neither fighter has done anything of merit for a good minute or two here and the crowd are not happy about it.
McGuinness working for submissions but it's allowed Archer to get to half guard.
McGuinness looking to work for a kimura from the bottom.
Archer lands strikes from half guard.
Archer performing his best blanket impression for a moment.
Archer looking for a kimura but he'll have to free his other leg if he wants to finish that. Perhaps he's just using it as a distraction technique.
McGuinness wants to control but Archer is keeping busy.
That's three minutes gone in the round.
Archer slips a nice elbow through McGuinness's hands, connecting with McGuinness's forehead.
The ref warns both fighters not to hold the cage as they work up against the meshing.
Archer trying to control the action but McGuinness is working from the bottom.
McGuinness is looking to sinch up a guillotine here but Archer pulls his head out easily.
Archer stalling away here and it's allowed McGuinness to slip out his trapped foot and regain full guard.
McGuinness looking for a sweep. Not yet McGuinness, not yet.
That's four minutes gone in the round.
A few boos can be heard. I'm sure they will multiply if the fighters don't pick up the pace.
Archer wants to control from the top but McGuinness keeps moving.
Archer content to stall in guard here.
McGuinness had isolated an arm as going for a kimura. Archer defends it easily.
Archer postures up to throw the ground and pound strikes but they don't connect.
Boooooooooooooooooooo!!! God, this has been a terrible round. Come on you two, sort yourselves out!
McGuinness working from the bottom, still in full guard. He's managed to get a loose triangle. Archer doesn't seem to be doing much to defend here, obviously he feels comfortable in the position. Archer manages to throw the legs off his shoulder and he's back into guard - no problem.
McGuinness keeping moving, preventing Archer from controlling successfully.
And thats the end of the round the fighters go back to their corners.
Sterling Archer showed his class in that round. I'd imagine he'll take it on all the scorecards.
The cut man is working on Sterling Archer's cut.
That's the end of the round. The referee orders the cornermen out of the cage so we can get back down to business. This is the final round!

That kick from Archer tenderised McGuinness's leg. McGuinness is trying to keep his angry face on.
Archer uses decent footwork to sidestep a right hand from McGuinness.
McGuinness throws out a loose jab but Archer uses good head movement to avoid it.
Archer has been the more effective fighter overall so far.
Archer throws a hook to the body but it doesn't connect.
McGuinness throws a hook but Archer avoids it easily.
A looping hook to the body misses from Archer. McGuinness does a little dance to reset his feet.
Archer uses good head movement to avoid the hook from McGuinness.
Some wild striking there from McGuinness.
Archer dances in quickly and lands a nice inside leg kick on McGuinness. That did some damage!
We've had a slow start to the round here - hopefully the action picks up.
Archer defending well as McGuinness loads up on a big left hand.
McGuinness throws a combination but it was largely blocked by Archer.
Archer tries for a takedown but McGuinness sees it coming a mile off and avoids it easily.
Archer avoids the body shot from McGuinness.
Archer fakes high and shoots in for a takedown but McGuinness avoids it really well and circles away.
That's one minute gone in the round.
Archer cracks McGuinness with a good jab.
Connor McGuinness seems to be the more aggressive standup fighter in this bout.
McGuinness falls off balance throwing a combination
and Archer counters with a shot to the ribs. That looked like it hurt.
A swing and a miss from McGuinness.
McGuinness darts in and out, connecting with a jab.
Connor McGuinness is winning the standup battle so far.
Archer swings and misses with a hook to the body.
McGuinness throwing a counter right hand but Archer manages to avoid it.
McGuinness is really head hunting here, hardly looking to strike to the body at all.
McGuinness scores with a hook to the body. Archer takes a step back and tries to catch his breath.
Archer shoots in for a takedown but McGuinness shows good takedown defense.
Connor McGuinness has stuffed three takedown attempts in the round now. That's going to take a lot out of Sterling Archer.
Archer displays some good footwork, moving neatly out of range as McGuinness throws out the jab.
Archer closes the distance, clinches up and gets a nice trip takedown into side control. Very smooth.
McGuinness is looking to reverse the position.
The fans in attendance giving it up for the two fighters, who have really let it all hang out in the last minute or so!
McGuinness is working hard here to advance position.
That's two minutes gone in the round.
Archer in side control lands a decent elbow.
McGuinness struggling a bit here.
Archer is putting a hurting on McGuinness here, landing some big shots from side control.
McGuinness is trying to get back to half guard.
You can see the frustration on McGuinness's face, being in this tough position on the bottom.
Archer lands some shots froms side control.
That's three minutes gone in the round.
Archer is putting a hurting on McGuinness here, landing some big shots from side control.
McGuinness gets back to half guard.
McGuinness wants to get back to full guard.
Archer lands a big shot. The thud that echoes around the arena is like music to the fans' ears.
Archer is looking to advance position but McGuinness won't allow it.
McGuinness is refusing to be controlled, as Archer sits in half guard.
Archer is trying to work for a kimura. This could be trouble! No, McGuinness has managed to free his arm - good work.
McGuinness wants to control but Archer is keeping busy and won't allow it.
That's four minutes gone in the round.
Archer trying to control the action but McGuinness is working from the bottom.
McGuinness is trying to get back to full guard.
Archer tries to pass to full mount but McGuinness defends it.
Archer working the head and body with strikes.
Sterling Archer is fighting for a decision - hopefully he's judged it right and he's actually winning the fight.
McGuinness is looking to sinch up a guillotine here but Archer pulls his head out easily.
Archer is thinking about going for an arm triangle but he can't free his leg.
Connor McGuinness has stepped it up - he knows he needs a finish here!
Archer scoring with strikes to the body and head.
And that's the end of the fight!
Sterling Archer comfortably won the final round on my scorecard.
I've got Archer winning every round here. Surely the decision will go his way and he'll pick up a well deserved decision victory. Over to the ring announcer for the scorecards.
Ladies and gentlemen, after 3 rounds of action, we go to the scorecards for a decision.
Judge Jack Bonds scores the fight 27:30
Judge Don Winkell scores the fight 27:30
Judge Percy O'Donnell scores the fight 27:30
In favor of your winner, by unanimous decision... Sterling Archer!
During a confident post fight interview, Sterling Archer thanked all his fans. He seemed very genuine when describing how motivated his fans keep him.
|
|
|
|
|
|
|
|
|
|
|
|
|
|
|
|
|
|
|
|
|
|
|
| S |
C
A |
G |
S |
C
B |
G |
|
S |
C |
G |
|
energy
A | B |
|
hype
A | B |
|
pop
A | B |
|
mgr
A | B |
|
FIGHT
RATING
30% |
|
|
|
|
|
|
