|
|
PBP Commentary |
Coming up we have a middleweight MMA rules bout between James Simeon (ranked 0 p4p, 0 weight class) and Bill Bungy (ranked 0 p4p, 0 weight class). Both these guys have really solid chins. Will we see a standup war or will they both decide that a knockout is unlikely and try to win the fight elsewhere?
 |
|
 |
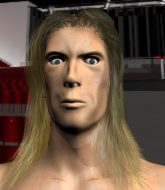
| 185 cm
19
184 lbs
1 - 2 - 0 |
|
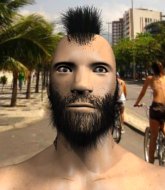
185 cm
26
185 lbs
1 - 3 - 0 |
BJJ Blue Belt
Counter fighter
Good chin |
|
BJJ Blue Belt
Solid Muay Thai
Granite chin |
|
| |
|
Ladies and gentlemen. This fight is 3 rounds, in the middleweight division.
Introducing the fighter to my left, fighting out of the red corner.
With a record of
1 - 2 - 0, fighting out of Sydney, James Simeon!
And introducing the fighter to my right, fighting out of the blue corner.
With a record of
1 - 3 - 0, fighting out of Sydney, Bill Bungy!
The judges for this bout are Hugh Johnson, Topper Green and Ben Hemmingworth.

The bell rings for round one and we are underway!
Simeon moves in looking to clinch but Bungy pushes him off.
Bungy is loading up here, looking for a big counter of his own.
Simeon darts in trying to clinch
and Bungy counters with a series of strikes. Simeon will be more careful next time no doubt.
Bungy lands a jab-cross combination.
Bungy throws a head kick that misses.
Bungy looks winded!
Bungy looks to land a combination. Simeon sees it coming but can only parry a couple of the shots.
Bungy stuffs the takedown.
Simeon lands a two punch combo.
Wooooo! Give it up for these two warriors! They are putting on a show!
Simeon tries to close the distance and clinch up but Bungy swats him away and circles back towards the center.
Bungy pulls out of a head kick attempt.
Simeon misses with the combination.

That's one minute gone in the round.
Simeon tries to clinch up.
Bungy throws a counter combo.
Simeon tries to close the distance and clinch up but Bungy swats him away and circles back towards the center.

Simeon moves into the clinch.
Both fighters working to control the clinch.
Bungy misses with a body punch.
Simeon tries to pull guard but Bungy won't allow it.
Simeon tries to pull guard but Bungy holds him up against the cage and eventually Simeon drops back down to his feet.
That's three failed takedown attempts in the round for James Simeon. That's going to take a lot out of him.
Simeon is looking to take this one to the mat.

That's two minutes gone in the round.
Neither fighter has done anything of merit for a good minute or two here and the crowd are not happy about it.

Simeon manages to break the clinch.
Simeon tries to clinch up against the cage, rushing in to close the distance. Bungy manages to break the clinch and circles back to the middle of the mat.
Simeon closes the distance and lands a one-two.
Bungy looks to score with a combo but nothing lands.
Simeon keeps Bungy at a distance using the push kick.

Simeon throws a loose over hand right and dives in with a double leg takedown. Bungy tries to sprawl but it's too late and the fighters hit the mat. Simeon is in Bungy's guard.
Simeon trying to control but Bungy is working from the bottom.

Simeon decides he's had enough of playing guard and decides to stand. Come on Bungy, up you get!

That's three minutes gone in the round.
Simeon throws a right hand that Bungy ducks under and follows up with a left that Bungy also avoids with ease.
Simeon wants to clinch.
Bungy pulls out of a head kick attempt.
Bungy throws a head kick that misses.
Simeon lands with a hook. Bungy tried to avoid it but it clipped the top of his head.
Bungy slaps away a takedown attempt from Simeon, before circling back to the center of the mat.

That's four minutes gone in the round.
Bungy circles away from the clinch attempt
and Bungy counters with a kick to the head that grazes his opponent. Simeon is lucky that one didn't land flush.
Simeon tries to clinch up against the cage, rushing in to close the distance. Bungy manages to break the clinch and circles back to the middle of the mat.
Simeon shoots in looking for a double leg takedown. Bungy defends it nicely.
Bungy gets caught flat footed, as Simeon shoots in with a quick takedown into guard.
And thats the end of the round the fighters go back to their corners.
That was a close round but I would say that James Simeon will probably get the nod.
The fighters' corners scream their final instructions, as the referee calls time. Here we go, back to the action!

Bungy fails to land with a series of punches.
Simeon takes the fight into the clinch.
With the fighters up against the cage, Bungy throws an elbow but misses.
Simeon manages to break the clinch.
Simeon fails with an attempt to clinch.
Simeon drives through with a takedown into Bungy's guard. Let's see what he can do from the top position.
We've had a slow start to the round here - hopefully the action picks up.
Simeon loading up with the ground and pound but he's missing more than he's landing in this flurry.
Bungy is breathing heavily.
Simeon sitting in guard here, content to control.
Simeon missing there with some ground and pound from the guard.
Simeon has to be careful here, sitting in the guard of a superior BJJ player.
That's one minute gone in the round.
Simeon trying to control but Bungy is working from the bottom.
Simeon working in close now, lands a nice elbow to the side of Bungy's head.
Simeon is pushing down on Bungy's leg trying to pass to half guard. Bungy is fighting to maintain full guard but Simeon has managed to sneak the leg through.
Simeon with a momentary lay and pray from half guard.
Simeon is trying to control the action in half guard but Bungy is working away on the bottom, looking perhaps to get back to full guard.
Simeon looks over to his corner - he wants some instructions but his corner are not responding.
We may be looking at a referee standup if the pace doesn't pick up soon.
That's two minutes gone in the round.
A few boos can be heard. I'm sure they will multiply if the fighters don't pick up the pace.
Simeon wants to take a breather but Bungy is having none of it.

The referee has stepped in and called for a break in the action. We'll restart on the feet.
Simeon connects with a leg kick. Bungy looked like he was expecting something else and didn't defend it.
Simeon shoots in with a lovely double leg takedown. Bungy manages to land in full guard to minimise the damage.
Simeon working some ground and pound from guard but it's not doing any damage.
Simeon with a nice head shot there.
Bungy is working an open guard so Simeon takes the opportunity to get back to his feet.
Simeon takes the fight into the clinch.
That's three minutes gone in the round.
Simeon breaks the clinch and we return to the middle of the mat.
Simeon fails to land with the punch combination there - jab, cross, hook, miss, miss, miss.
Simeon fails with a takedown attempt.
No luck with that takedown attempt from Simeon.
Simeon will have to do better than that with his takedown attempts.
That's three failed takedown attempts in the round for James Simeon. That's going to take a lot out of him.
Simeon shoots in but no luck this time.
That's four minutes gone in the round.
Bungy throws a one two combo.
Simeon doesn't manage to clinch there - Bungy circles away.
Simeon manages to get an easy takedown there - catching Bungy on his heels. He'll look to pass Bungy's guard now, I'm sure.
Simeon wants to control from the top but Bungy keeps moving.
Simeon is really dominating this fight. Is there anything that Bungy can do to turn this around?
Simeon sneaks a leg through and gets to half guard. That was like a knife through butter how easily he passed Bungy's guard.
Simeon wants to pass to mount but Bungy is defending the position.
The crowd thankful this round is nearly over.
Simeon prevents Bungy from standing back up.
And thats the end of the round the fighters go back to their corners.
James Simeon dominated that second round.
The fighters' corners scream their final instructions, as the referee calls time. Here we go, back to the action! And we move into the final round!

Simeon shoots in for a double leg but Bungy sprawls well. That's going to sap some energy.
Bungy lets it all go there with a big combo counter but none of the punches connected.
Simeon bobs and weaves into range and then changes levels and scores with a nice takedown into side control.
Bungy seems a little lost for a moment, as Simeon dominates the positioning.
Simeon stands up and beckons Bungy to his feet.
Simeon tries to close the distance and clinch up but Bungy swats him away and circles back towards the center.
Bungy gets caught on his heels momentarily as he allows Simeon to score an easy takedown into full guard.
We've had a slow start to the round here - hopefully the action picks up.
Simeon is looking to work some ground and pound but Bungy has wrist control.
Both fighters are breathing heavily.
That's one minute gone in the round.
Simeon trying to control the position from guard on top but Bungy is wriggling around, looking for whatever he can.
Simeon gets to his feet and steps away from his opponent.
Simeon misses with a half-hearted attempt at a head kick.
Simeon drives through with a takedown into Bungy's guard. Let's see what he can do from the top position.
Simeon wants to control from the top but Bungy keeps moving.
Simeon with a flurry of punches that miss.
That's two minutes gone in the round.
Simeon trying to control but Bungy is working from the bottom.
Simeon advances to half guard.
Bungy is refusing to be controlled, as Simeon sits in half guard.
The fighters are pressed up against the cage, both looking to find a bit of space to work.
Simeon thows a huge punch but Bungy dodges it nicely.
Bungy wants to get back to his feet.
The referee has motioned to the fighters to stand back up. He just wasn't happy with the level of activity.
That's three minutes gone in the round.
Simeon gets in close and instigates a clinch.
Simeon manages to break the clinch.
Simeon wants to clinch up but Bungy keeps it at a distance.
Simeon shoots in looking for a double leg takedown. Bungy defends it nicely.
Simeon moves into the clinch.
That's four minutes gone in the round.
Simeon looking to stall.
Simeon is working on a leg, looking for a takedown but Bungy is defending well.
That's three failed takedown attempts in the round for James Simeon. That's going to take a lot out of him.
Simeon is trying to stall.
Simeon jumps guard but Bungy stands there with Simeon around his waist. Simeon gives up and drops back to his feet. We remain in the clinch.
Bill Bungy has stepped it up - he knows he needs a finish here!
James Simeon is fighting for a decision here - he's started to take the cautious approach.
Boooooooooooooooooooo!!! God, this has been a terrible round. Come on you two, sort yourselves out!
Simeon's corner calls for him to break the clinch, which he does.
And that's the end of the fight!
James Simeon showed his dominance in that final round.
Well I reckon that's a shut out for Simeon, winning every round. Will the judges agree? They are the ones who matter, even if they are often depressingly incompetent. Over to the ring announcer for the scorecards.
Ladies and gentlemen, after 3 rounds of action, we go to the scorecards for a decision.
Judge Hugh Johnson scores the fight 30:27
Judge Topper Green scores the fight 30:27
Judge Ben Hemmingworth scores the fight 30:27
In favor of your winner, by unanimous decision... James Simeon!
A very excited looking James Simeon made sure he remembered to thank all the fans both in the arena and on the internet. He said all the coolest people spend all day on MMA websites, which got a big reaction.
|
|
|
|
|
|
|
|
|
|
|
|
|
|
|
|
|
|
|
|
|
|
|
| S |
C
A |
G |
S |
C
B |
G |
|
S |
C |
G |
|
energy
A | B |
|
hype
A | B |
|
pop
A | B |
|
mgr
A | B |
|
FIGHT
RATING
33% |
|
|
|
|
|
|
