|
|
PBP Commentary |
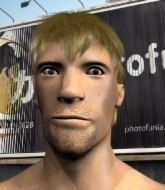
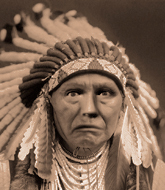
Coming up we have a middleweight MMA rules bout between Cid Strife (ranked 0 p4p, 0 weight class) and Chief Tappenahomma (ranked 0 p4p, 0 weight class). Strife comes into the arena with Anciients - Raise the Sun blaring out of the sound system. The crowd seem to be enjoying Tappenahomma's choice of entrance music: Tatanka. Both fighters look fresh as a daisy as they make their way towards the cage.
 |
|
 |
| 183 cm
22
189 lbs
9 - 0 - 0 |
|
180 cm
23
182 lbs
7 - 2 - 0 |
Good wrestling
World class boxer
Insanely flexible |
|
Good wrestler
World class MT
Granite chin |
|
| |
|
Ladies and gentlemen. This fight is 5 rounds, in the middleweight division.
Introducing the fighter to my left, fighting out of the red corner.
With a record of
9 - 0 - 0, fighting out of Rio de Janeiro, Cid Strife!
And introducing the fighter to my right, fighting out of the blue corner.
With a record of
7 - 2 - 0, fighting out of Las Vegas, Chief Tappenahomma!
The judges for this bout are Radbod Blank, Aafke Stam and Daniel Blasius.

The bell rings for round one and we are underway!
Tappenahomma digs a good body shot into Strife's ribs.
Tappenahomma moves his head to the side to avoid a jab but walks straight into a cross.
Tappenahomma keeping his hands up high there, blocking the jab from Strife.
Tappenahomma stuns Strife with a nice body shot, before stepping back out of range.
The fighters circling - Strife throws out the jab but it was never going to land.
Nice defenses there by Strife.
Nice shot by Tappenahomma.
Tappenahomma dips down and scores with a jab to the body.
Strife works the jab nicely.
Tappenahomma looks to score with a jab to the body but Strife is just out of range.
Strife throws a shot from downtown. Tappenahomma moves away and avoids it.
Strife throws a big shot that misses.
Tappenahomma thows a leg kick but Strife checks it
and Strife counters with a crisp hook to the side of the head.
The crowd cheering loudly, showing their appreciation for the quality fight we're seeing here.
Tappenahomma ducks down and throws a hook to the body but Strife moves away.
Strife has been working on his boxing with his coaches at Ninjin no Tamanegi in the buildup to the fight.
Tappenahomma lands with a shot to the body.
Strife misses with a lunging right hand
and Tappenahomma counters with a stiff right hand.
Strife misses with a body shot. Nice footwork from Tappenahomma.

That's one minute gone in the round.
A low kick from Tappenahomma misses
and Tappenahomma takes a counter punch right on the button for his troubles.
Tappenahomma lands a nice leg kick that just misses Strife's sensitive parts.
Strife lunges at Tappenahomma with a hook that half lands and is half blocked by Tappenahomma's hand.
Tappenahomma misses with a body shot
and Strife counters with a straight right hand.
Tappenahomma looks to land a left hand but Strife moved out of range nicely.
Strife throws an overhand right that lands on Tappenahomma's shoulder, as Tappenahomma tries to avoid the shot.
Tappenahomma misses with a leg kick.
Strife swings for the body but Tappenahomma moves out of range.
Tappenahomma throws a body punch but Strife moves out of range.
Strife throws out a token jab with nothing on it.
A countering left hand to the body from Tappenahomma misses.
Tappenahomma lands a jab to the nose.
Tappenahomma misses with a body shot. Nice footwork from Strife.
Strife misses with a jab to the body
and Tappenahomma counters with a lovely shot to the body.
Strife pushes forward with a 1-2 combination that forces Tappenahomma back to the cage. Strife follows up with a solid lead hook to the liver.
This has been an exciting period of action!
Strife slips a jab from Tappenahomma.
Strife swung with a counter punch to the body but it didn't connect.

That's two minutes gone in the round.
Strife avoids the clinch attempt nicely.
Tappenahomma tries to close the distance and clinch up but Strife swats him away and circles back towards the center.
Strife fakes and then throws a beautiful body shot. Tappenahomma looks a bit winded and takes a step backwards to take a breath.
Tappenahomma tries to score with a leg kick but it misses it's target.
A cross from Strife lands.
Strife misses with a right hand

and Tappenahomma moves into the clinch.
Strife is trying to work out of this bad position, with his back against the cage.
Strife tries to break free but Tappenahomma pushes him back against the cage.
Tappenahomma lands an elbow inside.

It looks like Cid Strife has been cut.
Strife is trying to break the clinch but Tappenahomma is controlling him.
Strife taking a break, stalling in the clinch.
Strife lands a shoulder strike that jolts his opponent's head backwards.
Strife avoids a wild elbow strike from Tappenahomma.
Tappenahomma tries to land a knee to the body but he is off balance and Strife avoids it.
Tappenahomma is looking to score with knees to the body. Maybe he'll change it up and go body then head. Strife is defending well for now.
Strife misses with a hook from the clinch.

That's three minutes gone in the round.
Strife tries to stall but Tappenahomma uses the opportunity to gain a better position.
Tappenahomma lands with a short head shot on the inside.
Strife tries a shoulder strike but it doesn't do any damage.
Strife tries to stall but Tappenahomma uses the opportunity to gain a better position.
Strife takes a shot to the head.
Tappenahomma lands a nice uppercut.
Strife avoiding damage as Tappenahomma throws knees to the body.
Strife is trying to work out of this bad position, with his back against the cage.

Strife breaks the clinch and we return to the middle of the mat.
Jab, jab by Strife - just one landing.
Tappenahomma misses with a body shot. Nice footwork from Strife.
Strife displays some good footwork, moving neatly out of range as Tappenahomma throws out the jab.
A kick lands to the mid section there for Tappenahomma.
Strife lands with a hook. Tappenahomma tried to avoid it but it clipped the top of his head.
Strife is really peppering his opponent's head with punches.
Strife looks to land a left hand but Tappenahomma moved out of range nicely.
Tappenahomma takes a shot to the body in his stride.

That's four minutes gone in the round.
The crowd are loving this. Great action here.
Tappenahomma throws a hard body shot but it just misses.
Tappenahomma tries to clinch up
and Strife counters with a crisp hook to the side of the head.

It looks like Chief Tappenahomma has been cut.
Tappenahomma is throwing a lot of body shots here, looking to wear down Strife rather than just go for the knockout.
Tappenahomma ducks under a wild hook from Strife.
Strife throws a jab when Tappenahomma was well out of range.
Strife takes a body kick right on the floating rib. Ouchie.
Tappenahomma lands a body shot.
Strife misses with a right hand
and Tappenahomma cracks him with a counter punch right on the button.
Tappenahomma tries to clinch but Strife is having none of it.
Tappenahomma walks into a left hand.
The crowd applaud the fighters' efforts here as the round comes to an end.
Tappenahomma pivots as if he's going to throw a leg kick but stops half way.
Strife throws a monster uppercut resembling something out of street fighter but it doesn't land.
Strife dips down and scores with a jab to the body.
Tappenahomma throws a hook to the body but it doesn't connect.
And thats the end of the round the fighters go back to their corners.
That was a close round but I would say that Cid Strife will probably get the nod.
Both fighters have cut men working on them during the interval.
The corners get their ten second warning. Both fighters stand from their stools and stare eachother down, ready to get back to the action.

Strife steps to the side to avoid the strikes from Tappenahomma.
Tappenahomma with a nice looking leg kick. You could hear that one land in a back row.
Strife on the wrong end of a vicious looking body shot.
Strife ducks right into an uppercut from Tappenahomma.
Cid Strife is winning the standup battle so far.
Strife avoids the clinch attempt nicely.
Strife throws a hook but Tappenahomma avoids it easily.
Sloppy strikes from Strife. Those never looked like landing.
Tappenahomma misses with a hook.
Tappenahomma displays some good footwork, moving neatly out of range as Strife throws out the jab.
Tappenahomma is trying to avoid his opponent's strikes and get into the clinch.
Tappenahomma misses with an uppercut.
We've had a slow start to the round here - hopefully the action picks up.
Strife connects with a nice looking jab.
Strife lands a nice looking body shot.
Tappenahomma throws a hook but Strife avoids it easily.
A bone on bone clash there as Strife blocks the leg kick.
Strife displays some good footwork, moving neatly out of range as Tappenahomma throws out the jab.
Strife is looking to counter with a shot to the body.
That's one minute gone in the round.
Good standup being displayed there by Tappenahomma as he connects with a hook.
Strife waving his hands out in front of him, looking to distract Tappenahomma.
Tappenahomma fakes a couple of low kicks, before throwing one on the third attempt. It connects and Strife has to reset his feet before getting ready to engage.
Strife ducks right into an uppercut from Tappenahomma.
Tappenahomma swings widly with a right hand
and Strife counters with a three punch combination, finished off with a leg kick. Nice work.
Tappenahomma thows a left - swing and a miss!
Strife closes the distance and takes a jab right on the nose as he does so.
Strife staying out of range there.
Strife thows a left - swing and a miss!
Strife throws a hook to the side of Tappenahomma's head but Tappenahomma sees it coming and ducks under it beautifully.
Tappenahomma throws out a counter right but Strife avoids it with no problem.
Tappenahomma moves away from the strike by Strife.
Tappenahomma slips under a jab.
Strife tries to bum rush Tappenahomma with a series of wild strikes but Tappenahomma uses good footwork to avoid the assault.
Tappenahomma is trying to avoid his opponent's strikes and get into the clinch.
Wooooo! Give it up for these two warriors! They are putting on a show!
Strife misses with a hook.
That's two minutes gone in the round.
Strife moves forwards but Tappenahomma connects with a nice, crisp jab.
Strife takes a really solid shot there but just smiles back and shrugs his shoulders.
Strife looks to land a left hand but Tappenahomma moved out of range nicely.
Nice shot lands for Strife.
Tappenahomma thuds a left hand into Strife's body.
Tappenahomma is looking to land body kicks.
Tappenahomma throws a body punch but Strife moves out of range.
Tappenahomma tries to clinch but Strife moves out of range.
Tappenahomma is looking to slow Strife down with leg kicks.
Strife misses with a hook
and Tappenahomma counters with an inside leg kick.
Strife misses with a hook to the body
and Tappenahomma counters with a crisp hook to the side of the head.
Strife takes a shot to the nose. Hopefully that hasn't broken it.
Tappenahomma avoids a lazy jab quite easily.
A left lands for Tappenahomma.
Tappenahomma throws a push kick but Strife slaps the foot to one side.
That's three minutes gone in the round.
Tappenahomma waving his hands out in front of him, looking to distract Strife.
Tappenahomma misses with a hook. Strife ducked under it nicely.
Strife misses with a straight left.
Tappenahomma uses good footwork to get in and out, landing a nice hook.
We are yet to see a takedown attempt from Tappenahomma in the fight. On paper you would think he is the more dominant ground fighter so let's see if these unusual tactics pay off.
Strife throws a sloppy body shot
and Tappenahomma counters with a shot to the ribs. That looked like it hurt.
A looping hook to the body misses from Tappenahomma. Strife does a little dance to reset his feet.
Tappenahomma throws a low kick but it's checked well by Strife.
Tappenahomma punishes Strife's body with a nice straight punch.
Tappenahomma throws a lazy right hand but Strife sees it coming a mile off and sidesteps it easily.
Strife is looking to counter punch.
Strife lands with a good body shot.
Strife misses the shot to the body.
Tappenahomma pushing out the jab but it's not landing.
Strife jabbing away but nothing is landing.
Strife misses the jab.
That's four minutes gone in the round.
Tappenahomma lands a nice shot that snaps Strife's head back.
Strife misses with a looping left.
Tappenahomma takes a swing at Strife's ribcage but misses.
Tappenahomma throws a wild body kick that Strife sees coming a mile off.
The fans in attendance giving it up for the two fighters, who have really let it all hang out in the last minute or so!
An inside leg kick lands from Tappenahomma.
Strife throws an uppercut from half a mile away. Tappenahomma sees it coming and avoids it easily.
Strife gets cracked with a nice right hand there by Tappenahomma.
Tappenahomma wants to clinch up but Strife keeps it at a distance.
Tappenahomma keeping a good distance there, avoiding the body shot.
Jab, jab by Tappenahomma - just one landing.
Strife connects with a right hand. Tappenahomma shakes it off.
Tappenahomma cracks Strife with a good jab.
A looping hook to the body misses from Strife. Tappenahomma does a little dance to reset his feet.
Strife takes a swing at Tappenahomma's ribcage but misses.
And thats the end of the round the fighters go back to their corners.
Chief Tappenahomma showed his class in that round. I'd imagine he'll take it on all the scorecards.
Both fighters have cut men working on them during the interval.
The fighters' corners scream their final instructions, as the referee calls time. Here we go, back to the action!

Strife swings for the body but Tappenahomma moves out of range.
Strife loads up on a big right hand but Tappenahomma slips the punch.
Strife on the wrong end of a nice low kick. He's acting like it's no big deal but he doesn't want to take many more of those.
Strife tests Tappenahomma's chin there with a solid looking shot.
Tappenahomma throws the left hand but Strife avoids the punch easily.
Strife throws a jab but it's blocked by Tappenahomma.
Tappenahomma closes the distance and pushes Strife back into the cage.
Strife breaks the clinch.
Strife throws a hook to the side of Tappenahomma's head but Tappenahomma sees it coming and ducks under it beautifully.
Strife throws a poor cross that misses
and Tappenahomma counters with a nice uppercut.
We've had a slow start to the round here - hopefully the action picks up.
Strife misses with a double jab
and Tappenahomma counters by moving into the clinch. Good anticipation by Tappenahomma.
Tappenahomma lands an elbow inside.
Tappenahomma lands a right hand.
Strife lands with a short punch from the clinch.
That's one minute gone in the round.
Strife tries to circle away but Tappenahomma has him pinned against the cage.
Strife misses with some punches.
Strife misses with a punch to the body.
Tappenahomma works on Strife's body with a couple of short punches.
Strife goes for a body shot but it's blocked.
Strife escapes the clinch and we're back to striking.
Strife looks to score with a jab to the body but Tappenahomma is just out of range.
Tappenahomma looks to land a body kick but Strife moved away.
Tappenahomma walks straight into an uppercut. Luckily it didn't land flush.
Tappenahomma lands a really nice looking cross but Strife seems unphased.
Strife rushes forward with a series of wild hooks but Tappenahomma moves out of range and avoids them all easily.
Tappenahomma connects with a leg kick. He turned his hip over nicely there.
Tappenahomma tries to clinch but fails miserably
and Strife counters with a lovely straight right hand!
Tappenahomma throws a body punch but Strife moves out of range.
A nice inside leg kick there by Tappenahomma. That's going to slow Strife down.
That's two minutes gone in the round.
Strife throws a shot from downtown. Tappenahomma moves away and avoids it.
Strife takes a shot right to the liver - Bas would have been proud of that punch.
Strife is hobbling a little on that front leg after taking quite a few leg kicks so far in this fight.
This is a great period of action - very entertaining stuff!
The fighters circling - Strife throws out the jab but it was never going to land.
Tappenahomma throws a low kick, looking for Strife's leg but Strife calmly moves out of range.
Tappenahomma buckles his opponent's knee momentarily with a nice leg kick.
Strife moves out of range of the strikes.
Tappenahomma misses with a wild body shot.
Strife throws an overhand right that lands on Tappenahomma's shoulder, as Tappenahomma tries to avoid the shot.
Strife throws a hard body shot but it just misses.
Strife throws a hook but Tappenahomma avoids it easily.
Tappenahomma scores with a jab to the head.
Strife throws a left and a right that both miss
letting Tappenahomma counter with a right hand.
Strife ducks under a wild hook from Tappenahomma.
Strife walks straight into a jab right on the nose. That one stung - he's blinking and trying to clear his head.
That's three minutes gone in the round.
Strife missing with a left hand there. Tappenahomma was out of range so wasted energy throwing that one.
Strife gets cracked with a nice right hand there by Tappenahomma.
Tappenahomma misses with a few strikes there.
Strife misses with an uppercut.
Strife checks the leg kick.
Strife tries to keep at a distance but Tappenahomma has taken the fight into the clinch.
Tappenahomma has been looking to improve his clinch game in recent weeks. Strife seems to have the measure of him in the clinch so far, so let's see if Tappenahomma can turn it around.
Chief Tappenahomma seems to be working more effectively in the clinch in the fight so far.
Strife looking to stall.
Strife breaks the clinch.
Tappenahomma throws a hook to the body but it doesn't connect.
Strife throws a shot to the body.
Tappenahomma lands a nice hook to Strife's body. Strife takes it in his stride and looks to land his own strikes.
Tappenahomma takes a big uppercut there. He seems a bit wobbly but no, he's OK.
That's four minutes gone in the round.
Strife swings wildly with a right hand that was never going to find it's target.
Strife looks like he's developed a pretty tasty lump over his left eye. He'll need to avoid taking much more damage to that.
Tappenahomma lands a leg kick and bounces back out of range.
Strife slips a jab and a cross from Tappenahomma.
Tappenahomma feints a straight left to the body, then turns around with a flashy move and hits Strifes jaw with a dramatic spinning back fist!
We've seen a great period of action over the last minute or so - credit to both fighters for going all out!
Tappenahomma pivots as if he's going to throw a leg kick but stops half way.
A shot to the liver by Tappenahomma. Beautiful body shot.
Tappenahomma throws a series of strikes that have Strife backpedaling.
Strife misses with a hook
and Tappenahomma counters with a straight right hand.
Tappenahomma tries to clinch but Strife moves out of range.
Boom, another hit is landed. "You're gunna get knocked out" taunts Strife, as that shot connected.
Tappenahomma is looking to clinch.
Strife just misses with a punch to the body.
Tappenahomma lands a nice leg kick that just misses Strife's sensitive parts.
Strife misses with an uppercut
and Tappenahomma counters with a good, hard body kick but Strife shrugs it off.
And thats the end of the round the fighters go back to their corners.
Chief Tappenahomma really dominated that round.
Both fighters have cut men working on them during the interval.
Well, the break between rounds is over. Let's get back to the scrappin!

Tappenahomma throws a half hearted mid kick.
Tappenahomma throws a leg kick
and Strife counters with a right hand to the body.
Tappenahomma lands an overhand right.
Strife thows a left - swing and a miss!
Strife walks into a stiff left hand from Tappenahomma.
Strife jabs at Tappenahomma's body.
Strife pushes forward with a 1-2 combination that forces Tappenahomma back to the cage. Strife follows up with a solid lead hook to the liver.
Tappenahomma has been the more effective fighter overall so far.
Tappenahomma swings wildly with a hook that is half blocked by Strife.
Strife pushing out the jab but it's not landing.
Strife sets himself, and Tappenahomma steps forward looking for the clinch! Strife avoids it this time.
Strife scores with a jab to the jaw of his opponent.
Tappenahomma slips under a jab.
Wooooo! Give it up for these two warriors! They are putting on a show!
Strife ducks under an overhand right and circles away with a smile on his face.
A solid leg kick lands there for Tappenahomma.
Tappenahomma cracks Strife with a good jab.
That's one minute gone in the round.
Strife connects with a body shot.
Tappenahomma misses with a jab, cross combination.
Tappenahomma dances in quickly and lands a nice inside leg kick on Strife. That did some damage!
Strife lands with a straight right. Tappenahomma didn't see that one coming.
Strife with a hook.
Tappenahomma stuns Strife with a nice body shot, before stepping back out of range.
Tappenahomma just misses with a punch to the body.
Tappenahomma thuds his right hand into Strife's forehead from close range. That could be painful for both fighters.
Tappenahomma scores with a nice body kick.
Ouch! a nice leg kick from Tappenahomma, right into the meat.
Tappenahomma digs a good hook to Strife's body.
We've seen a great period of action over the last minute or so - credit to both fighters for going all out!
Strife misses with a lunging right hand
and Tappenahomma counters nicely by changing levels and landing a hook to the body.
Tappenahomma dips down and scores with a jab to the body.
That's two minutes gone in the round.
Strife missing with a left hand there. Tappenahomma was out of range so wasted energy throwing that one.
A jab from Strife misses.
A big left from Strife misses.
Strife throws a hook but Tappenahomma blocks it.
Tappenahomma misses with a body shot. Nice footwork from Strife.
Tappenahomma throws a hard body shot but it just misses.
Strife is looking to counter with a shot to the body.
Strife misses with a looping left.
Tappenahomma ducks under an overhand right and circles away with a smile on his face.
It seemed like Tappenahomma was going to counter with the hook but didn't fully commit to it.
That kick from Tappenahomma tenderised Strife's leg. Strife is trying to keep his angry face on.
An inside leg kick from Tappenahomma misses.
Tappenahomma connects with a solid leg kick.
Tappenahomma just misses with a punch to the body.
Strife throws a right hand that misses
and Tappenahomma counters with a nice uppercut.
That's three minutes gone in the round.
Strife scores with a body shot.
Tappenahomma gets cracked with a nice right hand there by Strife.
Strife misses with a lunging right hand
and Tappenahomma counters with a straight right hand.
Tappenahomma lands an overhand right.
Tappenahomma defending well as Strife loads up on a big left hand.
Good standup being displayed there by Strife as he connects with a hook.
Tappenahomma tries to score with an inside leg kick but telegraphs it and Strife is able to avoid easily.
Tappenahomma fails to land with the punch combination there - jab, cross, hook, miss, miss, miss.
Strife is looking to counter punch.
A combination from Strife does no damage.
Strife ducks under a wild hook from Tappenahomma.
A jab lands there for Strife.
Strife blocks a jab.
Tappenahomma uses some good footwork to avoid the body shot by Strife.
That's four minutes gone in the round.
Strife fakes a jab and then connects with a hook.
Wooooo! Give it up for these two warriors! They are putting on a show!
Strife misses with a straight right.
Tappenahomma stuns Strife with a nice body shot, before stepping back out of range.
Tappenahomma fakes with a right hand and throws a good leg kick, right into the thigh. That had to hurt Strife.
Strife misses with a two punch combination.
Strife throws a hook to the side of Tappenahomma's head but Tappenahomma sees it coming and ducks under it beautifully.
Strife moves away from the strike by Tappenahomma.
A counter left hand to the body from Strife misses its target.
Strife misses with an uppercut. Tappenahomma saw that one coming.
Tappenahomma ducks under an overhand right and circles away with a smile on his face.
Tappenahomma with a body punch. A glancing blow.
Strife rushes in with a sloppy looking punch
and Tappenahomma counters nicely by changing levels and landing a hook to the body.
Tappenahomma tries to land with a swinging hook to the body but Strife was well out of range. Poor timing from Tappenahomma.
Strife throws a shot from downtown. Tappenahomma moves away and avoids it.
And thats the end of the round the fighters go back to their corners.
A close fourth round but Chief Tappenahomma will probably get the nod - 10:9.
Both fighters have cut men working on them during the interval.
That's the end of the round. The referee orders the cornermen out of the cage so we can get back down to business. This is the final round!

Tappenahomma throws a hook to the side of Strife's head but Strife sees it coming and ducks under it beautifully.
Strife slips under a jab.
Tappenahomma takes a swing at Strife's ribcage but misses.
Tappenahomma looks to land a combination but Strife avoids it well.
Strife works Tappenahomma's body with a nice hook.
Strife throws a right hand that Tappenahomma ducks under and follows up with a left that Tappenahomma also avoids with ease.
Tappenahomma displays some good footwork, moving neatly out of range as Strife throws out the jab.
Strife throws a hook to the side of Tappenahomma's head but Tappenahomma sees it coming and ducks under it beautifully.
Tappenahomma lunges in with swinging rights and lefts but Strife circles away quickly and effectively.
We've had a slow start to the round here - hopefully the action picks up.
Tappenahomma tries to clinch there but Strife circles away.
A big right from Strife misses.
Nice defenses there by Tappenahomma.
Tappenahomma takes a jab on the nose. He smiles like he loves it and keeps coming.
Strife throws a body shot but no joy.
That's one minute gone in the round.
Tappenahomma avoids a lazy jab quite easily.
Tappenahomma throws a monster uppercut resembling something out of street fighter but it doesn't land.
Tappenahomma takes a punch right to his stomach. That took the wind out of him momentarily.
Tappenahomma misses with a leg kick.
Tappenahomma uses some good footwork to avoid the body shot by Strife.
Tappenahomma looks like he wants to counter punch here.
Strife throws a hook but Tappenahomma avoids it easily.
A nice side step and Tappenahomma releases a counter shot to the body, but it doesn't find it's home.
Tappenahomma uses some good footwork to avoid the body shot by Strife.
Tappenahomma slips a jab from Strife.
Tappenahomma looks to land a right hand but Strife moved out of range.
Tappenahomma misses with a body shot. Nice footwork from Strife.
An attempted straight right counter from Strife misses the target.
Tappenahomma keeping his hands up high there, blocking the jab from Strife.
Tappenahomma doesn't react quick enough there as he takes a shot to the body.
Strife cracks Tappenahomma with a good jab.
Cid Strife has stepped it up - he knows he needs a finish here!
That's two minutes gone in the round.
Strife throws a monster uppercut resembling something out of street fighter but it doesn't land.
Strife misses with a looping left.
Strife misses with a hook.
A shot to the liver by Tappenahomma. Beautiful body shot.
Tappenahomma slips a jab from Strife.
Tappenahomma connects with the punch.
Wooooo! Give it up for these two warriors! They are putting on a show!
Tappenahomma takes a shot to the eye socket. That's gotta hurt.
Tappenahomma scores with a reasonable looking shot to the body. Strife doesn't seem bothered though.
Strife misses the jab.
Tappenahomma lands a front kick.
Both of our modern day gladiators look out of it here - a gruelling 5 rounds of action taking it's toll on them, no doubt.
Tappenahomma lands three nice shots there - that looked like it hurt!
Strife throws an overhand right that lands on Tappenahomma's shoulder, as Tappenahomma tries to avoid the shot.
Strife takes a body punch that cleary hurt but he's trying not to show any weakness.
That's three minutes gone in the round.
Strife swats away the attempt to clinch by Tappenahomma.
Strife thuds a left hand into Tappenahomma's body.
Tappenahomma lands a lovely overhand right.
Tappenahomma lands with a hook. Strife tried to avoid it but it clipped the top of his head.
Tappenahomma uses good head movement to avoid the hook from Strife.
Strife pushing out the jab but it's not landing.
Strife misses with a body shot.
Strife swings and misses with a shot to the body
and Tappenahomma counters with a nice uppercut.
Strife swings and misses with a hook to the body.
Tappenahomma looked like he wanted to counter with a punch but didn't throw it.
Boom, another hit is landed. "You're gunna get knocked out" taunts Tappenahomma, as that shot connected.
Tappenahomma feints and then cracks Strife's leading leg with a nice low kick. He's obviously looking to slow Strife down.
That's four minutes gone in the round.
Strife throws a looping overhand right but Tappenahomma ducks down to avoid it.
Tappenahomma avoids a punch combination nicely.
Strife throws out a token jab with nothing on it.
Tappenahomma closes the distance and presses his opponent up against the cage.
The crowd cheering loudly, showing their appreciation for the quality fight we're seeing here.
Tappenahomma lands a good knee to the midsection. Strife won't want to take too many of those.
Tappenahomma tries a knee to the head but Strife blocks it.
Tappenahomma stays in close to his opponent and throws a right hand to the body.
Strife throws a head punch that misses.
Strife dodges an elbow strike from Tappenahomma.
With the two fighters working up against the cage, Tappenahomma just misses with a elbow thrown towards Strife's brow.
Strife takes a knee to the side of the body.
Tappenahomma connects with a nasty looking knee right to Strife's face.
Tappenahomma lands a glancing elbow in the clinch.
Tappenahomma landing knees to the head.
And that's the end of the fight!
Chief Tappenahomma comfortably won the final round on my scorecard.
Well Tappenahomma has outworked and out performed his opponent in all aspects of the game today. He was simply too good and the decision should be no more than a formality. Over to the ring announcer for the scorecards.
Ladies and gentlemen, after 5 rounds of action, we go to the scorecards for a decision.
Judge Radbod Blank scores the fight 45:50
Judge Aafke Stam scores the fight 45:50
Judge Daniel Blasius scores the fight 46:50
In favor of your winner, by unanimous decision... Chief Tappenahomma!
A relieved looking Chief Tappenahomma thanked the fans for their support and gave the usual line about them being amazing. They seemed to believe that he actually meant it.
|
|
|
|
|
|
|
|
|
|
|
|
|
|
|
|
|
|
|
|
|
|
|
| S |
C
A |
G |
S |
C
B |
G |
|
S |
C |
G |
|
energy
A | B |
|
hype
A | B |
|
pop
A | B |
|
mgr
A | B |
|
FIGHT
RATING
78% |
|
|
|
|
|
|
