|
|
PBP Commentary |
Coming up we have a lightweight MMA rules bout between Raekwon Carter (ranked 0 p4p, 0 weight class) and Chris White (ranked 0 p4p, 0 weight class). I can't wait for this one - let's get the fighter introductions out of the way and get this one started!
 |
|
 |
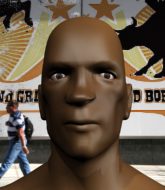
| 175 cm
22
162 lbs
0 - 0 - 1 |
|
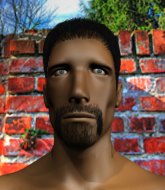
176 cm
22
158 lbs
0 - 1 - 0 |
BJJ Purple Belt
Counter striker
Cuts easily |
|
BJJ White Belt
Excellent boxer
Heavy handed |
|
| |
|
Ladies and gentlemen. This fight is 3 rounds, in the lightweight division.
Introducing the fighter to my left, fighting out of the red corner.
With a record of
0 - 0 - 1, fighting out of Montreal, Raekwon Carter!
And introducing the fighter to my right, fighting out of the blue corner.
With a record of
0 - 1 - 0, fighting out of Montreal, Chris White!
The judges for this bout are Steve Smith, William Peck and Robert Douchet.

The bell rings for round one and we are underway!
White lands a two punch combo.
Carter shoots in but no luck this time.
White scores with a nice looking left hook and follows it up with an uppercut!
White with a poor takedown

and Carter counters by moving into the clinch. Good anticipation by Carter.
White drops down for a takedown but doesn't get it.
Carter tries to jump guard but he falls flat on his backside. White smiles and moves away.
Horrible takedown by Carter or perhaps it was just good defense by White which made him look bad.
That's three failed takedown attempts in the round for Raekwon Carter. That's going to take a lot out of him.
Carter showing good head movement there, avoiding the strikes from White.
White misses with a takedown attempt

and Carter counters with a shoot takedown. White fights it but they end up in guard.

Carter postures up as if he's going to throw some strikes but drops back for an ankle! White is in big trouble! He looks ready to tap! But no, he's escaped and dives on top of Carter, into his guard.
Carter working for a triangle but White defends it easily.

That's one minute gone in the round.
White would like to get this fight back to the feet but can't get free from the closed guard.
Carter wants to sweep here but White controlling him for the moment.
Carter is looking for a triangle here but White uses the submission attempt to pass into side control.
Carter tries to strike from the bottom but misses.
White happy to just control the position for now.

That's two minutes gone in the round.
The crowd are getting on the fighters' backs, as the pace has dropped off in the last minute or so.
Carter is looking to reverse the position.
White wants to control but Carter is keeping him busy.
Carter manages to get back to half guard.
The ref warns both fighters not to hold the cage as they work up against the meshing.
Carter tries to get to full guard but White has control of the leg.
Carter is breathing heavily.
Carter wants to sweep but White has passed to side control!
Carter gets back to half guard.
White really doesn't want to stay on the ground with Carter. If he can't get it back to his feet, it's only a matter of time before he'll be tapping out.
White is looking to pass the guard... He's managed it - he's now in full mount!
Carter is looking to improve his position but White isn't that keen on the idea.

That's three minutes gone in the round.
White controlling the pace for now.
Carter is squirming around, avoiding White's attempts to control the action.
Carter really trying hard to get back to half guard here.
Carter sneaks a leg under to get to half guard.
Carter tries to roll over but White keeps him under control.

That's four minutes gone in the round.
Well. There's a bit of a lull in the action here and the crowd are starting to get restless.
White is looking to take a break and control but Carter is keeping him honest, looking to work from the bottom.
Carter looking for submissions off his back.
Carter trying to hold on to White's head to control him but White postures up.
Carter tries to roll over but White keeps him under control.
Carter manages to get to full guard.
Carter wants to sweep but no luck.
And thats the end of the round the fighters go back to their corners.
That was a close round but I would say that Raekwon Carter will probably get the nod.
That's the end of the interval. I'm sure that seemed a lot quicker than a minute for our two fighters! Back to the action.

A punch combination from White misses.
Carter fails with a takedown attempt from distance.
White displaying good standup as he scores with a three punch combination.
A shot to de liver by White. Beautiful body shot.
White throws a jab, cross combination which is slipped
and Carter holds on and brings the fighters into a clinch.
Carter has a body lock and is looking for a takedown. White is bouncing around trying to prevent the takedown and somehow he has indeed managed to stay on his feet.
Carter tries to jump guard but he falls flat on his backside. White smiles and moves away.
That's three failed takedown attempts in the round for Raekwon Carter. That's going to take a lot out of him.
Carter shoots in for a takedown but White shows good takedown defense.
Carter circles away from the clinch attempt
and Carter counters with a nice double leg into half guard.
White won't allow Carter to pass to mount.
Carter seems to be working for a kimura but White defends the submission attempt.
Both fighters are absolutely exhausted here.
White keeps control of the position for the meantime.
That's one minute gone in the round.
Carter is working for a submission of some sort.
Carter is working for a kimura but White is defending it quite comfortably.
Carter wants to pass the guard but White is defending well.
Carter trying to control the action but White is working from the bottom.
That's two minutes gone in the round.
The crowd are starting to boo a lack of action.
Carter is working for a submission of some sort.
Carter is working for a kimura but White is defending it quite comfortably.
Carter frees up his trapped foot and advances to mount.
Carter throwing sloppy strikes here. Perhaps if he tightened up his striking from such a dominant position, he'd be able to finish easier.
The fighters are pressed up against the cage, both looking to find a bit of space to work.
That's three minutes gone in the round.
Carter jumps to side control looking for an arm triangle but White manages to avoid the submission attempt.
Carter is looking for a kimura. He might have it! No, White has escaped the position, nice work there.
Carter wants to work for a kimura but he's foiled early by White, who protects the arm well.
Carter is looking for a kimura. He might have it! No, White has escaped the position, nice work there.
Carter tries for a kimura but White is defending well.
Carter looking for an arm triangle but it's way too loose to do anything.
That's four minutes gone in the round.
Carter tries to land with some ground and pound but misses.
Carter wants to work for a kimura but he's foiled early by White, who protects the arm well.
Carter creates a bit of distance and throws down some hard shots.
Carter working hard here to secure a kimura but he's not really in the right position for it.
Carter has knee on belly momentarily but White bucks him off and regains half guard.
And thats the end of the round the fighters go back to their corners.
Raekwon Carter dominated that second round.
That's time! Carter's corner gives him a slap on the ass as he gets ready to fight. This is the final round!

White lands a two punch combo.
Carter circles away from the clinch attempt
and Carter holds on and brings the fighters into a clinch.
Carter misses with a knee strike.
White wants to push off and get back to the center of the mat but Carter has him pressed against the cage.
Carter gets a nice trip takedown into half guard.
Carter is tying to control. White wants to improve his position but can't escape this time.
Carter is working hard to pass the guard. He's done it - he's now in full mount! Trouble for White!
Carter swings around for an armbar but it's a sloppy attempt and White is now in Carter's guard. A big mistake from Carter there, giving up the dominant position!
Carter is striking but White is not phased and passes to half guard.
Both fighters are breathing heavily.
White prevents Carter from improving his position.
That's one minute gone in the round.
White wants to stand but Carter has hold of a leg and an arm, so he's trapped for now.
White controlling the action here.
Carter works his way to full guard. Good work.
Carter working from the bottom, still in full guard. He's managed to get a loose triangle. White doesn't seem to be doing much to defend here, obviously he feels comfortable in the position. White manages to throw the legs off his shoulder and he's back into guard - no problem.
Carter throws his legs up looking for a submission but White uses it to pass to side control.
That's two minutes gone in the round.
The crowd are hurling abuse towards the fighters... You can hardly blame them though because there isn't a lot going on in the fight.
Carter is looking for a sweep.
Carter sneaks a leg under to get back to half guard.
Carter regains full guard. Nicely done.
Carter looking to control.
Carter looking for a sweep. Not yet Carter, not yet.
Carter looking for a guillotine here but White defends easily.
White trying to control the position from guard on top but Carter is wriggling around, looking for whatever he can.
Chris White has stepped it up - he knows he needs a finish here!
That's three minutes gone in the round.
Carter throws his legs up looking for a submission but White uses it to pass to side control.
White is looking to take a break and control but Carter is keeping him honest, looking to work from the bottom.
White working away.
White working the ground and pound but Carter is defending the strikes.
Carter is looking to reverse the position.
White tries to advance to mount but can't.

The referee decides to stand the fighters back up.
White wants to clinch
and Carter counters with a single leg into guard. White didn't expect that.
Carter prevents White from getting back to his feet.
White looking to sweep here. No luck so far.
That's four minutes gone in the round.
Carteris looking to pass into half guard but White pushes him away with his feet and jumps on top - now White is in guard.
White has decided he wants to stand but the closed guard of Carter is proving hard to escape from.
White tries to free his leg and advance position but Carter is retaining full guard.
Carter looking for a guillotine here but White defends easily.
White seems content to control from guard here. He's going to have to remain active though if he doesn't want to get stood back up.
Raekwon Carter overall seems to be getting the better of the ground position in the fight so far.
Carter manages to sweep nicely, so he's now on top. White manages to get himself to full guard.
Carter trying to control but White is working from the bottom.
And that's the end of the fight!
Raekwon Carter showed his dominance in that final round.
Well I reckon that's a shut out for Carter, winning every round. Will the judges agree? They are the ones who matter, even if they are often depressingly incompetent. Over to the ring announcer for the scorecards.
Ladies and gentlemen, after 3 rounds of action, we go to the scorecards for a decision.
Judge Steve Smith scores the fight 30:27
Judge William Peck scores the fight 30:27
Judge Robert Douchet scores the fight 30:27
In favor of your winner, by unanimous decision... Raekwon Carter!
|
|
|
|
|
|
|
|
|
|
|
|
|
|
|
|
|
|
|
|
|
|
|
| S |
C
A |
G |
S |
C
B |
G |
|
S |
C |
G |
|
energy
A | B |
|
hype
A | B |
|
pop
A | B |
|
mgr
A | B |
|
FIGHT
RATING
45% |
|
|
|
|
|
|

