|
|
PBP Commentary |
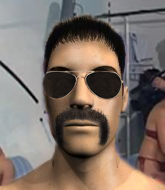
Coming up we have a welterweight MMA rules bout between Rod Stiffington (ranked 0 p4p, 0 weight class) and Edward Teach (ranked 0 p4p, 0 weight class). Stiffington comes to the cage accompanied by I'm Too Sexy by Right Said Fred. There are an array of beautiful celebrities at ringside tonight! I wonder if any of them paid for their tickets.
 |
|
 |
| 178 cm
27
180 lbs
12 - 3 - 0 |
|
175 cm
29
180 lbs
11 - 7 - 0 |
Powerful takedowns
Counter fighter
Cardio machine |
|
Powerful takedowns
Basic striking
Powerful |
|
| |
|
Ladies and gentlemen. This fight is 3 rounds, in the welterweight division.
Introducing the fighter to my left, fighting out of the red corner.
With a record of
12 - 3 - 0, fighting out of Hilo, Rod Stiffington!
And introducing the fighter to my right, fighting out of the blue corner.
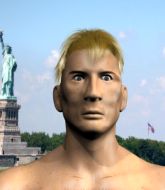
With a record of
11 - 7 - 0, fighting out of Hilo, Edward Teach!
The judges for this bout are Paul Gruel, Chris Saunders and Roger Salmon.

The bell rings for round one and we are underway!
Stiffington misses with a hook. Teach ducked under it nicely.

Teach bobs and weaves into range and then changes levels and scores with a nice takedown into side control.
Stiffington takes an elbow right on the bridge of the nose and winces in pain.
Teach looking to punish the body of his opponent here but Stiffington is avoiding damage well.
Teach lands a nice forearm strike.
Stiffington tries to improve position but can't.
Teach throws a strike aimed at the side of Stiffington's head but Stiffington avoids it well.
Teach lands a nice forearm strike.
We've been hearing good reports from Stiffington's training camp. Apparently he has been rolling around with some good quality BJJ practitioners and has been sharpening his skills. Let's see if that has an impact on the fight today.
Teach is putting a hurting on Stiffington here, landing some big shots from side control.
Teach cracks Stiffington with an elbow. That is naaassty.
The crowd are loving this. Great action here.
Stiffington sneaks a leg under to get back to half guard.
Teach is keeping good posture, landing some ground and pound.

Stiffington actively working from the bottom here.
Stiffington looking for submissions from an awkward position here.

That's one minute gone in the round.
Neither fighter is being very active at the moment, with Teach in particular looking to stall.
Teach has the superior BJJ but he's also working some ground strikes into his gameplan.
Stiffington is looking to sinch up a guillotine here but Teach pulls his head out easily.
Teach not landing any meaningful shots this time.
Stiffington is looking to regain full guard. Not this time though.
The two fighters exchange a few words. I couldn't hear what they were saying but maybe it's more fun if you make it up yourself. Teach connects with a nice short shot to Stiffington's temple.
The ref warns both fighters not to hold the cage as they work up against the meshing.
Stiffington looking to work for a kimura from the bottom.
Teach is trying to control. Stiffington wants to improve his position but can't escape this time.

That's two minutes gone in the round.
A few boos can be heard. I'm sure they will multiply if the fighters don't pick up the pace.
Stiffington on the receiving end of some nice ground and pound.
Teach thows a huge punch but Stiffington dodges it nicely.
Teach takes advantage of the dominant position to land a couple of big hammer fists.
Teach is keen to just control but Stiffington is a slippery customer.
Stiffington is trying to get back to full guard.
Teach missing with some ground and pound from the half guard.
The two fighters exchange a few words. I couldn't hear what they were saying but maybe it's more fun if you make it up yourself. Teach connects with a nice short shot to Stiffington's temple.
Teach throwing shots but Stiffington is blocking nicely.
Teach is keen to just control but Stiffington is a slippery customer.
Teach throwing punches and elbows but they're not doing any damage.
Stiffington trying to control but Teach postures up.
Stiffington manages to get to full guard.

That's three minutes gone in the round.
Teach lands a couple of elbows.
Stiffington can't keep his opponent in guard - Teach advances to half guard, no doubt looking to mount.
Teach trying to mount his opponent but Stiffington defends it.

Teach is trying to work for a kimura but Stiffington is defending well.
Teach takes advantage of the dominant position to land a couple of big hammer fists.
Teach missing with the ground and pound from half guard.
Teach wants to pass the guard but Stiffington is defending well.
Stiffington is trying to maintain the position but Teach is very close to passing his half guard.

That's four minutes gone in the round.
Teach seems very keen to just sit and control from half guard but Stiffington does not like that idea so much and is remaining active off his back.
Stiffington trying to control here.
Teach missing with some ground and pound from the half guard.
Stiffington wants to control but Teach is keeping busy.
Teach is trying to control the action in half guard but Stiffington is working away on the bottom, looking perhaps to get back to full guard.
Teach winds up and cracks Stiffington with a swinging punch to the side of the head.
The crowd thankful this round is nearly over.
Teach wants to work for an arm triangle but Stiffington is really keeping half guard well and defending the submission attempt.
Teach is looking to take a break and control but Stiffington is keeping him honest, looking to work from the bottom.
And thats the end of the round the fighters go back to their corners.
Edward Teach dominated that round.
The fighters' corners scream their final instructions, as the referee calls time. Here we go, back to the action!

Teach fails with the takedown.
Stiffington cracks Teach with a right hand to the side of the head.
Teach slips a jab from Stiffington.
No luck with that takedown attempt from Teach.
Teach darts in looking for a takedown but Stiffington gets double underhooks and turns Teach into the cage.
It looked like Stiffington wanted to counter with a hook but didn't fully commit.
Rod Stiffington has stuffed three takedown attempts in the round now. That's going to take a lot out of Edward Teach.
Teach shoots in for a takedown. He's persisting with it as Stiffington sprawls well. Stiffington wins this battle and keeps the fight standing. Teach gets slowly back to his feet.
We've had a slow start to the round here - hopefully the action picks up.
Teach shoots in for a takedown - he's clinched up with Stiffington but Stiffington pushes him off and we're back to square one.
Teach closes the distance and scores a nice trip takedown into half guard. Stiffington did well to prevent Teach getting side control.
Teach wants to take a breather but Stiffington is having none of it.
That's one minute gone in the round.
Stiffington is looking to control Teach's leg but it's slowly edging free. Can Stiffington avoid being mounted?
Nice strikes from Teach there.
Stiffington has hold of Teach's hands but Teach slips his arm to the side and lands an elbow.
Teach lands strikes from half guard.
Stiffington keeping his head moving to avoid the ground and pound.
Teach working to pass to mount. He's got his hand pressing down on Stiffington's thigh. Stiffington counters though and makes it back to full guard.
Stiffington wants to get back to his feet but Teach is in a dominant position and won't allow it.
Stiffington looking to control.
Stiffington keeping moving, preventing Teach from controlling successfully.
That's two minutes gone in the round.
Teach postures up to throw the ground and pound strikes but they don't connect.
Stiffington looking for a guillotine here but Teach defends easily.

Stiffington wriggles free and stands up.
Teach will have to do better than that with his takedown attempts.
Teach shoots in with a takedown attempt and he has Stiffington pinned against the cage. Stiffington gets the underhooks and manages to circle away.
Stiffington stuffs a takedown. It's all about dictating where the fight takes place and Stiffington wants it to stay on the feet.
Stiffington swung with a counter punch to the body but it didn't connect.
Teach needs to keep his hands up - Stiffington had a free shot at his head there.
Teach fails with the takedown
and Stiffington cracks him with a counter punch right on the button.

Teach is rocked!
That's three minutes gone in the round.
Stiffington weaves into range and cracks Teach right on the temple with a beautiful overhand right! Teach goes down! He's out cold! Wow, what a beautiful knockout! Stiffington is strutting round the canvas like a movie star as the camera bulbs flash frantically.
Ladies and gentlemen, after 3:11 of round 2, we have a winner by way of KO (Punch). Rod Stiffington!
A less than humble Rod Stiffington misjudged his post fight interview somewhat and came across a little too arrogant whilst trying to hype up his own abilities.
|
|
|
|
|
|
|
|
|
|
|
|
|
|
|
|
|
|
|
|
|
|
|
| S |
C
A |
G |
S |
C
B |
G |
|
S |
C |
G |
|
energy
A | B |
|
hype
A | B |
|
pop
A | B |
|
mgr
A | B |
|
FIGHT
RATING
38% |
|
|
|
|
|
|
