|
|
PBP Commentary |
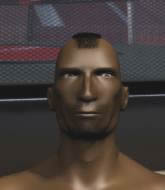
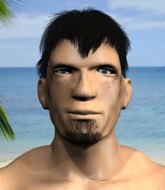
Coming up we have a middleweight MMA rules bout between Peter Kent (ranked 0 p4p, 0 weight class) and Romeo Bellanca (ranked 0 p4p, 0 weight class). Kent comes to the cage accompanied by I'll be Back. Bellanca has chosen Nightmare by Avenged Sevenfold as his entrance music. Peter Kent could well score a knockout today. He has the power to get to Romeo Bellanca's chin.
 |
|
 |
| 182 cm
33
196 lbs
19 - 19 - 3 |
|
180 cm
28
195 lbs
12 - 16 - 0 |
Great wrestler
Dangerous knees
Cardio machine |
|
Good wrestler
Excellent MT
Powerful |
|
| |
|
Ladies and gentlemen. This fight is 3 rounds, in the middleweight division.
Introducing the fighter to my left, fighting out of the red corner.
With a record of
19 - 19 - 3, fighting out of Tokyo, Peter Kent!
And introducing the fighter to my right, fighting out of the blue corner.
With a record of
12 - 16 - 0, fighting out of Tokyo, Romeo Bellanca!
The judges for this bout are Shirou Masuda, Tatsuya Matsuyama and Yukihiro Shimada.

The bell rings for round one and we are underway!
Bellanca lands a jab followed by a nice looking cross.

It looks like Peter Kent has been cut.
Bellanca misses with a jab and misses with a cross straight after too.
Bellanca throws a lazy uppercut

and Kent counters with a nice double leg into side control. Bellanca won't be happy with that.
Kent works to advance to full mount. Bellanca defends for a few seconds but eventually he succumbs.
Bellanca is looking to get to half guard.
Kent is looking to work his way around to Bellanca's back. He needs to be careful though, as he's in danger of losing this dominant position.
The crowd growing excited in anticipation of a finish here! Right on cue, Kent cracks his opponent with a massive right hand that draws loud cheers!
This has been an exciting period of action!
Kent looking to control but Bellanca is working nicely, looking to advance position himself.
Kent moves to back control.
Kent tries to keep control of the position but Bellanca is staying busy.

Bellanca is displaying good submission defense - not really looking in danger of submitting to the rear naked choke at the moment. That could change in an instant of course if Kent gets his way!
Kent has been looking to land a fair amount of strikes on the ground. He might be looking to soften his opponent up in order to work for a submission.
Kent is staying calm and holding on to the back position, whilst working on a rear naked choke. Bellanca is defending well though. Kent let's go of the attempt for now.
Kent punches the canvas rather than the man.

That's one minute gone in the round.
Kent is working really hard to secure the rear naked choke. Bellanca defends successfully for a significant amount of time. Both fighters are looking very determined.
Bellanca trying to control but not successfully.
Bellanca is defending well here and trying to improve his position.
Kent controlling from the back.
Bellanca fending off the submission attempt from Kent.
Bellanca is displaying good submission defense - not really looking in danger of submitting to the rear naked choke at the moment. That could change in an instant of course if Kent gets his way!

That's two minutes gone in the round.
Bellanca staying busy and making it hard for Kent to control.
The fighters are starting to perspire pretty heavily.
A bit of a pause in the action here. Kent controlling the positon.
Bellanca is displaying good submission defense - not really looking in danger of submitting to the rear naked choke at the moment. That could change in an instant of course if Kent gets his way!
Kent is looking for the choke from the back position but Bellanca is controlling his hands well.
Bellanca wants to get back to his feet.
Kent seems to have improved his submission grappling technique since last time we saw him. Let's see if he can pull off a submission.

That's three minutes gone in the round.
Bellanca rolls, trying to escape but Kent keeps control of the position.
Bellanca is trying to get back to his feet but Kent has full control of the position and if anything, Bellanca has just worked his way into a worse spot.
Bellanca wants to escape the position.
Bellanca keeps trying to improve his position.
Bellanca is trying to get back to his feet but he's not managed it yet.
Kent is working for the rear naked choke. He has one arm under the chin but Bellanca has hold of the other arm. A bit of a stalemate here.
Kent trying to control momentarily.
Kent is persistently looking for the submission but Bellanca is defending it well.
Bellanca wants to escape the position.
The ref warns both fighters not to hold the cage as they work up against the meshing.

That's four minutes gone in the round.
Bellanca breaks Kent's hooks off and manages to turn into his guard.
Kent wants to sweep here but Bellanca controlling him for the moment.
Kent is active off his back here, looking for submissions.
Kent escapes his hips to the side and looks to be working for an armbar. Bellanca gives him a little smile and shakes his head. No chance.
Kent looking for submissions from the bottom here. Moving his hips around, possibly looking for an armbar.
Kent is looking for a guillotine. You can't force these things though and Bellanca defends well.
And thats the end of the round the fighters go back to their corners.
Peter Kent dominated that round.
The cut man is working on Peter Kent's cut.
The minute break is over - no more time for sponges and pep talks - back to the action!

Kent shoots in with a takedown attempt and he has Bellanca pinned against the cage. Bellanca gets the underhooks and manages to circle away.
Bellanca doesn't manage to clinch there - Kent circles away.
Kent shoots and misses
and Bellanca counters with a good right hand that lands right on the jaw.
Bellanca is looking to clinch but Kent is avoiding it.
Kent shoots in looking for a takedown. Bellanca tries to sprawl out of it but Kent keeps driving through. The fighters are pinned against the cage. Bellanca manages to get underhooks and after a bit of a struggle, circles away and we're back to standing.
That's three failed takedown attempts in the round for Peter Kent. That's going to take a lot out of him.
Bellanca lands with a two punch combination before moving back out of range.
We've had a slow start to the round here - hopefully the action picks up.
Kent feints and then dives in with a takedown. That was a long way out but the feint bought him enough time to close the distance and complete the takedown. Now we'll play guard for a bit and see who can get the better of that position.
Kent loading up with the ground and pound but he's missing more than he's landing in this flurry.
Bellanca avoiding any damage from the ground and pound.
Kent postures up in Bellanca's guard and throws a big left but Bellanca blocks it.
That's one minute gone in the round.
Kent wants to pass the guard but Bellanca is keeping the position.
Bellanca throwing strikes off his back to little effect.
Kent is really dominating this fight. Is there anything that Bellanca can do to turn this around?
Kent trying to control the position from guard on top but Bellanca is wriggling around, looking for whatever he can.
Kent looking to pass the guard.
Kent won't allow Bellanca to sweep him here.
Bellanca throwing strikes off his back to little effect.
The referee looks like he's ready to step in and stand the fighters back up.
Kent stops Bellanca from standing up.

The referee decides to stand the fighters back up.
Bellanca leaves Kent with his face pressed against the mat as he sprawls beautifully, defending against a solid takedown attempt.
Bellanca misses the jab.
Kent shoots for a double leg takedown but Bellanca sprawls well. He's pushed Kent's face into the mat and manages to get back to his feet relatively easily.
Kent tries for a takedown but Bellanca circles away easily

and Bellanca counters with a driving takedown into guard. Nice work there by Bellanca.
That's two minutes gone in the round.
Bellanca cracks Kent with a solid left hand.
Bellanca wants to control from the top but Kent keeps moving.
Bellanca postures up.
Bellanca throws a big elbow that misses.
Bellanca keeps in close for a moment and lands a decent shot to the side of Kent's head.
Bellanca is in close to Kent's body, working some short punches and elbows.
Kent keeping full guard, as Bellanca tries to pass.
Bellanca pushes down on Kent's leg and manages to get into half guard.
Kent is working for an escape here. He's hooked one of Bellanca's legs and he's managed to sneak out and take Bellanca's back!
That's three minutes gone in the round.
Bellanca trying to control the position but Kent manages to sink in the hooks.
Bellanca covering up well under a barage of strikes.
Kent looking to break Bellanca's wrist control so he can sink in the choke. Bellanca remaining controlled and patient though - he really has to keep calm otherwise Kent will wrap this one up with the rear naked choke!
Kent looking to break Bellanca's wrist control so he can sink in the choke. Bellanca remaining controlled and patient though - he really has to keep calm otherwise Kent will wrap this one up with the rear naked choke!
Bellanca trying to control the action but Kent just sinks the hooks in.
Kent is looking cool and calm here, just waiting for a good opportunity to attack and finish the fight from this dominant position.
Kent tries to get the hooks in deep but Bellanca pushed the leg off.
Kent tightening his grip on Bellanca, looking for the choke.
Bellanca is in a world of trouble here. He's outmatched on the ground here and he'd better get Kent off his back sharpish unless he wants to be submitted.
That's four minutes gone in the round.
Bellanca is trying to stand back up.
Kent is persistently looking for the submission but Bellanca is defending it well.
Bellanca wants to escape the position.
Kent working for a choke but Bellanca is defending well.
I really don't envy Bellanca right now.
And thats the end of the round the fighters go back to their corners.
That was a close second round but I would say that Peter Kent will probably get the nod.
The cut man is working on Peter Kent's cut.
The fighters' corners scream their final instructions, as the referee calls time. Here we go, back to the action! Ladies and gentlemen, this is the final round!

Kent dives in and scores a takedown into Bellanca's guard.
Bellanca keeping moving, preventing Kent from controlling successfully.
Bellanca is working from a closed guard but he's struggling to control his opponent.
Bellanca doesn't do any damage with a couple of strikes from the bottom.

Bellanca looking for a guillotine here but Kent defends easily.
Bellanca is looking to get back to his feet but can't, whilst Kent is controlling him.
We've had a slow start to the round here - hopefully the action picks up.
That's one minute gone in the round.
Bellanca not looking particularly offensive just at the moment.
The referee decides to stand the fighters back up.
Kent slips a jab from Bellanca.
Kent tries to score a power double leg takedown but Bellanca sees that one coming and sprawls well. That will dishearten Kent somewhat.
Bellanca fakes the leg kick and cracks Kent in the body.

The fight moves into the clinch position.
Kent tries to score a body lock takedown but Bellanca shows good agility there to stay on his feet.

Bellanca breaks the clinch and we return to the middle of the mat.
Bellanca connects with a body shot that sends Kent's belly button to the back.
Kent takes a body punch but keeps moving.
Bellanca connects with a solid leg kick.
Bellanca rushes forward with a series of wild hooks but Kent moves out of range and avoids them all easily.
That's two minutes gone in the round.
Bellanca tries to clinch up but Kent circles away and keeps his distance.
Bellanca manages to get an easy takedown there - catching Kent on his heels. He'll look to pass Kent's guard now, I'm sure.
We've seen a great period of action over the last minute or so - credit to both fighters for going all out!
Bellanca trying to control but Kent is working from the bottom.
Bellanca looking to pass the guard.
Kent is trying to control the position but Bellanca postures up.
Bellanca advances to half guard.
Bellanca is keen to just control but Kent is a slippery customer.
Bellanca is working for a submission of some sort.
Bellanca trying to control from half guard but Kent is working away.
That's three minutes gone in the round.
Kent actively working from the bottom here.
Peter Kent overall seems to be getting the better of the ground position in the fight so far.
Kent trying to hold on to Bellanca's head to control him but Bellanca postures up.
Kent is not content to let Bellanca control the position.
Kent works his way to full guard. Good work.
Bellanca lands a nice shot whilst sitting in his opponent's guard.
Bellanca throwing elbows and punches but not connecting, as Kent works some decent striking defense from the bottom.
Romeo Bellanca has stepped it up - he knows he needs a finish here!
Peter Kent is fighting for a decision here - he's started to take the cautious approach.
That's four minutes gone in the round.
Well. There's a bit of a lull in the action here and the crowd are starting to get restless.
Bellanca throwing shots from guard but he's hitting more mat than opponent.
Bellanca trying to control the position from guard on top but Kent is wriggling around, looking for whatever he can.
The referee decides to stand the fighters back up.
Romeo Bellanca seems to be getting the better of the standup.
Bellanca throws a low kick but it's checked well by Kent.
Kent changes levels and looks for a double leg takedown. Bellanca tries to avoid it but Kent manages to keep hold of a leg and drag Bellanca to the ground. Bellanca escapes though and pops straight back up to his feet.
That's three failed takedown attempts in the round for Peter Kent. That's going to take a lot out of him.
Kent shoots in but doesn't get the takedown
and Bellanca cracks him with a counter punch right on the button.
Horrible takedown attempt by Kent or perhaps it was just good defense by Bellanca, which made it look bad.
Bellanca ducks down and throws a hook to the body.
Both fighters are breathing heavily.
The crowd thankful this round is nearly over.
Bellanca tries to clinch up against the cage, rushing in to close the distance. Kent manages to break the clinch and circles back to the middle of the mat.
Bellanca misses with a body kick.
Kent tries for a takedown but Bellanca circles away easily
and Bellanca counters with a two punch combo.
And that's the end of the fight!
Romeo Bellanca comfortably won the final round on my scorecard.
I think Kent has won this one but let's see what the judges have to say. Over to the ring announcer for the scorecards.
Ladies and gentlemen, after 3 rounds of action, we go to the scorecards for a decision.
Judge Shirou Masuda scores the fight 29:29
Judge Tatsuya Matsuyama scores the fight 29:29
Judge Yukihiro Shimada scores the fight 28:29
The fight is ruled a majority draw!
|
|
|
|
|
|
|
|
|
|
|
|
|
|
|
|
|
|
|
|
|
|
|
| S |
C
A |
G |
S |
C
B |
G |
|
S |
C |
G |
|
energy
A | B |
|
hype
A | B |
|
pop
A | B |
|
mgr
A | B |
|
FIGHT
RATING
40% |
|
|
|
|
|
|
