|
|
PBP Commentary |
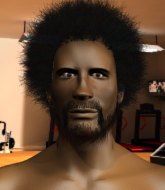
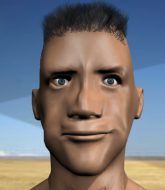
Coming up we have a heavyweight MMA rules bout between Sebastian Mayo (ranked 0 p4p, 0 weight class) and Johnny Dread (ranked 0 p4p, 0 weight class). Rumors backstage are that the fighters have been paid to keep it standing but we know that would never happen in MMA!
 |
|
 |
| 198 cm
24
215 lbs
1 - 3 - 0 |
|
215 cm
25
275 lbs
0 - 0 - 0 |
BJJ Blue Belt
Counter fighter
Cuts easily |
|
BJJ White Belt
Good low kicks
Heavy handed |
|
| |
|
Ladies and gentlemen. This fight is 3 rounds, in the heavyweight division.
Introducing the fighter to my left, fighting out of the red corner.
With a record of
1 - 3 - 0, fighting out of Las Vegas, Sebastian Mayo!
And introducing the fighter to my right, fighting out of the blue corner.
With a record of
0 - 0 - 0, fighting out of Las Vegas, Johnny Dread!
The judges for this bout are Wesley Smith, Robert Twigg and George Francis.

The bell rings for round one and we are underway!
Mayo shoots in looking for a double leg takedown. Dread defends it nicely.
A head kick by Dread misses
and Mayo counters with a shot to the ribs. That looked like it hurt.
A really sloppy takedown attempt there from Dread.

Dread gets tackled into the cage by Mayo. Mayo maintains the clinch.

Mayo has managed to pull guard. Let's see whether he can work an aggressive guard. It will also be interesting to see what tactics Dread uses from the top position.
Mayo keeping full guard, as Dread tries to pass.
Mayo is avoiding any damage by keeping wrist control.
Mayo wants to sweep here but Dread controlling him for the moment.
We've had a slow start to the round here - hopefully the action picks up.
Mayo has his hands on Dread's head, controlling the position.
Mayo keeping full guard, as Dread tries to pass.

That's one minute gone in the round.
Dread won't allow Mayo to get back to his feet.
Dread sitting in guard, not really doing much.
Dread trying to control but Mayo is working from the bottom.

The referee has stepped in and called for a break in the action. We'll restart on the feet.
Mayo fails with a takedown attempt.

Mayo tries to sprawl but Dread drives through with a takedown into half guard.
Mayo is trying is best to control the position here.
Dread seems to have lost interest with the ground game and is thinking about standing back up.

Mayo makes some distance and scrambles quickly back to his feet. Nice work!

That's two minutes gone in the round.
Dread closes the distance and clinches up, looking for a takedown. He shifts his weight and gets a nice trip into half guard.
Dread wants to lay and pray for a moment but Mayo keeps working.
Mayo has one foot on Dread's thigh - he pushes off and manages to get back to his feet.
Wooooo! Give it up for these two warriors! They are putting on a show!
A head kick misses from Dread.
A head kick by Dread misses
so Mayo counters with a double leg into guard. Good agility.
Mayo trying to land body shots but he keeps hitting the mat.
Dread really doesn't want to stay on the ground with Mayo. If he can't get it back to his feet, it's only a matter of time before he'll be tapping out.
Mayo works over Dread with some ground and pound from guard.
Dread controls Mayo momentarily but Mayo frees himself.
Mayo wants to control from the top but Dread keeps moving.

That's three minutes gone in the round.
Mayo throws a big elbow that misses.
Dread preventing the ground and pound from doing any damage.
Mayo might be looking to lock onto one of his opponent's long limbs for a submission, whilst we're on the ground.
Dread wants to sweep but no luck.
If this pace continues, the referee will definitely step in and force a standup.
The fighters are pressed up against the cage, both looking to find a bit of space to work.
Mayo stands up and waves to Dread to follow him.
Mayo misses with a two punch combination.
Mayo tries to close the distance and clinch up against the cage but Dread paws at him with a jab and circles away.
Dread tries to drive through with a takedown attempt but Mayo defends well and Dread ends up having to push Mayo into the cage where they will battle it out in the clinch.
Dread misses with a body punch.

That's four minutes gone in the round.
Dread is trying to pull guard but Mayo turns him against the cage and we stay in the clinch.
Sebastian Mayo has stuffed three takedown attempts in the round now. That's going to take a lot out of Johnny Dread.
Mayo stops a takedown attempt from Dread.
The fighters are starting to get sweaty, which will make takedowns a bit more tricky.
Dread is working for a takedown up against the cage. He can't get it on this occasion though.
Mayo has had enough of the clinch and is looking to separate.
Dread is trying to pull guard but Mayo turns him against the cage and we stay in the clinch.
Mayo manages to get underhooks and slows down the pace for a moment.
Dread can't get the takedown.
Dread is trying to break the clinch but Mayo is controlling him.
With the fighters up against the cage, Dread throws an elbow but misses.
And thats the end of the round the fighters go back to their corners.
Sebastian Mayo dominated that round.
The corners get their ten second warning. Both fighters stand from their stools and stare eachother down, ready to get back to the action.

Dread has a takedown stuffed.
Dread on the wrong end of a nice jab.
Johnny Dread seems to be the more aggressive standup fighter in this bout.
Dread changes levels and looks for a double leg takedown. Mayo tries to avoid it but Dread manages to keep hold of a leg and drag Mayo to the ground. Mayo escapes though and pops straight back up to his feet.
Dread fails with a takedown attempt from distance.
Sebastian Mayo has stuffed three takedown attempts in the round now. That's going to take a lot out of Johnny Dread.
Dread dives in and grabs Mayo's left leg, looking for a takedown. Mayo pushes down on Dread's head and hops out.
Mayo scores with a body shot.
Dread misses with a takedown
and Mayo cracks him with a counter punch right on the button.
We've had a slow start to the round here - hopefully the action picks up.
Mayo punishes Dread's body with a nice straight punch.
Dread is breathing heavily.
Mayo keeps the fight on the outside.
Mayo ducks low and lands a nice hook to the body of his opponent.
That's one minute gone in the round.
A low kick from Dread is predictable there
and Mayo counters with a nice jab to the body that keeps Dread thinking.
Mayo slaps away a takedown attempt from Dread, before circling back to the center of the mat.
It really doesn't seem like the step up in weight is hurting Mayo here at all. He's more than holding his own against the bigger man.
Mayo shoots in for a double leg but Dread sprawls well. That's going to sap some energy.
Dread goes for a double leg but Mayo avoids the attempt and the two fighters end up clinched against the cage as Mayo continues to drive forward.
A body shot lands from Mayo.
Mayo's corner are urging him to control the action in the clinch for a moment, rather than mount any serious offense. I'm sure the crowd appreciate those instructions... not.
Mayo pulls guard effortlessly.
Mayo is avoiding any damage by keeping wrist control.
Mayo wriggles free and stands up.
That's two minutes gone in the round.
Dread looks for a takedown here. Will he get it? Mayo is fending him off so far but Dread persists. Nope, Mayo circles away and we're back to standing.
Dread looking to shoot here. He's gone for it and he's landed a takedown into side control! Oh, that's bad for Mayo!
This has been an exciting period of action!
Mayo regains half guard.
Mayo gets full guard.
Sebastian Mayo overall seems to be getting the better of the ground position in the fight so far.
Mayo has butterfly guard. He's looking to stand up here. He pushes Dread off him and springs to his feet nicely. The crowd applauds.
Dread slips under a jab from Mayo.
Dread shoots in looking for a double leg takedown. Mayo defends it nicely.
Dread tries to grapple but his opponent circles
and Mayo counters with a nice body shot.
That's three minutes gone in the round.
Mayo scores with a jab to the head.
Mayo misses with a jab and misses with a cross straight after too.
Mayo lands a jab to Dread's midsection.
Mayo fakes high and shoots in for a takedown but Dread avoids it really well and circles away.
Dread darts in looking for a takedown but Mayo gets double underhooks and turns Dread into the cage.
Mayo keeps the fight in the clinch, despite Dread's efforts to push away.
That's four minutes gone in the round.
Mayo is defending well against a takedown attempt.
Dread is trying to pull guard but being pressed up against the cage enables Mayo to keep the fight standing.
Mayo pushes off an throws an elbow but Dread leans to the side and avoids it. We're back to clinching against the cage.
Dread throws an elbow but it's blocked.

Mayo manages to break the clinch.
Mayo misses with a jab and misses with a cross straight after too.
Mayo throws a good cross that connects.
Mayo defends well against a solid takedown attempt from Dread.
Mayo is really dominating this fight. Is there anything that Dread can do to turn this around?
No luck with that takedown attempt from Mayo.
Sebastian Mayo is looking to throw some combinations by the looks of things.
Dread shoots in but doesn't get the takedown
and Mayo counters with a lovely straight right hand!
And thats the end of the round the fighters go back to their corners.
Sebastian Mayo dominated that second round.
That's the end of the round. The referee orders the cornermen out of the cage so we can get back down to business. This is the final round!

Mayo keeps the fight on the outside.
Dread misses with a double jab.
Mayo bobs and weaves and unloads with a good uppercut.
A punch combination from Mayo misses.
Dread wants to clinch.
Dread scores with a nice takedown into half guard. Let's see what he's got on the ground.
We've had a slow start to the round here - hopefully the action picks up.
Mayo pushes Dread off and gets back to his feet.
Mayo instigates a clinch.
Mayo is trying to pull guard but Dread turns him against the cage and we stay in the clinch.
Fantastic stuff here - a very entertaining period of action, which has drawn cheers from the crowd.
Mayo successfully pulls guard.
That's one minute gone in the round.
A real slowdown in the pace of the fight for a moment, as Mayo holds on and takes a little breather.
Dread wants to control from the top but Mayo keeps moving.
Dread being controlled here momentarily.
Mayo is scooting his butt against the cage and has managed to get back to his feet. Dread presses him back against the cage, presumably looking to take the fight back to the mat.
Dread is trying to slow down the pace of the fight but Mayo is keeping busy.
Dread is trying to pull guard but Mayo has him pressed against the cage.
That's two minutes gone in the round.
Dread is trying to force a seperation but Mayo has the dominant position.
Mayo wants to get back to striking at distance but Dread won't allow it.
Dread is trying to pull guard but Mayo turns him against the cage and we stay in the clinch.
Dread tries to pull guard but can't drag his opponent to the mat. Mayo just stands there and leans against the cage.
Sebastian Mayo has stuffed three takedown attempts in the round now. That's going to take a lot out of Johnny Dread.
Dread takes a big intake of breath there - he's definitely tired.
Mayo stops a takedown attempt from Dread.
Mayo escapes the clinch and we're back to striking.
Dread fails with a takedown attempt.
Mayo jabs Dread right on the nose. Dread blinks but takes it well.
Dread wants to clinch but Mayo slips to the side
and Mayo counters with a shot to the ribs. That looked like it hurt.
That's three minutes gone in the round.
Dread tries for a takedown but Mayo sees it coming a mile off and avoids it easily.
Dread is looking to clinch but Mayo is avoiding it.
Mayo lands a jab.
Dread tries for a takedown but Mayo circles away easily
and Mayo counters with a left to the body.
Mayo scores with a nice strike.
Mayo tries to close the distance and clinch up but Dread swats him away and circles back towards the center.
Dread lands with a nice combination. Mayo backs away looking to recover.
Mayo has Dread up against the cage in a clinch.
Dread is trying to pull guard but Mayo turns him against the cage and we stay in the clinch.
That's four minutes gone in the round.
Dread wants to break the clinch but can't.
Mayo pulls guard successfully.
Mayo is pulling down on Dread's head to control his posture.
Mayo has butterfly guard. He's looking to stand up here. He pushes Dread off him and springs to his feet nicely. The crowd applauds.
The crowd are loving this. Great action here.
Mayo misses with a two punch combination.
Dread connects with a jab.
Sebastian Mayo is winning the standup battle so far.
Mayo fails miserably with a takedown attempt.
Dread shoots in for a double leg but Mayo sprawls well. That's going to sap some energy.
And that's the end of the fight!
Sebastian Mayo showed his dominance in that final round.
Well Mayo has outscored his opponent in every aspect of the fight today. Only a scarily incompetent judge or two will keep him from a well deserved win... Over to the ring announcer for the scorecards.
Ladies and gentlemen, after 3 rounds of action, we go to the scorecards for a decision.
Judge Wesley Smith scores the fight 30:27
Judge Robert Twigg scores the fight 30:27
Judge George Francis scores the fight 30:27
In favor of your winner, by unanimous decision... Sebastian Mayo!
|
|
|
|
|
|
|
|
|
|
|
|
|
|
|
|
|
|
|
|
|
|
|
| S |
C
A |
G |
S |
C
B |
G |
|
S |
C |
G |
|
energy
A | B |
|
hype
A | B |
|
pop
A | B |
|
mgr
A | B |
|
FIGHT
RATING
22% |
|
|
|
|
|
|
