|
|
PBP Commentary |
Coming up we have a middleweight MMA rules bout between Eliod Bunkley Iii (ranked 0 p4p, 0 weight class) and Memento Mori (ranked 0 p4p, 0 weight class). Bunkley Iii comes to the cage accompanied by Knocksville Girl. Memento Mori will no doubt be trying to keep this one on the feet, where he has a distinct advantage.
 |
|
 |
| 185 cm
29
193 lbs
19 - 16 - 1 |
|
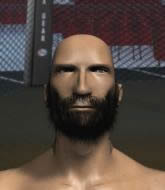
178 cm
29
197 lbs
17 - 8 - 0 |
Abu Dhabi Champ
Solid boxing
Cardio machine |
|
Good wrestler
Great elbows
Good gas tank |
|
| |
|
Ladies and gentlemen. This fight is 3 rounds, in the middleweight division.
Introducing the fighter to my left, fighting out of the red corner.
With a record of
19 - 16 - 1, fighting out of Las Vegas, Eliod Bunkley Iii!
And introducing the fighter to my right, fighting out of the blue corner.
With a record of
17 - 8 - 0, fighting out of Amsterdam, Memento Mori!
The judges for this bout are Frank Dennis, Chris Downing and George Francis.

The bell rings for round one and we are underway!
Bunkley Iii shoots in for a takedown but doesn't get it.
Bunkley Iii shoots in but doesn't get the takedown

and Mori counters by moving into the clinch. Good anticipation by Mori.
Bunkley Iii misses with a hook from the clinch.
Mori digs a right hand underneath Bunkley Iii's ribcage. Bunkley Iii let out a lung full of air as it connected.
An uppercut on the inside fails to land for Bunkley Iii.
Bunkley Iii tries to work over Mori's body with a swooping hook but it only glances the target.
Bunkley Iii tries to land a shot to the body but it's blocked.
Bunkley Iii's head jolts backwards as he takes an uppercut right on the button!
Bunkley Iii misses with a hook from the clinch.
Mori blocks a couple of punches on the inside.
Mori blocks a body shot from Bunkley Iii.
Mori lands a body punch in the clinch.
Mori lands a right hand.
Mori working aggressively here.
The crowd cheering loudly, showing their appreciation for the quality fight we're seeing here.
Bunkley Iii tried to land a shot to the body but connects with Mori's elbow.
Mori throws an elbow that misses.
Mori tries a shoulder strike but it doesn't do any damage.
Bunkley Iii misses with a punch to the body.
Bunkley Iii is looking to control Mori's arms but Mori gets an underhook and turns him. Now Bunkley Iii has his back to the cage.
Mori working some nice short punches in the clinch.

Bunkley Iii breaks the clinch.

That's one minute gone in the round.
Bunkley Iii throws a wild combination but nothing lands.
Mori lands a nice shot to the body.
Mori throws a feint and then finishes with a kick to the body.
Mori defends well against a solid takedown attempt from Bunkley Iii.
That's three failed takedown attempts in the round for Eliod Bunkley Iii. That's going to take a lot out of him.
Bunkley Iii is breathing heavily.
A good leg kick by Mori.
Bunkley Iii swats away the attempt to clinch by Mori.
Mori has been working on his striking defense in training and it's paying off as Bunkley Iii is landing a low percentage of strikes.
Mori tries to close the distance and clinch but Bunkley Iii swats him to one side with an open hand palm strike and circles away.
Mori uses good footwork to get in and out, landing a nice hook.
We've seen a great period of action over the last minute or so - credit to both fighters for going all out!
Bunkley Iii misses with a takedown attempt. He shot from a bit too far out.
Mori scores with a jab to the jaw of his opponent.

It looks like Eliod Bunkley Iii has been cut.
Mori lands with a good body shot.
Bunkley Iii shoots in for a takedown but Mori shows good takedown defense.
Bunkley Iii throws a big shot that misses.
Mori cracks Bunkley Iii with an open hand slap.
Mori throws a quick inside leg kick.

That's two minutes gone in the round.
Bunkley Iii tries to drive through with a takedown attempt but Mori defends well and Bunkley Iii ends up having to push Mori into the cage where they will battle it out in the clinch.
Mori lands with a short punch from the clinch.
Bunkley Iii misses with a hook from the clinch.
Bunkley Iii is trying to stall.
Bunkley Iii is trying to break the clinch but Mori is controlling him.
A short uppercut from Bunkley Iii.
Bunkley Iii throws a head punch that misses.
Bunkley Iii is trying to force a seperation but Mori has the dominant position.
Bunkley Iii misses with a punch to the body.
A short body shot lands from Mori as the two fighters clinch.

Mori pushes off and circles away, back to the middle of the mat.
Bunkley Iii fakes high and swings low for a body shot but Mori manages to avoid it.
Bunkley Iii looks for a takedown but Mori sprawls well.
Bunkley Iii fails with a takedown attempt.
Bunkley Iii shoots in for a double leg but Mori sprawls well. That's going to sap some energy.

Bunkley Iii rushes Mori and pushes him back against the cage in a clinch.

That's three minutes gone in the round.
Bunkley Iii is trying to break the clinch but Mori is controlling him.
This is turning into a torrid day at the office for Bunkley Iii. He's trying desperately to land a takedown but he's failing miserably and getting slapped silly on the feet to compound his misery.
Nice elbow from Mori.
With the fighters clinched against the cage, Mori creates a bit of distance for himself and scores with a nice uppercut.
Mori lands a right hand that snaps the head of Bunkley Iii backwards.
Bunkley Iii can't find room to land a body shot as Mori controls the action.
Mori breaks the clinch and we're back to striking at distance.
Bunkley Iii has his head snapped back a nice jab. A little nod from Bunkley Iii there as he acknowledges the shot.
Mori ducks low and lands a nice hook to the body of his opponent.
Mori wants to clinch up but Bunkley Iii keeps it at a distance.

Mori lands a big right hand that sends Bunkley Iii crashing to the mat! Mori stays standing though and waves Bunkley Iii back to his feet!

Bunkley Iii is rocked!
The fans in attendance giving it up for the two fighters, who have really let it all hang out in the last minute or so!
Mori connects with a solid leg kick.
Oh Bunkley Iii is still all over the place! His legs are completely gone! Will he be able to recover?!!
Mori cracks Bunkley Iii with a big right hand that sends him crashing to the floor. Mori has the opportunity to follow him to the ground but instead he's beckoning Bunkley Iii to stand back up!

Bunkley Iii closes the distance, clinches up and gets a nice trip takedown into side control. Very smooth.
Bunkley Iii working away.
Mori is positioning himself to get back to half guard.
Bunkley Iii seems to have got his legs back now.
Mori wants to control but Bunkley Iii postures up.

That's four minutes gone in the round.
Mori tries to get back to half guard but can't.
Bunkley Iii throwing ground and pound but whilst doing so, he forgets to control position and Mori works his way back to half guard. Good composure under pressure.
Mori wants to control but Bunkley Iii is keeping busy and won't allow it.
The crowd are going absolutely nuts as the round comes to an end - what a fantastic round of action!
Bunkley Iii is looking to advance position but Mori won't allow it.
Mori is trying to get back to full guard.
And thats the end of the round the fighters go back to their corners.
Memento Mori dominated that round.
The cut man is working on Eliod Bunkley Iii's cut.
Well, the break between rounds is over. Let's get back to the scrappin!

Bunkley Iii keeps the fight on the outside.
Bunkley Iii has his head snapped back a nice jab. A little nod from Bunkley Iii there as he acknowledges the shot.
Bunkley Iii gets to the clinch - let's see what his plan is here.
Mori gets an overhook and lands an elbow to the side of the head.
An uppercut on the inside fails to land for Mori.
Bunkley Iii blocking some punches.
Bunkley Iii scores with a hook to the body.
Bunkley Iii tried to land a shot to the body but connects with Mori's elbow.
Mori can't find room to land a body shot as Bunkley Iii controls the action.
Bunkley Iii doesn't land with the attempted body shot.
Bunkley Iii tries to land a shot to the body but it's blocked.
Mori has been the more effective fighter overall so far.
Bunkley Iii manages to break the clinch.
Wooooo! Give it up for these two warriors! They are putting on a show!
Bunkley Iii tries to score a power double leg takedown but Mori sees that one coming and sprawls well. That will dishearten Bunkley Iii somewhat.
Mori lands a jab to the head.
Bunkley Iii is looking for a takedown here. He's shot in and has managed to get it, finishing up in Mori's half guard.
That's one minute gone in the round.
Mori avoiding damage under a succession of punches from Bunkley Iii.
Bunkley Iii wants to pass the guard but Mori is defending well.
Bunkley Iii is thwarting Mori's attempts to control the position.
Mori works his way to full guard. Good work.
The ref warns both fighters not to hold the cage as they work up against the meshing.
A big thud reverberates around the arena there as Bunkley Iii accidentally thumps the mat. Hopefully he's not broken his hand.
Mori is avoiding any damage by keeping wrist control.
Bunkley Iii lands a couple of digs.
Mori keeping full guard, as Bunkley Iii tries to pass.
That's two minutes gone in the round.

Bunkley Iii is holding a leg here, probably looking for an ankle lock - he drops back and goes for it! Mori is in trouble! Is it all over??? No! Mori has escaped and now he's on top!
Bunkley Iii has a loose triangle. He'll be looking to tighten that up but Mori can see exactly what he's planning and manages to posture up and free himself.
Bunkley Iii controls Mori momentarily but Mori frees himself.
Bunkley Iii is throwing his legs up, looking for submissions. Mori is aware though and is defending well.
Mori slips effortlessly into side control - very nice.
This is a great period of action - very entertaining stuff!
Bunkley Iii takes a couple of big shots there - the referee warns him that he has to defend himself better.
That's three minutes gone in the round.
Bunkley Iii takes a couple of big shots there - the referee warns him that he has to defend himself better.
Mori lands a knee to the body and a forearm to the face.
Mori cracks Bunkley Iii with an elbow. That is naaassty.
Mori is looking to take a break and control but Bunkley Iii is keeping him honest, looking to work from the bottom.
Bunkley Iii is trying to control Mori's posture but Mori avoids it.
The fighters are pressed up against the cage, both looking to find a bit of space to work.
Bunkley Iii is in a tricky position but he's been working on his transitions down at Miletich Xtreme Fighting Systems, so we'll see if he gets out of it.
Check out the look on Mori's face as he threw that strike - that's one determined fighter!
That's four minutes gone in the round.
Mori landing with strikes to the head and body from side control.
The fans in attendance giving it up for the two fighters, who have really let it all hang out in the last minute or so!
Bunkley Iii is trying to improve his position.
Mori working the ground and pound from side control.
Bunkley Iii manages to get one leg in to regain half guard.
The crowd are going absolutely nuts as the round comes to an end - what a fantastic round of action!
Bunkley Iii looking for submissions from an awkward position here.
Bunkley Iii is looking to regain full guard. Not this time though.
And thats the end of the round the fighters go back to their corners.
Memento Mori showed his class in that round. I'd imagine he'll take it on all the scorecards.
The cut man is working on Eliod Bunkley Iii's cut.
That's the end of the interval. I'm sure that seemed a lot quicker than a minute for our two fighters! Back to the action. This is the final round!

Mori lands a nice leg kick that just misses Bunkley Iii's sensitive parts.
Bunkley Iii has his front leg slapped to the side - a nice low kick landing there from Mori.
Bunkley Iii circles away from the clinch attempt.
Bunkley Iii scores with a takedown into Mori's guard.
Bunkley Iii throwing strikes but missing.
Bunkley Iii throws an elbow that misses. Mori uses the momentum to reverse the position. He's now in Bunkley Iii's guard. Nice move by Mori!
Mori lands a nice shot whilst sitting in his opponent's guard.
Mori cracks Bunkley Iii with a solid left hand.
The fans in attendance giving it up for the two fighters, who have really let it all hang out in the last minute or so!
Mori looking to pass the guard.
Bunkley Iii is throwing his legs up, looking for submissions. Mori is aware though and is defending well.
That's one minute gone in the round.
Mori tries to stand but Bunkley Iii is controlling from the bottom.
Bunkley Iii has an active guard here but Mori has managed to pass into half guard.
Bunkley Iii is trying to control but can't.
Mori wants to pass to mount but Bunkley Iii is defending the position.
Bunkley Iii looking for submissions from an awkward position here.
Bunkley Iii trying to control but Mori postures up.
Bunkley Iii regains full guard. Nicely done.
That's two minutes gone in the round.
Bunkley Iii has his foot on Mori's thigh. He's trying to push off and get in position for a triangle, I think. Mori works his way back into a safe position though.
Both fighters are breathing heavily.
Mori pushes down on Bunkley Iii's leg and manages to get into half guard.
Bunkley Iii regains full guard. Nicely done.
Bunkley Iii is looking for a triangle here but Mori uses the submission attempt to pass into side control.
Mori is putting a hurting on Bunkley Iii here, landing some big shots from side control.
Memento Mori has got the better of the ground game so far.
This has been an exciting period of action!
Mori working the body and head with strikes.
Bunkley Iii is not in a great position here, taking some shots.
Bunkley Iii takes an elbow right on the bridge of the nose and winces in pain.
That's three minutes gone in the round.
Bunkley Iii wants to control but Mori postures up.
Bunkley Iii tries to work a leg under to get back to half guard but Mori wriggles his own leg back out and remains in side control.
Mori trying to control the action but Bunkley Iii is working from the bottom.
Bunkley Iii struggling a bit here.
Mori lands a nice forearm strike.
Mori wants to control but Bunkley Iii is keeping him busy.
Bunkley Iii is looking to reverse the position.
Bunkley Iii is moving his hips around well on the bottom and has managed to get back to half guard.
That's four minutes gone in the round.
Bunkley Iii actively working from the bottom here.
Mori frees up his trapped foot and advances to mount.
Mori scores with a couple of good head shots there.
Wooooo! Give it up for these two warriors! They are putting on a show!
Bunkley Iii is desperately trying to get back to half guard.
Mori drops a big elbow. That's hurt Bunkley Iii! More shots from Mori and the ref steps in! The fight is over!
Ladies and gentlemen, after 4:49 of round 3, we have a winner by way of TKO (Strikes). Memento Mori!
Memento Mori thanked the fans post fight for their support.
|
|
|
|
|
|
|
|
|
|
|
|
|
|
|
|
|
|
|
|
|
|
|
| S |
C
A |
G |
S |
C
B |
G |
|
S |
C |
G |
|
energy
A | B |
|
hype
A | B |
|
pop
A | B |
|
mgr
A | B |
|
FIGHT
RATING
100% |
|
|
|
|
|
|
