|
|
PBP Commentary |
Coming up we have a featherweight MMA rules bout between Matt Buckner (ranked 0 p4p, 0 weight class) and Nathan Redmond (ranked 0 p4p, 0 weight class). Both fighters look fresh as a daisy as they make their way towards the cage.
 |
|
 |
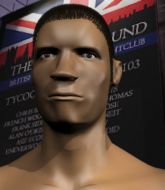
| 160 cm
33
150 lbs
23 - 14 - 1 |
|
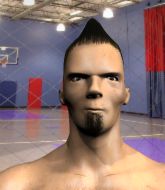
166 cm
28
157 lbs
14 - 15 - 0 |
Good wrestling
Lethal high kicks
KO power |
|
Excellent grappler
Lethal high kicks
Good gas tank |
|
| |
|
Ladies and gentlemen. This fight is 3 rounds, in the featherweight division.
Introducing the fighter to my left, fighting out of the red corner.
With a record of
23 - 14 - 1, fighting out of Rio de Janeiro, Matt Buckner!
And introducing the fighter to my right, fighting out of the blue corner.
With a record of
14 - 15 - 0, fighting out of Rio de Janeiro, Nathan Redmond!
The judges for this bout are Paulo Santos, Seu Braga and Edson Gomes.

The bell rings for round one and we are underway!

Buckner ducks straight into an uppercut from Redmond and tumbles to the canvas! Its a flash knockdown though - Buckner manages to regain guard straight away.

Buckner is rocked!

It looks like Matt Buckner has been cut.
Wooooo! Give it up for these two warriors! They are putting on a show!
The referee is pacing around the two fighters - he looks like he's thinking about a standup.
Redmond throws a big right hand that misses.
Oh Buckner is still in real trouble! Will he be able to recover?!!
Redmond throwing strikes from guard but Buckner blocks nicely.
Buckner seems to have got his legs back now.
Buckner is working from a closed guard but he's struggling to control his opponent.
Redmond in full guard, throwing the ground and pound. No damage this time.
Buckner looking to hit a scissor sweep but Redmond is one step ahead there.
Redmond content to strike from guard, landing some decent shots.
Redmond working some ground and pound from guard but it's not doing any damage.
Buckner wants to stand up but Redmond is controlling him.
Buckner looking to hit a scissor sweep but Redmond is one step ahead there.
Redmond postures up to throw the ground and pound strikes but they don't connect.

That's one minute gone in the round.
Redmond with a flurry of punches that miss.
Buckner keeping moving, preventing Redmond from controlling successfully.
Buckner avoiding any damage from the ground and pound.
Redmond loading up with the ground and pound but he's missing more than he's landing in this flurry.
Buckner looking to control.
Redmond trying to control but Buckner is working from the bottom.

Neither fighter is doing enough for the referee's liking and he's decided to stand them back up.

Redmond looking to shoot here. He's gone for it and he's landed a takedown into side control! Oh, that's bad for Buckner!
Buckner can't do much from the bottom here.
Buckner is going to have to think about doing something other than just controlling because Redmond is managing to avoid having the position dictated to him.

That's two minutes gone in the round.
Redmond is chipping away with strikes.
Redmond working away diligently from side control. Landing strikes effectively there - that will score him some points on the judges scorecards.
The crowd cheering loudly, showing their appreciation for the quality fight we're seeing here.
Redmond landing strikes.
Buckner takes a couple of big shots there - the referee warns him that he has to defend himself better.
Buckner is working hard to escape and get back to his feet. After a battle for position, Redmond asserts his dominance and retains side control.
Buckner being controlled for a moment.
Buckner parries the strikes from Redmond easily there. Redmond is wary of posturing up too much because it might enable Buckner to escape.
You can see the frustration on Buckner's face, being in this tough position on the bottom.

That's three minutes gone in the round.
Sloppy strikes there by Redmond.
Buckner takes an elbow right on the bridge of the nose and winces in pain.
Redmond working the ground and pound but he's contacting the mat, not the fighter.
Redmond is putting a hurting on Buckner here, landing some big shots from side control.
Buckner sneaks a leg under to get back to half guard.
Redmond missing with the ground and pound from half guard.
Buckner is trying to stand.
Buckner blocking the ground and pound attempt from Redmond.
Redmond is trying to control the action in half guard but Buckner is working away on the bottom, looking perhaps to get back to full guard.
Buckner trying to control here.
Redmond tries to stand and escape but Buckner is controlling the position.
The ref warns both fighters not to hold the cage as they work up against the meshing.

That's four minutes gone in the round.
Buckner tries to kick Redmond off but Redmond keeps his base steady and stays in half guard.
The fans in attendance giving it up for the two fighters, who have really let it all hang out in the last minute or so!
Buckner is refusing to be controlled, as Redmond sits in half guard.

Nathan Redmond has forced the referee to step in and restart the fight on the feet.
Redmond tries to clinch up against the cage, rushing in to close the distance. Buckner manages to break the clinch and circles back to the middle of the mat.
Wow, both these guys are really going for it!
Buckner will have to do better than that with his takedown attempts.
Buckner keeps the fight on the outside.
The fight stays on the outside here - Buckner looks like he's thinking about clinching though.
Buckner shoots in for a takedown. "I don't think so" says Redmond as he avoids it easily.
Buckner looks frustrated there after his takedown attempt is stuffed easily.
That's three failed takedown attempts in the round for Matt Buckner. That's going to take a lot out of him.
Buckner has his head slapped from side to side by a 3 punch combination. That must have hurt him.
The crowd are going absolutely nuts as the round comes to an end - what a fantastic round of action!
Buckner scores with a jab. Redmond acknowledges it with a nod of the head.
Redmond looks for a takedown but Buckner sprawls well.
Redmond fails in his attempt to clinch.
And thats the end of the round the fighters go back to their corners.
Nathan Redmond dominated that round.
The cut man is working on Matt Buckner's cut.
That's time! Buckner's corner gives him a slap on the ass as he gets ready to fight.


Redmond has closed the distance and engaged Buckner in a clinch.
Buckner is trying to drag Redmond to the mat but Redmond just about manages to keep his footing. He used the cage to his advantage there.
I was talking to Buckner's coach per-fight and he was telling me that they'd been working on the clinch in the runup to this fight.
Redmond stalling in the clinch but Buckner improves position.
Buckner is trying to pull guard but Redmond has him pressed against the cage.
Redmond creates a bit of space for himself and sneaks an elbow through Buckner's defenses.
Redmond tries to land a knee to the head but Buckner blocks with his arms.
Redmond stops a takedown attempt from Buckner.
That's three failed takedown attempts in the round for Matt Buckner. That's going to take a lot out of him.
Redmond effectively controlling the action here.
Buckner throws a blind hook that connects with the side of Redmonds head.
Buckner misses with an elbow over the top.
Buckner pushes Redmond back against the cage and lands a hook to the side of the head.
Buckner tries for a takedown. No joy.
Redmond landing knees to the body. They look like they could hurt.
Buckner blocks a knee to the body. He'll have a nicely bruised forearm in the morning.
That's one minute gone in the round.
Redmond tries a knee to the head but he's missed.
Redmond tries to land a knee to the head but Buckner blocks with his arms.
Redmond misses with an elbow strike.
Redmond is pressed up against the cage. Buckner has hold of a leg and is looking to drag Redmond down to the mat. Redmond avoids the attempt though and has circled away. We're back to striking at a distance.
The crowd cheers as Redmond lands an impressive looking overhand right. Buckner doesn't seem phased though.
Redmond feints and then dives in with a takedown. That was a long way out but the feint bought him enough time to close the distance and complete the takedown. Now we'll play guard for a bit and see who can get the better of that position.
Buckner wants to improve his position but instead Redmond has moved into half guard.
Redmond throwing shots but they're hitting the canvas more than the man.
Redmond trying to mount his opponent but Buckner defends it.
Redmond missing with some ground and pound from the half guard.
Buckner gets back to full guard.
Buckner keeping moving, preventing Redmond from controlling successfully.
That's two minutes gone in the round.
Fantastic stuff here - a very entertaining period of action, which has drawn cheers from the crowd.
Redmond is working Buckner over from the guard. He should look to pass the guard and do a little more damage with these strikes.
Redmond throwing elbows and punches but not connecting, as Buckner works some decent striking defense from the bottom.
Redmond throws a big elbow that misses.
Redmond keeps in close for a moment and lands a decent shot to the side of Buckner's head.
Redmond tries to free his leg and advance position but Buckner is retaining full guard.
Redmond wants to control from the top but Buckner keeps moving.
Redmond working some ground and pound from guard but it's not doing any damage.
Buckner is looking to get back to his feet but can't, whilst Redmond is controlling him.
Buckner has a closed guard, preventing Redmond from standing up.
Redmond is pushing down on Buckner's leg trying to pass to half guard. Buckner is fighting to maintain full guard but Redmond has managed to sneak the leg through.
That's three minutes gone in the round.
Buckner trying to control but Redmond postures up.
The fighters are pressed up against the cage, both looking to find a bit of space to work.
Buckner is trying to stand up here but Redmond is controlling him well.
Redmond wants to take a breather but Buckner is having none of it.
Redmond trying to mount his opponent but Buckner defends it.
Redmond trying to control the action but Buckner is working from the bottom.
It looks like the ref is thinking about a standup.
Buckner wants to get back to full guard.
Redmond working over Buckner with some ground and pound. Buckner looks like he wants out of this position, which is understandable.
Redmond throwing shots but Buckner is blocking nicely.
Buckner tries to kick Redmond off but Redmond keeps his base steady and stays in half guard.
Redmond looks over to his corner - he wants some instructions but his corner are not responding.
Redmond thumps the canvas. Not on purpose obviously - he just missed Buckner's head.
That's four minutes gone in the round.
Buckner looks like he's trying to stand up.
Redmond thows a huge punch but Buckner dodges it nicely.
Redmond sitting in half guard, looking to land shots. Buckner defending well though.

Redmond seems to be working for a kimura but Buckner defends the submission attempt.
Buckner desperately trying to maintain half guard.
Redmond looks towards his corner to check for any instructions. The corner give him nothing to work with, so he cracks Buckner with a short hammerfist. I guess that's as good as any advice he could get in this position.
Wooooo! Give it up for these two warriors! They are putting on a show!
As the round comes to an end the crowd are showing their appreciation for a great round of action.
Redmond lands with a punch from half guard.
Redmond not throwing his punches with enough precision this time.
Buckner taking some punishment here, with Redmond in his half guard.
And thats the end of the round the fighters go back to their corners.
Nathan Redmond showed his class in that round. I'd imagine he'll take it on all the scorecards.
The cut man is working on Matt Buckner's cut.
That's the end of the round. The referee orders the cornermen out of the cage so we can get back down to business. This is the final round!

No luck with that takedown attempt from Buckner.
Redmond sizes up Buckner with a pawing jab and scores with a straight right down the middle.
Buckner misses with a two punch combination.
Redmond lands a jab to the nose.
Redmond rushes Buckner and presses him up against the cage.
Buckner wants to take the fight to the mat but Redmond manages to get underhooks and keep the fight in the clinch.

Redmond breaks the clinch and we're back to striking at distance.
Redmond keeps the fight standing with a nice sprawl.
That's three failed takedown attempts in the round for Matt Buckner. That's going to take a lot out of him.
Redmond pushes Buckner up against the cage in a clinch.
Buckner has dropped down and is looking to force the takedown but it's defended by Redmond after a bit of a struggle.
Buckner goes for a takedown attempt but Redmond pushes him away and we're back to fighting at a distance.
Redmond fires a straight punch through the middle that cracks Buckner square on the jaw! Damn, Buckner is out cold on his feet and topples face first to the canvas! Wow, I haven't seen a knockout that brutal in a long time!
Ladies and gentlemen, after 0:52 of round 3, we have a winner by way of KO (Punch). Nathan Redmond!
Jumping up and down and very excited, Nathan Redmond waved his t-shirt featuring Mango Nutrition 's logo in front of the cameras.
|
|
|
|
|
|
|
|
|
|
|
|
|
|
|
|
|
|
|
|
|
|
|
| S |
C
A |
G |
S |
C
B |
G |
|
S |
C |
G |
|
energy
A | B |
|
hype
A | B |
|
pop
A | B |
|
mgr
A | B |
|
FIGHT
RATING
100% |
|
|
|
|
|
|
