|
|
PBP Commentary |
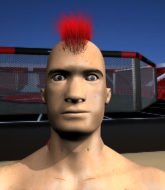
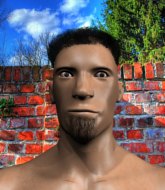
Coming up we have a middleweight MMA rules bout between Marcos Ayers (ranked 0 p4p, 0 weight class) and Fletcher Stott (ranked 0 p4p, 0 weight class). Fletcher Stott will no doubt be looking to use his reach advantage to good effect.
 |
|
 |
| 166 cm
22
193 lbs
0 - 2 - 0 |
|
185 cm
18
185 lbs
0 - 0 - 0 |
BJJ Blue Belt
Counter fighter
Cuts easily |
|
BJJ Blue Belt
Brawler
Enjoys gardening |
|
| |
|
Ladies and gentlemen. This fight is 3 rounds, in the middleweight division.
Introducing the fighter to my left, fighting out of the red corner.
With a record of
0 - 2 - 0, fighting out of Las Vegas, Marcos Ayers!
And introducing the fighter to my right, fighting out of the blue corner.
With a record of
0 - 0 - 0, fighting out of Las Vegas, Fletcher Stott!
The judges for this bout are Frank Dennis, Wesley Smith and Robert Twigg.

The bell rings for round one and we are underway!

Stott gets tackled into the cage by Ayers. Ayers maintains the clinch.

Stott gets the body lock takedown. After a quick scramble, Ayers regains guard.
The referee is asking the fighters to pick up the pace.
Stott won't allow Ayers to get back to his feet.
Ayers looking to sweep here. No luck so far.
Ayers looking to control the pace of the fight rather than finish it.
Ayers might be looking to lock onto one of his opponent's long limbs for a submission, whilst we're on the ground.
A big thud reverberates around the arena there as Stott accidentally thumps the mat. Hopefully he's not broken his hand.
Stott wants to control from the top but Ayers keeps moving.
Ayers looking for a sweep. Not yet Ayers, not yet.
Ayers pulls Stott in to control the position.

The referee decides to stand the fighters back up.
Stott tries a switch kick but it misses it's target.
Stott connects with an inside leg kick.

That's one minute gone in the round.
Stott throws the overhand right but ducks down into a quick takedown attempt. Ayers was covering up waiting for the punch and Stott finishes the takedown easily into guard.
A real slowdown in the pace of the fight for a moment, as Ayers holds on and takes a little breather.
Stott works a leg free and moves into half guard.
Ayers has no desire to be mounted, so is trying to control. Stott is working away from the top position though.
Ayers has his hands clasped together around Stott's back. He's all about the action.
Ayers is looking to regain full guard. Not this time though.

That's two minutes gone in the round.
Stott seems to have lost interest with the ground game and is thinking about standing back up.

Stott is looking for an arm triangle, whilst trying to pass to side control. Ayers doesn't seem that keen to cooperate though. No luck this time Stott.
Stott throwing shots but Ayers is blocking nicely.
Stott thows a wild elbow that connects with the canvas.
Stott trying to pass the guard but Ayers defending well.
Ayers controlling the position for now.

That's three minutes gone in the round.
Stott prevents Ayers from improving his position.
Stott tries to stand but can't do so whilst Ayers controls his leg.
Ayers is trying to get back to full guard.
Ayers really is a fat lump.
Stott wants to work for an arm triangle but Ayers is really keeping half guard well and defending the submission attempt.
Ayers is controlling Stott's trapped leg to prevent Stott from advancing to side control.
Ayers wants to get back to full guard.

That's four minutes gone in the round.
Ayers is controlling Stott's trapped leg to prevent Stott from advancing to side control.
Stott seems to be looking for submissions.
Ayers is positioning himself well to prevent Stott advancing to mount.
Ayers tries to roll over but Stott keeps him under control.
The fighters are pressed up against the cage, both looking to find a bit of space to work.
The crowd applaud the fighters efforts here as the round comes to an end.
Ayers is controlling Stott's position as best he can from this difficult position.
And thats the end of the round the fighters go back to their corners.
A close round but Fletcher Stott will probably get the nod.
Well, the break between rounds is over. Let's get back to the scrappin!

Stott throws a left and a right that both miss

and Ayers counters with a nice shoot takedown that brings the fighters to the ground.
Ayers chips away with some ground and pound.
Stott throws his legs up looking for a submission but Ayers uses it to pass to side control.
Stott is trying to stand back up. He's worked his way up against the cage but Ayers has just dragged him back down to the mat.
Stott gets back to half guard.
Ayers seems to be taking a bit of a break to think of his next move. He lands a short punch in the meantime.
That's one minute gone in the round.
Stott wants to get back to full guard.
Ayers trying to mount his opponent but Stott defends it.
Stott wants to get back to his feet.
Stott is breathing heavily.
Ayers scoring with strikes to the body and head.
Stott trying to control here but he's found himself mounted! Oh no!
That's two minutes gone in the round.
Ayers putting on the heat here with some good ground and pound!
Ayers knows he needs to get back to his feet asap. He's simply no match for Stott on the ground.
Ayers lands a couple of nice shots there from mount.
Stott gets back to half guard.
Ayers throwing punches and elbows but they're not doing any damage.
Ayers is thwarting Stott's attempts to control the position.

Ayers looking for a kimura but he'll have to free his other leg if he wants to finish that. Perhaps he's just using it as a distraction technique.
That's three minutes gone in the round.
Ayers is stalling here. Stott is in no mood to hang around though. He's locked up a kimura from the bottom! Ayers seems to be keeping calm but he's forced to roll out of the hold and Stott has ended up in side control on the top. Nice work.
Ayers gets back to half guard.
That's four minutes gone in the round.
Ayers wants to get back to full guard.
Ayers is looking to escape.
Stott is looking to take a break and control but Ayers is keeping him honest, looking to work from the bottom.
Stott tries to stand and escape but Ayers is controlling the position.
Stott lands strikes from half guard.
The crowd applaud the fighters efforts here as the round comes to an end.
Ayers is trying is best to control the position here.
Marcos Ayers overall seems to be getting the better of the ground position in the fight so far.
The ref warns both fighters not to hold the cage as they work up against the meshing.
And thats the end of the round the fighters go back to their corners.
Marcos Ayers dominated that second round.
That's time! Ayers's corner gives him a slap on the ass as he gets ready to fight. This is the final round!

Ayers clinches.
Stott is trying to force a seperation but Ayers has the dominant position.
Ayers has double underhooks and is working for a body lock takedown. He's got it. The fighters land in half guard but Stott regains guard immediately.
Ayers is sitting in guard, working some ground and pound.
Stott is trying to control the position but Ayers postures up.
Stott is trying to hold Ayers in close to prevent damage but Ayers has managed to pass into half guard.
Ayers thumps the canvas. Not on purpose obviously - he just missed Stott's head.
That's one minute gone in the round.
Stott is pressing down on Ayers's left leg trying to get back to full guard. He's managed it.
Ayers drops back, looking for a kneebar! Stott looks panicked! The fighters roll across the mat, one looking to finish, one looking to escape. Stott looks to have wriggled free... Yes, he's got his leg free and he's dived into side control! Good work there from Stott!
Ayers is not content to let Stott control the position.
Ayers is trying to control Stott's posture but Stott avoids it.
That's two minutes gone in the round.
Ayers is looking to reverse the position.
Ayers controls the position for a moment.
Ayers can't do much from the bottom here.
Stott working the ground and pound.
Ayers is trying to control Stott's posture but Stott avoids it.
Ayers is putting a lot of effort into getting back to his feet here.
Stott wants to control but Ayers is keeping him busy.
That's three minutes gone in the round.
You can see the frustration on Ayers's face, being in this tough position on the bottom.
Stott wants to lay and pray for a moment but Ayers keeps working.
Ayers is positioning himself to get back to half guard.
Stott tries to stand but Ayers is controlling his head.
That's four minutes gone in the round.
Stott is looking for a kimura. He might have it! No, Ayers has escaped the position, nice work there.
Stott wants to stand but Ayers is controlling his arm.
Stott takes a big intake of breath there - he's definitely tired.
Stott wants to control but Ayers is keeping him busy.
You can see the frustration on Ayers's face, being in this tough position on the bottom.
Ayers wants to escape from the position here - easier said than done!
The crowd applaud the fighters efforts here as the round comes to an end.
Ayers throws an elbow to the body but it doesn't land.
And that's the end of the fight!
Marcos Ayers showed his dominance in that final round.
I think Ayers has won this one but let's see what the judges have to say. Over to the ring announcer for the scorecards.
Ladies and gentlemen, after 3 rounds of action, we go to the scorecards for a decision.
Judge Frank Dennis scores the fight 29:28
Judge Wesley Smith scores the fight 29:28
Judge Robert Twigg scores the fight 29:28
In favor of your winner, by unanimous decision... Marcos Ayers!
|
|
|
|
|
|
|
|
|
|
|
|
|
|
|
|
|
|
|
|
|
|
|
| S |
C
A |
G |
S |
C
B |
G |
|
S |
C |
G |
|
energy
A | B |
|
hype
A | B |
|
pop
A | B |
|
mgr
A | B |
|
FIGHT
RATING
41% |
|
|
|
|
|
|

