|
|
PBP Commentary |
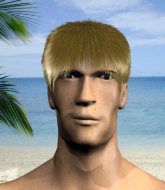
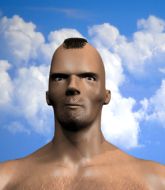
Coming up we have a featherweight MMA rules bout between Akiyama Shinichi (ranked 0 p4p, 0 weight class) and Jay Zol (ranked 0 p4p, 0 weight class). Jay Zol will no doubt be looking to use his reach advantage to good effect.
 |
|
 |
| 155 cm
34
145 lbs
18 - 9 - 1 |
|
170 cm
28
148 lbs
12 - 11 - 0 |
Abu Dhabi Champ
Counter fighter
Granite chin |
|
Olympic wrestler
Excellent boxer
Good gas tank |
|
| |
|
Ladies and gentlemen. This fight is 3 rounds, in the featherweight division.
Introducing the fighter to my left, fighting out of the red corner.
With a record of
18 - 9 - 1, fighting out of Los Angeles, Akiyama Shinichi!
And introducing the fighter to my right, fighting out of the blue corner.
With a record of
12 - 11 - 0, fighting out of Los Angeles, Jay Zol!
The judges for this bout are Jack Bonds, and Don Winkell.

The bell rings for round one and we are underway!
Shinichi walks into a straight right hand from Zol.
Zol scores with a jab.
Zol throws a nice looking combination but Shinichi bobs and weaves to avoid any damage.
Shinichi slips a jab and a cross from Zol.

Shinichi looks for a takedown. He's got it. We're now in half guard.
If this pace continues, the referee will definitely step in and force a standup.
Zol tries to kick Shinichi off but Shinichi keeps his base steady and stays in half guard.

Zol pushes Shinichi off and gets back to his feet.
Zol misses with the combination.
Zol misses with a few strikes there.
Jay Zol seems to be the more aggressive standup fighter in this bout.
Zol throws a lazy right hand but Shinichi sees it coming a mile off and sidesteps it easily.
Zol jabs Shinichi right on the nose. Shinichi blinks but takes it well.
A big right from Zol misses.
Shinichi tries to drive through with a takedown attempt but Zol defends well and Shinichi ends up having to push Zol into the cage where they will battle it out in the clinch.
Shinichi lands a takedown into guard.
The ref warns both fighters not to hold the cage as they work up against the meshing.
The fans in attendance giving it up for the two fighters, who have really let it all hang out in the last minute or so!
Zol wants to stand up but Shinichi is controlling him.
Shinichi wants to control from the top but Zol keeps moving.

That's one minute gone in the round.
Shinichi tries to free his leg and advance position but Zol is retaining full guard.
Both fighters really going for it on the ground here!
Zol wants to get back to his feet but Shinichi is in a dominant position and won't allow it.
Zol keeping moving, preventing Shinichi from controlling successfully.
We may be looking at a referee standup if the pace doesn't pick up soon.
Zol can't do much from the bottom at the moment, as Shinichi controls the pace.

The ref stands the fighters back up because Akiyama Shinichi just wasn't active enough.
Shinichi slips under a jab from Zol.
Shinichi throws a looping left and ducks down for a takedown. He's got his arms around Zol's waist but Zol gets an underhook and avoids the takedown by throwing Shinichi off to one side.
A combination from Zol does no damage.
Shinichi takes a solid shot to the body. That one hurt him but he's trying not to show it.
Zol is the aggressor but that punch slipped nicely by Shinichi.

That's two minutes gone in the round.
A slow jab from Zol misses its intended target.
Jay Zol is looking to keep the fight on the feet at all costs.
Shinichi defending well as Zol loads up on a big left hand.
Shinichi seems to be moving with more speed, compared to his last bout. He must have been working on that in the gym.
Shinichi is looking to clinch but Zol is avoiding it.
Nice sprawl there from Zol as Shinichi shoots in.
That's three failed takedown attempts in the round for Akiyama Shinichi. That's going to take a lot out of him.
Shinichi dodges the punch combination from Zol.
Zol lands a really nice looking cross but Shinichi seems unphased.
Shinichi misses with a takedown attempt - Zol sprawls well and throws a nice strike on the way out which just misses.
Zol throws a combination but comes up with nothing but fresh air.
No luck for Shinichi with that takedown attempt.
Zol misses with a wild body shot.
Zol throws a hook to the body but it doesn't connect.
Zol scores with a body shot.
Zol has been working on his striking defense in training and it's paying off as Shinichi is landing a low percentage of strikes.
This has been an exciting period of action!
Zol looks to land a combination but Shinichi avoids it well.
Shinichi misses with a leg kick.

That's three minutes gone in the round.
Zol scores with the left hand. Shinichi knows he should have avoided that one.
Horrible takedown by Shinichi or perhaps it was just good defense by Zol which made him look bad.
Shinichi fails with an attempt to clinch.
Zol throws a lazy right hand but Shinichi sees it coming a mile off and sidesteps it easily.
Zol misses with a double jab.
Zol connects with a looping right hand.
Zol misses with the combination.
Shinichi fails in his attempt to clinch.

Shinichi gets a clinch.

Zol has hold of one of Shinichi's legs. Shinichi is fighting the takedown attempt but Zol gets the trip and lands the takedown into guard.
Zol stands up from guard. Let's bang!
A looping hook to the body misses from Zol. Shinichi does a little dance to reset his feet.
Zol throws a series of punches but Shinichi moves out of range.
Zol fails to land with the punch combination there - jab, cross, hook, miss, miss, miss.
Zol throws out a token jab with nothing on it.
The crowd cheering loudly, showing their appreciation for the quality fight we're seeing here.
Shinichi shoots in but Zol avoids the takedown attempt easily.

That's four minutes gone in the round.
Zol connects with a lovely jab that went straight through the gap between Shinichi's hands.
Shinichi takes a punch right to his stomach. That took the wind out of him momentarily.
Zol misses the jab.
Zol lands with a hook. Shinichi tried to avoid it but it clipped the top of his head.
Shinichi bobs and weaves well there to avoid the strikes.
Zol throws a jab when Shinichi was well out of range.
Shinichi shoots in looking for a double leg takedown. Zol defends it nicely.
A big left from Zol misses.
A bone on bone clash there as Zol blocks the leg kick.
As the round comes to an end the crowd are showing their appreciation for a great round of action.
Shinichi tries to shoot in for a takedown. He's got hold of a leg but Zol swivels and escapes.
Zol misses with a few strikes there.
Zol scores with a punch to the gut of his opponent.
Shinichi moves into the clinch.
And thats the end of the round the fighters go back to their corners.
Jay Zol dominated that round.
That's the end of the round. The referee orders the cornermen out of the cage so we can get back down to business.

Shinichi keeping a good distance there, avoiding the body shot.
The fighters are starting to get sweaty, which will make takedowns a bit more tricky.
Zol throws a good cross that connects.
Sloppy strikes from Zol. Those never looked like landing.
No luck for Shinichi with that takedown attempt.
Shinichi dives in and grabs Zol's left leg, looking for a takedown. Zol pushes down on Shinichi's head and hops out.
Jay Zol seems to be getting the better of the standup.
Zol jabs away that one connects to the head of his opponent.
Zol with a jab.
Shinichi moves out of range of the strikes.
Shinichi fails with a takedown attempt from distance.
That's three failed takedown attempts in the round for Akiyama Shinichi. That's going to take a lot out of him.
Shinichi tries to clinch up against the cage, rushing in to close the distance. Zol manages to break the clinch and circles back to the middle of the mat.
Jay Zol is looking to throw some combinations by the looks of things.
Zol throws out a token jab with nothing on it.
Zol misses the shot to the body.
Danga de danga de dang - Zol scores with a four punch combination!
Nice takedown defense from Zol. No joy for Shinichi on that attempt.
Zol throws a big shot that misses.
Zol scores with a three punch combo!
That's one minute gone in the round.
Shinichi blocks a jab.
The fight stays on the outside here - Shinichi looks like he's thinking about clinching though.
Shinichi fails with a takedown attempt from distance.
Zol misses with the combination.
Shinichi shoots in for a takedown and gets it. Let's see what he's got on the mat.
Shinichi tries to free his leg and advance position but Zol is retaining full guard.
Zol is looking to stand up but Shinichi isn't so interested in that idea.
Zol keeping full guard, as Shinichi tries to pass.
Zol is looking to stand up but Shinichi isn't so interested in that idea.
That's two minutes gone in the round.
Zol scrambles and gets back to his feet.
Shinichi moves forwards but Zol connects with a nice, crisp jab.
Shinichi fails with an attempt to clinch.
Shinichi fails with a takedown attempt.
Shinichi takes a body punch but keeps moving.
The crowd cheering loudly, showing their appreciation for the quality fight we're seeing here.
Shinichi avoids a lazy jab quite easily.
A telegraphed right hand from Zol misses the target.
Zol bobbing and weaving, closes the distance and lands a hook to the side of Shinichi's head.
Shinichi showing good head movement there, avoiding the strikes from Zol.
Zol swinging wildly here.
Shinichi slips under a jab.
That's three minutes gone in the round.
Shinichi gets cracked there but stands up to it.
No luck with that takedown attempt from Shinichi.
Zol lunges in with swinging rights and lefts but Shinichi circles away quickly and effectively.
Shinichi looks for a takedown but Zol sprawls well.
Shinichi shoots in with a takedown attempt and he has Zol pinned against the cage. Zol gets the underhooks and manages to circle away.
Shinichi fails with the takedown.
Zol keeps the fight on the outside.
Nice shot lands for Zol.
Zol stuffs a takedown. It's all about dictating where the fight takes place and Zol wants it to stay on the feet.
Zol cracks Shinichi with a hook to the jaw. Both fighters smile at eachother and high-five before getting back down to business.
Zol misses with a wild body shot.
That's four minutes gone in the round.
Zol throws a combination but comes up with nothing but fresh air.
Shinichi tries to clinch but is not successful on this occasion.
Shinichi shoots in looking for a takedown. Zol tries to sprawl out of it but Shinichi keeps driving through. The fighters are pinned against the cage. Zol manages to get underhooks and after a bit of a struggle, circles away and we're back to standing.
Shinichi slips a jab from Zol.
Zol lands a jab to the head.
Zol stuffs the takedown attempt from Shinichi. Shinichi gets slowly back to his feet.
Zol throws a right hand that Shinichi ducks under and follows up with a left that Shinichi also avoids with ease.
Zol thows a left - swing and a miss!
Zol lands a nice hook to Shinichi's body. Shinichi takes it in his stride and looks to land his own strikes.
This is a great period of action - very entertaining stuff!
As the round comes to an end the crowd are showing their appreciation for a great round of action.
Shinichi shoots in for a takedown. "I don't think so" says Zol as he avoids it easily.
Zol fails to land with a series of punches.
Zol cracks a nice hook into Shinichi's ribs.
A punch combination from Zol misses.
And thats the end of the round the fighters go back to their corners.
Jay Zol showed his class in that round. I'd imagine he'll take it on all the scorecards.
The referee calls time. The cornermen exit stage left and we're back to business. So, we enter the final round. Let's see if either fighter can bring us a finish, or whether we're going to the judges scorecards.

Shinichi slips under a jab from Zol.
Zol throws a right and a left that both miss.
Zol gets tackled into the cage by Shinichi. Shinichi maintains the clinch.
Shinichi is trying to maintain a safe position but Zol gets an underhook and turns Shinichi into the cage.
Zol is fighting off a takedown attempt but Shinichi is just too persistent for him and manages to trip Zol to the mat. Zol regains guard as soon as the fighters hit the mat.
Shinichi trying to control the position from guard on top but Zol is wriggling around, looking for whatever he can.
Zol wants to stand and escape but Shinichi is having none of it.
Shinichi forces his way into half guard.
Zol pushes Shinichi off looking to stand but Shinichi dives back in and keeps control.

Shinichi wants to work for an arm triangle but Zol is really keeping half guard well and defending the submission attempt.
That's one minute gone in the round.
Shinichi stops Zol from getting back to his feet.
Zol takes a big intake of breath there - he's definitely tired.
Zol makes some distance and scrambles quickly back to his feet. Nice work!
Shinichi clinches with his opponent.
Shinichi changes levels and goes for a takedown here. Zol fights it off and pushes away nicely.
Zol scores with a one two! Shinichi had his feet all tangled up there and couldn't avoid the strikes.
Shinichi throws a decent looking leg kick but it doesn't land clean.
Zol connects with the punch.
Zol throws a lazy right hand but Shinichi sees it coming a mile off and sidesteps it easily.
Shinichi has his hands up protecting his head but a hook from Zol finds it's way round the side to connect with Shinichi's head.
Zol scores with a punch to the gut of his opponent.
Shinichi ducks under an overhand right and circles away with a smile on his face.
A jab from Zol finds it's way through Shinichi's defenses.
Shinichi is looking to clinch but Zol is avoiding it.
That's two minutes gone in the round.
A telegraphed takedown attempt from Shinichi is defended easily by Zol.
Zol takes a swing at Shinichi's ribcage but misses.
Zol is using his reach advantage to land shots from outside his opponent's range.
Zol's corner calls for a 1, 2 combination and Zol duly obliges.
Zol lands a nice hook to Shinichi's body. Shinichi takes it in his stride and looks to land his own strikes.
This has been an exciting period of action!
Zol throws a right and a left that Shinichi avoids nicely.
Zol swings wildly with a right hand that was never going to find it's target.
Zol fails to land with the punch combination there - jab, cross, hook, miss, miss, miss.
Zol misses with a straight left.
Shinichi ducks under an overhand right and circles away with a smile on his face.
Zol jabbing away but nothing is landing.
Zol listening to his corner there, landing a nice uppercut.
Jab, cross, leg kick. Nice combination by Zol!
Some wild striking there from Zol.
Zol misses with a wild body shot.
That's three minutes gone in the round.
Shinichi tries to clinch up against the cage, rushing in to close the distance. Zol manages to break the clinch and circles back to the middle of the mat.
Shinichi looks like he's developed a pretty tasty lump over his left eye. He'll need to avoid taking much more damage to that.
Shinichi wants to clinch up but Zol keeps it at a distance.
Zol misses with a straight left.
Shinichi slips a jab from Zol.
Zol throws a shot from downtown. Shinichi moves away and avoids it.
Shinichi slips under a jab from Zol.
Zol throws a combination but comes up with nothing but fresh air.
Zol throws a right hand that Shinichi ducks under and follows up with a left that Shinichi also avoids with ease.
Shinichi drives through with a takedown into guard.
Zol keeping moving, preventing Shinichi from controlling successfully.
Zol is trying to stand up but he's not managed so far.
The fighters are pressed up against the cage, both looking to find a bit of space to work.
Shinichi stands up and looks to throw the legs aside to pass to side control. Zol swivels though and keeps the full guard.
That's four minutes gone in the round.
Shinichi wants to control from the top but Zol keeps moving.
Shinichi slows down the pace of the fight, as he sits in guard.
Shinichi trying to control but Zol is working from the bottom.
The ref stands the fighters back up because Akiyama Shinichi just wasn't active enough.
Shinichi moves out of range as Zol strikes.
Zol scores with a nice head shot.
Shinichi throws a looping left and ducks down for a takedown. He's got his arms around Zol's waist but Zol gets an underhook and avoids the takedown by throwing Shinichi off to one side.
That's three failed takedown attempts in the round for Akiyama Shinichi. That's going to take a lot out of him.
As the round comes to an end the crowd are showing their appreciation for a great round of action.
Shinichi fails with a takedown attempt.
The crowd cheering loudly, showing their appreciation for the quality fight we're seeing here.
Shinichi moves in looking to clinch but Zol pushes him off.
Akiyama Shinichi has stepped it up - he knows he needs a finish here!
Shinichi uses good head movement to avoid the hook from Zol.
And that's the end of the fight!
I would just about give that final round to Jay Zol.
I've got Zol winning every round here. Surely the decision will go his way and he'll pick up a well deserved decision victory. Over to the ring announcer for the scorecards.
Ladies and gentlemen, after 3 rounds of action, we go to the scorecards for a decision.
Judge Jack Bonds scores the fight for Jay Zol!
Judge Percy O'Donnell scores the fight for Jay Zol!
Judge Don Winkell scores the fight for Jay Zol!
Jay Zol wins by unanimous decision!
|
|
|
|
|
|
|
|
|
|
|
|
|
|
|
|
|
|
|
|
|
|
|
| S |
C
A |
G |
S |
C
B |
G |
|
S |
C |
G |
|
energy
A | B |
|
hype
A | B |
|
pop
A | B |
|
mgr
A | B |
|
FIGHT
RATING
81% |
|
|
|
|
|
|
