|
|
PBP Commentary |
Coming up we have a heavyweight MMA rules bout between Kareem Leonard (ranked 0 p4p, 0 weight class) and Danny Sizemore (ranked 0 p4p, 0 weight class). We have two fighters making their debuts here, so let's see who comes out of this one with their first professional victory.
 |
|
 |
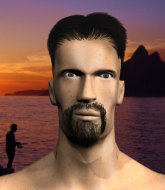
| 154 cm
24
279 lbs
0 - 0 - 0 |
|
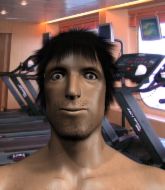
225 cm
25
275 lbs
0 - 0 - 0 |
BJJ Blue Belt
Counter fighter
Cuts easily |
|
BJJ White Belt
Decent boxing
Powerful |
|
| |
|
Ladies and gentlemen. This fight is 3 rounds, in the heavyweight division.
Introducing the fighter to my left, fighting out of the red corner.
With a record of
0 - 0 - 0, fighting out of New York, Kareem Leonard!
And introducing the fighter to my right, fighting out of the blue corner.
With a record of
0 - 0 - 0, fighting out of New York, Danny Sizemore!
The judges for this bout are Franklyn Lucas, Bruno Lombardi and Steve Montenegro.

The bell rings for round one and we are underway!
Leonard darts in looking for a takedown but Sizemore gets double underhooks and turns Leonard into the cage.
Sizemore lands a short shot on the inside that snaps the head of Leonard backwards.

It looks like Kareem Leonard has been cut.
Sizemore slows down the pace here.
Sizemore lands a left hand that snaps the head of Leonard backwards.
Leonard jumps guard but Sizemore turns him against the cage and keeps the fight standing.
Sizemore jumps guard but Leonard turns him against the cage and keeps the fight standing.
Sizemore's corner are urging him to control the action in the clinch for a moment, rather than mount any serious offense. I'm sure the crowd appreciate those instructions... not.
A frustrated look appears on Sizemore's face as he tries to break the clinch.
An uppercut on the inside fails to land for Sizemore.

That's one minute gone in the round.
Sizemore tries to break the clinch but Leonard is controlling the position.
Sizemore tries to pull guard but Leonard holds him up against the cage and eventually Sizemore drops back down to his feet.
A right hook to the body lands for Leonard.
Leonard wants a takedown.
That's three failed takedown attempts in the round for Kareem Leonard. That's going to take a lot out of him.
Leonard prevents Sizemore from breaking the clinch.
Leonard fails to pull the fight into his guard.
Sizemore misses the knee to the body. Nice hip positioning from Leonard.
Leonard prevents a takedown attempt there.

Sizemore pulls Leonard into guard.

That's two minutes gone in the round.
Leonard cracks Sizemore with a solid left hand.
Leonard throwing strikes from guard but Sizemore blocks nicely.
Sizemore working a defensive guard here.
The fighters are pressed up against the cage, both looking to find a bit of space to work.
Leonard won't allow Sizemore to sweep him here.
Leonard could do with losing a few pounds - he looks very soft around the mid section, to put it politely.
Sizemore will have to put a bit more behind his punches if he's going to do any damage from this position.
Leonard throws a big elbow that misses.

That's three minutes gone in the round.
Sizemore lands an upkick as Leonard stands over him.
Sizemore will have to put a bit more behind his punches if he's going to do any damage from this position.
Sizemore wants to control but Leonard passes easily into half guard.

Leonard seems to be looking for submissions.
Sizemore wants to get back to his feet.

That's four minutes gone in the round.
Sizemore is defending against the submission attempts here by Leonard.
Leonard throws a big elbow that misses, also allowing Sizemore to regain full guard.
The ref warns both fighters not to hold the cage as they work up against the meshing.
Leonard throwing shots from guard but he's hitting more mat than opponent.
Sizemore is trying to keep Leonard in close.
And thats the end of the round the fighters go back to their corners.
Danny Sizemore dominated that round.
The cut man is working on Kareem Leonard's cut.
The fighters' corners scream their final instructions, as the referee calls time. Here we go, back to the action!

Sizemore tries to score a power double leg takedown but Leonard sees that one coming and sprawls well. That will dishearten Sizemore somewhat.
Danny Sizemore seems to be the more aggressive standup fighter in this bout.
Sizemore waving his hands out in front of him, looking to distract Leonard.
A punch combination from Sizemore misses.
Sizemore has a takedown stuffed.
A punch combination from Sizemore misses.
Leonard uses good footwork to avoid the strikes from Sizemore.
A combination from Sizemore does no damage.

Leonard shoots in for a takedown and gets it.
Leonard is looking for a kimura here.
That's one minute gone in the round.
Leonard missing with the ground and pound from half guard.
Leonard is working for a kimura but Sizemore is defending it quite comfortably.
That's two minutes gone in the round.
Neither fighter has done anything of merit for a good minute or two here and the crowd are not happy about it.

Leonard escapes and gets back to his feet.
Sizemore misses with a takedown
and Leonard counters with a straight punch to the midsection.
Kareem Leonard has stuffed three takedown attempts in the round now. That's going to take a lot out of Danny Sizemore.
Some wild striking there from Sizemore.
Sizemore throws a right and a left that both miss.
Sizemore shoots in but Leonard avoids the takedown attempt easily.
Sizemore is breathing heavily.
That's three minutes gone in the round.
Sizemore fails with the takedown
and Leonard counters with a nice double leg into side control. Sizemore won't be happy with that.
Leonard tries for a kimura but Sizemore is defending well.
Leonard is looking to finish here, going for an Americana. Sizemore knows the correct defense though, so he's OK.
Leonard creates some space and throws a big elbow, but Sizemore sees it coming and moves his head just enough to avoid the strike.
That's four minutes gone in the round.
Leonard misses with the ground and pound.
Sizemore wants to control but Leonard postures up.
Leonard is trying to get an arm triangle but Sizemore is defending well.
Leonard tries for an arm triangle. That looks pretty tight to me. Is this one over!?! Possibly, maybe, no Leonard has let go of the choke. Obviously it wasn't as tight as we thought!
And thats the end of the round the fighters go back to their corners.
Kareem Leonard dominated that second round.
The cut man is working on Kareem Leonard's cut.
That's the end of the round. The referee orders the cornermen out of the cage so we can get back down to business. This is the final round!

Sizemore lands three nice shots there - that looked like it hurt!
Sizemore is a painfully thin specimen of a man. You do wonder whether a good body kick would snap him clean in two.
Sizemore is pawing at Leonard, trying to feel the distance before throwing out a cross that crashes into Leonard's nose. Leonard is badly hurt! Sizemore pounces, throwing wild strikes as both fighters end up on the ground! Leonard tries desperately to hold on but Sizemore is relentless in his assault! As Leonard receives an ever increasing number of unanswered strikes the referee pulls Sizemore away and this one is in the books!
Ladies and gentlemen, after 0:21 of round 3, we have a winner by way of TKO (Strikes). Danny Sizemore!
|
|
|
|
|
|
|
|
|
|
|
|
|
|
|
|
|
|
|
|
|
|
|
| S |
C
A |
G |
S |
C
B |
G |
|
S |
C |
G |
|
energy
A | B |
|
hype
A | B |
|
pop
A | B |
|
mgr
A | B |
|
FIGHT
RATING
100% |
|
|
|
|
|
|
