|
|
PBP Commentary |
Coming up we have a lightweight MMA rules bout between Nathan Hayway (ranked 0 p4p, 0 weight class) and Drew Taments (ranked 0 p4p, 0 weight class). Taments comes into a darkened arena with his song building. A$AP Ferg-Work kicks in, the lights come on and the crowd goes wild! What a showman! Both fighters look fresh as a daisy as they make their way towards the cage.
 |
|
 |
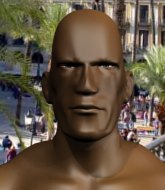
| 176 cm
20
168 lbs
1 - 1 - 0 |
|
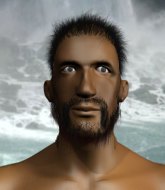
180 cm
26
145 lbs
2 - 4 - 0 |
BJJ Purple Belt
Great low kicks
Very strong |
|
Decent wrestler
Decent boxing
Powerful |
|
| |
|
Ladies and gentlemen. This fight is 3 rounds, in the lightweight division.
Introducing the fighter to my left, fighting out of the red corner.
With a record of
1 - 1 - 0, fighting out of New York, Nathan Hayway!
And introducing the fighter to my right, fighting out of the blue corner.
With a record of
2 - 4 - 0, fighting out of New York, Drew Taments!
The judges for this bout are Franklyn Lucas, Chad Campbell and David Schapiro.

The bell rings for round one and we are underway!
Taments defending well as Hayway loads up on a big left hand.
Hayway pivots as if he's going to throw a leg kick but stops half way.
Hayway slips in close and lands a nice hook before moving back out of range.
Hayway fails with a takedown attempt.
Taments is looking to clinch.
Taments throws a combination but it was largely blocked by Hayway.
Hayway lands a slapping body shot.
Hayway misses the jab.
Hayway misses with a head kick.
Hayway throws a head kick that Taments semi-blocks.
Hayway uses some good footwork to avoid the body shot by Taments.
Taments fails with an attempt to clinch.
Hayway pulls out of a head kick attempt.
Taments ducks under a wild hook from Hayway.
Hayway thuds a mid kick into his opponent's body. That will wear on Taments if he has to take too many more of those.
Hayway definitely looks more muscular than last time we saw him fight.

The fight moves into the clinch position.

That's one minute gone in the round.

Hayway breaks the clinch and we're back to striking at distance.
Hayway throws a head kick that misses and slips in the process. He scrambles back to his feet and the fighters circle.
Taments throws a combination. Hayway tries to block but a couple of punches get through.
Taments tries to clinch up against the cage, rushing in to close the distance. Hayway manages to break the clinch and circles back to the middle of the mat.
Taments closes the distance and takes a jab right on the nose as he does so.
Hayway lands a leg kick. The shin dug right into the meat of the thigh.
Taments avoids the head kick by Hayway.
Taments tries to clinch but is not successful on this occasion.
Hayway thuds a mid kick into his opponent's body. That will wear on Taments if he has to take too many more of those.

Hayway gets to the clinch - let's see what his plan is here.
Both fighters working to control the clinch.
Taments tries to land knees in the clinch but Hayway avoids the damage to the body.
Taments takes a shot to the head.
Hayway trying to control the position but instead, Taments has worked for underhooks and has pushed Hayway into the cage.

That's two minutes gone in the round.
The fighters are pressed against the cage, as the pace of the fight slows.
The crowd are getting pretty annoyed with Hayway for his constant stalling in the clinch and are voicing their displeasure.
This has been an exciting period of action!
Hayway misses with a knee to the head.
Taments has a body lock and is looking for a takedown. Hayway is bouncing around trying to prevent the takedown and somehow he has indeed managed to stay on his feet.
Taments is trying to pull guard but Hayway has him pressed against the cage.
Hayway manages to break the clinch.
Hayway dives in and grabs Taments's left leg, looking for a takedown. Taments pushes down on Hayway's head and hops out.
Hayway looks for the body kick but Taments saw that one coming.
Taments tries to close the distance and clinch up against the cage but Hayway paws at him with a jab and circles away.
Hayway looking to land some kicks to the body here.
Hayway pivots as if he's going to throw a leg kick but stops half way.

That's three minutes gone in the round.
Hayway scores with a nice body kick.
Taments will need to tighten up his combinations if he doesn't want to gas himself out, swinging at thin air.
Taments is looking to take this fight into the clinch.
Taments misses with the combination.
Hayway circles away from the clinch attempt
and Hayway finishes the little exchange by landing a big kick to the body.
A jab from Taments misses.
Hayway throws a front kick that sends Taments stumbling back into the cage.
Taments takes a head kick and shrugs it off.
Taments ducks under an overhand right and circles away with a smile on his face.
Taments dodges the punch combination from Hayway.
Taments is a painfully thin specimen of a man. You do wonder whether a good body kick would snap him clean in two.
Hayway tries to clinch up.

That's four minutes gone in the round.
Hayway looks for the body kick but Taments saw that one coming.
Hayway fakes with a right hand and throws a good leg kick, right into the thigh. That had to hurt Taments.
Fantastic stuff here - a very entertaining period of action, which has drawn cheers from the crowd.
Some wild striking there from Taments.
Taments misses with a wild body shot.
Taments sees a low kick coming and goes to check it, but it's actually a body kick and it thuds into his unprotected ribs.
Nathan Hayway seems to be the more aggressive standup fighter in this bout.
Taments thows a body shot but no joy.
Hayway fakes with an overhand right and moves in to clinch with Taments, pushing him back against the cage.
Hayway unloads a knee to the mid-section.
A bit of stalling here from Hayway.
The crowd are going absolutely nuts as the round comes to an end - what a fantastic round of action!
A knee to the head by Hayway.
Taments tries to pull guard but Hayway holds him up against the cage and eventually Taments drops back down to his feet.
Nathan Hayway has stuffed three takedown attempts in the round now. That's going to take a lot out of Drew Taments.
Hayway tries to land a knee to the head but Taments blocks with his arms.
And thats the end of the round the fighters go back to their corners.
Nathan Hayway dominated that round.
OK. That's time! The bell goes and we're back to the action.

Hayway fakes with an overhand right and moves in to clinch with Taments, pushing him back against the cage.
Taments is trying to work out of this bad position, with his back against the cage.
Taments is trying to force a seperation but Hayway has the dominant position.
Hayway tries a knee to the head but Taments blocks it.
Hayway escapes the clinch and we're back to striking.
Hayway throws a quick head kick that skims the top of Taments's head.
Hayway connects with a nice looking jab.
Nice body kick from Hayway.
Nathan Hayway is winning the standup battle so far.
Taments scores with a nice right hand.
Taments just misses with a punch to the body.
Nice uppercut lands for Hayway. That snapped Taments's head back.
Taments tries to clinch up but Hayway circles away and keeps his distance.
Taments uses good footwork to avoid the strikes from Hayway.
Taments has developed a nice purple lump on his ribcage, as a result of some heavy body kicks from Hayway.
Hayway fakes the leg kick and cracks Taments in the body.
We've seen a great period of action over the last minute or so - credit to both fighters for going all out!
Hayway tries a switch kick but it misses it's target.
That's one minute gone in the round.
Hayway will need to tighten up his combinations if he doesn't want to gas himself out, swinging at thin air.
Hayway misses with a straight left.
Hayway pulls out of a head kick attempt.
Hayway scores with a push kick.
Taments moves out of range as Hayway throws a body kick.
Taments has a nice red mark on his side after a thudding body kick by Hayway.
An inside leg kick lands from Hayway.
Taments slips a jab from Hayway.
Taments connects with a right hand. Hayway shakes it off.
Crunch! Hayway slams his shin into Taments's torso.
Taments throws the left hand but Hayway avoids the punch easily.
Drew Taments is looking to keep the fight on the feet at all costs.
Hayway rushes Taments and presses him up against the cage.
Taments looking to stall.
That's two minutes gone in the round.
Hayway throws a knee to the head but misses.
Taments is trying to work out of this bad position, with his back against the cage.
Hayway tries to stall but Taments uses the opportunity to gain a better position.
Hayway with the Thai clinch, lands a knee to the head.
Hayway with the Thai clinch. He's looking to land a big knee but he's not managed it this time.
Hayway trying to stall but Taments improves his position.
Taments goes for a body shot but it's blocked.
Fantastic stuff here - a very entertaining period of action, which has drawn cheers from the crowd.
A knee to the head by Hayway.
Taments missing with knees to the body.
Hayway tries a shoulder strike but it doesn't do any damage.
Taments blocking some punches.
Hayway stalls.
That's three minutes gone in the round.
Hayway tries a knee to the head but Taments blocks it.
A nice right hand lands inside from Hayway.
Taments drops to a knee looking for a takedown but Hayway gets the underhooks and prevents it.
Taments is looking to take this one to the mat.
Hayway pushes off and circles away, back to the middle of the mat.
That's a knee to de groin and it's over and out! Taments crumples to the ground after an illegal strike from Hayway - the referee stops the clock and Taments gets 5 minutes to recover from that one. "I'm sorry" says Hayway. Taments manages to get back to his feet and the fight resumes.
Hayway ducks down and throws a hook to the body.
Some wild striking there from Hayway.
That's four minutes gone in the round.
Hayway avoids a punch combination nicely.
Taments doesn't react quick enough there as he takes a shot to the body.
Taments fails to land with the punch combination there - jab, cross, hook, miss, miss, miss.
Hayway scores with a leg kick.
Hayway takes a shot right to the liver - Bas would have been proud of that punch.
Taments avoids the body shot from Hayway.
No joy there for Taments, who threw a few shots but didn't land.
Hayway throws a head kick that misses.
Jab, jab by Taments - just one landing.
The fans in attendance giving it up for the two fighters, who have really let it all hang out in the last minute or so!
As the round comes to an end the crowd are showing their appreciation for a great round of action.
Hayway explodes with a nice body kick and back out of range. Nice work.
A slapping body kick lands there for Hayway.
Hayway lands a front kick.
And thats the end of the round the fighters go back to their corners.
Nathan Hayway dominated that second round.
The referee calls time. The cornermen exit stage left and we're back to business. This is the final round!

Hayway throws a head kick that Taments semi-blocks.
Taments defending well as Hayway loads up on a big left hand.
Hayway ducks under a wild hook from Taments.
Taments swinging wildly here.
Hayway wants to clinch up but Taments keeps it at a distance.
Crunch! Hayway slams his shin into Taments's torso.
Taments fails with an attempt to clinch.
Hayway throws a nice outside leg kick.
A slow jab from Taments misses its intended target.
Taments takes a head kick and keeps coming.
Hayway delivers a nice body kick.
Hayway dances in quickly and lands a nice inside leg kick on Taments. That did some damage!
Hayway throws a mid kick that lands with a slap.
We've seen a great period of action over the last minute or so - credit to both fighters for going all out!
Hayway throws a jab but it's blocked by Taments.
That's one minute gone in the round.
Hayway closes the distance and clinches.
Hayway misses with a knee to the head.
Taments tries to break the clinch but Hayway is controlling the position.

Hayway ties up his opponent against the cage and manages to drag the fight down to the ground. Hayway no doubt will be looking to work submissions from his guard.
If this pace continues, the referee will definitely step in and force a standup.
Hayway is trying to control the position from the bottom.
Hayway keeping moving, preventing Taments from controlling successfully.
Hayway trying to keep a closed guard but Taments is proving a slippery customer.
Taments looking to sit in guard and control but Hayway gets the butterfly guard and sweeps. He's now in the guard on the top.
That's two minutes gone in the round.
Hayway passes easily into side control. Nice work.
Taments really doesn't want to stay on the ground with Hayway. If he can't get it back to his feet, it's only a matter of time before he'll be tapping out.
Hayway wants to control but Taments is keeping him busy.
The fighters are pressed up against the cage, both looking to find a bit of space to work.
Hayway controlling the position from side mount.

Taments wants to control the position but that's not easy when your opponent is in side control! Hayway seems to be going for some sort of submission here. Hard to say what - oh, it's a Brabo choke! He's got it! Taments is tapping! Wow, great finish!
Ladies and gentlemen, after 3:59 of round 3, we have a winner by way of Submission (Brabo Choke). Nathan Hayway!
After winning the bout, Nathan Hayway thanked all his fans and promised he'd do even better in his next fight. The crowd seemed to love his humility.
In defeat, Drew Taments stepped up to the mic, saying 'Thanks for having me on the card! I will be back! Thank you fans! '.
|
|
|
|
|
|
|
|
|
|
|
|
|
|
|
|
|
|
|
|
|
|
|
| S |
C
A |
G |
S |
C
B |
G |
|
S |
C |
G |
|
energy
A | B |
|
hype
A | B |
|
pop
A | B |
|
mgr
A | B |
|
FIGHT
RATING
81% |
|
|
|
|
|
|

