|
|
PBP Commentary |
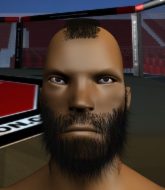
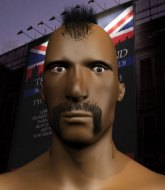
Coming up we have a heavyweight MMA rules bout between dylan madgwick (ranked 0 p4p, 0 weight class) and Billy Bad Butt (ranked 0 p4p, 0 weight class). dylan madgwick has the better chin. Will he look to stand and bang today?
 |
|
 |
| 210 cm
23
220 lbs
2 - 2 - 0 |
|
191 cm
23
210 lbs
3 - 5 - 0 |
BJJ Blue Belt
Basic striking
Big heart |
|
BJJ Blue Belt
Good kicks
Knockout power |
|
| |
|
Ladies and gentlemen. This fight is 3 rounds, in the heavyweight division.
Introducing the fighter to my left, fighting out of the red corner.
With a record of
2 - 2 - 0, fighting out of Sydney, dylan madgwick!
And introducing the fighter to my right, fighting out of the blue corner.
With a record of
3 - 5 - 0, fighting out of Sydney, Billy Bad Butt!
The judges for this bout are Hugh Johnson, Donatello Bradman and Skip Squint.

The bell rings for round one and we are underway!
Bad Butt throws a combination but it was largely blocked by madgwick.
madgwick shoots in for a double leg but Bad Butt sprawls well. That's going to sap some energy.
Bad Butt lands an overhand right.

It looks like dylan madgwick has been cut.
Bad Butt tries a head kick but it misses.
madgwick closes the distance and clinches up with Bad Butt, looking for a takedown. madgwick pushes Bad Butt against the cage but Bad Butt circles to the side and manages to break the clinch.
madgwick changes levels and looks for a double leg takedown. Bad Butt tries to avoid it but madgwick manages to keep hold of a leg and drag Bad Butt to the ground. Bad Butt escapes though and pops straight back up to his feet.
That's three failed takedown attempts in the round for dylan madgwick. That's going to take a lot out of him.
Bad Butt throws a left that rocks madgwick and follows with a right that sends him tumbling to the canvas! Bad Butt dives into side control, looking to finish! Can madgwick regain composure!
The crowd cheering loudly, showing their appreciation for the quality fight we're seeing here.
madgwick manages to get one leg in to regain half guard.
Bad Butt wants to control but madgwick is keeping him busy.
madgwick is trying to defend against the ground and pound but Bad Butt scores with a couple of nice shots.

madgwick is looking to sinch up a gullotine here but Bad Butt pulls his head out easily.
madgwick tries to roll over but Bad Butt keeps him under control.
The fighters are pressed up against the cage, both looking to find a bit of space to work.
Bad Butt is looking for a kimura but he's never going to get it from there.
madgwick looking for submissions off his back.
madgwick tries to get to full guard but Bad Butt has control of the leg.
The ref warns both fighters not to hold the cage as they work up against the meshing.
Bad Butt is looking to take a break and control but madgwick is keeping him honest, looking to work from the bottom.

That's one minute gone in the round.

Bad Butt decides he's had enough of the ground and stands up.
Bad Butt misses with a looping right.
A nice leg kick lands there from Bad Butt.
madgwick is breathing heavily.
Bad Butt throws a head kick that misses and slips in the process. He scrambles back to his feet and the fighters circle.
Bad Butt throws a sloppy head kick and madgwick moves out of range easily.
Nice shot lands for Bad Butt.
madgwick looks for a takedown here. Will he get it? Bad Butt is fending him off so far but madgwick persists. Nope, Bad Butt circles away and we're back to standing.
Bad Butt comes forward and lands a shot to the body, then darts back out of range.
Nice sprawl there from Bad Butt as madgwick shoots in.
This is a great period of action - very entertaining stuff!
Bad Butt tries a head kick but it misses.
madgwick changes levels and looks for a double leg takedown. Bad Butt tries to avoid it but madgwick manages to keep hold of a leg and drag Bad Butt to the ground. Bad Butt escapes though and pops straight back up to his feet.
Billy Bad Butt is looking to keep the fight on the feet at all costs.
Bad Butt scores with a three punch combo!
Bad Butt misses the shot to the body.
Bad Butt lands with an overhand left.
Bad Butt moving in and out of range nicely, whilst landing the scoring shot.
Bad Butt lands with a right hand.
madgwick shoots in looking for a takedown. Bad Butt tries to sprawl out of it but madgwick keeps driving through. The fighters are pinned against the cage. Bad Butt manages to get underhooks and after a bit of a struggle, circles away and we're back to standing.

That's two minutes gone in the round.
madgwick avoids the head kick by Bad Butt.
Bad Butt has used his reach advantage pretty well so far tonight.
madgwick shoots in for a takedown but Bad Butt shows good takedown defense.
Bad Butt throws a head kick that misses and slips in the process. He scrambles back to his feet and the fighters circle.

madgwick feints and then dives in with a takedown. That was a long way out but the feint bought him enough time to close the distance and complete the takedown. Now we'll play guard for a bit and see who can get the better of that position.
madgwick pressing down on his opponent's thigh, looking to pass guard. Bad Butt is keeping the position for now.
madgwick will need to keep those long limbs tucked in whilst he's on the ground, to prevent any submissions.
madgwick advances position into side control!
madgwick goes for an armbar here - this could be all over! But no, Bad Butt has escaped beautifully and is now on top in side control! Oh, that's unlucky for madgwick but great work by Bad Butt.
madgwick tries to work a leg under to get back to half guard but Bad Butt wriggles his own leg back out and remains in side control.
Bad Butt tries to move to mount but madgwick blocks the move with his legs.
Bad Butt is looking to take a break and control but madgwick is keeping him honest, looking to work from the bottom.

That's three minutes gone in the round.
madgwick tries to bench press Bad Butt off him but Bad Butt keeps the position.
madgwick on his back here. We all know that wrestlers don't like being on their back so let's see if madgwick tries to get out of the position.
madgwick manages to land a sweep and he's now on top! Lovely Jiu Jitsu!
Bad Butt wants to get back to full guard.
Bad Butt misses with some strikes from the bottom.

Neither fighter is doing enough for the referee's liking and he's decided to stand them back up.
madgwick looks for a takedown here. Will he get it? Bad Butt is fending him off so far but madgwick persists. Nope, Bad Butt circles away and we're back to standing.
madgwick avoids the head kick by Bad Butt.
Bad Butt thuds a mid kick into his opponent's body. That will wear on madgwick if he has to take too many more of those.
madgwick fails with the takedown.
madgwick darts in and lands a nice takedown into half guard.
madgwick wants to pass the guard but Bad Butt is defending well.
Bad Butt tries to get to full guard but madgwick has control of the leg.

That's four minutes gone in the round.
madgwick seems to be working for a kimura but Bad Butt defends the submission attempt.
madgwick is looking for a kimura but he's never going to get it from there.
madgwick is working for a kimura but Bad Butt is defending it quite comfortably.
Bad Butt actively working from the bottom here.
As the round comes to an end the crowd are showing their appreciation for a great round of action.
Bad Butt slips a foot under and gets full guard. Nice work.
madgwick passes Bad Butt's right leg, so he's now in half guard.
And thats the end of the round the fighters go back to their corners.
Billy Bad Butt dominated that round.
The cut man is working on dylan madgwick's cut.
Well, the break between rounds is over. Let's get back to the scrappin!

madgwick looks for a takedown. He's got it. We're now in half guard.
Bad Butt tries to kick madgwick off but madgwick keeps his base steady and stays in half guard.
madgwick is looking for an arm triangle, whilst trying to pass to side control. Bad Butt doesn't seem that keen to cooperate though. No luck this time madgwick.
Bad Butt is looking to regain full guard. Not this time though.
Bad Butt won't allow madgwick to pass to mount.
Bad Butt flails away from the bottom but he's not doing any damage.
madgwick is looking for a kimura. It's going to be difficult to finish that from half guard though and Bad Butt defends it well.
madgwick looking for a kimura but he'll have to free his other leg if he wants to finish that. Perhaps he's just using it as a distraction technique.
Both fighters are absolutely exhausted here.
Bad Butt is trying to control but can't.
That's one minute gone in the round.
The referee decides to stand the fighters back up.
madgwick avoids the head kick by Bad Butt.
Billy Bad Butt seems to be getting the better of the standup.
madgwick fails with a rather predictable takedown attempt.
madgwick drops down and drives through with a powerful takedown into guard.
Bad Butt lands a beautiful switch and he's in full mount! That could spell trouble for madgwick!
Bad Butt landing strikes, looking to finish!
madgwick is desperately trying to get back to half guard.
That's two minutes gone in the round.
Bad Butt tries to control but madgwick wriggling away.
Bad Butt throwing sloppy strikes, which aren't doing any damage.
madgwick avoids a series of strikes thrown by Bad Butt.
madgwick is squirming around, avoiding Bad Butt's attempts to control the action.
madgwick is working to get back to half guard.
Bad Butt is working on an americana here. Ooh, that looks pretty nasty! Nope, madgwick has managed to escape the submission attempt.
madgwick is desperately trying to improve his position but Bad Butt has a good base and remains in mount.
madgwick is working hard here to advance position.
That's three minutes gone in the round.
Bad Butt is working for a guillotine from mount but madgwick frees his head quite easily.
madgwick is in all sorts of trouble here.
Bad Butt scoring with strikes but madgwick is staying in there.
madgwick working to try and regain half guard.
A nice elbow there by Bad Butt.
That's four minutes gone in the round.
Neither fighter has done anything of merit for a good minute or two here and the crowd are not happy about it.
Bad Butt looking to secure an arm triangle but madgwick defends it well.
madgwick tries to reverse the position but Bad Butt maintains control.
madgwick blocking the ground and pound.
madgwick sneaks a leg under to get to half guard.
madgwick blocking the ground and pound attempt from Bad Butt.
madgwick is looking to sinch up a gullotine here but Bad Butt pulls his head out easily.
madgwick tries to get to full guard but Bad Butt has control of the leg.
madgwick actively working from the bottom here.
The crowd thankful this round is nearly over.
madgwick manages to get to full guard.
And thats the end of the round the fighters go back to their corners.
dylan madgwick dominated that second round.
The cut man is working on dylan madgwick's cut.
That's the end of the round. The referee orders the cornermen out of the cage so we can get back down to business. This is the final round!

madgwick shoots in for a takedown but doesn't get it.
Wow, both these guys are really going for it!
Bad Butt throws a half hearted mid kick.
Bad Butt ducks down and throws a hook to the body.
Both fighters circling a little - Bad Butt finishes the exchange with a kick to the body.
Bad Butt misses with a body kick.
Bad Butt throws a series of strikes that have madgwick backpedaling.
Bad Butt scores with a head kick.
madgwick avoids the head kick by Bad Butt.
madgwick shoots for a takedown but Bad Butt saw that one coming a mile off and avoided it easily.
madgwick closes the distance and looks for a trip takedown... aaaand he's got it - madgwick lands in his opponent's guard.
The crowd are loving this. Great action here.
Bad Butt not looking particularly offensive just at the moment.
madgwick thinks about going for a leg but decides against it, in order to maintain the position.
Both fighters are breathing heavily.
madgwick stands up and looks to throw the legs aside to pass to side control. Bad Butt swivels though and keeps the full guard.
That's one minute gone in the round.
Bad Butt working for a triangle but madgwick defends it easily.
madgwick looking to pass the guard.
There's a bit of a scramble here and now Bad Butt is on top in guard.
Bad Butt wants to pass the guard but madgwick is keeping the position.
That's two minutes gone in the round.
madgwick manages to land a sweep and now he's in mount on top!
Both fighters really going for it on the ground here!
Bad Butt really trying hard to get back to half guard here.
madgwick throws some shoulder strikes here and then postures up. Oh, he's gone for an armbar! Bad Butt has his hands clasped together but madgwick breaks the hold and Bad Butt is forced to tap! This one is aaaaaaaaaaall over! That was lightning fast by madgwick!
Ladies and gentlemen, after 2:43 of round 3, we have a winner by way of Submission (Armbar). dylan madgwick!
|
|
|
|
|
|
|
|
|
|
|
|
|
|
|
|
|
|
|
|
|
|
|
| S |
C
A |
G |
S |
C
B |
G |
|
S |
C |
G |
|
energy
A | B |
|
hype
A | B |
|
pop
A | B |
|
mgr
A | B |
|
FIGHT
RATING
100% |
|
|
|
|
|
|
