|
|
PBP Commentary |
Coming up we have a welterweight MMA rules bout between Harold Buck (ranked 0 p4p, 0 weight class) and Ozuma Obata (ranked 0 p4p, 0 weight class). Obata is bouncing up and down as he enters the arena, backed by Hijack The Terrorist Group - Hijack. Both fighters look fresh as a daisy as they make their way towards the cage.
 |
|
 |
| 180 cm
32
187 lbs
24 - 19 - 0 |
|
191 cm
28
186 lbs
16 - 13 - 0 |
Abu Dhabi Champ
World class boxer
Insanely flexible |
|
Olympic wrestler
World class MT
Good gas tank |
|
| |
|
Ladies and gentlemen. This fight is 3 rounds, in the welterweight division.
Introducing the fighter to my left, fighting out of the red corner.
With a record of
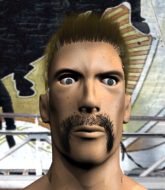
24 - 19 - 0, fighting out of Rio de Janeiro, Harold Buck!
And introducing the fighter to my right, fighting out of the blue corner.
With a record of
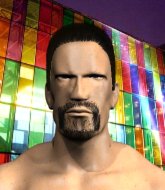
16 - 13 - 0, fighting out of Rio de Janeiro, Ozuma Obata!
The judges for this bout are Daniel Cesar, Edson Gomes and Alexandre Firmino.

The bell rings for round one and we are underway!
Buck shoots in looking for a takedown but Obata manages to keep the fight standing, pushing Buck's face into the canvas for good measure before circling away.
Obata throws a nice looking combination but Buck bobs and weaves to avoid any damage.
Buck throws the left hand but Obata avoids the punch easily.
A shot to the liver by Obata. Beautiful body shot.
Obata ducks down and throws a hook to the body but Buck moves away.
Buck swings for the body but Obata moves out of range.
Obata has been working on his striking defense in training and it's paying off as Buck is landing a low percentage of strikes.
Buck uses good head movement to avoid the hook from Obata.
Obata throws a hard body shot but it just misses.
Obata throws a nice hook to the body that draws an oooh from the crowd.
Obata ducks under a wild hook from Buck.
A punch lands to the side of Obata 's head but he takes it in his stride.
Obata lunges at Buck with a hook that half lands and is half blocked by Buck's hand.
Obata jabs Buck to the body, keeping him at a distance.
The fans in attendance giving it up for the two fighters, who have really let it all hang out in the last minute or so!
Obata swings and misses with a hook to the body.
Obata swings for the body but Buck moves out of range.
Buck fails with a takedown attempt.
Buck tries to shoot in for a takedown. He's got hold of a leg but Obata swivels and escapes.
That's three failed takedown attempts in the round for Harold Buck. That's going to take a lot out of him.

That's one minute gone in the round.
Obata scores with a sloppy right hand. Buck should have avoided that one.

It looks like Harold Buck has been cut.
Obata dips down and scores with a jab to the body.
Buck misses with a jab and misses with a cross straight after too.
Buck shoots in for a double leg but Obata sprawls well. That's going to sap some energy.
Obata is throwing a lot of body shots here, looking to wear down Buck rather than just go for the knockout.
Buck keeping a good distance there, avoiding the body shot.
Buck misses with a hook. Obata ducked under it nicely.
Obata lands a straight punch to the body, keeping Buck at a distance.
Buck tries for a takedown but Obata sees it coming a mile off and avoids it easily.
Obata misses with a jab and misses with a cross straight after too.
Obata lands a right hook to the body.
Buck is breathing heavily.
We've seen a great period of action over the last minute or so - credit to both fighters for going all out!
Buck misses with a takedown attempt - Obata sprawls well and throws a nice strike on the way out which just misses.
Obata dips down and scores with a jab to the body.
Obata will need to tighten up his combinations if he doesn't want to gas himself out, swinging at thin air.
Buck looks to have improved his striking defense since last time we saw him fight.
Ozuma Obata is looking to keep the fight on the feet at all costs.

That's two minutes gone in the round.
Obata misses with a body shot. Nice footwork from Buck.
Obata scores with a punch to the head.
Buck misses with an uppercut.
Obata swings and misses with a hook to the body.
Obata cracks a nice hook into Buck's ribs.
Buck slips a jab and a cross from Obata.
Obata slips a jab from Buck.
Buck misses the shot to the body.
Obata misses with a jab, cross combination.
Buck looks to throw the jab but Obata is out of range.
Buck uses some good footwork to avoid the body shot by Obata.
Buck is really struggling to find his range with his punches. Obata's reach advantage is clearly causing him problems.
Buck missing with a left hand there. Obata was out of range so wasted energy throwing that one.
Obata scores with a sloppy punch to the body. Not much technique there but it did the business.
Buck looks to score with a jab to the body but Obata is just out of range.

That's three minutes gone in the round.
Buck throws a hook to the body but it doesn't connect.
Obata lands a jab to Buck's midsection.
Buck uses some good footwork to avoid the body shot by Obata.
Obata lunges in with an uppercut that skims his opponent's chin.
Obata throws a hook to the body but it doesn't connect.
Obata steps to the side to avoid the strikes from Buck.

Oooooh!!! Obata has knocked Buck down with a huge combo! Obata steps away and waves a wobbly Buck back to his feet! This one might not go much longer!

Buck is rocked!
The fans in attendance giving it up for the two fighters, who have really let it all hang out in the last minute or so!
Buck avoids a punch combination nicely.
Buck fails to land with a series of punches.
Buck slips under a jab.
Obata throws a predictable looking body shot
and Buck counters with a quick right hand to the jaw.
Buck walks into a stiff left hand from Obata.
Harold Buck's cut is getting worse.
Buck throws a jab to the body, straight down the pipe. Boom. That sent Obata stumbling backwards but he manages to regain his composure quickly.

That's four minutes gone in the round.
Buck misses the body punch
and Obata counters with a crisp one two that drops Buck! Obata thinks about following him to the mat for a moment but instead steps back and waves Buck to his feet! Buck is in big trouble!
Oh Buck is still all over the place! His legs are completely gone! Will he be able to recover?!!
Obata rushes forward with a series of wild hooks but Buck moves out of range and avoids them all easily.
Obata moves out of range as Buck strikes.
A looping hook to the body misses from Buck. Obata does a little dance to reset his feet.
Obata looks to land a combination but Buck avoids it well.
Buck seems to have got his legs back now.
Obata avoids the body shot from Buck.
Obata is using his reach advantage to land shots from outside his opponent's range.
Obata cracks Buck with a big right hand that sends him to the floor! Buck looks wobbly but he's sprung back up to his feet straight away
can Obata finish him?
Harold Buck's cut is bleeding quite badly. He's got to try and protect it.
Obata avoids a lazy jab quite easily.
Buck fails with a takedown attempt from distance.
Buck throws an overhand right that lands on Obata's shoulder, as Obata tries to avoid the shot.
Obata takes a swing at Buck's ribcage but misses.
The crowd are going absolutely nuts as the round comes to an end - what a fantastic round of action!
Obata drops Buck with a beautiful combination! Buck stares up at his opponent, who ushers him back to his feet - Obata is looking for the KO!
Obata looks to land a combination but Buck avoids it well.
A telegraphed right hand from Buck misses the target.
And thats the end of the round the fighters go back to their corners.
Ozuma Obata dominated that round.
The cut man is working on Harold Buck's cut.
That's the end of the interval. I'm sure that seemed a lot quicker than a minute for our two fighters! Back to the action.

Buck throws a monster uppercut resembling something out of street fighter but it doesn't land.
Obata throws a hook but Buck blocks it.
Obata has used his reach advantage pretty well so far tonight.
A jab from Obata misses.
Obata dodges the punch combination from Buck.
Obata connects nicely with a jab. Noted by the judges no doubt.
Buck throws a hook but Obata avoids it easily.

Buck drives through with a takedown into guard.

Obata kicks Buck off and gets to his feet.
Obata connects with a hook to the side of his opponent's head.
Obata looks to land a left hand but Buck moved out of range nicely.
Obata throws a body punch but Buck moves out of range.
Obata will need to tighten up his combinations if he doesn't want to gas himself out, swinging at thin air.
Obata fails to land with the punch combination there - jab, cross, hook, miss, miss, miss.
That's one minute gone in the round.
Obata feints a straight left to the body, then turns around with a flashy move and hits Bucks jaw with a dramatic spinning back fist!
Buck throws an ugly left hook that misses
and Obata counters with a one-two to the body.
Obata walks into a straight right hand from Buck.
Obata slips a jab from Buck.
Buck takes a shot right to the bread basket.
Buck scores with a nice takedown into half guard. Let's see what he's got on the ground.
Obata is trying to stand back up but Buck is controlling him
Wooooo! Give it up for these two warriors! They are putting on a show!
Buck is looking to take a break and control but Obata is keeping him honest, looking to work from the bottom.

Buck wants to work for an arm triangle but Obata is really keeping half guard well and defending the submission attempt.
Buck wants to take a breather but Obata is having none of it.
Buck looking for a kimura but he'll have to free his other leg if he wants to finish that. Perhaps he's just using it as a distraction technique.
That's two minutes gone in the round.
The fighters are starting to perspire pretty heavily.
Obata looks like he's trying to stand up.
Obata manages to escape and get back to his feet!
Buck takes one on the chin but seems OK.
Jeez, Harold Buck's cut is really nasty now. The referee must be thinking about getting that checked.
Buck shoots in and drives through. Obata sprawls well.
Buck moves out of range of the strikes.
Buck lands with a nice combination. Obata backs away looking to recover.
That's three minutes gone in the round.
Obata misses the body punch
and Buck counters with a nice jab to the body that keeps Obata thinking.
Ozuma Obata is looking to throw some combinations by the looks of things.
Buck misses with a looping right.
Obata takes a swing at Buck's ribcage but misses.
Buck throws a jab when Obata was well out of range.
Ozuma Obata seems to be getting the better of the standup.
Buck comes forward and lands a shot to the body, then darts back out of range.
Obata throws a jab, cross combination which is slipped
and Buck counters with a nice uppercut.
Buck misses with a double jab
and Obata counters with a three punch combination, finished off with a leg kick. Nice work.
The referee calls the doctor in to look at Harold Buck's cut. Oh no, the doctor has called an end to the bout!
Ladies and gentlemen, after 3:41 of round 2, we have a winner by way of TKO (Cut). Ozuma Obata!
A victorious Ozuma Obata thanked his army of followers in his post fight interview, telling people to make sure they follow him on Twitter.
|
|
|
|
|
|
|
|
|
|
|
|
|
|
|
|
|
|
|
|
|
|
|
| S |
C
A |
G |
S |
C
B |
G |
|
S |
C |
G |
|
energy
A | B |
|
hype
A | B |
|
pop
A | B |
|
mgr
A | B |
|
FIGHT
RATING
100% |
|
|
|
|
|
|
