|
|
PBP Commentary |
Coming up we have a featherweight MMA rules bout between Liam Ward (ranked 0 p4p, 0 weight class) and Experience Test (ranked 0 p4p, 0 weight class). Both fighters look fresh as a daisy as they make their way towards the cage.
 |
|
 |
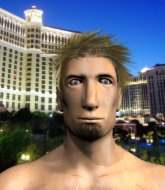
| 159 cm
19
146 lbs
1 - 1 - 0 |
|
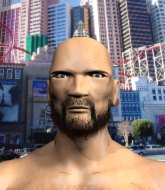
180 cm
24
148 lbs
3 - 1 - 0 |
BJJ Brown Belt
Counter fighter
Very strong |
|
Good takedowns
Basic striking
Solid chin |
|
| |
|
Ladies and gentlemen. This fight is 3 rounds, in the featherweight division.
Introducing the fighter to my left, fighting out of the red corner.
With a record of
1 - 1 - 0, fighting out of Sydney, Liam Ward!
And introducing the fighter to my right, fighting out of the blue corner.
With a record of
3 - 1 - 0, fighting out of Sydney, Experience Test!
The judges for this bout are Eliza Hachem, Steve Erwin and Donatello Bradman.

The bell rings for round one and we are underway!
Test uses some good footwork to avoid the body shot by Ward.
Test throws the left hand but Ward avoids the punch easily.
Ward has been talking about how he's improved his wrestling in the run up to the fight so let's see if that's enough to sway the balance.
Test keeping a good distance there, avoiding the body shot.
Test checks a leg kick.
Test misses with a looping left.
Ward ducks down and throws a hook to the body.
Test misses with a body punch
enabling Ward to counter with a crisp jab.
Test doesn't react quick enough there as he takes a shot to the body.
Test keeping a good distance there, avoiding the body shot.
Ward misses the shot to the body.
Test has a takedown stuffed.
Test throws a hook to the body but it doesn't connect.
Ward scores with a nice head shot.
Experience Test seems to be the more aggressive standup fighter in this bout.
Test avoids the body shot from Ward.
Test avoids the body shot from Ward.

That's one minute gone in the round.
Ward ducks down and throws a hook to the body but Test moves away.
Ward thuds a left hand into Test's body.
Ward just misses with a punch to the body.
A looping hook to the body misses from Test. Ward does a little dance to reset his feet.
Ward is looking to wear down Test with body shots, infact he's throwing more body shots than head shots at the moment.
Test misses with a body shot.

Test changes levels and drives through with a really nice takedown into side control. Ward looks really pissed at himself for not defending that better.
It looks like the ref is thinking about a standup.
Ward tries to get back to half guard but can't.
A lull in the action here.
Test working the ground and pound but Ward is defending the strikes.

That's two minutes gone in the round.
Ward regains half guard.

Ward looking to work for a kimura from the bottom.
Test is scoring with some nice ground and pound from the dominant position.
Test thows a wild elbow that connects with the canvas.
Test missing with some ground and pound from the half guard.
Ward is trying to maintain the position but Test is very close to passing his half guard.

That's three minutes gone in the round.
Test not landing any meaningful shots this time.
Ward is trying to get back to full guard.
Test winds up and cracks Ward with a swinging punch to the side of the head.
Ward is not content to let Test control the position.
Ward is looking to regain full guard. Not this time though.

That's four minutes gone in the round.
Test really doesn't want to stay on the ground with Ward. If he can't get it back to his feet, it's only a matter of time before he'll be tapping out.
Test is thwarting Ward's attempts to control the position.
Ward is trying to get back to full guard.
The crowd applaud the fighters efforts here as the round comes to an end.
Ward gets back to full guard.
And thats the end of the round the fighters go back to their corners.
That was a close round but I would say that Liam Ward will probably get the nod.
That's the end of the round. The referee orders the cornermen out of the cage so we can get back down to business.

Ward throws a hard body shot but it just misses.
Test thows a left - swing and a miss!
Test misses the shot to the body.
Test throws a hook to the body but it doesn't connect.
Test shoots in for a takedown. "Ole!" shouts Ward as he jumps to the side.
Test throws a hook to the body but it doesn't connect.
A looping hook to the body misses from Test. Ward does a little dance to reset his feet.
Ward keeping his hands up high there, blocking the jab from Test.
Ward ducks down and throws a hook to the body but Test moves away.
Ward fakes high and swings low for a body shot but Test manages to avoid it.
Test lands a right hook to the body.
Ward tries to land with a swinging hook to the body but Test was well out of range. Poor timing from Ward.
That's one minute gone in the round.
Ward looks to score with a combo but nothing lands.
Test swings for the body but Ward moves out of range.
Ward takes a swing at Test's ribcage but misses.
Ward avoids a lazy jab quite easily.
Ward throws a hard body shot but it just misses.
Ward thows a body shot but no joy.
Test just misses with a punch to the body.
Test throws a jab to the body, straight down the pipe. Boom. That sent Ward stumbling backwards but he manages to regain his composure quickly.
Test blocks a jab.
Ward swings for the body but Test moves out of range.
Test takes a swing at Ward's ribcage but misses.
Test throws a body punch but Ward moves out of range.
A big left from Test misses.
Ward throws a hook to the body but it doesn't connect.
That's two minutes gone in the round.
A looping hook to the body misses from Ward. Test does a little dance to reset his feet.
Ward throws a hard body shot but it just misses.
Test swings and misses with a hook to the body.
Ward swings for the body but Test moves out of range.
Ward avoids the body shot from Test.
Test walks into a stiff left hand from Ward.
Ward throws a hook to the body but it doesn't connect.
Test throws a hook to the body but it doesn't connect.
Test misses with a body shot. Nice footwork from Ward.
Test tries to land with a swinging hook to the body but Ward was well out of range. Poor timing from Test.
Ward takes a swing at Test's ribcage but misses.
Test tries to land with a swinging hook to the body but Ward was well out of range. Poor timing from Test.
Test takes a swing at Ward's ribcage but misses.
That's three minutes gone in the round.
Ward jabs at Test's body.
Ward takes a swing at Test's ribcage but misses.
A looping hook to the body misses from Ward. Test does a little dance to reset his feet.
Ward avoids a punch combination nicely.
Test misses with a left hand
and Ward counters with a shot to the ribs. That looked like it hurt.
Liam Ward is looking to keep the fight on the feet at all costs.
A really sloppy takedown attempt there from Test.
Ward misses the shot to the body.
Ward stuffs the takedown attempt from Test. Test gets slowly back to his feet.
Liam Ward has stuffed three takedown attempts in the round now. That's going to take a lot out of Experience Test.
Ward swings for the body but Test moves out of range.
Test looks to land a left hand but Ward moved out of range nicely.
No luck for Test with that takedown attempt.
That's four minutes gone in the round.
Test feints a straight left to the body, then turns around with a flashy move and hits Wards jaw with a dramatic spinning back fist!
Ward is moving around nicely and scores here with a single head shot.
Test takes a swing at Ward's ribcage but misses.
Test fails with the takedown.
Liam Ward is winning the standup battle so far.
Ward digs a good body shot into Test's ribs.
Ward lands with an overhand left.
Ward ducks low and lands a nice hook to the body of his opponent.
Ward tries to land with a swinging hook to the body but Test was well out of range. Poor timing from Ward.
The crowd applaud the fighters efforts here as the round comes to an end.
Test takes one to the chin there.
This has been an exciting period of action!
Test throws a body punch but Ward moves out of range.
Ward's jab looks to have found its range, popping Test under the eye.
And thats the end of the round the fighters go back to their corners.
That was a close second round but I would say that Liam Ward will probably get the nod.
The minute break is over - no more time for sponges and pep talks - back to the action! This is the final round!

Ward scores with a reasonable looking shot to the body. Test doesn't seem bothered though.
Ward misses with a body shot. Nice footwork from Test.
Ward throws a body punch but Test moves out of range.
Ward keeping his hands up high there, blocking the jab from Test.
Ward scores with a body shot.
Ward lands a nice looking body shot.
Ward throws out a powerful jab.
Ward scores with a punch to the head.
Ward keeping a good distance there, avoiding the body shot.
Ward throws a body punch but Test moves out of range.
Ward lands a nice shot to the body.
Ward throws a sloppy body shot
and Test counters with a nice double leg into side control. Ward won't be happy with that.
Wooooo! Give it up for these two warriors! They are putting on a show!
Ward can't do much from the bottom here.
That's one minute gone in the round.
Ward gets one leg under and gets the fight to half guard.
Ward wants to control but Test is keeping busy and won't allow it.
Ward manages to get to full guard.
Ward looks to be working for a triangle here. Oh, it looks like he might have it! Test has picked Ward up and slammed him! Ward can't keep hold of the triangle and Test manages to pass to side control!
Test wants to lay and pray for a moment but Ward keeps working.
That's two minutes gone in the round.
Ward is trying to get back to half guard.
Test working away.
Test lands a few punches from side control.
Ward is looking for a sweep.
Test scoring with punches and elbows.
That's three minutes gone in the round.
Ward is trying to improve his position.
Test misses with the ground and pound.
Ward can't do much from the bottom here.
Test scores with a couple of short elbows.
Experience Test has stepped it up - he knows he needs a finish here!
Ward is sneaking out the side here. He's bucked Test off and has taken his back!
Ward throwing damaging strikes from the back! Test could be in trouble here!
Test avoids the strikes from Ward.
That's four minutes gone in the round.
Ward misses with an elbow to the head.
Ward looking for the choke from the back.
Ward throwing sloppy strikes.
Ward misses with a punch to the head.
Fantastic stuff here - a very entertaining period of action, which has drawn cheers from the crowd.
Ward is staying calm and holding on to the back position, whilst working on a rear naked choke. Test is defending well though. Ward let's go of the attempt for now.
Ward misses with a punch to the head.
Ward has the rear naked choke here! This is very bad for Test! Can he survive? No! He's out! Ward gets to his feet and celebrates with his cornermen. He looks absolutely delighted. In the post fight interviews he takes time to thank his parents and everyone who has believed in him from the start. How sweet.
Ladies and gentlemen, after 4:59 of round 3, we have a winner by way of Submission (RNC). Liam Ward!
|
|
|
|
|
|
|
|
|
|
|
|
|
|
|
|
|
|
|
|
|
|
|
| S |
C
A |
G |
S |
C
B |
G |
|
S |
C |
G |
|
energy
A | B |
|
hype
A | B |
|
pop
A | B |
|
mgr
A | B |
|
FIGHT
RATING
41% |
|
|
|
|
|
|
