|
|
PBP Commentary |
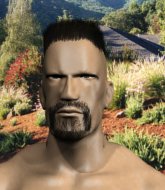
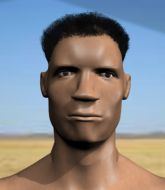
Coming up we have a heavyweight MMA rules bout between Nakamura Muramaki (ranked 0 p4p, 0 weight class) and Mario Bones (ranked 0 p4p, 0 weight class). Muramaki comes to the cage accompanied by Europe - The final countdown. Mario Bones is the more experienced fighter, so let's see if that makes a difference tonight.
 |
|
 |
| 178 cm
25
234 lbs
0 - 0 - 0 |
|
198 cm
23
265 lbs
2 - 5 - 0 |
BJJ Blue Belt
Excellent boxer
Very strong |
|
BJJ Blue Belt
Brawler
Knockout power |
|
| |
|
Ladies and gentlemen. This fight is 3 rounds, in the heavyweight division.
Introducing the fighter to my left, fighting out of the red corner.
With a record of
0 - 0 - 0, fighting out of Tokyo, Nakamura Muramaki!
And introducing the fighter to my right, fighting out of the blue corner.
With a record of
2 - 5 - 0, fighting out of Tokyo, Mario Bones!
The judges for this bout are Sosuke Kotani, Kenichi Hosakawa and Shigeki Fujiwara.

The bell rings for round one and we are underway!

Muramaki scores a trip takedown into side control. Nice.
The ref warns both fighters not to hold the cage as they work up against the meshing.

Muramaki has had enough of the ground for now and decides to stand.
Bones tries to sprawl but Muramaki drives through with a takedown into half guard.
Muramaki keeping composed on the top, looking to control the action.
Muramaki wants to get back to his feet.
Muramaki is looking to advance position but Bones won't allow it.
Bones looks like he's trying to stand up.
The crowd are loving this. Great action here.

Muramaki is working for submissions here but there's nothing on.

Bones kicks off Muramaki and gets to his feet.
Bones throws a series of punches but Muramaki avoids them all with ease.
Bones fails to land with the punch combination there - jab, cross, hook, miss, miss, miss.
Muramaki dodges the punch combination from Bones.
Bones gets taken down but at least he's managed to land in guard.
Bones pushes Muramaki off and scrambles back to his feet.
Wow, both these guys are really going for it!
Bones looks winded!

That's one minute gone in the round.
Muramaki decides to change it up a bit and drives through with a nice takedown into half guard.
Bones tries to kick Muramaki off but Muramaki keeps his base steady and stays in half guard.
Bones manages to escape and get back to his feet!
Muramaki closes the distance and gets a double leg, slamming Bones to the mat! Bones manages to get full guard.
Muramaki tries to stand but Bones is controlling from the bottom.
Muramaki stands up over Bones, holding his feet. He dives back in and lands a decent shot to the head.
Muramaki with a couple of shots to the head there. Not particularly brutal.
The crowd are loving this. Great action here.
Muramaki stands up from Bones's guard - Muramaki perhaps looking for a knockout.
Muramaki scores with a takedown into Bones's guard.
The fighters are pressed up against the cage, both looking to find a bit of space to work.
Muramaki trying to control the position from guard on top but Bones is wriggling around, looking for whatever he can.
Bones wriggles free and stands up.

That's two minutes gone in the round.
Bones gets taken down but at least he's managed to land in guard.
Muramaki might be looking to lock onto one of his opponent's long limbs for a submission, whilst we're on the ground.
Muramaki cracks Bones with a solid left hand.
Bones has managed to wall walk up one of the corner posts to get back to his feet. Muramaki is pushing him up against the cage, looking to control the position.
Bones looking for a takedown.
Muramaki decides to pull guard.
Muramaki has Bones pulled in close to control his posture.
Bones slips effortlessly into side control - very nice.
Muramaki tries to bench press Bones off him but Bones keeps the position.

Bones wants to work for a kimura but he's foiled early by Muramaki, who protects the arm well.
Bones wants to work for a kimura but he's foiled early by Muramaki, who protects the arm well.

That's three minutes gone in the round.
Muramaki is trying to control Bones's posture but Bones avoids it.
Bones is trying to land an Americana. He has the arm isolated but Muramaki is keeping cool and he's avoided the danger for now.
Bones is trying to land an Americana. He has the arm isolated but Muramaki is keeping cool and he's avoided the danger for now.
Bones blocks the strikes from Muramaki.
Muramaki manages to get one leg in to regain half guard.
Muramaki wants to control but Bones is keeping busy.
Muramaki looking for submissions from an awkward position here.

That's four minutes gone in the round.
Bones is trying a forearm choke
I don't think that's going to do much at this level of the game.
Bones is thinking about going for an arm triangle but he can't free his leg.
Bones is working for a kimura but Muramaki is defending it quite comfortably.
Muramaki is looking to improve his position.
The crowd are going absolutely nuts as the round comes to an end - what a fantastic round of action!
Bones is trying to work for a kimura but Muramaki is defending well.
And thats the end of the round the fighters go back to their corners.
Nakamura Muramaki dominated that round.
That's the end of the round. The referee orders the cornermen out of the cage so we can get back down to business.

Muramaki fakes a strike and closes the distance, dragging Bones to the ground. Muramaki is now in Bones's guard.
Bones utilising some decent striking defenses from the guard, preventing the ground and pound.
Muramaki wants to control from the top but Bones keeps moving.
Muramaki is really struggling to control Bones but he's trying to hold on to the position.
Bones wants to stand and escape but Muramaki is having none of it.
Muramaki decides to stand up and beckons his opponent to follow.
Muramaki closes the distance and gets a double leg, slamming Bones to the mat! Bones manages to get full guard.
This has been an exciting period of action!
Bones pushes Muramaki off and gets back to his feet.
Muramaki gets a double leg takedown into Bones's guard.
Both fighters are absolutely exhausted here.
Bones pushes Muramaki off and gets back to his feet.
That's one minute gone in the round.
Muramaki fakes an overhand right and shoots for a takedown. Bones sprawls well initially but Muramaki persists and gets the takedown into half guard.
Bones wants to get back to his feet.
Muramaki is keen to just control but Bones is a slippery customer.
Bones is trying to stand up here but Muramaki is controlling him well.
Muramaki working the head and body with strikes.
Bones is refusing to be controlled, as Muramaki sits in half guard.
Muramaki seems to be working for a kimura but Bones defends the submission attempt.
Bones manages to escape and get back to his feet!
Muramaki gets a takedown into half guard.
This has been an exciting period of action!
Bones makes some distance and scrambles quickly back to his feet. Nice work!
Nakamura Muramaki is looking to throw some combinations by the looks of things.
That's two minutes gone in the round.
Bones gets caught flat footed, as Muramaki shoots in with a quick takedown into guard.
Bones pushes Muramaki off and scrambles back to his feet.
Bones throws a combination but comes up with nothing but fresh air.
Muramaki shoots in looking for a single leg takedown. Bones is trying to defend but Muramaki finishes it well and ends up in half guard. Let's see if he can advance position further.
Bones has one foot on Muramaki's thigh - he pushes off and manages to get back to his feet.
Mario Bones is looking to keep the fight on the feet at all costs.
Muramaki looks for a takedown. He's got it. We're now in half guard.
Muramaki throwing punches and elbows but they're not doing any damage.
Bones wants to get back to his feet.
That's three minutes gone in the round.
Muramaki passes the half guard and he's now in mount! Big trouble for Bones!
Bones is not a happy chappy
he wants out of there.
Muramaki trying to control but Bones is having none of it.
Bones is trying to get to the cage to help him get back to his feet.
Muramaki has control of Bones's right arm, working for a kimura. It's a bit of a token attempt though and Bones regains control of the situation pretty easily.
Bones is not a happy chappy
he wants out of there.
Bones somehow manages to escape the mount and get back to his feet!
Muramaki looking to shoot here. He's gone for it and he's landed a takedown into side control! Oh, that's bad for Bones!
That's four minutes gone in the round.
Muramaki is looking to take a break and control but Bones is keeping him honest, looking to work from the bottom.
Bones is trying to get back to his feet.
This is a great period of action - very entertaining stuff!
Muramaki landing strikes.
Muramaki stands up.
Bones lands with a two punch combination before moving back out of range.
Muramaki shoots in and scores a nice double leg takedown into half guard.
Muramaki wants to stand up but Bones has a hold of him and won't allow it.
The crowd are going absolutely nuts as the round comes to an end - what a fantastic round of action!
Bones pushes Muramaki off looking to stand but Muramaki dives back in and keeps control.
And thats the end of the round the fighters go back to their corners.
Nakamura Muramaki dominated that second round.
The minute break is over - no more time for sponges and pep talks - back to the action! This is the final round!

Muramaki dives in and scores a takedown into Bones's guard.
Bones wriggles free and stands up.
Muramaki scores with a nice takedown into half guard. Let's see what he's got on the ground.
Muramaki decides to return to a standing position.
Muramaki shoots in and bounces Bones off the cage to secure the takedown into guard.
Both fighters really going for it on the ground here!
The crowd are loving this. Great action here.
Muramaki is trying to work a guillotine from the top, or something like that? Don't know how he thinks he's going to get a finish from there.
Muramaki is really dominating this fight. Is there anything that Bones can do to turn this around?
Bones manages to wriggle out and sneak his way back up to his feet, so the fighters are now clinched up against the cage.
Muramaki turns his back and goes for a hip toss. It's a bit messy but it gets the job done and Muramaki manages to end up in side control.
Nakamura Muramaki overall seems to be getting the better of the ground position in the fight so far.
Both fighters are breathing heavily.
Bones throws his opponent off and manages to get back to his feet! Nicely done!
Muramaki gets a double leg takedown into Bones's guard.
Muramaki drops back for a leg! It's a sloppy attempt though and Muramaki jumps back into guard quickly, to retain the dominant position.
That's one minute gone in the round.
Muramaki wants to get up but he can't break Bones's closed guard. He needs to be careful trying to break the legs open, as he's open to submissions here.
Bones has scooted to the edge of the canvas and used the cage to get back to his feet. Muramaki has stuck on his opponent and is forcing him back against the cage.
Bones is trying to drag Muramaki to the mat but Muramaki just about manages to keep his footing. He used the cage to his advantage there.
Muramaki gets double underhooks to prevent a takedown attempt from Bones.
Muramaki has moved round to his opponent's back and is looking for a suplex! Oh snap! He's tossed Bones clear over his head and slammed him to the mat!
Bones wants to get back to his feet.
Bones manages to escape to his feet.
That's two minutes gone in the round.
Muramaki throws a loose over hand right and dives in with a double leg takedown. Bones tries to sprawl but it's too late and the fighters hit the mat. Muramaki is in Bones's guard.
Fantastic stuff here - a very entertaining period of action, which has drawn cheers from the crowd.
Bones pushes Muramaki off for just long enough to get back to his feet. Very athletic spring there.
Muramaki gets a takedown into half guard.
Muramaki stands, ready to strike. The ref makes him back up and allows Bones to get to his feet.
A punch combination from Bones misses.
Muramaki manages to get an easy takedown there - catching Bones on his heels. He'll look to pass Bones's guard now, I'm sure.
Bones keeping moving, preventing Muramaki from controlling successfully.
The fighters are working up against the cage. Bones manages to wriggle his way back to his feet, so the fighters are now clinched against the cage.
Bones drops down for a takedown but doesn't get it.
Nakamura Muramaki has stuffed three takedown attempts in the round now. That's going to take a lot out of Mario Bones.
Muramaki gets control of Bones's arms and successfully pulls guard. Muramaki will no doubt be looking for submissions off his back.
That's three minutes gone in the round.
Bones passes Muramaki's right leg, so he's now in half guard.
Bones is looking for a kimura here.
Muramaki is looking to regain full guard. Not this time though.
Bones is looking for a kimura. It's going to be difficult to finish that from half guard though and Muramaki defends it well.
Bones looking for a kimura but he'll have to free his other leg if he wants to finish that. Perhaps he's just using it as a distraction technique.
Muramaki manages to escape and get back to his feet!
That's four minutes gone in the round.
Muramaki shoots in from a long way out. He's driving through with the takedown attempt and he eventually gets it, landing in Bones's guard.
Bones manages to escape and get back to his feet.
Mario Bones has stepped it up - he knows he needs a finish here!
Muramaki shoots in and bounces Bones off the cage to secure the takedown into guard.
This has been an exciting period of action!
Muramaki won't allow Bones to get back to his feet.
Muramaki trying to stand up but can't free himself from Bones's guard.
The crowd are going absolutely nuts as the round comes to an end - what a fantastic round of action!
Bones throws a couple of shots from the bottom but they don't land.
And that's the end of the fight!
Nakamura Muramaki showed his dominance in that final round.
Well Muramaki has outscored his opponent in every aspect of the fight today. Only a scarily incompetent judge or two will keep him from a well deserved win... Over to the ring announcer for the scorecards.
Ladies and gentlemen, after 3 rounds of action, we go to the scorecards for a decision.
Judge Sosuke Kotani scores the fight 30:27
Judge Kenichi Hosakawa scores the fight 30:27
Judge Shigeki Fujiwara scores the fight 30:27
In favor of your winner, by unanimous decision... Nakamura Muramaki!
An out of breath Nakamura Muramaki thanked his loyal fans in his post fight interview, giving them credit for his success over the course of his career.
|
|
|
|
|
|
|
|
|
|
|
|
|
|
|
|
|
|
|
|
|
|
|
| S |
C
A |
G |
S |
C
B |
G |
|
S |
C |
G |
|
energy
A | B |
|
hype
A | B |
|
pop
A | B |
|
mgr
A | B |
|
FIGHT
RATING
100% |
|
|
|
|
|
|
