|
|
PBP Commentary |
Coming up we have a welterweight MMA rules bout between Blaise Lamont (ranked 0 p4p, 0 weight class) and Ozuma Obata (ranked 0 p4p, 0 weight class). Lamont kept the crowd waiting but all that was forgotten when his ring entrance music started. The incomparable musical genius that is Twisted Nerve. Obata has chosen Hijack The Terrorist Group - Hijack as his entrance music. These two fighters really are very evenly matched on the feet - it will be fascinating to see who can assert themselves in that aspect of the fight.
 |
|
 |
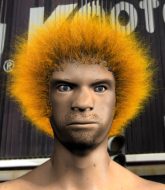
| 181 cm
32
180 lbs
21 - 13 - 0 |
|
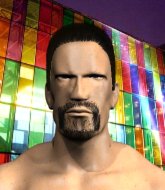
191 cm
27
186 lbs
14 - 11 - 0 |
Good wrestling
World class boxer
Insanely flexible |
|
Olympic wrestler
World class MT
Good gas tank |
|
| |
|
Ladies and gentlemen. This fight is 3 rounds, in the welterweight division.
Introducing the fighter to my left, fighting out of the red corner.
With a record of
21 - 13 - 0, fighting out of Rio de Janeiro, Blaise Lamont!
And introducing the fighter to my right, fighting out of the blue corner.
With a record of
14 - 11 - 0, fighting out of Rio de Janeiro, Ozuma Obata!
The judges for this bout are Thiago Cunha, Felipe Paraventi and Daniel Cesar.

The bell rings for round one and we are underway!
Lamont tries to drive through with a takedown attempt but Obata defends well and Lamont ends up having to push Obata into the cage where they will battle it out in the clinch.
Lamont's head jolts backwards as he takes an uppercut right on the button!
Obata lands a shoulder strike.
Obata tries to throw a body punch but Lamont avoids it by throwing Obata back against the cage.
Obata blocking some punches.
Obata gets through Lamont's defenses to land a nice punch to the side of the head.
Nice body punch from Obata.
Obata tries to work over Lamont's body with a swooping hook but it only glances the target.

Obata's corner calls for him to break the clinch, which he does.
Obata fakes high and swings low for a body shot but Lamont manages to avoid it.
We've been told by Lamont's head coaches at Soco na mãe - Stand Up Striking that he's been working on his takedown defense in preparation for this fight.
Obata misses with a series of wild punches.
Lamont shoots in for a takedown but doesn't get it.
A big right from Obata misses.
Obata has been working on his striking defense in training and it's paying off as Lamont is landing a low percentage of strikes.
Lamont tries to score a power double leg takedown but Obata sees that one coming and sprawls well. That will dishearten Lamont somewhat.
That's three failed takedown attempts in the round for Blaise Lamont. That's going to take a lot out of him.
Lamont throws a looping left and ducks down for a takedown. He's got his arms around Obata's waist but Obata gets an underhook and avoids the takedown by throwing Lamont off to one side.

That's one minute gone in the round.
Lamont fails with a takedown attempt from distance.
Obata misses with a two punch combination.
Obata throws out a token jab with nothing on it.
Lamont shoots in and drives through. Obata sprawls well.
A slow jab from Obata misses its intended target.
Obata ducks down and throws a hook to the body but Lamont moves away.
Obata misses with a series of wild punches.
A nice combination there by Obata.

It looks like Blaise Lamont has been cut.
Obata swings wildly with a hook that is half blocked by Lamont.
Lamont shoots in for a double leg but Obata sprawls well. That's going to sap some energy.

That's two minutes gone in the round.
Obata misses with a double jab.
Lamont dives in and grabs Obata's left leg, looking for a takedown. Obata pushes down on Lamont's head and hops out.
Obata scores with a big left there. The judges will like that one.
This has been an exciting period of action!
Obata lands a nice looking body shot.
Lamont shoots in looking for a takedown. Obata tries to sprawl out of it but Lamont keeps driving through. The fighters are pinned against the cage. Obata manages to get underhooks and after a bit of a struggle, circles away and we're back to standing.
Obata throws a right and a left that both miss.
Lamont fails to land the takedown.
Lamont shoots in with a takedown attempt and he has Obata pinned against the cage. Obata gets the underhooks and manages to circle away.
Obata lands a nice hook to Lamont's body. Lamont takes it in his stride and looks to land his own strikes.

That's three minutes gone in the round.
Obata throws a hard body shot but it just misses.
Lamont shoots in looking for a takedown. Obata tries to sprawl out of it but Lamont keeps driving through. The fighters are pinned against the cage. Obata manages to get underhooks and after a bit of a struggle, circles away and we're back to standing.
Obata misses with a few strikes there.
Lamont misses with the combination.
Obata fakes a jab and then connects with a hook.
Obata pushes forward with a 1-2 combination that forces Lamont back to the cage. Obata follows up with a solid lead hook to the liver.

Oooooh!!! Obata has knocked Lamont down with a huge combo! Obata steps away and waves a wobbly Lamont back to his feet! This one might not go much longer!

Lamont is rocked!
The crowd cheering loudly, showing their appreciation for the quality fight we're seeing here.
Lamont showing good head movement there, avoiding the strikes from Obata.
Oh Lamont is still all over the place! His legs are completely gone! Will he be able to recover?!!

That's four minutes gone in the round.
Lamont has a takedown stuffed.
Lamont ducks down and throws a hook to the body but Obata moves away.
Lamont misses with a combination
and Obata counters with a lovely shot to the body.
Lamont seems to have got his legs back now.
Obata thows a left - swing and a miss!
Obata lands a two punch combo.
Obata lands with a right hand.
Blaise Lamont's cut is getting worse.
Obata throws a jab but it's blocked by Lamont.
The crowd are going absolutely nuts as the round comes to an end - what a fantastic round of action!
Lamont shoots in for a takedown but Obata shows good takedown defense.
Obata misses with a body shot.
Obata throws a right and a left that Lamont avoids nicely.
And thats the end of the round the fighters go back to their corners.
Ozuma Obata dominated that round.
The cut man is working on Blaise Lamont's cut.
The corners get their ten second warning. Both fighters stand from their stools and stare eachother down, ready to get back to the action.

Obata fakes high and swings low for a body shot but Lamont manages to avoid it.
Lamont closes this distance looking for a takedown but Obata circles away.
Obata looks to throw the jab but Lamont is out of range.
Lamont tries for a takedown but Obata sees it coming a mile off and avoids it easily.
Obata connects nicely with a jab. Noted by the judges no doubt.
Obata scores with a nice right hand.
Obata throws a series of punches but Lamont moves out of range.
Obata scores with a body shot.
Lamont lands a glancing blow to the side of Obata's head.
Obata looks to score with a jab to the body but Lamont is just out of range.
Obata lands a nice looking body shot.
Obata misses with a series of wild punches.
The fans in attendance giving it up for the two fighters, who have really let it all hang out in the last minute or so!
Obata punishes Lamont's body with a nice straight punch.
That's one minute gone in the round.
Obata misses the shot to the body.
Horrible takedown by Lamont or perhaps it was just good defense by Obata which made him look bad.
That's three failed takedown attempts in the round for Blaise Lamont. That's going to take a lot out of him.
Obata lands with a nice combination. Lamont backs away looking to recover.
A jab from Obata finds it's way through Lamont's defenses.
Lamont will have to do better than that with his takedown attempts.
Lamont looks for a takedown here. Will he get it? Obata is fending him off so far but Lamont persists. Nope, Obata circles away and we're back to standing.
Obata lands with a cross to side of his opponent's head.
Obata cracks Lamont with an open hand slap.
This is turning into a torrid day at the office for Lamont. He's trying desperately to land a takedown but he's failing miserably and getting slapped silly on the feet to compound his misery.
Lamont throws a wild combination but nothing lands.
That's two minutes gone in the round.
Obata bobs and weaves and throws out a fast jab that snaps Lamont's head backwards.
Obata stuffs a takedown. It's all about dictating where the fight takes place and Obata wants it to stay on the feet.
Ozuma Obata seems to be getting the better of the standup.
We've seen a great period of action over the last minute or so - credit to both fighters for going all out!
Lamont tries to drive through with a takedown attempt but Obata defends well and Lamont ends up having to push Obata into the cage where they will battle it out in the clinch.
Both fighters are absolutely exhausted here.
Lamont misses with a punch on the inside.
Lamont blocks a couple of punches on the inside.
Obata throws a punch but it's blocked by Lamont.
Obata's corner calls for him to break the clinch, which he does.
Lamont dives in and grabs Obata's left leg, looking for a takedown. Obata pushes down on Lamont's head and hops out.
Obata tries to land with a swinging hook to the body but Lamont was well out of range. Poor timing from Obata.
Lamont fails miserably with a takedown attempt.
Obata is the aggressor but that punch slipped nicely by Lamont.
Lamont fails to land the takedown.
That's three minutes gone in the round.
Obata fakes low and throws an overhand right that catches Lamont on the side of the head.
Obata misses with a telegraphed body shot

and Lamont counters into the clinch. Nicely done.
Lamont tries to work over Obata's body with a swooping hook but it only glances the target.
Obata lands a left hand that snaps the head of Lamont backwards.
Obata tries to throw a body punch but Lamont avoids it by throwing Obata back against the cage.
Obata lands with a quick shot inside that doesn't really do much damage.
Obata breaks from the clinch.
A looping hook to the body misses from Obata. Lamont does a little dance to reset his feet.
Obata fails to land with the punch combination there - jab, cross, hook, miss, miss, miss.
Obata has used his reach advantage pretty well so far tonight.
Obata throws a hard body shot but it just misses.
Lamont dodges the punch combination from Obata.
Lamont uses some good footwork to avoid the body shot by Obata.
That's four minutes gone in the round.
Obata moving in and out of range nicely, whilst landing the scoring shot.
A really sloppy takedown attempt there from Lamont.
Lamont cracks Obata with a right hand to the side of the head.
Obata has been the more effective fighter overall so far.
Lamont shoots in for a takedown but doesn't get it.
A decent looking cross lands there for Obata.
The fans in attendance giving it up for the two fighters, who have really let it all hang out in the last minute or so!
Lamont shoots in for a takedown but doesn't get it.
Lamont closes this distance looking for a takedown but Obata circles away.
As the round comes to an end the crowd are showing their appreciation for a great round of action.
Lamont misses with a takedown attempt. He shot from a bit too far out.
Lamont shoots in for a takedown - he's clinched up with Obata but Obata pushes him off and we're back to square one.
And thats the end of the round the fighters go back to their corners.
Ozuma Obata showed his class in that round. I'd imagine he'll take it on all the scorecards.
The cut man is working on Blaise Lamont's cut.
Well, the break between rounds is over. Let's get back to the scrappin! This is the final round!

Obata lands a right hook to the body.
Obata closes the distance and lands a one-two.
Obata throws a series of punches but Lamont moves out of range.
Lamont dives in and grabs Obata's left leg, looking for a takedown. Obata pushes down on Lamont's head and hops out.
Obata thows a body shot but no joy.
Lamont misses with an uppercut.
Lamont gets cracked with a nice right hand there by Obata.
Lamont shoots for a takedown but Obata saw that one coming a mile off and avoided it easily.
Obata lands the left hand.
Obata connects with a looping right hand.
Both fighters are breathing heavily.
The fans in attendance giving it up for the two fighters, who have really let it all hang out in the last minute or so!
Obata punishes Lamont's body with a nice straight punch.
That's one minute gone in the round.
Obata cracks Lamont with a hook to the temple - Lamont is on wobbly legs here! Obata swarms him with hook after hook, landing with each one! Lamont falls to the canvas face first and the referee dives in to stop the fight! Obata wins by TKO!
Ladies and gentlemen, after 1:07 of round 3, we have a winner by way of TKO (Punches). Ozuma Obata!
A less than humble Ozuma Obata misjudged his post fight interview somewhat and came across a little too arrogant whilst trying to hype up his own abilities.
|
|
|
|
|
|
|
|
|
|
|
|
|
|
|
|
|
|
|
|
|
|
|
| S |
C
A |
G |
S |
C
B |
G |
|
S |
C |
G |
|
energy
A | B |
|
hype
A | B |
|
pop
A | B |
|
mgr
A | B |
|
FIGHT
RATING
100% |
|
|
|
|
|
|

