|
|
PBP Commentary |
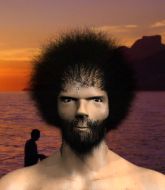
Coming up we have a lightweight MMA rules bout between Tom Fritz (ranked 0 p4p, 0 weight class) and Hanz Stokenhizer (ranked 0 p4p, 0 weight class). Fritz kept the crowd waiting but all that was forgotten when his ring entrance music started. The incomparable musical genuis that is Metallica - Enter Sandman . This should be fireworks!
 |
|
 |
| 175 cm
22
164 lbs
6 - 1 - 0 |
|
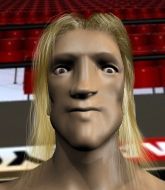
184 cm
23
162 lbs
5 - 2 - 0 |
BJJ Purple Belt
Counter striker
Granite chin |
|
BJJ Purple Belt
Brawler
Knockout power |
|
| |
|
Ladies and gentlemen. This fight is 5 rounds, in the lightweight division.
Introducing the fighter to my left, fighting out of the red corner.
With a record of
6 - 1 - 0, fighting out of London, Tom Fritz!
And introducing the fighter to my right, fighting out of the blue corner.
With a record of
5 - 2 - 0, fighting out of London, Hanz Stokenhizer!
The judges for this bout are William Gold, Andrew Berry and Donald Grub.

The bell rings for round one and we are underway!

Fritz closes the distance and clinches up, looking for a takedown. He shifts his weight and gets a nice trip into half guard.
Stokenhizer pushes Fritz off looking to stand but Fritz dives back in and keeps control.
Fritz working the head and body with strikes.
Stokenhizer tries to get to full guard but Fritz has control of the leg.
Both fighters really going for it on the ground here!
Stokenhizer moves his hips nicely and gets into full guard.
Fritz stands up and looks to throw the legs aside to pass to side control. Stokenhizer swivels though and keeps the full guard.
Fritz won't allow Stokenhizer to sweep him here.
Stokenhizer wants to get back to his feet but Fritz is in a dominant position and won't allow it.
Fritz trying to land body shots but he keeps hitting the mat.

Fritz thinks about going for a leg but decides against it, in order to maintain the position.
Stokenhizer is looking to get back to his feet but can't, whilst Fritz is controlling him.

Neither fighter is doing enough for the referee's liking and he's decided to stand them back up.
Stokenhizer throws a monster uppercut resembling something out of street fighter but it doesn't land.
Fritz fails with a rather predictable takedown attempt.
Stokenhizer stuffs the takedown attempt from Fritz. Fritz gets slowly back to his feet.

That's one minute gone in the round.
Stokenhizer misses with a few strikes there.
A head kick misses from Stokenhizer.
Fritz displays some good footwork, moving neatly out of range as Stokenhizer throws out the jab.
Nice defenses there by Fritz.
Fritz walks straight into an uppercut. Luckily it didn't land flush.
Stokenhizer throws a right and a left that both miss.
Fritz changes levels and drives through with a really nice takedown into side control. Stokenhizer looks really pissed at himself for not defending that better.
Fritz landing strikes.
Stokenhizer sneaks a leg under to get back to half guard.
Fritz lands a big shot. The thud that echoes around the arena is like music to the fans' ears.
Stokenhizer tries to roll over but Fritz keeps him under control.
Fritz wants to pass to mount but Stokenhizer is defending the position.
Fritz has been looking to land a fair amount of strikes on the ground. He might be looking to soften his opponent up in order to work for a submission.

That's two minutes gone in the round.
Fritz is working for submissions here but there's nothing on.
Fritz is breathing heavily.
Stokenhizer tries to get to full guard but Fritz has control of the leg.
Stokenhizer is in trouble now - Fritz has advanced to mount!
The ref warns both fighters not to hold the cage as they work up against the meshing.
Fritz prevents Stokenhizer from getting the reversal.
Stokenhizer bucks up and manages to get a nice reversal! He's in guard on the top - nicely done!
Stokenhizer trying to control the position from guard on top but Fritz is wriggling around, looking for whatever he can.
Stokenhizer avoids a guillotine attempt easily.
Fritz is active off his back here, looking for submissions.

That's three minutes gone in the round.
Stokenhizer has decided he wants to stand but the closed guard of Fritz is proving hard to escape from.
Stokenhizer trying to control but Fritz is working from the bottom.
Stokenhizer avoids a guillotine attempt easily.

Stokenhizer gets to his feet. Fritz looking to butt scoot but the ref puts an end to that. On your feet son!
Stokenhizer throws a big shot that misses.
Stokenhizer throws a big shot that misses.
Stokenhizer will need to tighten up his combinations if he doesn't want to gas himself out, swinging at thin air.
Stokenhizer gets taken down but at least he's managed to land in guard.

That's four minutes gone in the round.
Stokenhizer trying to strike off his back.
Stokenhizer looking for a guillotine here but Fritz defends easily.
Fritz passes into half guard.
Stokenhizer throws a strike from the bottom that misses.
Fritz tries to pass to full mount but Stokenhizer defends it.
Stokenhizer gets full guard.
Fritz thinks about going for a leg but decides against it, in order to maintain the position.
Fritz preventing the sweep.
And thats the end of the round the fighters go back to their corners.
Tom Fritz dominated that round.
The corners get their ten second warning. Both fighters stand from their stools and stare eachother down, ready to get back to the action.

Fritz tries to shoot in for a takedown. He's got hold of a leg but Stokenhizer swivels and escapes.
Fritz darts in and lands a nice takedown into half guard.
Fritz is looking for an arm triangle, whilst trying to pass to side control. Stokenhizer doesn't seem that keen to cooperate though. No luck this time Fritz.
Stokenhizer makes some distance and scrambles quickly back to his feet. Nice work!
Fritz moves forwards but Stokenhizer connects with a nice, crisp jab.
Left hook, right uppercut from Stokenhizer.
Fritz showing good head movement there, avoiding the strikes from Stokenhizer.
Stokenhizer ducks down and throws a hook to the body but Fritz moves away.
Both fighters are absolutely exhausted here.
That's one minute gone in the round.
Stokenhizer thows a left - swing and a miss!
Stokenhizer fails to land with a series of punches.
Stokenhizer connects with a nice looking jab.
Fritz ducks under a wild hook from Stokenhizer.
Fritz decides to change it up a bit and drives through with a nice takedown into half guard.
Fritz tries to pass the half guard into mount. Stokenhizer knows what he's doing though and prevents the attempt.
Stokenhizer looks like he's trying to stand up.
Fritz is trying a forearm choke
I don't think that's going to do much at this level of the game.
Fritz prevents Stokenhizer from standing back up.
That's two minutes gone in the round.
Stokenhizer has hold of Fritz's hands but Fritz slips his arm to the side and lands an elbow.
Stokenhizer wants to get back to full guard.
Stokenhizer is persisting with the attempt to improve his position.
Well, the referee has seen enough. Neither fighter is active enough on the ground so he's stood them back up.
Fritz looks for a takedown. He's got it. We're now in half guard.
Stokenhizer is looking to escape.
Fritz looking for a kimura but he'll have to free his other leg if he wants to finish that. Perhaps he's just using it as a distraction technique.
Stokenhizer regains full guard, whilst avoiding punches from Fritz.
That's three minutes gone in the round.
Stokenhizer wants to sweep but no luck.
Fritz avoids a guillotine attempt easily.
Fritz passes Stokenhizer's right leg, so he's now in half guard.
Stokenhizer is trying to maintain the position but Fritz is very close to passing his half guard.
Stokenhizer wants to improve his position but Fritz is controlling well.
Fritz works his way into full mount!
Fritz lands with some vicious ground and pound - can Stokenhizer hang on?
Stokenhizer regains half guard.
Stokenhizer is looking to improve his position.
That's four minutes gone in the round.
Stokenhizer manages to get to full guard.
Fritz advances position into side control!
Stokenhizer is putting a lot of effort into getting back to his feet here.
Fritz is looking for a kimura. He might have it! No, Stokenhizer has escaped the position, nice work there.
Fritz working away.
Fritz working hard here to secure a kimura but he's not really in the right position for it.
Stokenhizer is working hard to escape and get back to his feet. After a battle for position, Fritz asserts his dominance and retains side control.
And thats the end of the round the fighters go back to their corners.
That was a close second round but I would say that Tom Fritz will probably get the nod.
That's time! Fritz's corner gives him a slap on the ass as he gets ready to fight.

No joy there for Stokenhizer, who threw a few shots but didn't land.
Fritz looking to shoot here. He's gone for it and he's landed a takedown into mount! Oh, that's bad for Stokenhizer!
Stokenhizer has given up his back. Will we see Fritz going for some submissions?
Stokenhizer manages to reverse the position and now he's in Fritz's guard. Nice work there by Stokenhizer.
Stokenhizer is in close to Fritz's body, working some short punches and elbows.
Stokenhizer passes easily into side control. Nice work.
Both fighters are breathing heavily.
Fritz manages to get back to half guard.
Stokenhizer looks towards his corner to check for any instructions. The corner give him nothing to work with, so he cracks Fritz with a short hammerfist. I guess that's as good as any advice he could get in this position.
Stokenhizer prevents Fritz from improving his position.
That's one minute gone in the round.
Fritz on the receiving end of some nice ground and pound.
Stokenhizer wants to stand but Fritz has hold of a leg and an arm, so he's trapped for now.
Stokenhizer seems to be working for a kimura but Fritz defends the submission attempt.
Stokenhizer tries to stand and escape but Fritz is controlling the position.
Fritz flails away from the bottom but he's not doing any damage.
Stokenhizer has freed up his trapped foot and advances to mount.
Fritz is looking to improve his position but Stokenhizer isn't that keen on the idea.
BOOM! Stokenhizer connects with a massive shot to the dome!
The fighters are pressed up against the cage, both looking to find a bit of space to work.
Stokenhizer is in the full mount, landing strikes.
That's two minutes gone in the round.
There's not a lot going on here and the crowd are letting the fighters know they're not willing to tolerate a lack of action.
Stokenhizer throwing sloppy strikes, which aren't doing any damage.
Fritz is desperately trying to improve his position but Stokenhizer has a good base and remains in mount.
Stokenhizer fakes a shot to the body and cracks his opponent in the head. Nice ground and pound there!
Stokenhizer tries to control but Fritz wriggling away.
Fritz bucks up and manages to get a nice reversal! He's in guard on the top - nicely done!
Fritz is trying to work a guillotine from the top, or something like that? Don't know how he thinks he's going to get a finish from there.
Stokenhizer is looking for a triangle but Fritz pushes his legs off easily.
Stokenhizer lands a beautiful switch and he's in full mount! That could spell trouble for Fritz!
That's three minutes gone in the round.
Fritz tries to get back to half guard but can't.
Fritz is bucking up trying to escape but Stokenhizer cracks him with another couple of good strikes.
Stokenhizer lands a nice shot to the head.
Stokenhizer working to secure an arm triangle but it's not happening for him just yet.
Stokenhizer with a couple of short strikes.
The crowd growing excited in anticipation of a finish here! Right on cue, Stokenhizer cracks his opponent with a massive right hand that draws loud cheers!
Fritz regains half guard.
Fritz is staying active underneath Stokenhizer, who seems content to just control the action from this position.
Fritz gets back to full guard.
Fritz has a loose triangle. He'll be looking to tighten that up but Stokenhizer can see exactly what he's planning and manages to posture up and free himself.
That's four minutes gone in the round.
Stokenhizer in full guard, throwing the ground and pound. No damage this time.
Stokenhizer wants to stand but Fritz has a closed guard, so he can't escape.
Tom Fritz overall seems to be getting the better of the ground position in the fight so far.
Fritz manages to land a sweep and now he's in mount on top!
Stokenhizer defends a decent attempt at a guillotine from Fritz.
Fritz scoring with some good ground and pound from mount here. Will he manage to finish Stokenhizer?
Fritz looks like he's working for a submission but he's not found anything just yet.
Stokenhizer is trying to escape the mount.
And thats the end of the round the fighters go back to their corners.
Tom Fritz clearly takes that round.
Well, the break between rounds is over. Let's get back to the scrappin!

Stokenhizer throws a right and a left that Fritz avoids nicely.
Stokenhizer just misses with a punch to the body.
Stokenhizer misses with a few strikes there.
Stokenhizer throws a right and a left that Fritz avoids nicely.
Fritz feints and as Stokenhizer raises his hands in defense, Fritz changes levels and drives through with a takedown into guard.
Stokenhizer is working an open guard here, looking to improve his position. No doubt that will leave him open to counters but at least he's being more offensive.
Fritz drops back looking for a leg! Stokenhizer is in trouble here! The fighters roll with the hold and Stokenhizer manages to kick Fritz off! Fritz jumps back into Stokenhizer's guard.
We've had a slow start to the round here - hopefully the action picks up.
Fritz drops back looking for a heel hook - he quickly realises he's not going to get it but Stokenhizer manages to dive on top of him before he can escape and now Fritz has Stokenhizer in his guard.
It's got to the stage where if one of these guys blows hard enough, the other might fall over.
Stokenhizer postures up and scores with a shot to the body and a follow up elbow to the head.
That's one minute gone in the round.
Fritz looking for submissions from the bottom here. Moving his hips around, possibly looking for an armbar.
Fritz had isolated an arm as going for an omaplata. Stokenhizer is defending the submission well but is in a very vulnerable position. Fritz Is leaning forward trying to finish the omaplata but decides to abandon it, and take Stokenhizer's back instead.
Fritz is persistently looking for the submission but Stokenhizer is defending it well.
Stokenhizer defending nicely against the rear naked choke attempt.
Stokenhizer turns into Fritz and is now in his guard.
Stokenhizer works a leg free and moves into half guard.
That's two minutes gone in the round.
There's not a lot going on here and the crowd are letting the fighters know they're not willing to tolerate a lack of action.
Stokenhizer is thinking about going for an arm triangle but he can't free his leg.
Fritz manages to get to full guard.
Fritz is working an open guard here, looking to improve his position. No doubt that will leave him open to counters but at least he's being more offensive.
Stokenhizer chips away with some ground and pound.
Stokenhizer pushing down on Fritz's thigh, trying to pass to half guard. He's managed it... Nice work.
Fritz keeping his head moving to avoid the ground and pound.
Stokenhizer thows a huge punch but Fritz dodges it nicely.
The fighters are battling for position here. Fritz manages to regain full guard. Nice work.
Stokenhizer pressing down on his opponent's thigh, looking to pass guard. Fritz is keeping the position for now.
Fritz escapes his hips to the side and looks to be working for an armbar. Stokenhizer gives him a little smile and shakes his head. No chance.
That's three minutes gone in the round.
Stokenhizer stopping the sweep attempt from Fritz.
Stokenhizer is pushing down on Fritz's leg trying to pass to half guard. Fritz is fighting to maintain full guard but Stokenhizer has managed to sneak the leg through.
Stokenhizer wants to work for an arm triangle but Fritz is really keeping half guard well and defending the submission attempt.
Stokenhizer is working for a submission of some sort.
Fritz works his way to full guard. Good work.
Stokenhizer is looking to stand up but Fritz won't let him.
Fritz has his foot on Stokenhizer's thigh. He's trying to push off and get in position for a triangle, I think. Stokenhizer works his way back into a safe position though.
That's four minutes gone in the round.
Stokenhizer wanted to stand there but Fritz had control of the position.
Stokenhizer avoids a guillotine attempt easily.
Stokenhizer stands up and looks to throw the legs aside to pass to side control. Fritz swivels though and keeps the full guard.
Fritz is working actively off his back, looking to secure an arm or perhaps work for a triangle.
Fritz has a closed guard, preventing Stokenhizer from standing up.
Fritz controls Stokenhizer momentarily but Stokenhizer frees himself.
Stokenhizer passes easily into side control. Nice work.
Stokenhizer has knee on belly and now moves to full mount! Trouble for Fritz!
And thats the end of the round the fighters go back to their corners.
Tom Fritz had his way with Hanz Stokenhizer in that round.
That's the end of the interval. I'm sure that seemed a lot quicker than a minute for our two fighters! Back to the action. This is the final round!

Fritz blocks a head kick by Stokenhizer.
Stokenhizer throws out a loose jab but Fritz uses good head movement to avoid it.
Fritz feints and as Stokenhizer raises his hands in defense, Fritz changes levels and drives through with a takedown into guard.
Stokenhizer is trying to keep Fritz in close.
Fritz working some ground and pound from guard but it's not doing any damage.
Hammerfist, elbow! yells Fritz's corner. There ya go! There ya go!
Stokenhizer is edging up against the cage. He's using the cage to get back to his feet. Nice work there - the fighters are clinched.
Fritz keeps control of Stokenhizer as he tries to wriggle out of the double underhooks.
Fritz blocks a couple of punches on the inside.
Stokenhizer gets double underhooks to prevent a takedown attempt from Fritz.

Stokenhizer manages to break the clinch.
Hanz Stokenhizer is looking to keep the fight on the feet at all costs.
Both of our modern day gladiators look out of it here - an gruelling 5 rounds of action taking it's toll on them, no doubt.
That's one minute gone in the round.
Stokenhizer lands with a shot to the body.
Stokenhizer misses with a jab and misses with a cross straight after too.
Fritz decides to change it up a bit and drives through with a nice takedown into half guard.
Fritz looking for a kimura but he'll have to free his other leg if he wants to finish that. Perhaps he's just using it as a distraction technique.
Stokenhizer is looking to regain full guard. Not this time though.
Fritz is nestled in close to Stokenhizer, controlling him well. He's worked in a nice elbow to the side of the head as well, for good measure.
Stokenhizer gets full guard.
Stokenhizer working from the bottom, still in full guard. He's managed to get a loose triangle. Fritz doesn't seem to be doing much to defend here, obviously he feels comfortable in the position. Fritz manages to throw the legs off his shoulder and he's back into guard - no problem.
That's two minutes gone in the round.
Fritz trying to pass the guard but can't manage it just yet.
Stokenhizer lands a beautiful switch and he's in full mount! That could spell trouble for Fritz!
Stokenhizer with shots to the head and body - Fritz looks very uncomfortable down there.
Stokenhizer cracks Fritz with a nasty head shot there - the crowd let out an audible gasp there, as the noise reverberated around the arena.
Stokenhizer lands a big shot there that rocks Fritz but he's holding on and managing to survive for now.
Fritz holding onto his opponent's waist for dear life, as Stokenhizer tries to land some strikes to get him to release his grip.
Stokenhizer with some aggressive grappling here. He's looking for submissions here, rather than waiting for the opportunity to counter.
Fritz is working to get back to half guard.
Stokenhizer landing strikes from the mount.
That's three minutes gone in the round.
Stokenhizer is standing up out of mount! Strange tactic there - he must really want this one on the feet!
Fritz bobs and weaves into range and then changes levels and scores with a nice takedown into side control.
Stokenhizer tries to get back to half guard but can't.
Fritz is looking to finish here, going for an Americana. Stokenhizer knows the correct defense though, so he's OK.
Fritz wants to work for a kimura but he's foiled early by Stokenhizer, who protects the arm well.
Stokenhizer is moving his hips around well on the bottom and has managed to get back to half guard.
Stokenhizer pushes Fritz off looking to stand but Fritz dives back in and keeps control.
Stokenhizer is looking for a sweep. Fritz is wise to his cunning plan and keeps the top position.
Hanz Stokenhizer has stepped it up - he knows he needs a finish here!
That's four minutes gone in the round.
Stokenhizer wants to get back to his feet.
Fritz working over Stokenhizer with some ground and pound. Stokenhizer looks like he wants out of this position, which is understandable.
Fritz prevents Stokenhizer from improving his position.
It looks like we're going to have a standup here. Neither fight is doing enough on the ground.
Fritz feints and then dives in with a takedown. That was a long way out but the feint bought him enough time to close the distance and complete the takedown. Now we'll play guard for a bit and see who can get the better of that position.
Stokenhizer looking to sweep here. No luck so far.
Fritz sneaks a leg through and gets to half guard. That was like a knife through butter how easily he passed Stokenhizer's guard.
Fritz prevents Stokenhizer from improving his position.
Stokenhizer throws a strike from the bottom that misses.
Stokenhizer throws a strike from the bottom that misses.
And that's the end of the fight!
Tom Fritz showed his dominance in that final round.
Well I reckon that's a shut out for Fritz, winning every round. Will the judges agree? They are the ones who matter, even if they are often depressingly incompetent. Over to the ring announcer for the scorecards.
Ladies and gentlemen, after 5 rounds of action, we go to the scorecards for a decision.
Judge William Gold scores the fight 50:45
Judge Andrew Berry scores the fight 50:45
Judge Donald Grub scores the fight 50:45
In favor of your winner, by unanimous decision... Tom Fritz!
|
|
|
|
|
|
|
|
|
|
|
|
|
|
|
|
|
|
|
|
|
|
|
| S |
C
A |
G |
S |
C
B |
G |
|
S |
C |
G |
|
energy
A | B |
|
hype
A | B |
|
pop
A | B |
|
mgr
A | B |
|
FIGHT
RATING
94% |
|
|
|
|
|
|

