|
|
PBP Commentary |
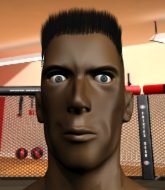
Coming up we have a welterweight MMA rules bout between Phil Mcgroin (ranked 0 p4p, 0 weight class) and Hanz Stokenhizer (ranked 0 p4p, 0 weight class). Phil Mcgroin has the better chin. Will he look to stand and bang today?
 |
|
 |
| 178 cm
21
180 lbs
0 - 0 - 0 |
|
184 cm
22
162 lbs
1 - 0 - 0 |
BJJ White Belt
Solid Muay Thai
KO power |
|
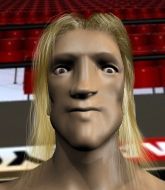
BJJ Purple Belt
Brawler
Very confident |
|
| |
|
Ladies and gentlemen. This fight is 3 rounds, in the welterweight division.
Introducing the fighter to my left, fighting out of the red corner.
With a record of
0 - 0 - 0, fighting out of London, Phil Mcgroin!
And introducing the fighter to my right, fighting out of the blue corner.
With a record of
1 - 0 - 0, fighting out of London, Hanz Stokenhizer!
The judges for this bout are Colin Fotheringham, William Gold and Sam Margolis.

The bell rings for round one and we are underway!
Stokenhizer looks to land a right hand but Mcgroin moved out of range.
Stokenhizer throws a hook to the side of Mcgroin's head but Mcgroin sees it coming and ducks under it beautifully.
Mcgroin keeping his hands up high there, blocking the jab from Stokenhizer.
Mcgroin shoots in but Stokenhizer avoids the takedown attempt easily.
Mcgroin bobs and weaves well there to avoid the strikes.
Mcgroin connects with a body shot.
Mcgroin plants his feet and lands a nice head kick!
Mcgroin looks to score with a combo but nothing lands.
Stokenhizer keeps the fight standing with a nice sprawl.
Hanz Stokenhizer seems to be the more aggressive standup fighter in this bout.
Mcgroin wants to clinch up but Stokenhizer keeps it at a distance.
Mcgroin fails with an attempt to clinch.
Mcgroin misses with a wild combination.
Stokenhizer misses with a hook.
Stokenhizer getting the better of the striking in that exchange.
Stokenhizer looks gassed!
Mcgroin fails to land the takedown.
That's three failed takedown attempts in the round for Phil Mcgroin. That's going to take a lot out of him.
Stokenhizer scores with a jab.
Stokenhizer throws out a token jab with nothing on it.
Mcgroin fails with a takedown attempt.
Stokenhizer blocks a head kick by Mcgroin.

That's one minute gone in the round.
Nice sprawl there from Stokenhizer as Mcgroin shoots in.

Mcgroin shoots in for a takedown! He's got it and he's managed to land in full mount! That's better than Mcgroin was expecting from the takedown attempt, I'm sure!
Mcgroin wants to control the pace but Stokenhizer is squirming around nicely.
Stokenhizer working to try and regain half guard.
Stokenhizer manages to regain half guard. Good work.
Mcgroin frees up his trapped foot and advances to mount.
Stokenhizer tries to hold on but Mcgroin postures up.
Stokenhizer holding onto his opponent's waist for dear life, as Mcgroin tries to land some strikes to get him to release his grip.
Mcgroin has his opponent pinned against the cage, landing some nasty ground and pound that is really making a bit of a mess out of Stokenhizer's face.

That's two minutes gone in the round.
Mcgroin with good strikes from the mount here!

Stokenhizer is rocked!
Mcgroin trying to control but he's not successful this time.
Stokenhizer is still in real trouble! Can Mcgroin finish him?
Stokenhizer takes a big shot to the head but keeps on trying to improve his position.
Mcgroin in mount throwing good strikes here, bouncing his opponent's head off the canvas.
Mcgroin trying to control but he's not successful this time.
Stokenhizer is in a horrible position here. Mcgroin smacks him with another shot as he tries to escape the position.
Mcgroin looking to finish Stokenhizer with some ground and pound. This is bad for Stokenhizer!
This is a great period of action - very entertaining stuff!
Mcgroin is landing with some decent strikes but Stokenhizer is trying to advance his position so the referee is letting the fight continue.
Stokenhizer really trying hard to get back to half guard here.
Mcgroin wants to control the pace but Stokenhizer is squirming around nicely.
Mcgroin lands with some vicious ground and pound - can Stokenhizer hang on?

That's three minutes gone in the round.
Mcgroin has his opponent pinned against the cage, landing some nasty ground and pound that is really making a bit of a mess out of Stokenhizer's face.
Mcgroin landing shots from mount.

Mcgroin is in full mount, looking to secure a guillotine but Stokenhizer is surviving well by controlling Mcgroin's body position as best he can.
Mcgroin takes his opponent's back. Perhaps a chance to lock up a rear naked choke here.
Mcgroin punishes Stokenhizer with strikes from the back mount.
Mcgroin is staying calm and holding on to the back position, whilst working on a rear naked choke. Stokenhizer is defending well though. Mcgroin let's go of the attempt for now.
Mcgroin looking for the RNC.
Mcgroin lands with a nice looking elbow that stuns Stokenhizer.
Mcgroin lands with a nice looking elbow that stuns Stokenhizer.

That's four minutes gone in the round.
Mcgroin gets his hooks in and is throwing strikes.
Mcgroin scores with strikes from the back.
Stokenhizer tries to break free.
Mcgroin connects with a series of strikes and the referee is calling for Stokenhizer to escape the position.
Mcgroin keeps control of the position as Stokenhizer tries to break free.
Mcgroin avoiding Stokenhizer 's attempts to control his hands.
Stokenhizer tries to break free.
The crowd applaud the fighters efforts here as the round comes to an end.
Mcgroin wants to control but Stokenhizer is keeping busy.
Stokenhizer is trying to break free.
Stokenhizer defends a rear naked choke attempt by controlling one of Mcgroin's arms.
Oooh a big shot gets through from Mcgroin. Many more shots like that and the referee will have to think about stepping in!
And thats the end of the round the fighters go back to their corners.
Phil Mcgroin dominated that round.
OK. That's time! The bell goes and we're back to the action.

Mcgroin throws a head kick that misses and slips in the process. He scrambles back to his feet and the fighters circle.
Mcgroin has a takedown stuffed.
A head kick misses from Mcgroin.
Mcgroin throws a series of punches but Stokenhizer avoids them all with ease.
Mcgroin is looking to clinch.
Mcgroin moves in looking to clinch but Stokenhizer pushes him off.
Stokenhizer bobs and weaves well there to avoid the strikes.
Stokenhizer avoids the clinch attempt nicely.
Mcgroin shoots in and drives through. Stokenhizer sprawls well.
Mcgroin fails in his attempt to clinch.
Mcgroin will have to do better than that with his takedown attempts.
That's three failed takedown attempts in the round for Phil Mcgroin. That's going to take a lot out of him.
Mcgroin tries to clinch but Stokenhizer is having none of it.
Mcgroin shoots in with a takedown attempt and he has Stokenhizer pinned against the cage. Stokenhizer gets the underhooks and manages to circle away.
Mcgroin shoots in with a takedown attempt and he has Stokenhizer pinned against the cage. Stokenhizer gets the underhooks and manages to circle away.
Stokenhizer avoids the head kick by Mcgroin.
Both fighters are absolutely exhausted here.
Stokenhizer moves away from the strike by Mcgroin.
Stokenhizer keeps the fight on the outside.
That's one minute gone in the round.
Mcgroin throws a nice looking combination but Stokenhizer bobs and weaves to avoid any damage.
Mcgroin throws a combination but it was largely blocked by Stokenhizer.
Stokenhizer keeps the fight standing with a nice sprawl.
Stokenhizer avoids the head kick by Mcgroin.
Mcgroin throws a series of punches but Stokenhizer moves out of range.
Mcgroin throws the left hand but Stokenhizer avoids the punch easily.
Mcgroin looks for a takedown here. Will he get it? Stokenhizer is fending him off so far but Mcgroin persists. Nope, Stokenhizer circles away and we're back to standing.
Mcgroin misses with a takedown attempt. He shot from a bit too far out.
Mcgroin looks for a takedown here. Will he get it? Stokenhizer is fending him off so far but Mcgroin persists. Nope, Stokenhizer circles away and we're back to standing.
Mcgroin tries to clinch up.
Mcgroin is looking to clinch but Stokenhizer is avoiding it.
Mcgroin shoots in for a takedown. "Ole!" shouts Stokenhizer as he jumps to the side.
Mcgroin looks for a takedown here. Will he get it? Stokenhizer is fending him off so far but Mcgroin persists. Nope, Stokenhizer circles away and we're back to standing.
Stokenhizer swats away the attempt to clinch by Mcgroin.
Stokenhizer uses some good footwork to avoid the body shot by Mcgroin.
Mcgroin throws a head kick that misses and slips in the process. He scrambles back to his feet and the fighters circle.
Mcgroin misses with a series of wild punches.
Mcgroin tries a head kick but it misses.
That's two minutes gone in the round.
The crowd are starting to boo a lack of action.
Mcgroin throws out a token jab with nothing on it.
Mcgroin fails with a takedown attempt.
Mcgroin throws a head kick but Stokenhizer moves out of range.
Mcgroin shoots in for a takedown but Stokenhizer shows good takedown defense.
Mcgroin fails in his attempt to clinch.
Mcgroin shoots in with a takedown attempt and he has Stokenhizer pinned against the cage. Stokenhizer gets the underhooks and manages to circle away.
Mcgroin shoots in and drives through. Stokenhizer sprawls well.
Mcgroin throws a series of punches but Stokenhizer moves out of range.
Mcgroin throws a jab but it's blocked by Stokenhizer.
Mcgroin throws a wild combination but nothing lands.
Horrible takedown by Mcgroin or perhaps it was just good defense by Stokenhizer which made him look bad.
Mcgroin shoots in for a takedown. "I don't think so" says Stokenhizer as he avoids it easily.
Stokenhizer blocks a head kick by Mcgroin.
Mcgroin shoots in for a takedown. "Ole!" shouts Stokenhizer as he jumps to the side.
Mcgroin moves in looking to clinch but Stokenhizer pushes him off.
That's three minutes gone in the round.
Mcgroin throws a head kick that misses and slips in the process. He scrambles back to his feet and the fighters circle.
Mcgroin looks for a takedown here. Will he get it? Stokenhizer is fending him off so far but Mcgroin persists. Nope, Stokenhizer circles away and we're back to standing.
Stokenhizer avoids the head kick by Mcgroin.
Mcgroin doesn't manage to clinch there - Stokenhizer circles away.
Mcgroin tries to clinch but Stokenhizer moves out of range.
Mcgroin tries to clinch but is not successful on this occasion.
Stokenhizer blocks a head kick by Mcgroin.
Mcgroin misses with a takedown attempt. He shot from a bit too far out.
Stokenhizer stuffs the takedown attempt from Mcgroin. Mcgroin gets slowly back to his feet.
Stokenhizer displays some good footwork, moving neatly out of range as Mcgroin throws out the jab.
Mcgroin misses with a few strikes there.
Mcgroin closes this distance looking for a takedown but Stokenhizer circles away.
Mcgroin closes this distance looking for a takedown but Stokenhizer circles away.
Mcgroin shoots in for a takedown - he's clinched up with Stokenhizer but Stokenhizer pushes him off and we're back to square one.
Mcgroin throws a looping left and ducks down for a takedown. He's got his arms around Stokenhizer's waist but Stokenhizer gets an underhook and avoids the takedown by throwing Mcgroin off to one side.
Mcgroin shoots in for a takedown. "Ole!" shouts Stokenhizer as he jumps to the side.
Stokenhizer swats away the attempt to clinch by Mcgroin.
That's four minutes gone in the round.
Mcgroin shoots in for a takedown. "I don't think so" says Stokenhizer as he avoids it easily.
Mcgroin throws a sloppy head kick and Stokenhizer moves out of range easily.
Mcgroin tries to clinch but Stokenhizer is having none of it.
Mcgroin looks for a takedown here. Will he get it? Stokenhizer is fending him off so far but Mcgroin persists. Nope, Stokenhizer circles away and we're back to standing.
Mcgroin throws a head kick but Stokenhizer moves out of range.
Mcgroin shoots in for a takedown but doesn't get it.
Mcgroin shoots in for a takedown - he's clinched up with Stokenhizer but Stokenhizer pushes him off and we're back to square one.
Stokenhizer staying out of range there.
Horrible takedown by Mcgroin or perhaps it was just good defense by Stokenhizer which made him look bad.
Mcgroin fails with the takedown.
Mcgroin fails miserably with a takedown attempt.
Mcgroin throws a head kick that misses.
Mcgroin throws a head kick that misses and slips in the process. He scrambles back to his feet and the fighters circle.
Mcgroin tries to clinch there but Stokenhizer circles away.
Mcgroin pulls out of a head kick attempt.
Mcgroin tries to clinch but Stokenhizer is having none of it.
Stokenhizer avoids the clinch attempt nicely.
And thats the end of the round the fighters go back to their corners.
Hanz Stokenhizer showed his class in that round. I'd imagine he'll take it on all the scorecards.
The fighters' corners scream their final instructions, as the referee calls time. Here we go, back to the action! The crowd applaud as we get ready to start the final round!

Stokenhizer throws a looping overhand right but Mcgroin ducks down to avoid it.
Stokenhizer closes this distance looking for a takedown but Mcgroin circles away.
Mcgroin shoots in for a takedown. "Ole!" shouts Stokenhizer as he jumps to the side.
Mcgroin tries to clinch up but Stokenhizer circles away and keeps his distance.
Mcgroin is looking to take this fight into the clinch.

Mcgroin takes the fight into the clinch.
Mcgroin tries for a takedown. No joy.
Stokenhizer wants to break the clinch but can't.
Mcgroin changes levels and goes for a takedown here. Stokenhizer fights it off and pushes away nicely.
That's three failed takedown attempts in the round for Phil Mcgroin. That's going to take a lot out of him.
Mcgroin shoots in with a takedown attempt and he has Stokenhizer pinned against the cage. Stokenhizer gets the underhooks and manages to circle away.
Excellent takedown into side control there by Mcgroin.
Stokenhizer manages to get back to half guard.
Mcgroin is looking for a kimura but Stokenhizer is holding onto that half guard position, so it's hard for Mcgroin to get the leverage.
The fighters are pressed up against the cage, both looking to find a bit of space to work.
Both fighters are breathing heavily.
Stokenhizer tries to roll over but Mcgroin keeps him under control.
That's one minute gone in the round.
Stokenhizer wants to control but Mcgroin is keeping busy and won't allow it.
Mcgroin wants to free his trapped foot but Stokenhizer is holding on for dear life with his legs.
Stokenhizer is pressing down on Mcgroin's left leg trying to get back to full guard. He's managed it.
Mcgroin stopping the sweep attempt from Stokenhizer.
Stokenhizer bucks up whilst keeping hold of a body lock, managing to reverse the position. Now he's in top in Mcgroin's guard.
Mcgroin looking for submissions from the bottom here. Moving his hips around, possibly looking for an armbar.
Stokenhizer pressing down on his opponent's thigh, looking to pass guard. Mcgroin is keeping the position for now.
Mcgroin wants to sweep but no luck.
Mcgroin is working hard here to advance position.
That's two minutes gone in the round.
The crowd are starting to boo a lack of action.
Mcgroin keeping moving, preventing Stokenhizer from controlling successfully.
Stokenhizer seems to have recovered his senses.
Mcgroin looking to sweep here. No luck so far.
Phil Mcgroin overall seems to be getting the better of the ground position in the fight so far.

Well, the referee has seen enough. Neither fighter is active enough on the ground so he's stood them back up.
Good exchange - Stokenhizer coming out on top.
A big left from Stokenhizer misses.
Mcgroin gets a clinch.
Mcgroin pulls guard.
Mcgroin keeping moving, preventing Stokenhizer from controlling successfully.
Stokenhizer wants to pass the guard but Mcgroin is keeping the position.
The ref warns both fighters not to hold the cage as they work up against the meshing.
Stokenhizer passes Mcgroin's right leg, so he's now in half guard.
Stokenhizer uses his free foot to push down on Mcgroin's thigh. Eventually he works his other foot free and he's advanced to mount - this is trouble for Mcgroin.
A big strike lands for Stokenhizer! That's really hurt Mcgroin and he's turned his back - Stokenhizer keeps firing away and the ref dives in to stop the fight! Stokenhizer Jumps to his feet to celebrate the victory!
Ladies and gentlemen, after 3:02 of round 3, we have a winner by way of TKO (Strikes). Hanz Stokenhizer!
|
|
|
|
|
|
|
|
|
|
|
|
|
|
|
|
|
|
|
|
|
|
|
| S |
C
A |
G |
S |
C
B |
G |
|
S |
C |
G |
|
energy
A | B |
|
hype
A | B |
|
pop
A | B |
|
mgr
A | B |
|
FIGHT
RATING
90% |
|
|
|
|
|
|
